Filament Fun and Future Flying

3D Printing, Propellers, and Models.

According to the old clock on the server, it’s been over a month since I posted on this blog!  For Shame!  Today, I’ll cover some things going on at the Volare Headquarters.

Archie Adamisin (you can contact Archie – 3D Props via email HERE) and I have been collaborating on some 3D printed propeller designs.  I say “collaborating”, but it is really more like “Hey Archie, can you draw this up?” since I am not nearly at his level of 3D design.  He’s been doing great with his P-30 Props and others, probably overwhelmed with people wanting them.

Back in January, I laid out and printed a folding prop hinge design and it was successful.  Well, it hasn’t been proven in flight at all, but it functions as intended.

This was not designed to replace the hub on our Superior Prop Folders, but actually for FAC models – where we are restricted from using folders.  Actually, the rules state:  “Props that fold or feather before the model lands are prohibited in ALL FAC EVENTS.”  The key words here are “before the model lands” – we can use them to save the prop blades or the fuselage from breaking on the ground strike, as long as they are held open in all other parts of the model’s flight.  So this hinge does not have the offsets that allow the blades to fold back flat against the fuselage, it will just need to flex upon landing.

Of course, what is a prop hinge without blades.  Here is where I fail in my self-taught design.  I cannot design props (although I can interpret and modify Archie’s prop designs).  So Archie was called upon to integrate a propeller design and hub hinge design into one.  He did a great job!  You can see the results in the photo below on the top – a 12″ diameter, 15 pitch, Larrabee blade layout*, folder printed in white ABS.  The blades were printed individually and this layout produced a very smooth blade with almost no artifacts that cleaned up easily.  I thought it was a little heavy at 11.5 grams, but it turns out that a 12″ Chinese prop is just over 12 grams.  It is a very pretty prop, if nothing else!  I can’t wait to try it out this summer.

* – I have been trying to make props with the Larrabee layout for a couple of years now.  Most of my efforts to date have been with formed props, but again, I asked Archie if he could change his prop layout to use the Larrabee stations and values.  I am glad he is up for such challenges, because now we are experimenting with printing props with the Larrabee blade profiles.

You can read about Larrabee propeller ideas at the NFFS Technical Library (here).  In theory, they are the most efficient blade design.  If you are really intrigued, you can also download a spreadsheet that will produce blade width values at 100 stations along the radius, if you input the diameter, pitch, and blade width (you can even integrate blade flare, if you want).  You can also find that spreadsheet in the NFFS Technical Library (here).   I have been using this spreadsheet to develop blade shapes that I can convert to DXF files and import into my CAD program and then laser-cut blanks for forming.

Well, Archie created the blade design that would utilize my hinge and the Larrabee blade widths and the folder is the result.  Then he also converted his regular non-folding prop design so we could experiment with the Larrabee designs in other props.  The red and white props shown above are my props that I will be trying on Embryos this summer.  They are ABS (white) and PLA (red) and are 6.5″ in diameter, 8.125″ pitch, with a 1″ blade width.  The red weighs 3 grams and the white weighs 2.5 grams.  I have been having problems printing these larger props (larger than my Peanut props) in ABS as the heat while printing warps the prop.  This didn’t happen with the folder blades as they were printed flat and wide, while the necessity of printing a 2-blade, one-piece prop means the blades are somewhat on edge and I reduce support to leave less “scarring” and artifacts on the blades.  Anyway, I am hopeful these will work!  (Aren’t they pretty, too?!)

The last little model-related thing in the photo is a little clamp of clothespin style design and operation.  Modeling friend Mike Smith sent out some files well over a year ago, and I have modified those.  I find these useful while building; clamping things together (obviously) while glue dries or holding a part while dope or spray dries, or whatever.  These are 1.25″ long and sprung with a dental band.  They can open to about 3/16″ maximum grip.  I am thinking of selling them at, say, 4 clamps for $3.

I am also redesigning my Small and Medium Bobbins.  Currently, the user has to assemble them and some have had (very mild) complaints about the 2-piece designs.  So, I am working on whether single-piece units are viable.

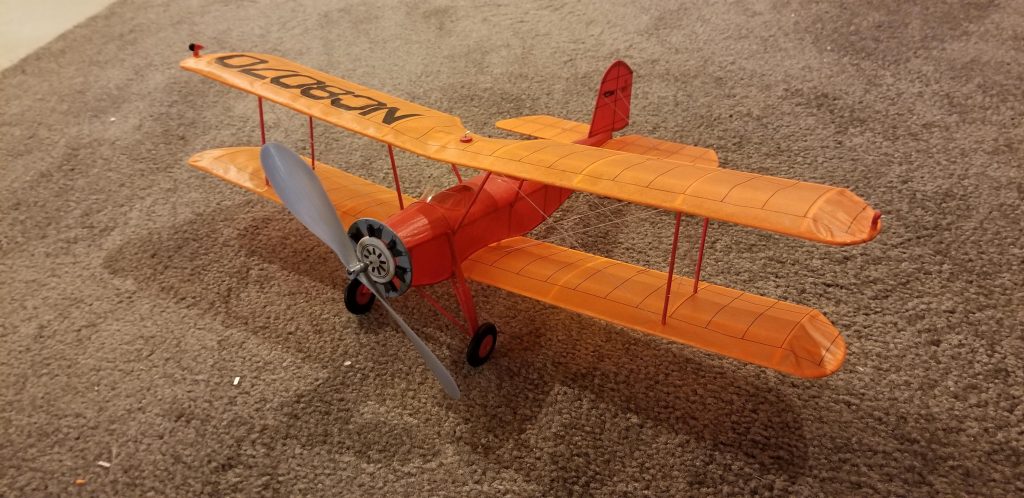
As for the “Future Flying” aspect of this post, I have finished my “Miss Production” Old Time Stick.  If you are a “MaxFax” subscriber, you saw that this was an old design that Dan Driscoll found.  The Maxecuters decided to honor Dan with a memorial one-design at their Kudzu meet in the spring.  I had similar thoughts and had started work converting the MaxFax sketch into a plan with laser-cut parts when they announced the one-design.  I completed the work and have it on my site as an early sales item so that flyers on the east coast could get the kit and build it before the event.  So, clearly, this short kit has not been flown to date.  At least two have been built now, mine and one by Duncan McBride in Florida.  His will probably get in the air sooner than mine, as his weather is more conducive to Free Flight in the February/March timeframe.  The short kit can be found in my shop for a early-bird price of $20 (that price increases soon).  Here is a shot of my finished model.

Lastly, I have been working on an outdoor Embryo.  This one is to honor a long-departed Cloudbuster, Tom Groening.  The hand-drawn plan was published in the Cloudbuster Newsletter in the last ’90s and I grabbed it when Dave Livesay pushed a bunch of plans to the web many, many years ago (I think that’s where I got it?)  As I told Winn Moore, who built kit prototype #1, there are probably three people that remember Tom:  me, Chris Boehm, and Dave Livesay.  There might be one or two more Cloudbusters that do, too.  I have intended to do this model for a long time.  I remember Tom and this Embryo and it is a shame that he was taken from us too soon – he was murdered in a home invasion in 2003.  So, 20 years later, this model will fly again.  I am calling it the “Dragonfly”, since there was no name and “Tom Groening’s Embryo” is just a little too clunky.  The new plan will appear in a future issue of the Cloudbuster’s newsletter and the short kit will be available as soon as either Winn’s or my model flies successfully.  Here are a couple of photos (my bones, Winn’s covered model).  I’ll write up details on this later, as it is quite a quirky design and build.


Loading

Posted in Builds, Products | 1 Comment

Pondering Peanut Power and Propellers

I’ve been building Rubber-Powered Free Flight Peanuts for just about 40 years.  I imagine that I have built 50 or more Peanuts.  And yet, I still am looking for better performance.  Where can we find those last little bits of performance?

There are a couple of obvious considerations:  subject matter, stability designed in, straight building, and weight are some of the most obvious.  For several years, I’ve been predicting basic performance or a potential subject by measuring the wing area and guessing at what weight I can build the model.  By dividing the weight by the wing area, we can come up with Wing Loading.  Having kept track of all of my models for an extended period, I can compare a potential subject to past models and, knowing how past models flew, I can guess that a new model with similar numbers might fly roughly as well as the old model.

Checking my records, I see that my Peanuts have had wing loadings as low as 0.22 g/sq in (Fike, BD-4) and as high as 0.46 g/ sq in (Stuka).  The average of 13 designs that have been built and flown (and have detailed records) is 0.33 g/sq in – that’s a good target for those of you who are looking to adopt this sort of tool.  But I have come to believe that this is just the start – there are other considerations – such as your power pack; the prop and rubber combo.

Everyone knows that the prop and rubber combo is important.  In fact, you can also add that to your “predictor” tool – just keep track of what all of your old models have used and when you get a new model and calculate the Wing Loading, you can start with a similar prop and rubber combo.  Everyone should do this – and they probably do, even if is inst as formal as keeping a spreadsheet.  But…there’s more…

When I first started building, I used plastic props, as everyone does.  In fact, one of my first Peanut designs that I did in the late 80s shows that I used the Guillows prop (now hated by me).  But my go-to props were the Peck props – 5″ and 6″ grays that were – and still are –  the standard for so many.

As I started to look for better performance and build lighter, I started using wood/carved props.  These were designed from formulae found in such places as Don Ross’ book and elsewhere.

Both the Maule and the Stallion were built very light (for me) and flew away.  But I still used mostly plastic props until maybe 8 years ago.  I started using Superior Props (6″ is the smallest we make) and stacked props.  But the problem was – I would almost always get beat at a larger contest.  I might be able to get 60 seconds or so.  And I had some Peanuts that I just could not get to fly, even given relatively low Wing Loading and lots of rubber.

Last year, as I got beat again in Peanut by Pat Murray, I asked him about his Peanut Fairchild.  It would zoom up and get great long flights while I was still stuck around 45-60 seconds.  He told me he uses a 4″ plastic prop.  I was amazed – that is a tiny prop.  But it got the wheels turning.

In the meantime, I had been working with Archie Adamisin, helping him sort out the 3D printing of propellers, mostly for larger and sport models (Archie sells some great P-30 props, possibly game-changers).  With his help, I printed a 4-blade prop for my Peanut Corsair – and I started getting some really nice flights with it.  But look at the prop … its not very wide.

I had been trying wood props with a 5″ diameter and up to 1″ blade width.  I got decent (sub-60 second) times, but this “skinny” 4-blader really allowed the model to fly better.  By the way, the model weighs about 10 grams (0.27 g/sq in WL) and uses a loop of 3/32″ rubber.

The next adventure was my Peanut Stallion.  Again, I tried to build as light as I could and it came out to be 7 grams (0.32 WL – its got a really narrow wing).  I had imagined and hoped that I could fly it on a loop of 1/16: rubber. I decided I wanted a scale-looking prop and changed the parameters to print out a narrow-bladed, 4″ diameter, 5″ pitch, 3-bladed prop (and spinner).  While I figured it would work, it did much better than I imagined and I get around 70 seconds indoors with regularity.

Things started to click – or gears started to turn – or something.  In my most recent Peanut build, I projected that I could get similar results with the BD-4 if I could keep it light.  My model again weighed 7 grams, but has a fatter wing so it has a 0.22 WL.  I took the Stallion prop, changed it to 2-blade, increased the diameter to 5″ and the pitch to 6.25″ and kept the blades skinny.  Compare this picture to a Peck 5″ prop.

The result – on a loop of 1/16″ rubber – was 84 seconds indoors.  Astounding for me.

Here is a question – have I (and to a greater extent – we) been over-propping our Peanut models?  We all have been using 5″ diameter plastic props with a fat blade (Peck) because that is what has been available. We also know that a higher pitch than is available on the plastic props is better for duration.  These props that I have printed have narrower blades and a higher pitch than the Peck props, especially for the 1/16″ motors.  The 3/32″ motored models have a wider blade.  I am a convert – I’ll be printing props for my Peanuts from now on.  I feel I have two good sets of data – for 1/16″ powered light-weight Peanuts and for 3/32″- powered middle-weight Peanuts.  But of course, I’ll keep experimenting and adding data points.


Loading

Posted in Builds, Products | 2 Comments

POW! Peanut Performance! The Bede BD-4.

I flew my Peanut Bede BD-4 yesterday and was surprised/impressed/shocked by the results.  Photos and video below.

I did something that I do not usually do:  I released this short kit at the very end of December without my “obligatory” 20-second-minimum test flight.  But I knew it would fly.

I drew up this model/kit after being inspired my fellow Cloudbuster, Chris Boehm.  Chris has a habit of building the same model over and over.  Recently, he published a Peanut BD-4 plan in the Cloudbusters’ newsletter and built two of them.  He might have used Bill Hannan’s plan, I don’t recall.  I don’t have any particular love for the BD-4 – it is very plain in design (intentionally), but I thought I would build one just for fun.  I drew up the tail-dragger version and used the simplest color and markings I could find to produce an all-white model with black registration.  Build it quick, cover it simply, get some flights, and move on.

At the Cloudbusters’ January Indoor Contest, I was finally able to put some power on the model and give it a test.  I tried my 10″ test motor – yup, still flies the model – nothing spectacular, but trim is still good (had to add some tail weight).   I made a 20″ motor – a loop of 1/16″.  The model weighs 7 grams, so it should fly on 1/16″ rubber (more on my logic here in a different article).  And the long motor might help with the needed tail weight.  I tried flying right and it wasn’t the best performance. So I dialed in left thrust instead of right and the model perked right up.  I did a flight and it was over 70 seconds!

I added a little bit more tail weight and wound in about 2000 turns (a 20″ motor has room for more) and filmed this spectacular 84-second flight!  I think it is still a bit nose heavy (see the last 10 seconds of the flight) and I think there is still more duration to be had on this little model!  Needless to say, I am feeling a bit better about the BD-4.  I’ll probably be losing this outdoors this year.

Loading

Posted in Builds, Events, Products | Leave a comment

Starting 2023 off the right way!

2022 is over and now we are on to 2023.  I almost forgot my traditional New Years Day flight in my back yard, but I got the flight logged in the late afternoon.

But this is about a new model!  I started this a little after midnight on New Years Eve/Day  before I headed off to bed.  I picked up the original kit last year and was surprised when I received it.  I knew it was an Old Time Fuselage model, but it is SMALL – only a 12″ wingspan!  The fuselage is built-up and the rubber is enclosed (so it should be good for the Flying Aces Club OT Fuse and 2-Bit events), but is only 1/2″ square on the outer dimensions (and only 3/8″ square internally).  The model came out to 5 grams without rubber (on 24 square inches of wing area).

I finished the model yesterday and put rubber in it and tested it today. It literally flew without adjustment.  I did try some right thrust, but it was too much, so I took it back out.  This is no side thrust, no down thrust, no nose weight, no tail weight – nothing but rubber.

Here is where to find the Short Kit.

Here is a test flight video and photos following.


Loading

Posted in Builds, Products | Leave a comment

Ending 2022 with Spartan, Fike, and Bede!

With 2022 coming to an end, I finalized some kits that I’ve been working on and here are the results:

Archie Adamisin’s recreation of the old Comet Kit for the Dime Scale Spartan C-3 Biplane.  Someone on Facebook asked if the original Comet kit was available.  Of course, it is as rare as hen’s teeth, but Archie redrew the plan and built one last winter.  We worked together to create the short kit and here it is.  You will receive the original plan, a new building plan, and two sheets of laser-cut parts (including two optional engine treatments).  Find the short kit HERE.

Next is a kit I have been sitting on for a long time – the Fike E “Dream” (C-GRSM) Peanut.  You might remember that I documented this plane and built the model some time ago.  I used the prototype model in Peanut, Embryo (yes!), and Simplified Power Scale.  I held off on publishing the short kit for personal reasons, but am releasing it now.  You will receive a 2-page detailed plan, two sheets of laser cut light-weight balsa, and a 3D-printed tailwheel.  You can find it HERE.  You can also download FREE printed tissue templates on the Downloads/Tissue page.

Lastly is my most recent build – the Bede BD-4 in Peanut Scale.  This is a common and popular Peanut, as it is all straight lines and is a simple build.  I was inspired by Cloudbuster Chris Boehm as he has built several of these.  Not only is it simple, but it has a generous 32+ square inch wing area.  This is the tail-dragger version, but the tri-gear is shown on the plan, too.  You will receive a plan, two sheets of laser cut light-weight balsa, and a 3D-printed tailwheel.  You can find it HERE.  You can also download FREE printed tissue templates on the Downloads/Tissue page.  Once I get the model fully trimmed, I should have 3D-printed prop and spinner combos available – in 2-blade, 3-blade, AND 4-blade setups – all to match your documentation for the build you want.

These will certainly be the last short kits from me in 2022.  But don’t worry!  The drawing board is always full of what’s next!  I’ll probably start on an Old Timer as a tribute model, and I just received the plans from Tom Hallman for next year’s Outdoor Champ One-Design – a 36″ span Schweizer 2-22 Glider for towline.  (Note: the short kit will be part of the registration package for the 2023 FAC Outdoor Champs in September, to be flown in 2024.  The short kit will be available after that contest.)  I am also working on various Race Planes, JetCats, NoCals, and more!  See you on the flying field in 2023!


Loading

Posted in Products | Leave a comment

Three New Short Kits!

Coming out of the Cloudbusters’ Indoor contest last Thursday (08 Dec), I had three successful new models!  My Floyd Bean NoCal had proven itself before, but it won the NoCal races, beating three Folkerts SK-2 and a Hosler Fury (all 5 models were my designs!)

I struggled with my Occipinti’s Wittman Tailwind again for an unexpected amount of time – until I upped the rubber from a loop of 3/32″ to a loop of 0.108″ rubber.  It settled right in to a nice climb and cruise, logging several seconds over 2 minutes. There was much rejoicing (well, internally, at least).

Also, my Sky Box Indoor Embryo was returned to me (stuck on the roof last month) and I tweaked it a little and had an ROG flight of almost 2 minutes in length.  More success (and more tweaking in the future)!

Find them here:

Floyd Bean NoCal

Tailwind NoCal

Sky Box Embryo


Loading

Posted in Products | Leave a comment

Peanut Canopies and “Scale” Props – Now AVAILABLE!!!

Now available: Peanut “Scale” Propellers and Canopies!

Canopies:  I’ve decided to no longer “limit” my production of canopies.  When I started, I was afraid of inconsistent results due to base materials.  I have now worked a process that produces good results.  I am starting with the canopies for my Peanut Short Kits:  Fairey Barracuda, Vought Corsair, Polikarpov I-16, Yakevlov Yak-3, and the Messerschmitt BF-109e.  These are the same items that already come in the short kits, but maybe you want extras or replacements – now you can get them.

Canopies available on THIS PAGE.

“Scale” Props:  Similarly, I am now able to produce good quality 3D-printed “scale” props for some of my Peanut Short Kits:  Vought Corsair, Aircraft Designs Stallion, Fairey Barracuda, Yakevlov Yak-3, and the Messerschmitt BF-109e.  All but the Corsair props come with a 3d-Printed spinner with index marks for the blade locations.  The propellers are printed from heat-resistant ABS plastic and are available in your choice of Black or Gray (sometimes, spinner color choice is also available).

I have had great success flying these props on my Corsair and Stallion, so I decided to expand and sell them.  The files were created in conjunction with Archie Adamisin and his “3D PROPS” venture.  I am calling them “scale” props because they have the same number of blades are the full-scale propellers, but the quotation marks refer to the fact that they are larger than the scale ratio.  The do give a more realistic appearance to the model.

Currently, all the 4-bladed props are the same, as are the 3-bladed props, with the exception of the Stallion 3-blade prop.  It is smaller, due to the lighter model and motor used.

Another comment is that these have worked for me.  I identify the target model weight and rubber usage.  Given that every model is different, your mileage may vary.  The 4-blade and 3-blade props have the same blade area, so switching for a 4-blade to a 3-blade (like on the Corsair) should make no appreciable difference.

NOTE:  NONE of the props come with ramp.  This is to allow the builder to install his favorite clutch mechanism.  Also, the shaft hole is a generic 1/16″ nominal diameter, again, allowing the builder to properly bush the hole with their favorite tubing solution.

Finally, I have tested these on each of my models – they do fly the models!

“Scale” Props available on THIS PAGE.

Currently, I am only offering Peanut Props and Canopies.  I will work to expand these as time goes by.


Loading

Posted in Products | Leave a comment

New Products and Estate Items!

What happens when you drag your feet for a few years?  Well, you find that you have quite a collection of Tools from various estates that you have neglected to offer to your customers.  Today I took some time and photographed all of them and logged them into my website.  NOTE:  there are TWENTY-EIGHT HARD-TO-FIND ITEMS – a large number of Rubber Strippers, Indoor Winders, Outdoor Winders, Balsa Strippers – a LOT of stuff!  (Maybe you should tell Santa!)  Check them all out HERE.

NEW PRODUCTS

Well, a reintroduction of an old product:  the Boehm Clutches, now in ALUMINUM!  I got a batch of these made, in both the 0.047″ and 0.032″ shaft sizes.  These are much more durable than the printed plastic – but they are about twice as heavy, too!  Now you have a choice – Plastic or Metal.  Find them HERE.

SOON TO COME:

I’ve decided to sell replacement vacu-formed canopies for my short kits.  These normally come WITH the short kit, but maybe you want an extra or you damaged yours.  I don’t have them online yet; I’m still building the catalog entries – but soon!

Similarly, I am developing Scale (appearing) 3D-Printed Prop and Spinners for my Peanut short kits.  Scale appearing because they represent the original number of blades that the real plane had.  You’ve seen my 4-bladed Corsair – that’s an example.  I will have sets for the Corsair (4-blade and 3-blade, no spinner), Yak-3 (3-blade with spinner), BF-109e (3-blade with spinner), Barracuda (4-blade with spinner), and the Stallion (3-blade with spinner) – and probably more.  The spinners will have blade location identified, but not cut out.  The props will be printed from heat-resistant ABS and will NOT have a ramp or clutch (so you can install your favorite clutch).  Please note:  these will have rubber power and model weight recommendations provided (based on what has worked for me).

Lastly, I’ve been getting a lot of queries about my mini adjustable nose buttons.  So I am pressing forward and will likely be producing these soon.  They will be in KIT FORM – that is, YOU get to assemble the final product.  They are just too time consuming for me to build them.  I’ve already got an instruction sheet written up.


Loading

Posted in Products | Leave a comment

Indoor Fun – 10 November 2022

The Cloudbusters held their November Indoor contest yesterday so I drove the 135 miles (2+ hours) one way to go have four hours of fun. (For those of you that complain about no where local to fly, I think this is the norm – you have to go where the flying IS, even if it is far away.)

The day presented a good amount of frustration.  I couldn’t get my NoCal Tailwind to fly (I think I over-propped it) and I broke both struts on it.  I got my breand-new Sky Box II Embryo out and promptly got it stuck.  I called the building management to help get it down – “we normally do that once a week – and not while the room is scheduled/occupied”.  See you later, Sky Box.

My Phantom Flash needs a replacement.  It is old and cantankerous.  Torque takes it left on takeoff, but it figure-eights to the right.  It got stuck on the side of the building.  Fortunately, I could reach it with my 35-foot pole.  It only got stuck THREE MORE TIMES on the way down from that retrieval.

I did win a couple events, and I put a 16″ loop of rubber in my Peanut Stallion and had a good flight.  It will be a great flight when I get the zoomies tamed.  Here’s a video:


Loading

Posted in Events, Products | Leave a comment

“Woohoo!” or “Ugh”??? Indoor NoCal Testing

Oh, the travails or Indoor FAC Free Flight.  Last Thursday (13 Oct 2022), I headed northeast to Pontiac, Michigan to our (the Cloudbusters) first Indoor contest of the year.  We had a light turnout, so most of the day was spent testing – and that was fine because new models need testing.

We are going to discuss my brand new model for the Combined Greve/Thompson NoCal Mass Launch event.  For the past couple of years, I have been flying my Folkerts SK-2 and it has been great, if not dominant.  But it has suffered many breaks from crashing into the rafters 60 feet above the floor.  As a result, the wings are warped and times are down – it’s time for a new model.

The Folkerts is a big NoCal 22″ from nose to tail, with 62.5 square inches of wing area.  And mine came out to 7 grams – just a little above the 6.2 minimum weight for the event.  The result was consistent time over 3 minutes and a high time of 3:47.

So – a new plane – what to create?  Well, bigger is better, right?  I searched for long-bodied, short-winged planes of the era.  That combination make for lots of wing area and lots of rubber capacity – theoretical “good things” for Scale Free Flight subjects, especially in the NoCal event (well, it’s MY theory, anyway).

One of the smaller, if not smallest airplanes designed for the pre-war National Air Races was the Floyd Bean Special. Designed in collaboration with the Chambermaid, it is very similar; more round in the fuselage and a longer nose.  It had a span of just over 13 feet and that long nose was due to the Menasco 6-cylinder engine (the Folkerts SK-2 only used a 4-cylinder Menasco engine).  The real plane was too late for the 1938 Races, and landing gear problems prevented entry into the 1939 Races.

I used the Kerka 3-view and scaled everything for the maximum 16″ wing span.  This makes a monster NoCal:  just over 26″ nose to tail, with almost 78 square inches of wing area and about 19.5″ hook-to-peg for the motor – it’s huge!

that is a 16 inch ruler!

the Floyd Bean NoCal compared to a Fairey Barracuda NoCal – same wingspan.

I made up a formed prop for it – a 7″ diameter formed on a 12″ pitch block with a 1.5″ wide Larabee profile.  I also used one of my mini-Gizmo Geezer adjustable NoCal nose bearings (this would be the first test of them).  After fitting all of the required nose parts, the total weight was just at 10 grams.  Oh, that hurts.  The target was 7 grams.  I used 5-pound wood throughout, except the motor stick which is made from 1/4″ balsa – 4-pound balsa.  Of course, it took a whole sheet of yellow tissue to get all the pieces.  I calculate there is about 1 gram in tissue alone.  Anyway, on to the actual flying of the model!

I did balance and glide testing with a full motor (25″ loop of 1/8″ – the Folkerts, lighter and smaller, used 24″ of 0.102″ rubber, so a bigger plane requires a bigger motor) and found I had to add a small amount of clay to the tail to get a decent glide.  “Gliding” is important in NoCal – most of your flight is on cruise, so you need to have a flat glide to allow for the lowest power flight.  I did a low-powered test flight of about 1000 turns and made a couple thrust adjustments and put in 2000 turns for a real test.  I was pleased as I hit over 2 minutes on it’s first real flight.  Of course, it wasn’t perfect.  The “cruise” had lots of minor porpoising, but no really bad characteristics.  After 5 or 6 additional test flights, tweaking thrust, but mostly taking off tail weight, I managed a really good flight as shown here:

A 2:29 on the first day sounds like a “woohoo!” moment – so whats the “ugh”?  To put it bluntly, it is going to take more than 2.5 minutes to win the races – a lot more.  As I said above, my Folkerts was dominant at 3-3.5 minutes – but it raised the bar locally – other were catching me and I was losing contests with the old broken-winged bird.

“Just keep tweaking and get more time.”  That’s the general process, but I don’t know if that will work here.  Here’s why:

  1.  at 10 grams, I need a lot of motor to haul the model around.  1/8″ seems to work well.  I had good climb-out, and good cruise (see the video) – but, I was landing with turns.  That means either my motor is too long or not fat enough.
  2.  I could cut about an inch or two off the motor (about 300 turns remained) to right-size the 1/8″ rubber.  That would lighten the carried weight, but shorten the duration of the motor.  However, that probably would result in about the same times, maybe a few seconds longer, if I got lucky.
  3.  I could strip some rubber to go fatter.  But a fatter motor means more torque – and more carried weight.  More carried weight could mean less flight time, but that might be offset by better cruise (not petering out right at the end).  But high torque at launch brings additional problems.
  4.  I would to about 2200 turns; this was about 1 in-oz on my digital torque meter.  On a 25″ loop of 1/8″, rubber theory suggests that should be able to increase both – up to about 2 in-oz and 2400 turns.  But I am not sure my model can handle this.
  5.  I used light-weight 1/4″ square balsa for the motor stick.  I have tapered this and smoothed it where appropriate.  This is what I always do and it is a “good practice”, a proven technique.  When I did this, even before I glued it to the fuselage, I was worried that I went “too light” – there was a good deal of flex in this stick.  I think it is just too long.  I reinforced it with strips of carbon fiber and that helped, but I noticed that the fuselage was flexing under the 2200 turns/1-in-oz load.  My plane flies left and this force causes the flex to the right.  The plane flies straight and up for the first 30 feet or so an then assumes a normal flight path.  More torque could be disastrous.

So…the model is too heavy, requires too much rubber, and is too flexible.  I have been thinking these past few days on how to cure these problems.

I could probably buildup a rolled motor stick.  This would likely be stiffer, but probably not much lighter, and it would be difficult to retrofit.  That would make the plane stiffer, but wouldn’t make it lighter.

I could wind the current motor up and back off a few turns.  This help because you nave nearly the same turns, but less torque.  I can probably get a little bit more performance this way, especially on that shorter motor.

I could build a second model, using thinner wood in selected places, a rolled tube, maybe some Gampi tissue, a lighter selection on nose/prop pieces and – MAYBE – drop 2 grams.  That is very optimistic for me – I’m no Indoor modeler.

But in the end, this model might just prove that I have reached the limits of “bigger is better”.  If I am building a newer, lighter model, I should probably spend that effort on another Folkerts.  But I am not giving up on this one just yet.  It will see action in November.

Oh, yes, this will be a Short Kit soon.  I even have printed tissue templates made up for it already.


Loading

Posted in Builds, Products | 2 Comments