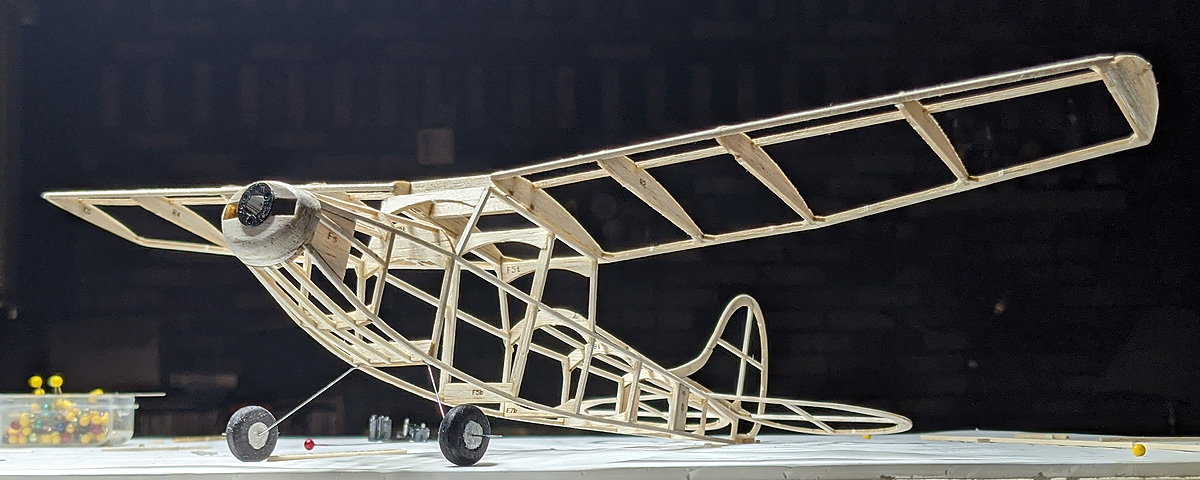
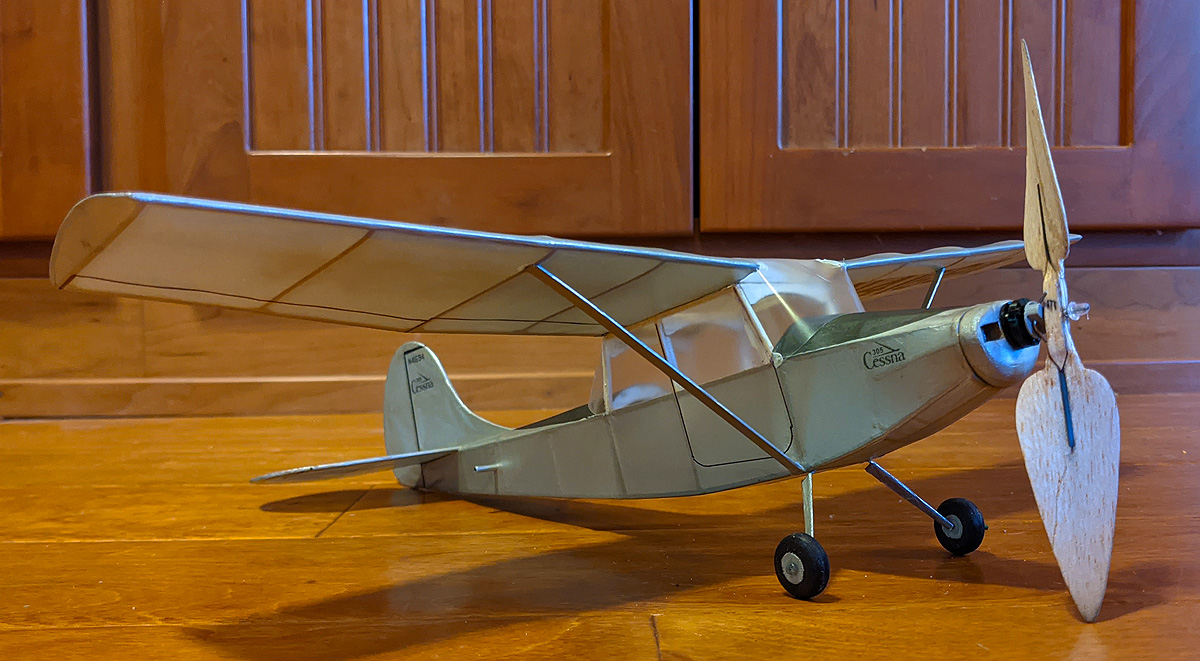
FIVE DAY BUILD! I call this the “ULTIMATE” Dime Scale model. Why is it the “ultimate”; it is not large in wing area, motor length or any other measurement? Well, the full scale Cessna 305 was flown on December 14th, 1949 – and our FAC Dime Scale rules have a cut-off date requiring the the full scale planes must have been built prior to December 31st, 1949. This may be the last eligible aircraft – hence the “Ultimate” (haha).
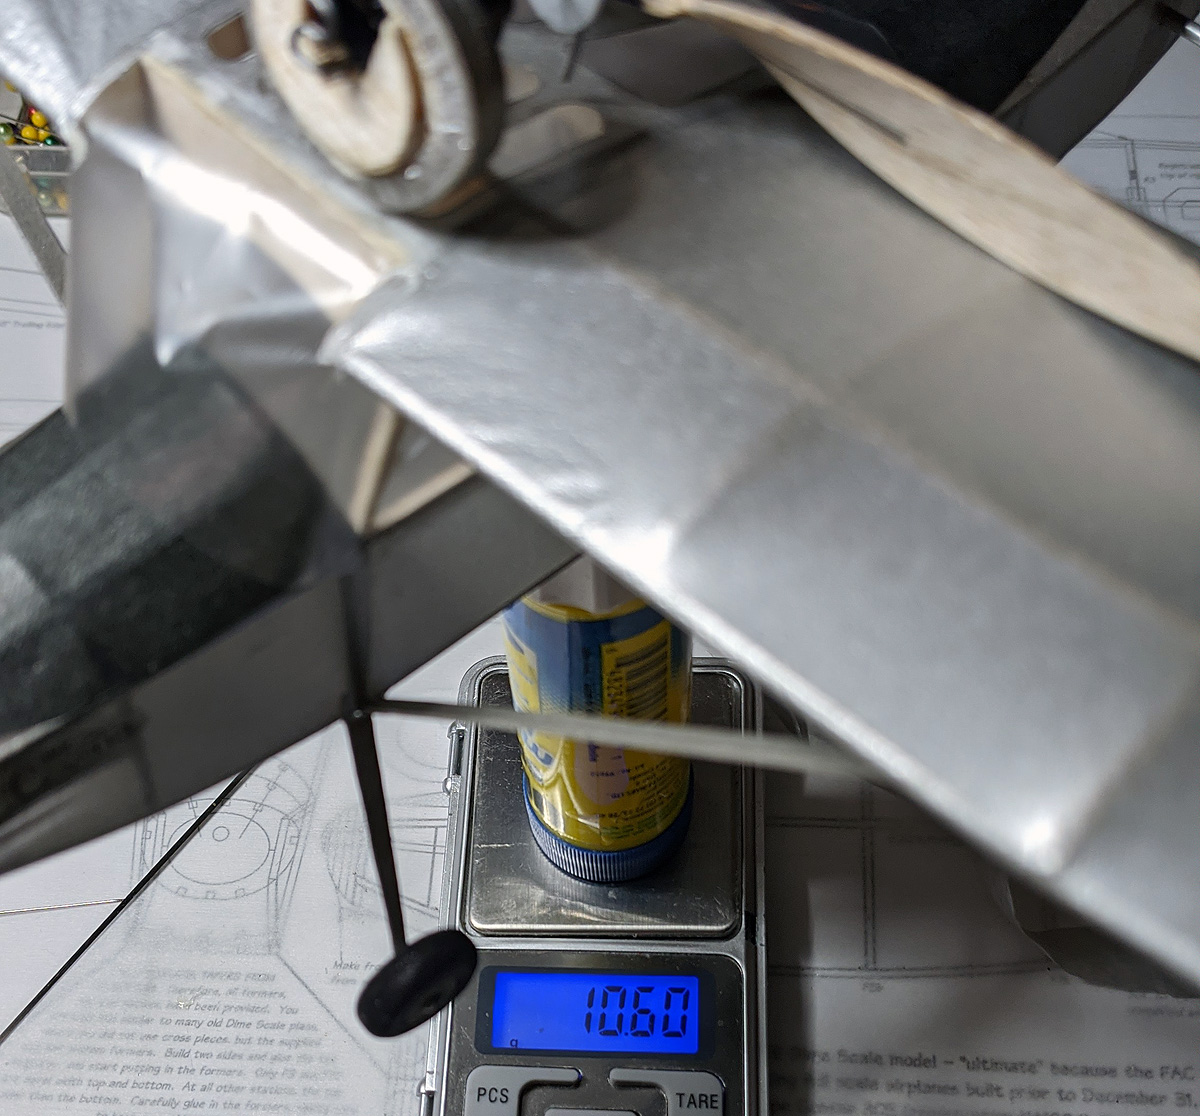
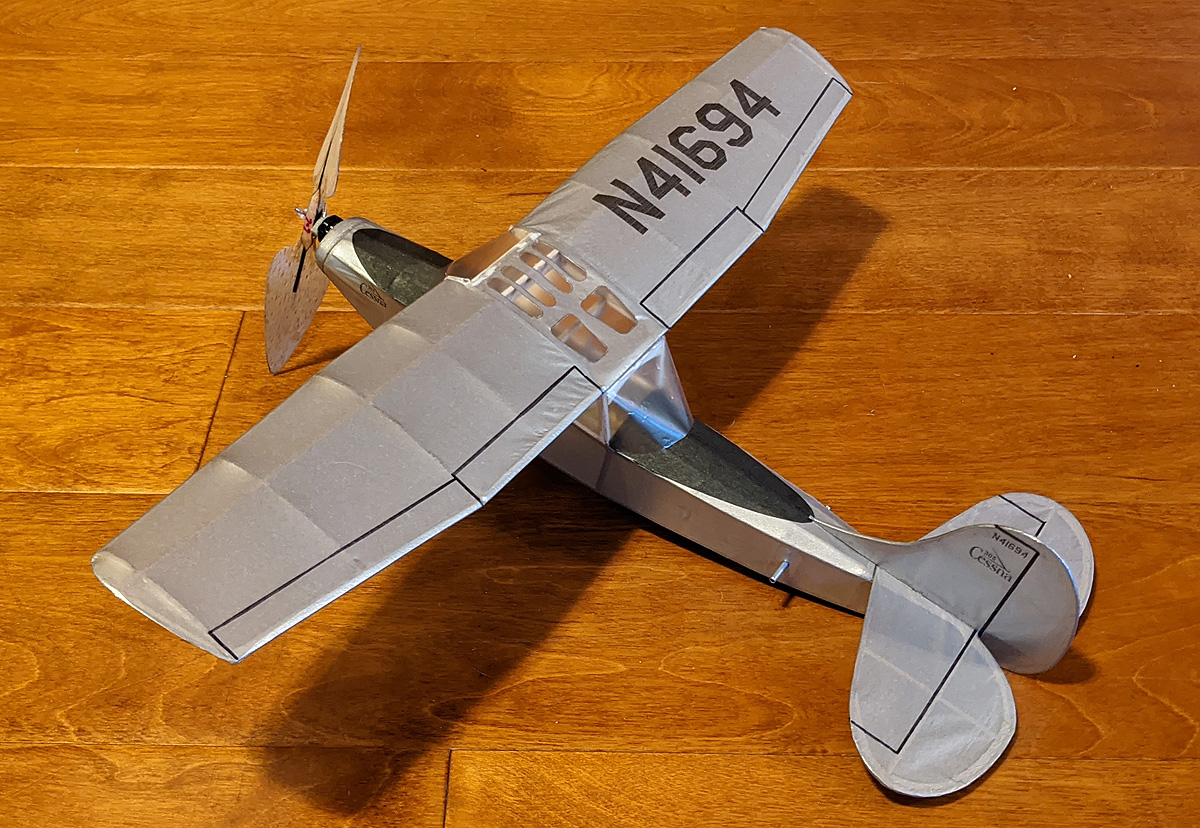
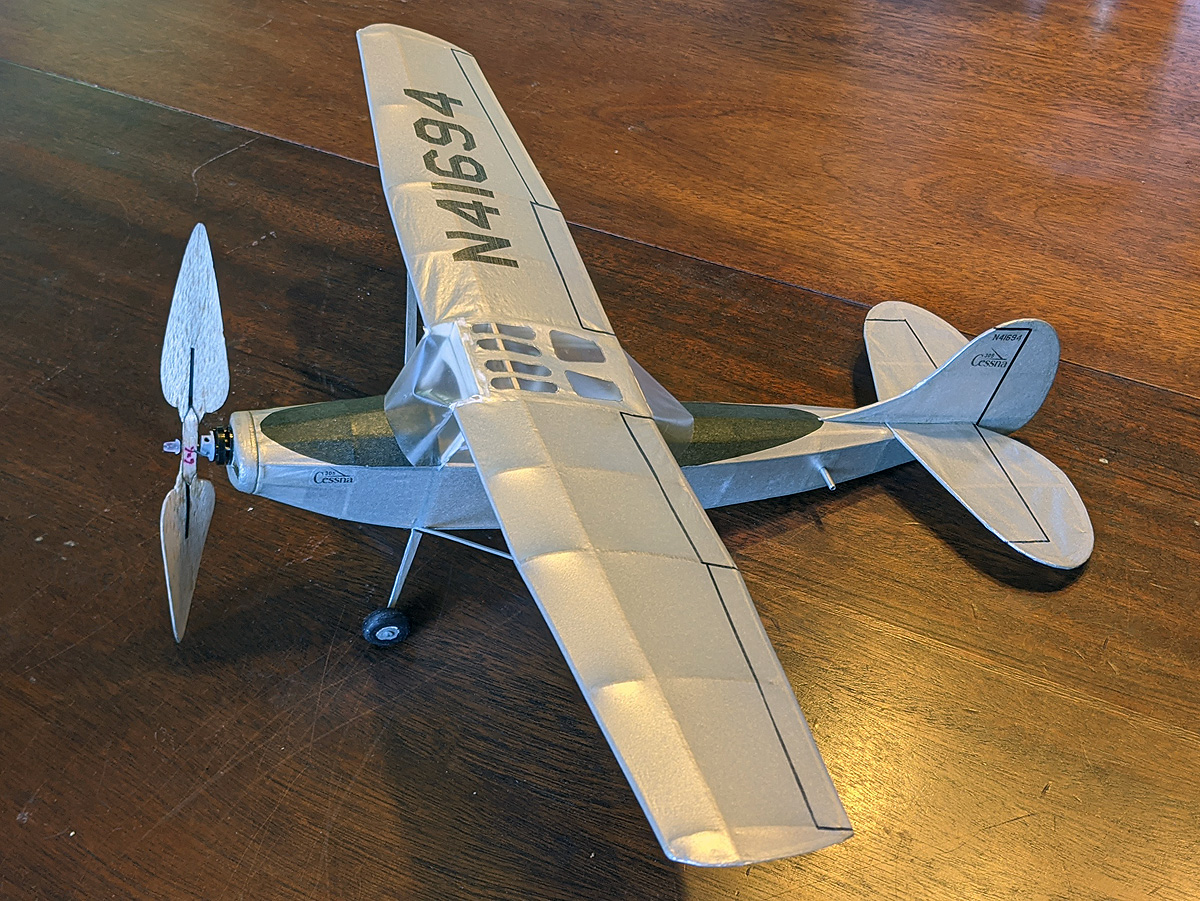
This design builds quick and light. For Dime Scale, I flattened the sides and bottom – very simple. All top and bottom cross pieces are provided to create the correct trapezoidal cabin shape. Even the color scheme of the 305 prototype is simple: Silver with black anti-glare panels and markings.
The plans and parts will be published int he next Cloudbusters newsletter, legalizing the new plan for FAC Dime.
Here are build photos and a crudely trimmed test flight. NOTE: the prop shown in the photos is NOT LEGAL for FAC Dime Scale is it is multi-piece wood construction. The video shows the model flying with a Peck 6″ prop (legal).
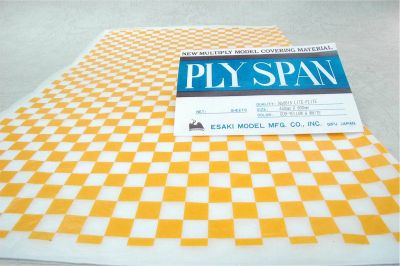
I was reduced to trying to clean up my workshop the other day. I decided to consolidate my “tissue for sale” cabinet. I have only a very little left and I was saving what I have for myself. I have small amounts from estates and thought I would put all of the tissue in one place.
The first place to start? Get rid of the box I used to take to contests and events where I brought a small amount of all the colors. Well, it wasn’t empty. In fact, it was full – about 1000 sheets of a variety of colors. Now this is more than I need for myself and I will offer it for sale, starting with large lots: 10 sheet lots of Checker and Silver, 50 sheet lots of some colors. I have more than 50 of some colors, but I do not know exactly how many. (Have you ever tried to count sheets of tissue? It’s not easy or fun).
Here is what I have – THIS IS GENUINE ESAKI TISSUE:
40 sheets of Blue/White Checker – 10-sheet lots, $50 each ($5 a sheet)
50 sheets of Yellow/White Checker – 10-sheet lots, $50 each ($5 a sheet)
50* sheets of Silver – 10-sheet lots, $50 each ($5 a sheet)
Yellow – 50 sheet lot* – $100 ($2 a sheet)
Orange – 50 sheet lot* – $100 ($2 a sheet)
Dark Blue – 50 sheet lot* – $100 ($2 a sheet)
Black – 50 sheet lot* – $100 ($2 a sheet)
Lots with an asterisk * – I probably have more than one lot, but this will be evident as I start counting out the lots sold. If you order and I don’t have enough, I will refund your order.
Note: I will NOT be selling individual sheets until such a time as no one wants these bulk lots. When I do revert to single sheets, the price will be higher.
The other day, I was shipping a package to a Canadian customer. Stamps.com warned me that Canadian customers are often charged a customs fee AND a $10 processing fee. They offered to bypass that with a flat rate pre-charge of $6.95. I know that not every Canadian shipment gets charged a customs fee, but those that do might easily exceed $7. So, I have implemented a $7 surcharge for my Canadian customers. This is supposed to ship directly to your door without any customs intervention. You can read about it here: Stamps.com – Canadian Duties & Taxes
2: Purchasing and Accounts
I have had NUMEROUS questions from customers in shock regarding a $25 shipping fee. $25 is my current flat rate for International Shipping. So, why are my US customers seeing a $25 shipping fee? Well, it is because – without logging in or creating a shipping address – the system does not know where you are and defaults to “everywhere else” – which is $25.
In order to save us all some time, I have now disabled “checkout as guest”. This means you have to have an account (and log in) or create a new account (and log in). The system will then know where you are and calculate your shipping charge based on your state (or country).
3: Rubber Prices
Added fees are now integrated into price, some are reduced.
4: Short Kit Prices
Due to the increase in balsa prices, (previously discussed) I have increased my Short Kit prices. These new prices are still pretty low and are based on the number of balsa sheets in each kit. Keep in mind that I try to select appropriate balsa density weights for the specific kits – and I do not use wood over 12#. For example, some of the Peanut kits are cut from 6-7# wood – that’s pretty light. JetCat kits increased and I will try my best to select lighter weight wood for the wings, especially.
NoCals – No Price increase (all are $11)
Dimers – all increased by $1 (all are now $12)
Peanuts – nearly all have increased by by $1 or $2
Scale – all of the lesser kits increased by $1 or $2
Embryos – nearly half increased by $1
Old Timers – nearly all have increased by a couple of dollars
JetCats – all increased by $2
Things have been slow around here, mainly because of a balsa shortage. I order nearly on a monthly basis. I got a small shock on my last order: 57 sheets out of 100 were in excess of my 12# weight limit. That means I am actually paying DOUBLE for the balsa I am buying (since half of it will not be used).
So, I am stuck – do I continue to buy excess from National – or do I specify my density and pay a 40% surcharge at Specialized? I ordered another lot from National and it is not here yet and I cannot cut what I do not have. So, some orders are delayed.
The balsa situation will cause me to increase prices on my short kits (insert sad face here). I do not like that prospect. I need to figure out a way to keep prices low. I think the best way to do that is to base the price on the amount of wood in the kit. In the past, I’ve done a flat rate – $10 for short kits, and $20 for JetCats. well, some of my short kits contain as many as 6 sheets of balsa – and they were the same price as those with half a sheet. I will probably end up taking the time to analyze each kit and set prices according to the number of sheets.
I also might add an option to have your kit cut from light balsa on some kits. I have a good stash of 6# and under wood that could be used on certain kits. Also, JetCat wings are another place where I could have a “light” option. Thick AND light balsa is definitely expensive (National quotes nearly $7 for a 36″ sheet of light 1/8″ and about $8.5 for a light sheet of 3/16″!!!)
Anyway, I can’t afford to give away the wood in my kits, so prices will need to go up (another sad face).
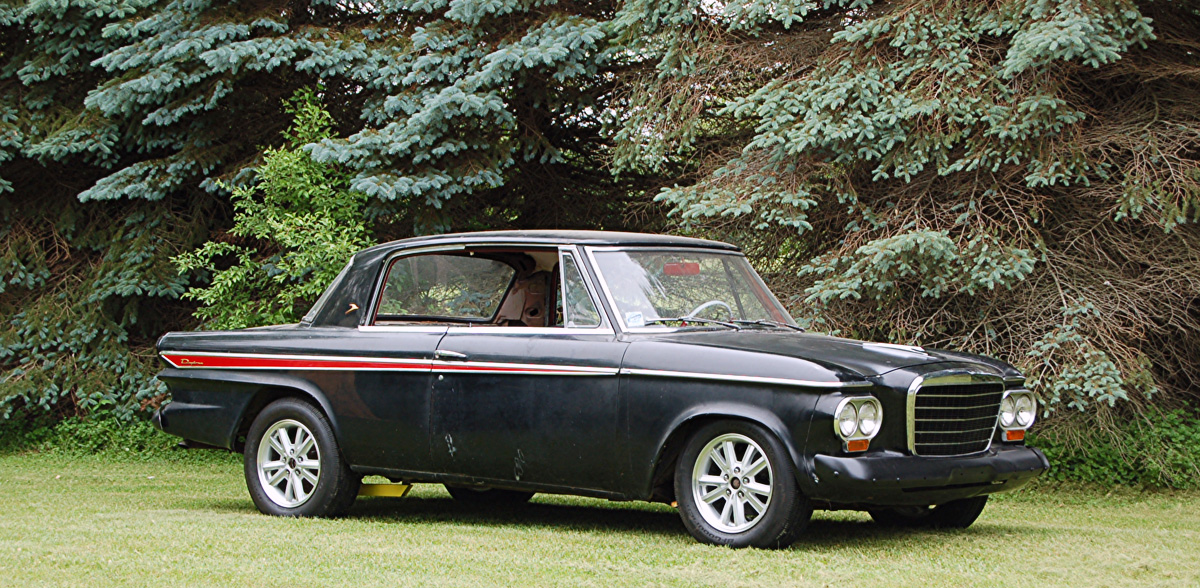
VACATION – I’m going to see my dad Tuesday and Wednesday. I haven’t been down there due to COVID since my mother’s funeral in February. We will be doing a bit of Studebakering and also spending some time in the Prop Factory (actually working on a custom made torque meter for a customer).
A year ago, we had put together plans for 2020 where we would spend several weeks together over the spring and summer, planning on doing a double engine swap in our Studebakers. Well, that hasn’t happened yet. But yesterday, I pulled the McCulloch supercharger from my car to take it down to Myer’s Studebakers in Duncan Falls, Ohio for a rebuild. Eventually, we will get that swap done and my Lark will be back on the road. Here’s a shot of it from 10 years ago – before I got back into Free Flight.
As for the torque meter, with any luck we will have an 8 in-oz torque meter available for the K&P 10/4:1 winder. That’s a little light compared to the maximum capacity for the winder, but it is what the customer wants. We will also think about a larger capacity torque meter, closer matching the winder. This is basically the Rees Torque Meter adapted to the output shaft of the K&P winder (which is almost certainly built with metric dimensions).
Anyway, if you have an order placed, be patient, I’ll be away for a couple days and by that time, I am sure I will have balsa waiting for me and I will get back to cutting and shipping.
BLUF: I discuss tissue and possible tissue options.
As everyone is probably aware, Esaki has gone by the wayside. Some of us suppliers still have some amounts and colors, but I think all the popular colors are getting really scarce (that includes white).
I have mentioned my favorite DOMESTIC replacement before (FLOMO Brand), but I had a customer send me a message a couple of weeks ago. Randy Wrisley sent me this:
“Found some domestic tissue I really like. Called Pom tissue and sold by Etsy. I like neon colors, very dense color. Tissue doesn’t run when water sprayed and is colorfast when doped with 50/50 nitrate. Take dope without the fuzzys so common with other domestic tissue I have used. On the model pictured, I used Esaki on the wing and stab. I noticed the Esaki sagged a lot more than the Pom tissue. It may be heavier, but if one doesn’t have to add dye or other color enhancers weight is probably about the same.”
Here’s a photo of the model he described.
I think this is a Finn Supermax by Randy Wrisley
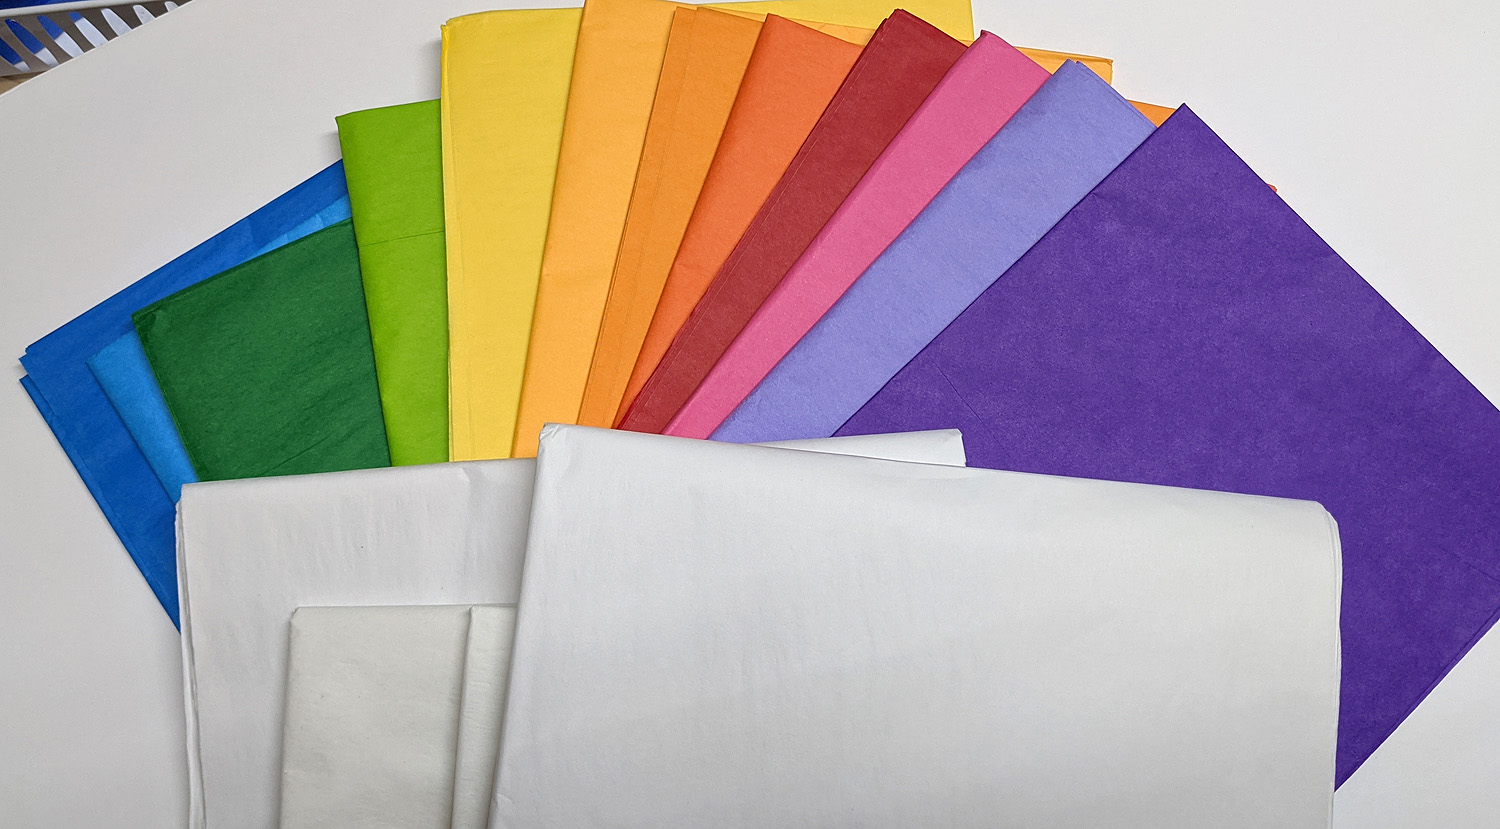
I told Randy that I would definitely check this out, so I found the ETSY site (“PomLove”). I was surprised at the variety of tissue they off (over 50 different variations). If you calculate, the prices are really cheap per sheet.
I ordered their White package and their Rainbow package. I just received it in the mail today.
These almost have a shiny side (no so shiny, but clearly more slippery) and a definite grain to the tissue.
The first thing I did was take a piece of white and weigh it. It measures 15″x20″ and weighs about 3.3 grams per sheet. I also weighed a sheet of the lavender. The colored sheets are twice as large, 20″x30″. The lavender weighed about 7.5 grams; so both colored and white tissue weigh the same.
I got out my trusty Excel spreadsheet and created a calculator to convert my “grams per sheet” to the standard tissue measurement of Grams per Square Meter (GSM). Here are the results:
Esaki was reported to have a GSM of 12
FLOMO (white) has a measured GSM of 14
PomLove has a measured GSM of 17
So the PomLove tissue (probably a chinese “domestic” tissue) is definitely heavier than Esaki, but you won’t have too much of a penalty on your sport models, especially the larger you go. The color selection is quite wide and it is cheap. So, the price is right. One thing I did notice is that the wet strength is not very good. This is typical of “domestic” tissues and should be no surprise. You can get around this by covering dry and shrinking the tissue.
In the end, here is another option when it comes to sport model tissue replacement.
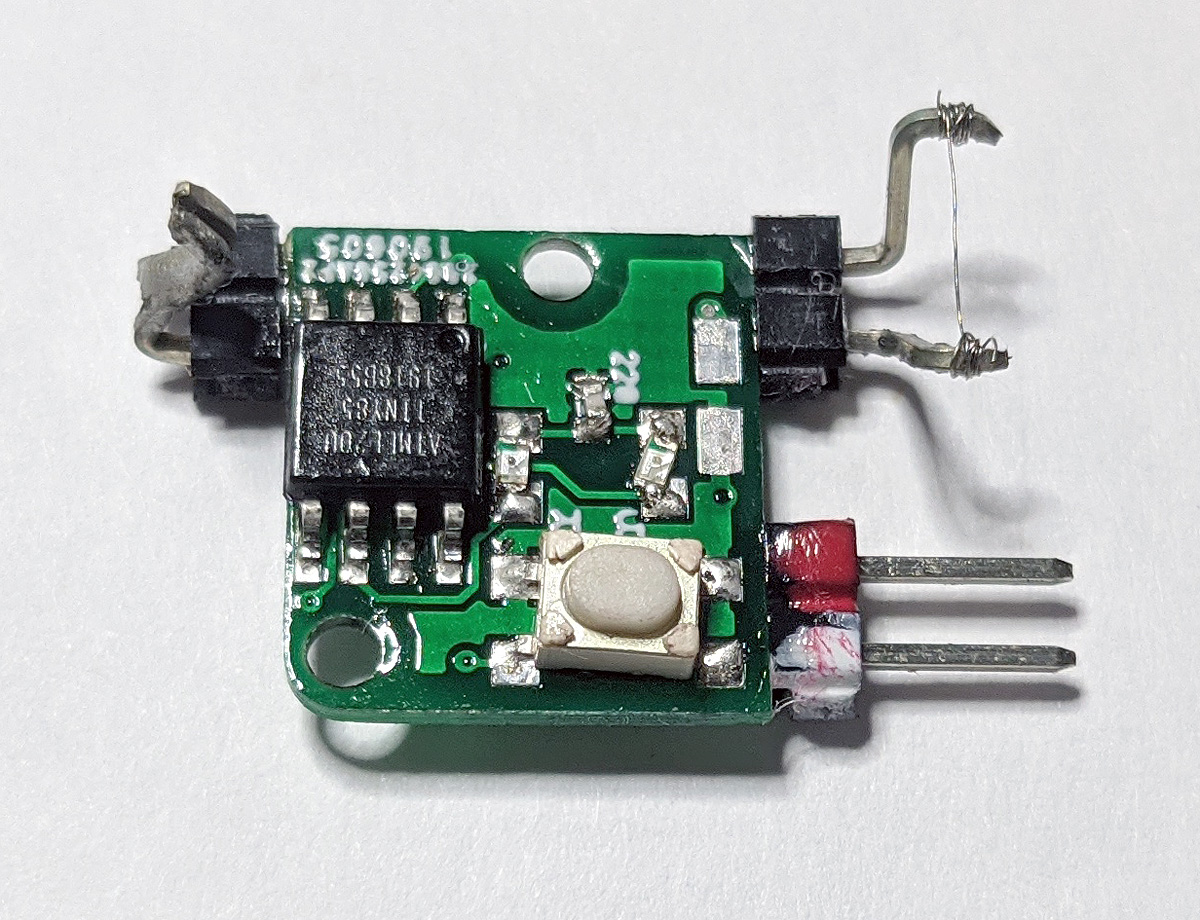
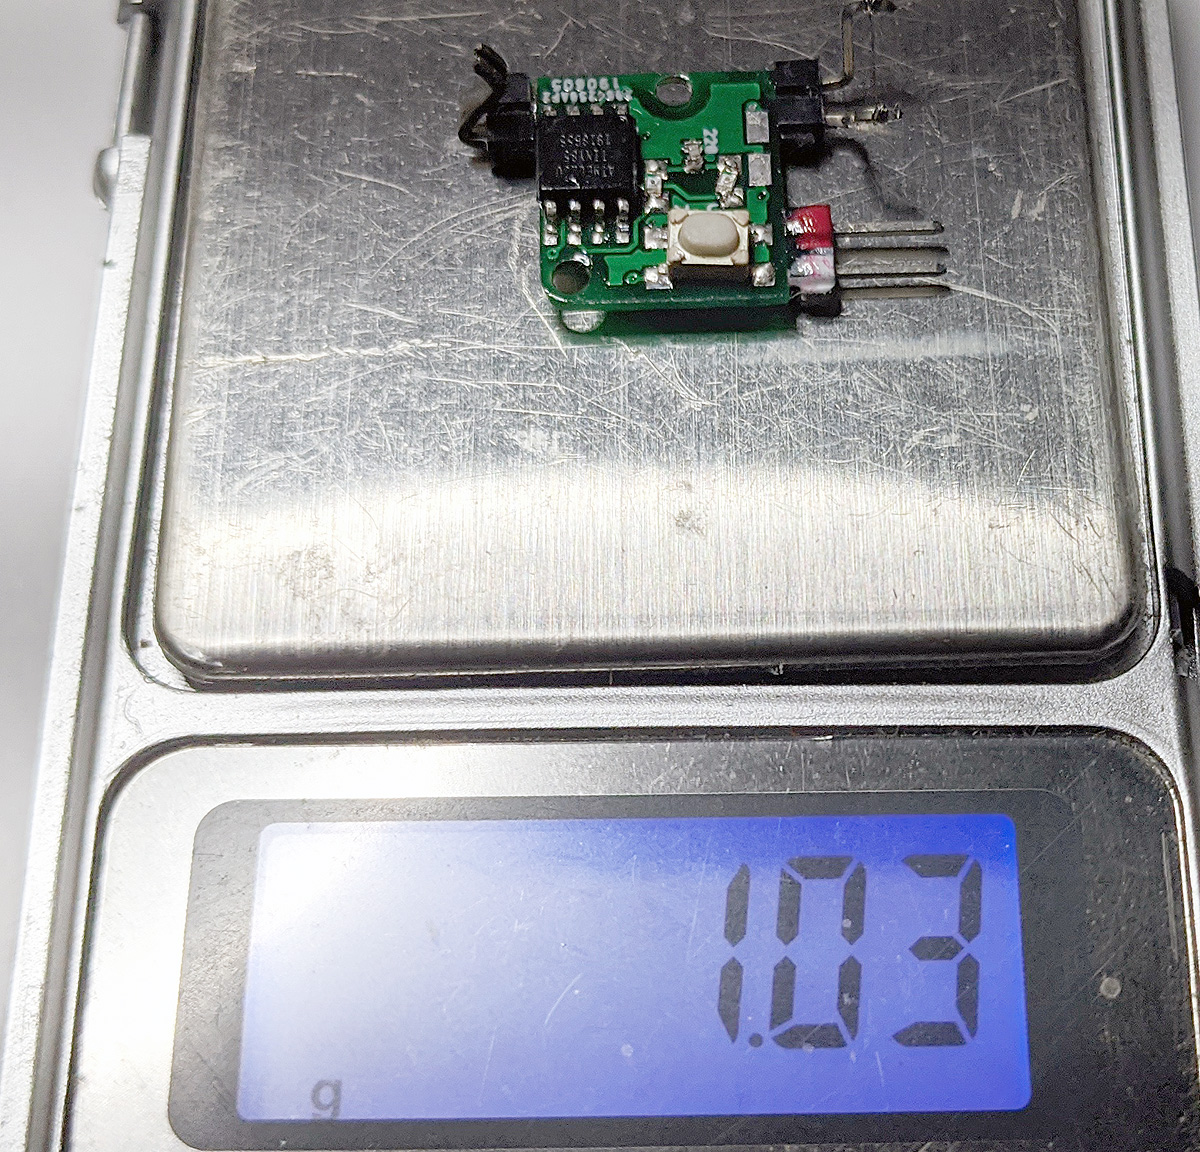
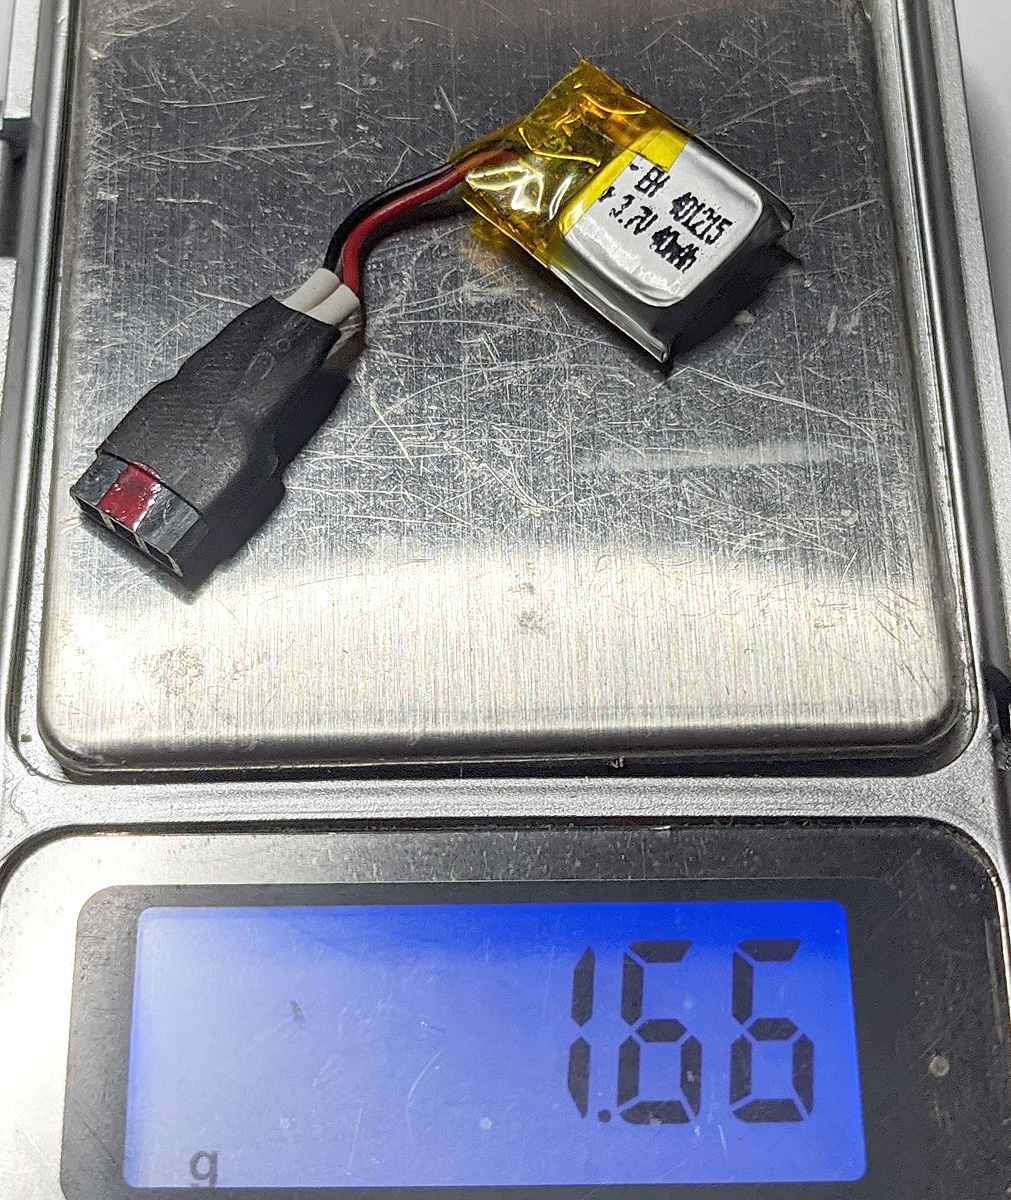
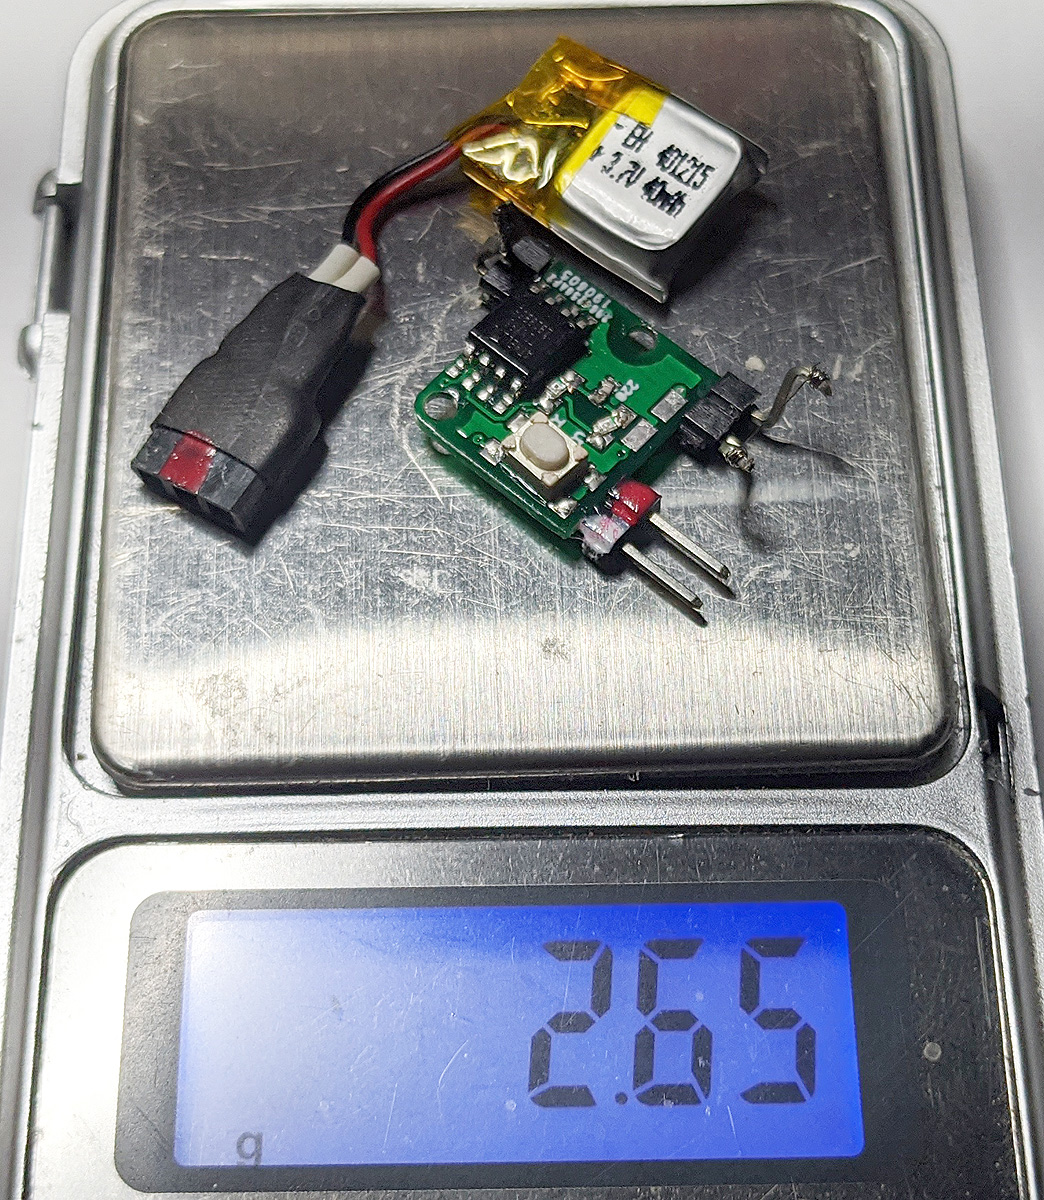
A year ago, I posted a video on the operation of a Electronic Band-Burner DT and many people have asked if I would be carrying this product.
I am happy to say that I have worked out an agreement with Bernard Guest, who is making these timers. I now have them on this site for sale – with or without a 40mAH battery.
These are great little timers and I use them myself. I am convince that one of these saved my Caudron from a fly-away last year at the AMA Nats.
They are programmable up to 16 minutes in 10-second increments. The operation and programming are not as difficult as you might think, and are especially easy to do after you’ve done it once or twice. (Instructions are posted on the product page)
Because Bernard is making these individually by hand and I have to buy them at very little discount, they are currently available only with or without the battery and I only have a small number (10) on-hand today. Should I get plenty of batteries in the future, I could sell them individually. Bernard does promise that he will soon be able to provide appropriate chargers in the near future, which I will post as soon as possible. (Note: I use a small and cheap 100mAH charger. Bernard warns that LiPos should not be charged at this high rate as it will shorten the life of the battery.)
It’s funny how perceptions change. Prior to this year, it might have been “too windy” to fly. It really wasn’t, but we get spoiled. Now, since many of us are self-isolating and most forms of entertainment are no longer available, we appreciate getting outside and doing what we love – flying model airplanes.
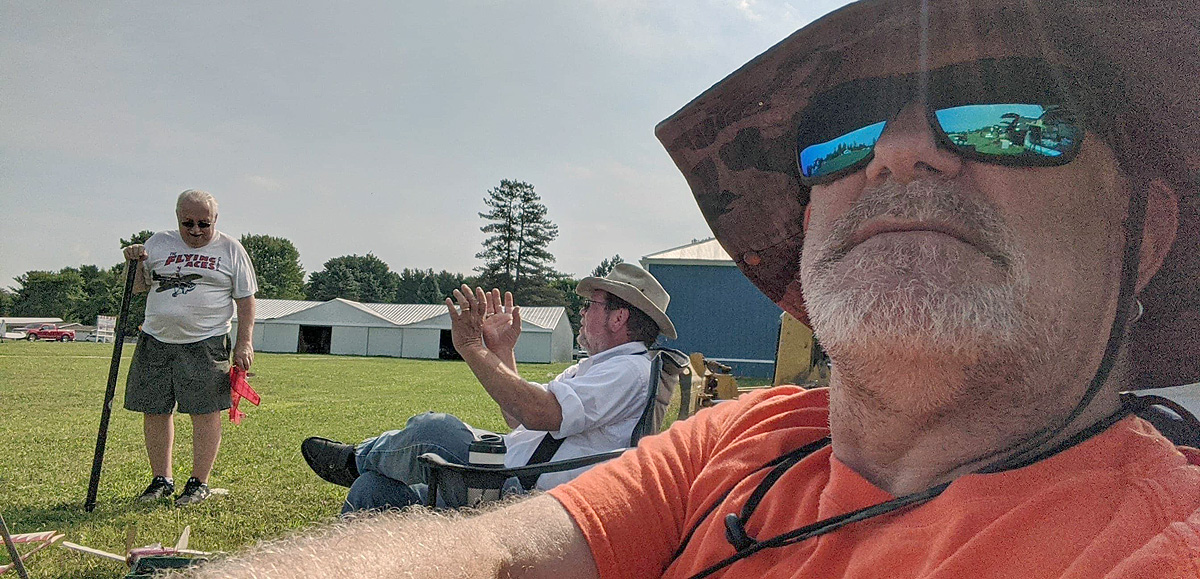
I was pretty tired Sunday morning, due to multiple sleep interruptions over the last week, but I made that long drive (2 hours) up to the Cloudbuster’s flying field for our monthly contest. These are low health risk events as there are only a few of us (eight, yesterday) and it is outdoors. We are cautious: no more hand shakes and we stay apart from each other, even when chatting.
Dave Livesay, Chris Boehm, and me having a little spaced-out chit-chat
I already posted the contest results on the Cloudbusters Facebook page, so I won’t go over that here, but will focus on some of my personal adventures here.
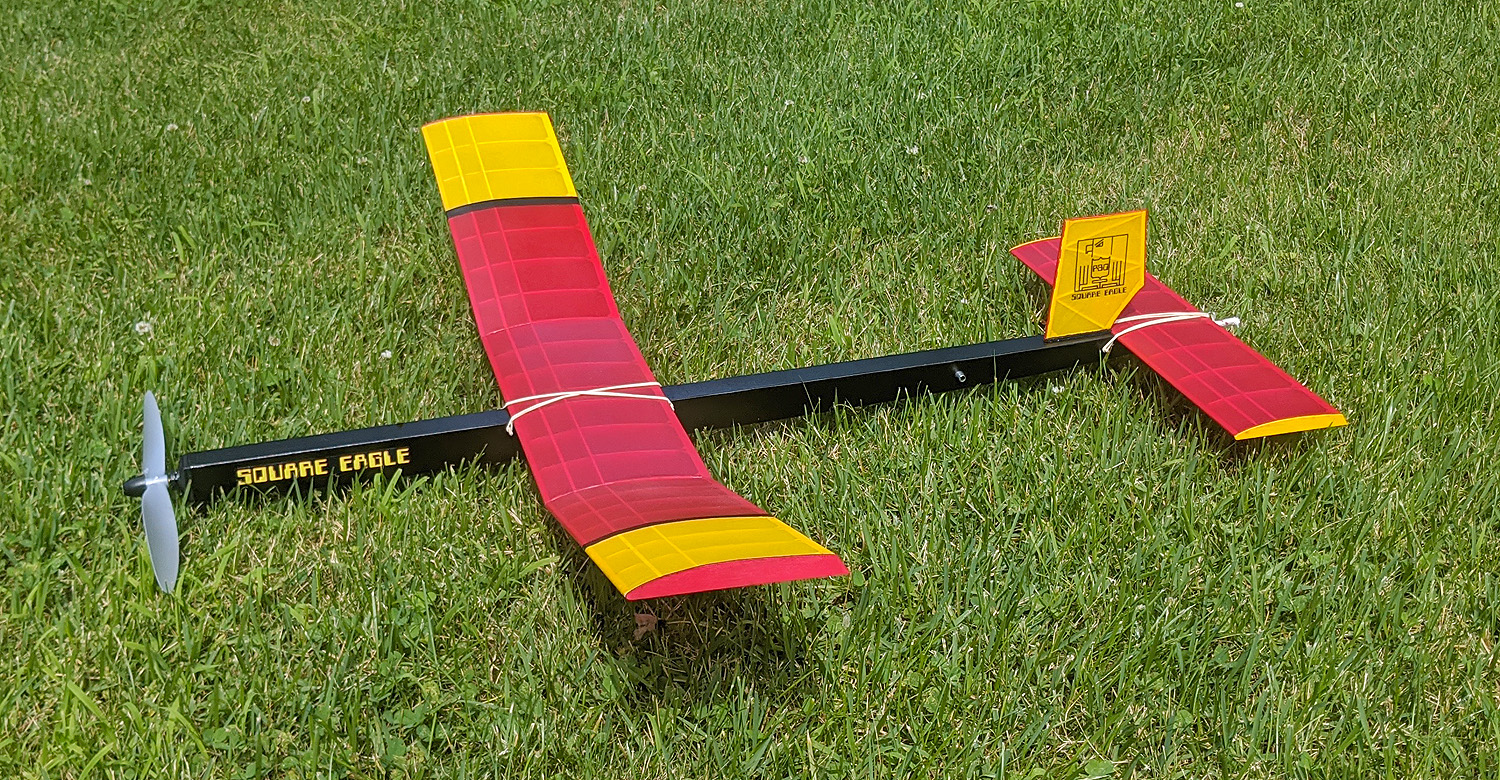
The first thing I did when I got parked and unpacked at around 8:30 was to get out my new Square Eagle P-30. If you remember, I was only able to put in 100 hand-winds at home for a 10-second jaunt around the back yard. I wanted to “air it out” so I was hoping to get in some test flight before the wind started to pick up (it was already pretty breezy and that probably didn’t change much throughout the day). I used a short DT every flight. On the first, a medium-powered flight (maybe 1000 turns?), I took it upwind and let it go. Even at medium power, it was up and climbing – maybe the turn was a little wide, but it did get up. The DT kicked before the power ran out, so we couldn’t check the glide.
The next two flights were full power – about 1600 turns or so with a 90-sec estimated fuse burn. The climb-out was good and I got a 1:57 with the DT kicking later than expected. I tweaked in a little more right turn in the Gizmo Geezer prop assembly and shortened the fuse a little more. Wow, it likes to fly, climbing right out (and this is on 2-loops of 1/8″, not 3), much better with the right turn. It was plenty high when the DT kicked this time and it came down slowly. As Winn suggested, it took 20 or 30 seconds to come down after the DT. My thoughts were – I will be losing this in a strong thermal some day. And this is with the tail kicked per the design. Success! In two weeks, we have our Oldenkamp Cup event – I’ll get to try to wrestle the cup from Winn’s firm grip (he has won it most of the past several years).
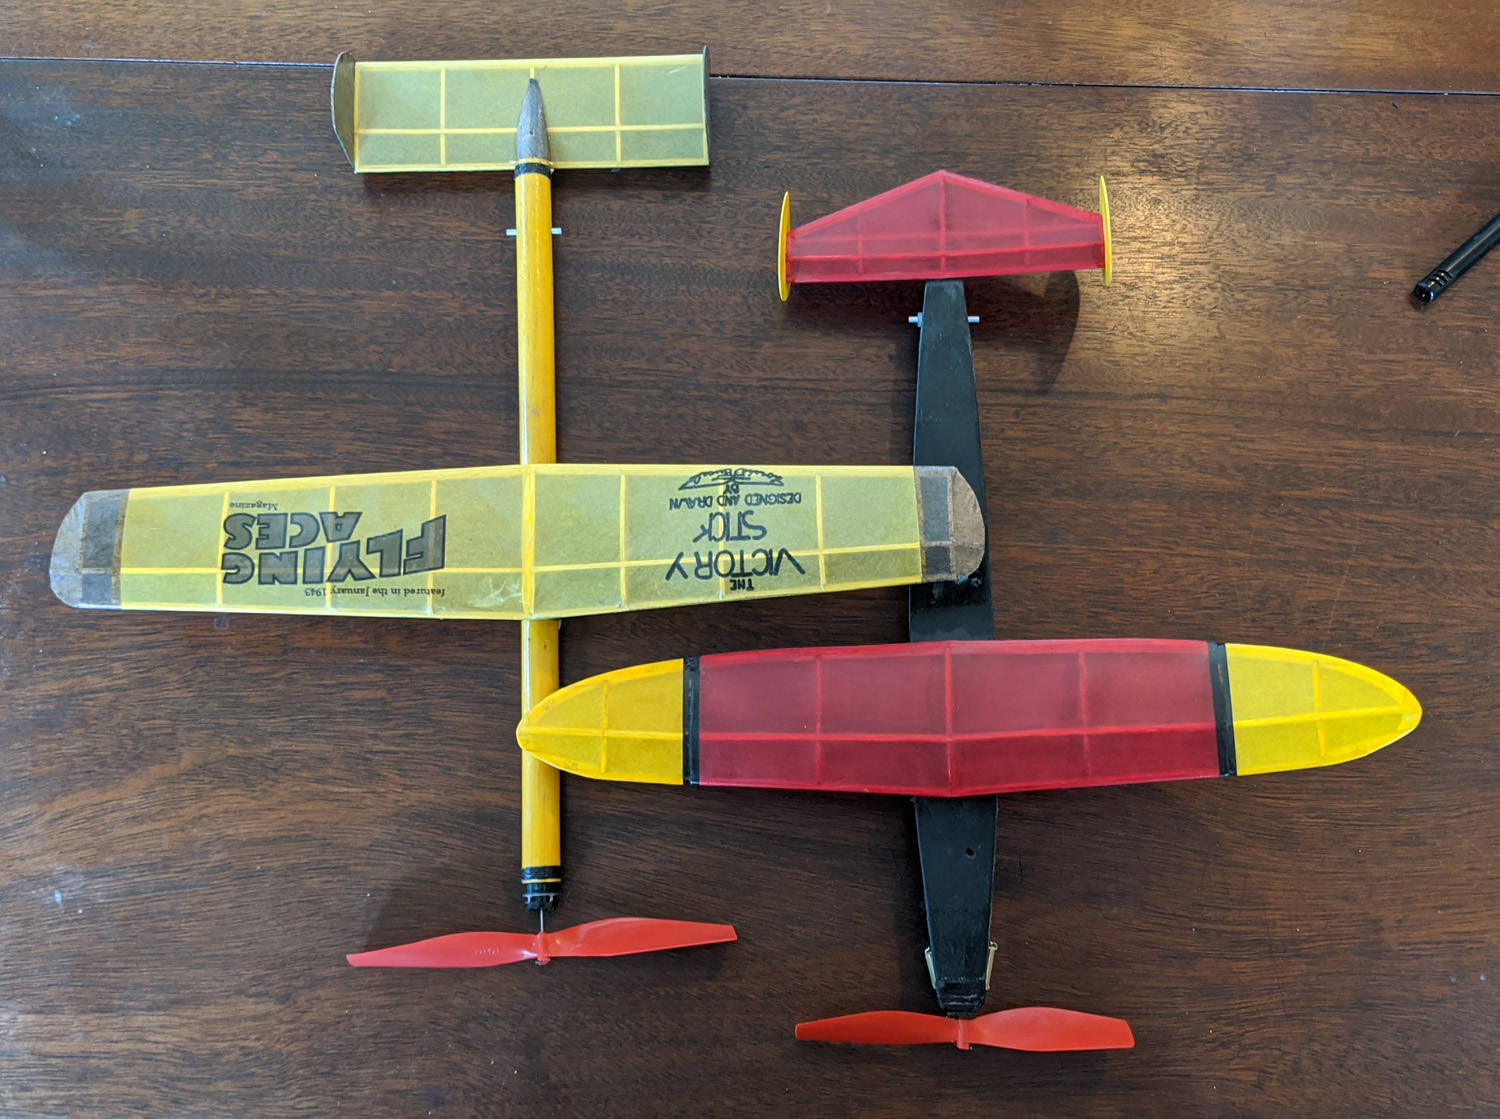
The next bit of fun was with my Victory Models. I decided to bring my old Victory Stick and my newer Shaft to participate in our Combined Old Timer event. The event is really 2-Bit, but if people want to fly the bigger Old Timers, we let them. In this case, I chose to fly SMALLER Old Timers as both are sub-14″ span OT Sticks (as Sticks, they are not eligible for 2-Bit – no landing gear).
The Victory Stick needs more work as the wings have been broken off the wire supports so many times, who knows if the incidence is anywhere close to correct. I really need to build another (fuselage tube is already completed!) But the Shaft flies well – it’s about a 45-second ship. Here’s a video from fall of 2016 when I built this second one.
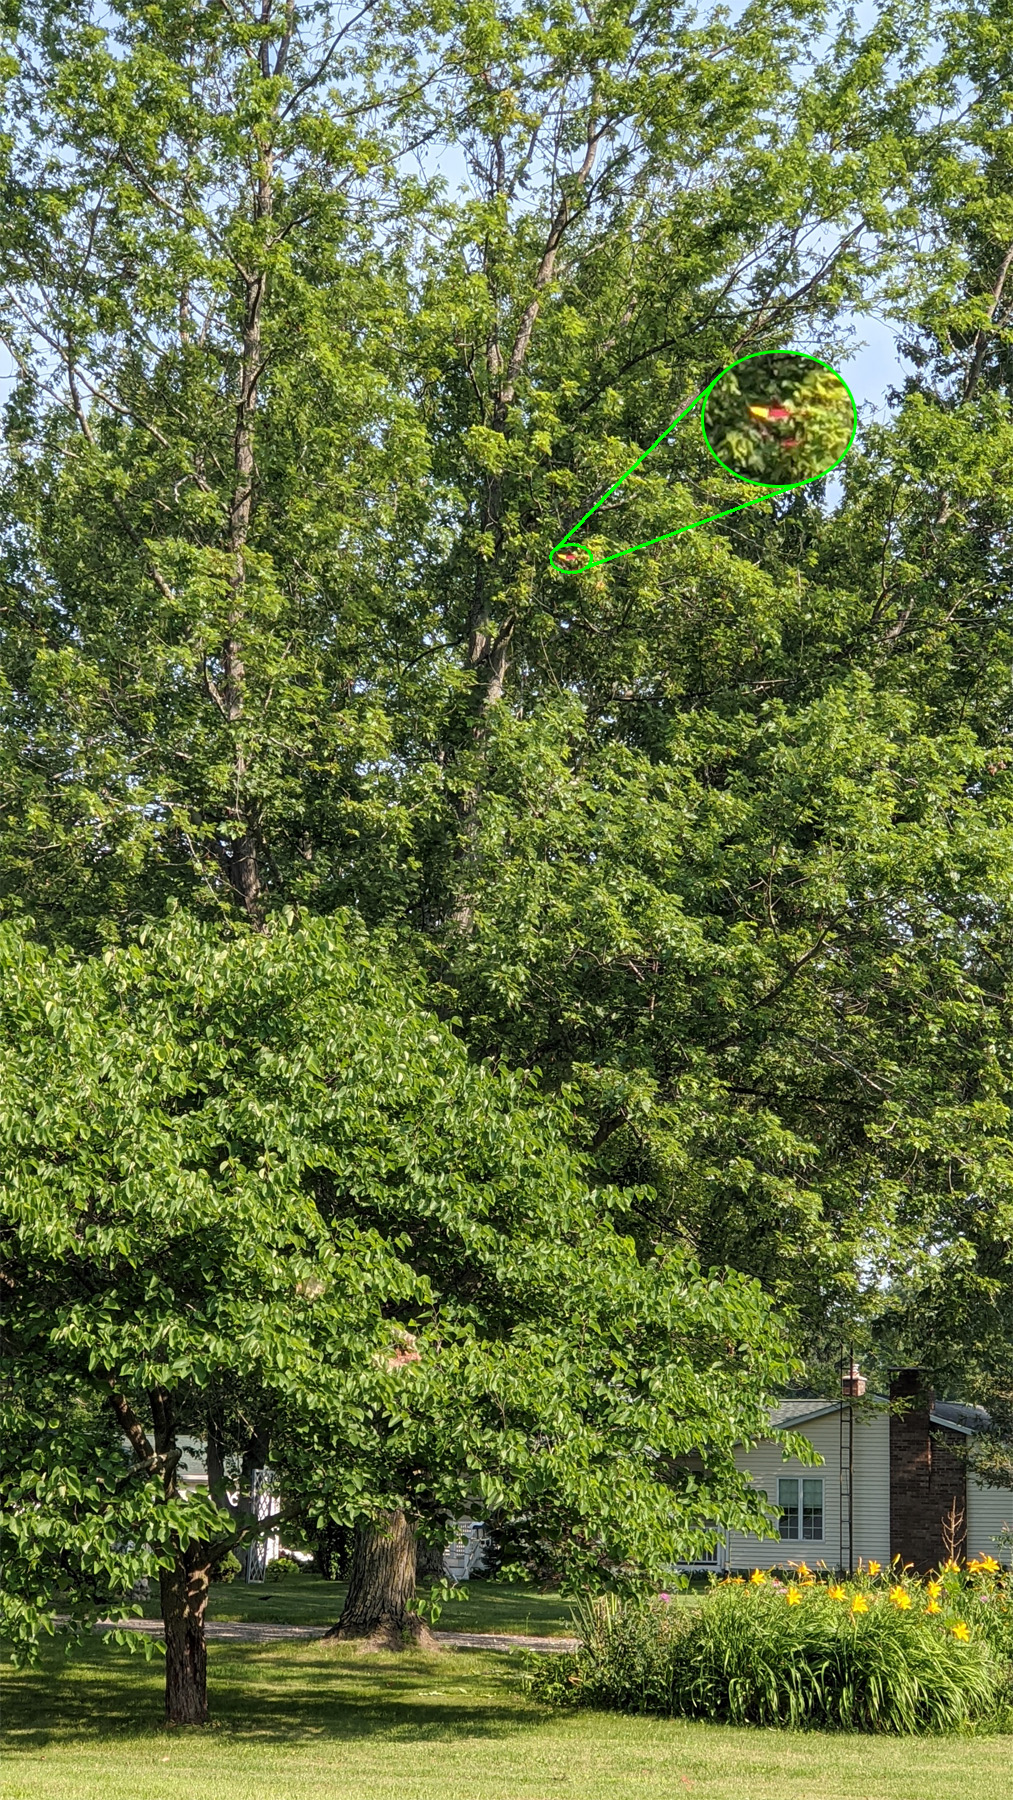
So I wound up the the little Shaft and took it upwind and let it go. Man, it climbs. With the help of the wind, it went quite aways downwind – almost across the road. But a tree grabbed it right out of the air. It was pretty high up, so I just went back and thought “the wind will blow it out”.
I would check on it as the day went on, but it wasn’t budging. So much for participating in Combined Old Timer (note – I “could” fly either the Victory Stick or the Flying Aces Sportster, but I “wanted” to fly the Shaft).
Later on, a few of us had gathered to fly JetCat. We often fly at the same time so we can record/fly/record/fly – and get it all out of the way. One of our new flyers, Ken McGuire, was flying a 2-Bit, trying to get it trimmed. We gave his some advice – maybe too much – and his little plane got caught in a tree near where my plane was. I told Winn “we’ve gotta go on a retrieval trip after this (JetCat) because Ken just put his plane in a tree”. So we went over there with my long pole (a Jackite 31″ Orange Kite Pole – get them through EasyBuilt or Jackite – but they’re $80 before shipping!)
(Note – in my opinion, an important part of having a club and attracting new members is helping them get their planes to fly. Most of the time, that is just a piece of trimming advice here or there – you don’t need to dedicate the afternoon to their planes. But, again in my opinion, possibly an even more important part is finding their lost planes. Losing a plane can be disappointing or even heart-breaking and maybe they will quit after that. So go find that plane and keep them flying!)
We got back to the cars and Chris Boehm said they needed a third for Combined Old Timer – he and Chuck Hickson had been flying that while we were jetting. That was more incentive to get my little plane back.
I spotted Ken’s model deep in a tree and way up. With the pole fully extended, I was able to get it out of the tree. Then we went to the next tree and did the same for mine. I thought it was too high, but that pole is long (and, apparently, my how-high-up internal estimator needs calibration).
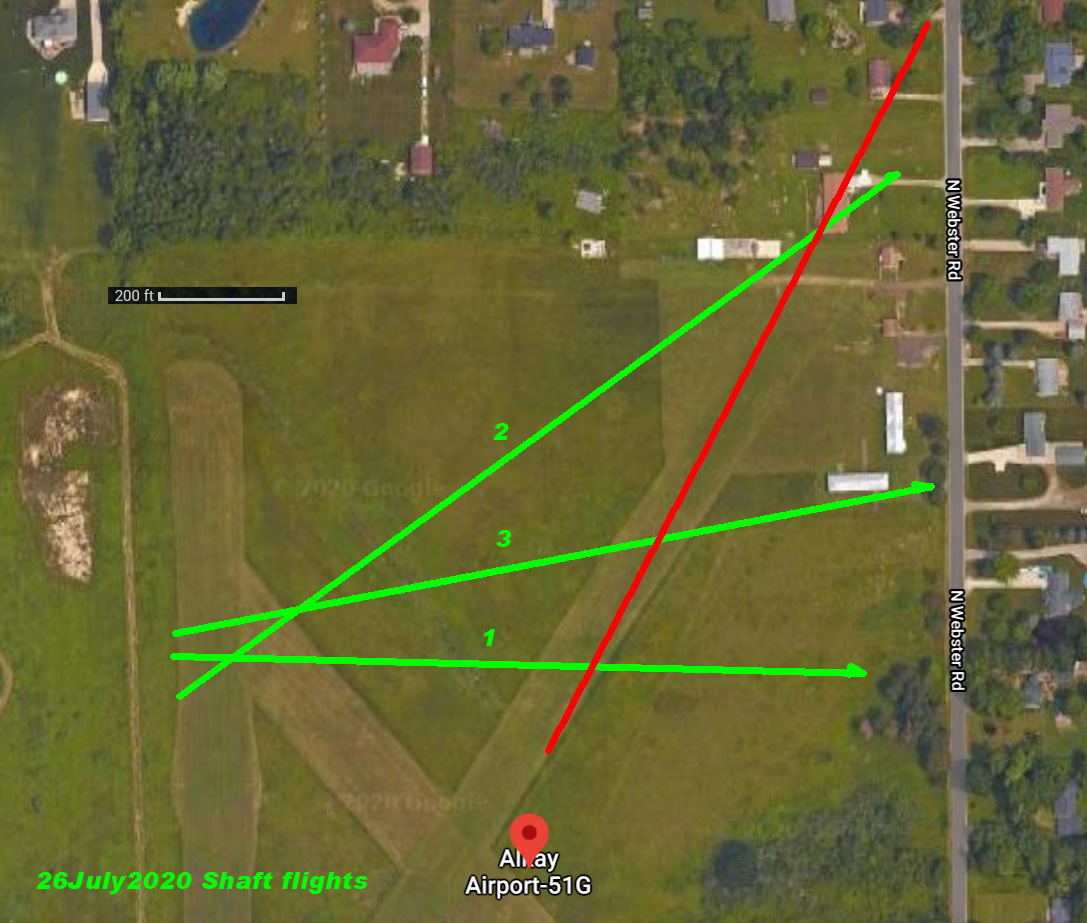
What followed was some really good flights on this little ship. Here is a chart I made of the general start locations and landing spots of my four flights on the Shaft. The red line is the first test flight that landed in the tree.
Keep in mind that I use a scooter for chasing. Our pit area was just to the left of the white hangar at the end of Line 3. We ride on the edges of the runways – the runways are smooth; the other areas are very rough, usually with tall grass, and some areas have ditches crossing them. So, really, you have to stay on the runways to chase (that makes following on windy days difficult as you are sometimes traveling in the opposite direction of your model!)
I don’t know how long, in time, the test flight was, but the official flights were: 1) 52 seconds, 2) 102 seconds, and 3) 69 seconds. These were really good flights for the Shaft. Torqued up and trimmed, it would go nearly straight up with a slight left component. Flight 2 was nerve-wracking as it actually went NNE toward the tree line and then headed east. We’ve lost several models in that tree-filled area and I was afraid that one was a goner. Those were long flights for the little plane and it ended up beating the Chris’s Flying Aces Moth (second place) by over 40 total seconds. More Success!
Oh, and I beat Winn in JetCat for the third straight month!
The trip back home was long and difficult, but I made it and spent the night relaxing and recuperating (and napping) in front of the tv, often recounting the day in my mind. It was a good day.
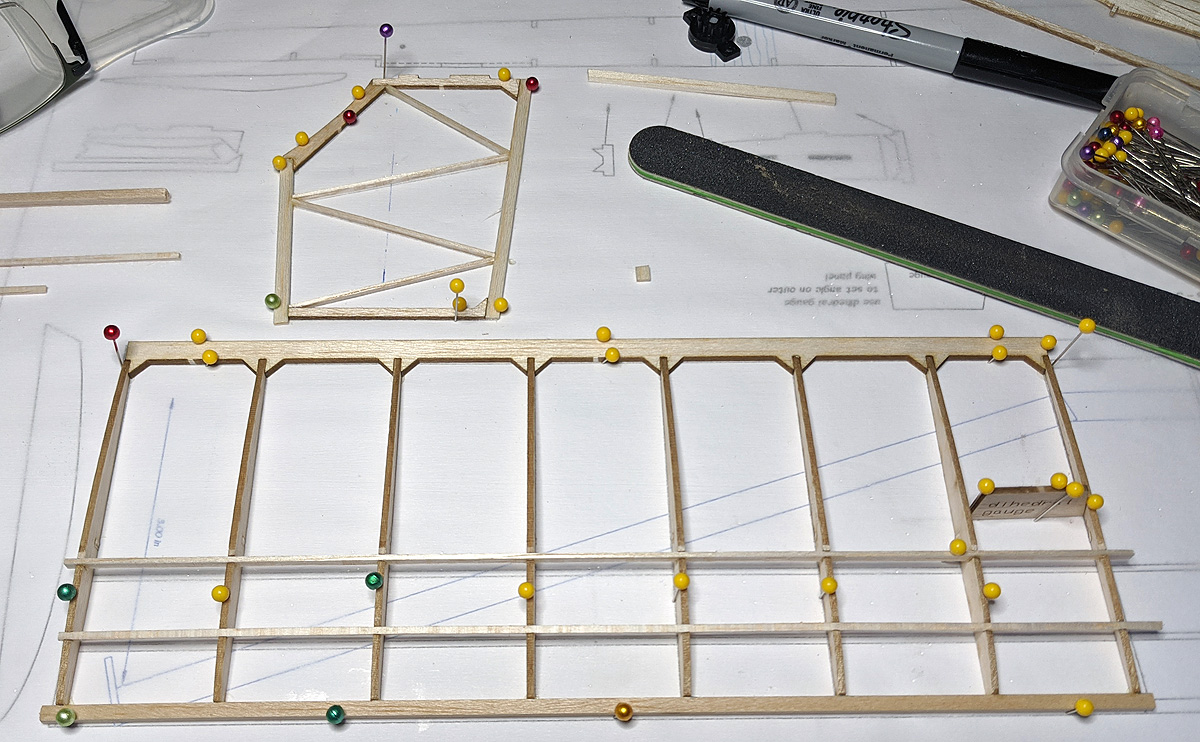
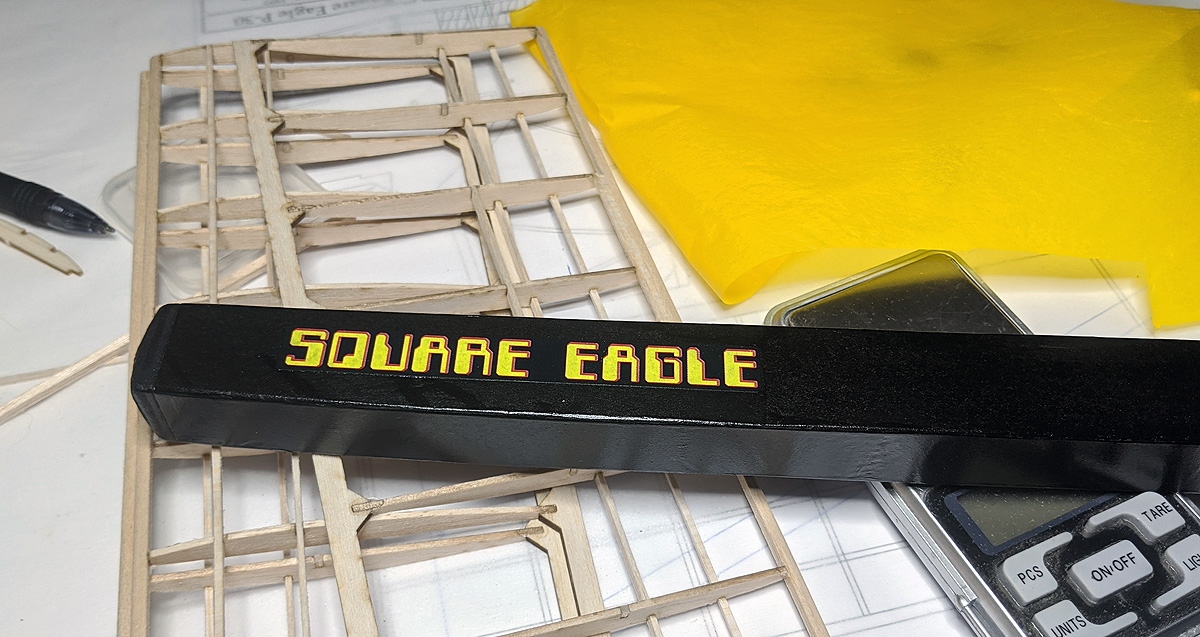
Two years ago, Dave Acton sent me the materials and his blessing to go produce the Square Eagle P-30, should I want to. Dave and Bob Langelius had been selling the Blue Ridge line through PAL Model Products. They had turned over the Blue Ridge Special a few years ago and then Dave sent me the Square Eagle. I knew it would be a good P-30 kit, but P-30 is not my area – I fly FAC events and only dabble in P-30 for fun at local events.
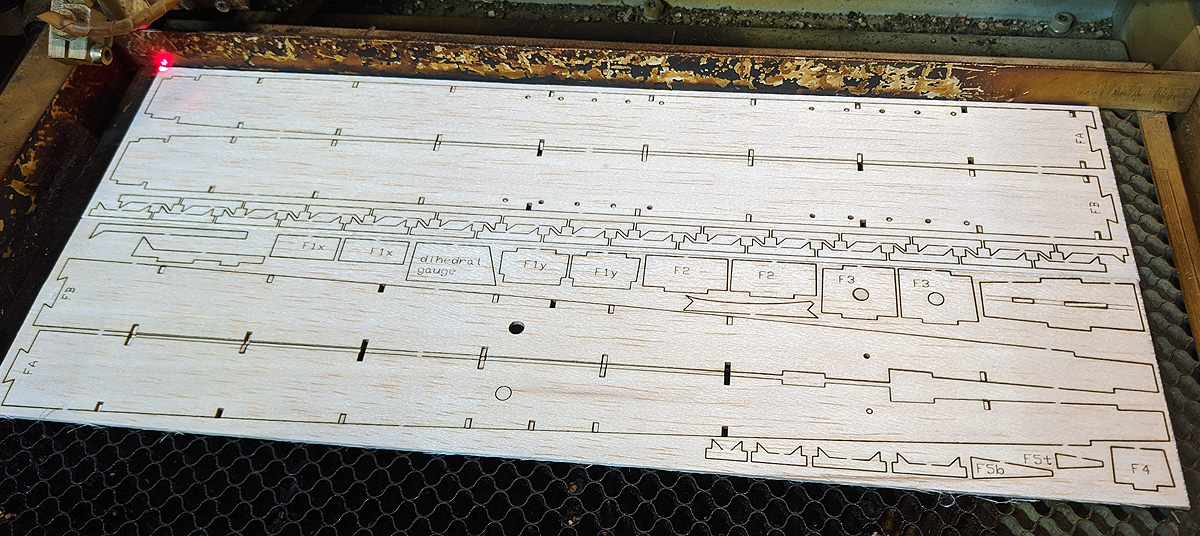
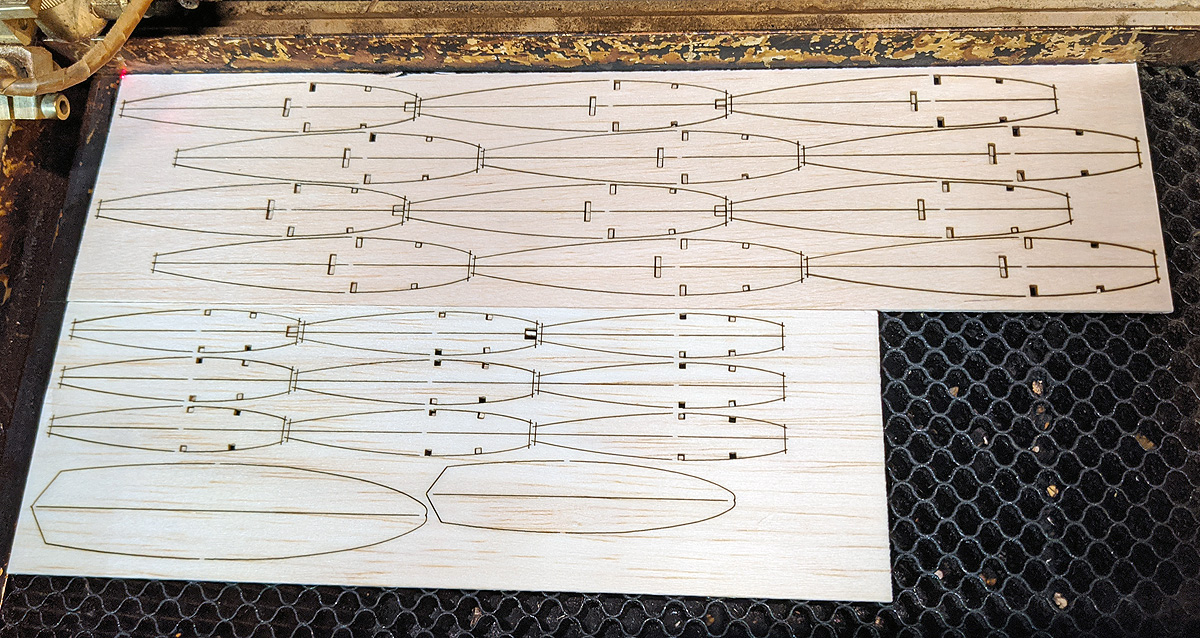
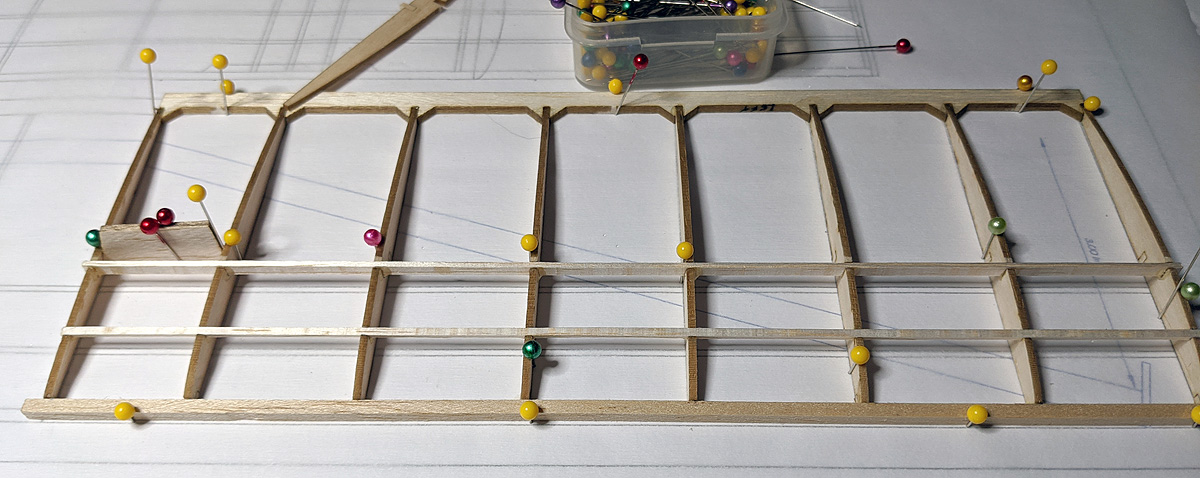
For some reason, I got a burr in my saddle to work on the Square Eagle. I set about measuring the original plan Dave sent and redrawing it. The first thing I had to do was figure out a way to produce a 29″ long laser-cut fuselage on a laser cutter with a 14″ bed. The solution was simple – splice the sheet pieces in the middle. I also decided to supply all of the cross pieces that hold the two sheet sides together. These have built-in gussets for a little more strength. Built-in gussets were added to the trailing edges, too. I designed a fin plug-in system that not only positively holds the fin, but also sets it at the proper angle to impart a right hand glide (per the original instructions). Lastly, I added a couple more wing-peg holes to allow the wing to be moved forward, if necessary.
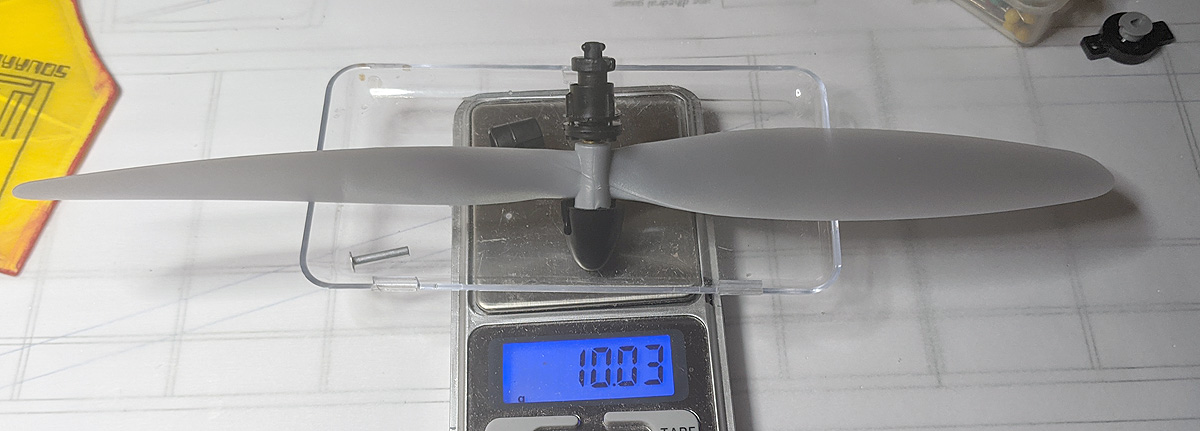
I started building on the 4th of July and finished on the 12th. That included time dragging my feet over covering, which I seem to dislike more and more. The wing-peg holes were an addition because I intended to use a 9.5″ Gizmo Geezer prop assembly. These are P-30 legal and include a freewheeling tensioner and thrust adjustment, but I felt they would be heavy, leading to a nose-heavy condition that would require the wing to be moved forward. While I did move the wing forward, I was surprised to see that the GG assembly was only 1 gram heavier than a Peck Prop, Gizmo Geezer Nose Button, a prop shaft and a clutch – so they really aren’t that heavy after all.
The build is fast. All parts are laser-cut except for the spars and the diagonals in the fin. And since all pieces are straight, covering couldn’t be easier, either. I used my personal colors of black, red, and yellow. The tissue was from my stash of Esaki, but any should work well. The black has been wiped with india ink to make it really black, the red was sprayed with Design Master Carnation red, and the yellow is airbrushed Dr Martin’s Bombay ink. The fin logo was inkjet printed on pre-painted tissue and the “SQUARE EAGLE” text was laser printed on bond paper and pasted to the fuselage. The pieces were sprayed with a couple of coats of Krylon crystal clear and then assembled.
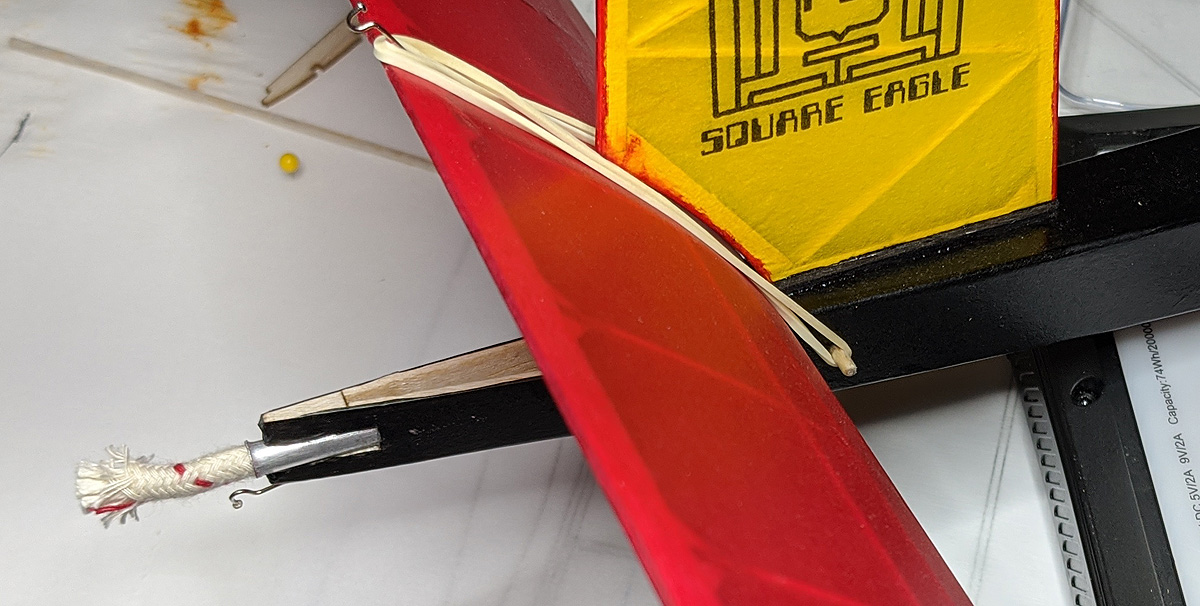
I stuck with the original and old-school fuse DT in the tail because it is light, quick to install, positive acting – and still permitted in this part of the country. This could certainly be replaced with a viscous, mechanical or electronic DT of your choice, but would take more time to install.
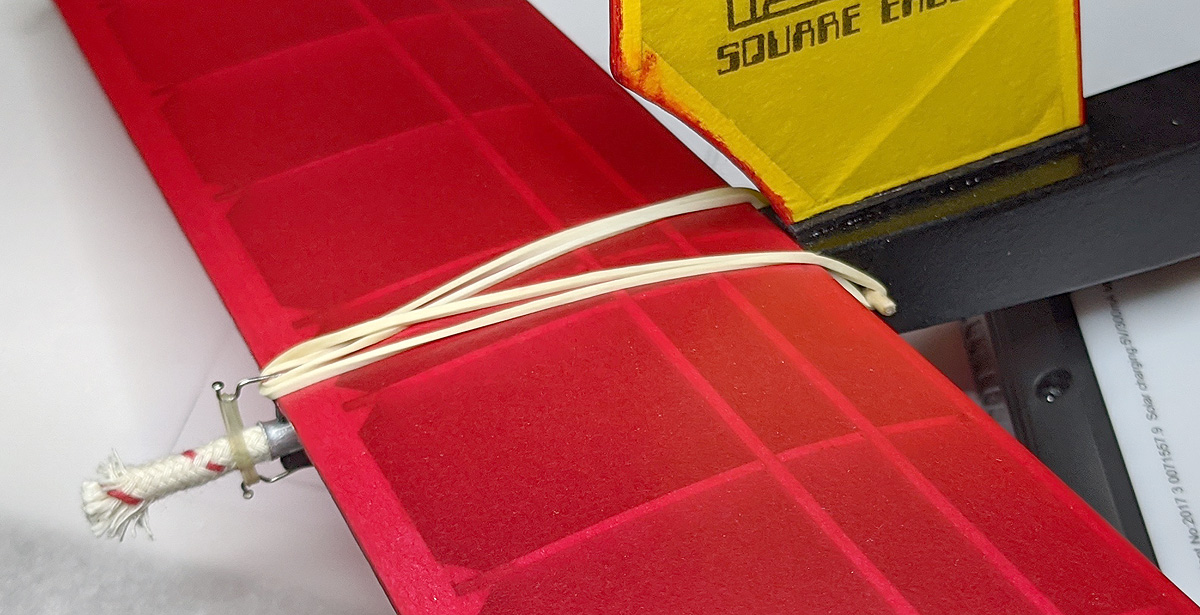
My little back yard is way, Way, WAY too small to fly a P-30, but I took it out for some power-glide testing. The first thing I did was, indeed, move the wing forward. In fact, I moved it two spaces (1 inch) forward to get a good glide. I put in 100 had turns into the prop and was rewarded with a gently climbing right hand turn and glide that got about 15 feet high and lasted about 10-12 seconds. This thing is gunna fly! I can’t wait to get it up to the airport and put some turns in it.
I know it hasn’t made 20 seconds yet, but it is obvious that it can and will fly. I am releasing it now. I’ve decided to offer four options as follows:
Option 1: the Short Kit – my new plan, an original instruction booklet, and 5 laser-cut sheets for $20
Option 2: the Short Kit plus a copy of the original Blue Ridge plan for $25
Option 3: the Short Kit plus a Gizmo Geezer 9.5″ prop assembly for $33 (save $2)
Option 4: the Short Kit both the original plan and the Prop Assembly for $38
A quick update – New JetCat Kits, Postal Rates, Build Projects, Photos, etc
NEW JETCAT KITS
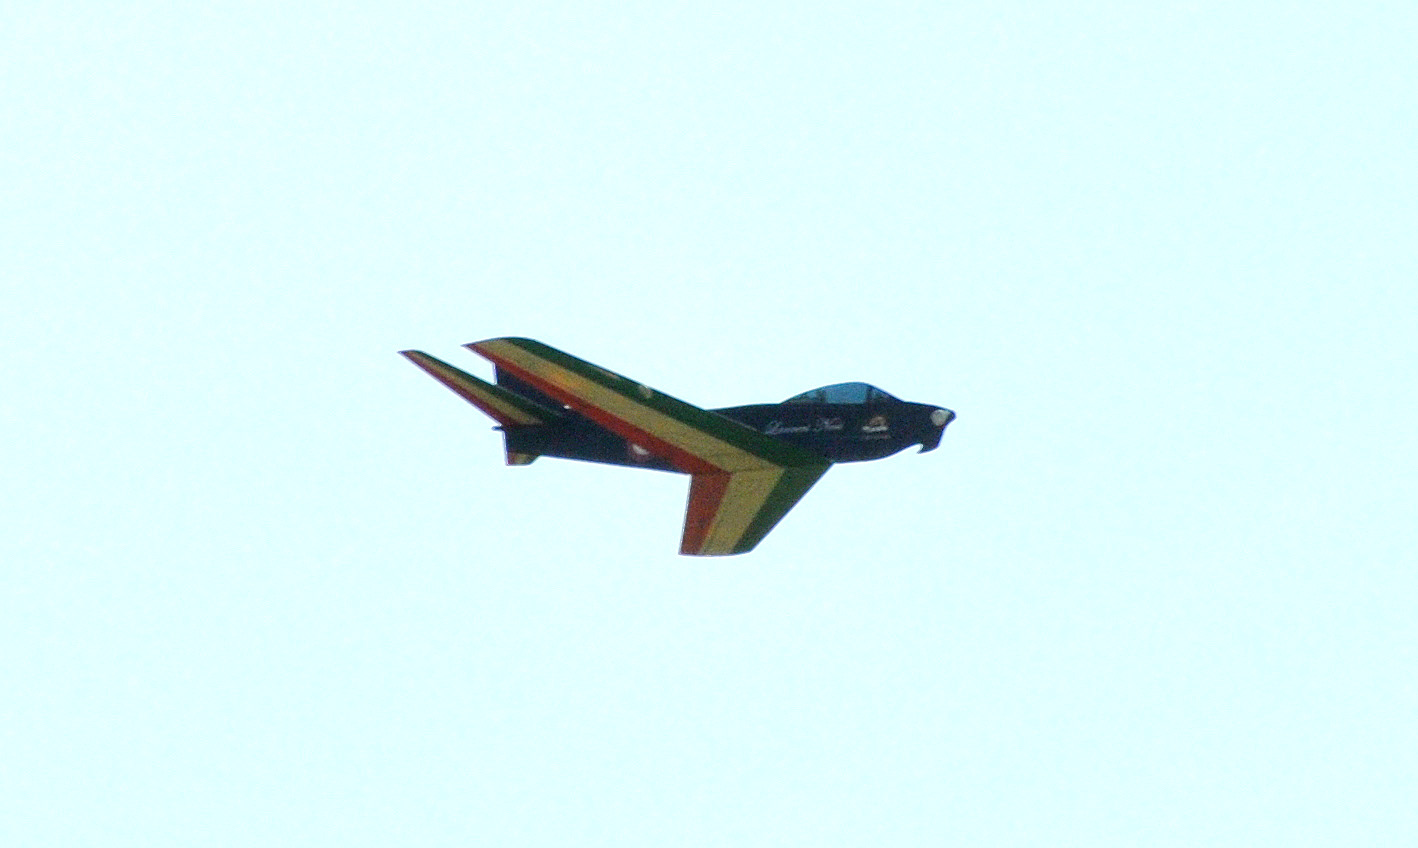
I have two New JetCat kits available: The Heinkel He.178 and the Lockheed L-133 Starjet
The He.178 has been mentioned here before, I am sure. I resisted doing this jet for awhile because it has been drawn up by others. But I gave in, drew it up and gave it my treatment. It has proven to be a great flyer. On a test outing last Sunday, I flew a 41-second flight (into brush; I was lucky to get it back!), three consecutive 30+ second flights, then two dud flights (under 15 seconds) and a final 30+ second flight. Possibly my best streak in JetCat ever.
The Lockheed L-133 Starjet was sent to my by Randy Wrisley as a proposed kit for me to do. I don’t usually take external suggestions to heart, but something about this grabbed me. The 1939 Lockheed proposal was a very sleek and aerodynamic twin jet canard. Randy reported his build flew great, so I set to work. It was a quick build and seemd to do well under low power in my back yard. Full power at the flying field showed the model to be very stable – in power and in glide.
Find both kits by clicking the JetCat link in the menu on the right side of the screen.
POSTAL RATES
I wrote about postal rates a few months ago. I resisted doing anything until today. I was packing orders and noted that my postal software told me they upped their rates. The margins were no very slim – a few cents. So I have upped my rates by 50 cents.
BUILD PROJECTS
I’ve got some things on the building board.
I started to work on a Phantom Flash. “Started?” you say – they don’t take very long to build. Well, you see, I started before all outdoor contest were cancelled. As I have an indoor (I hope we can fly indoor again this winter!) I don’t really need an outdoor Phantom Flash now – so it sits.
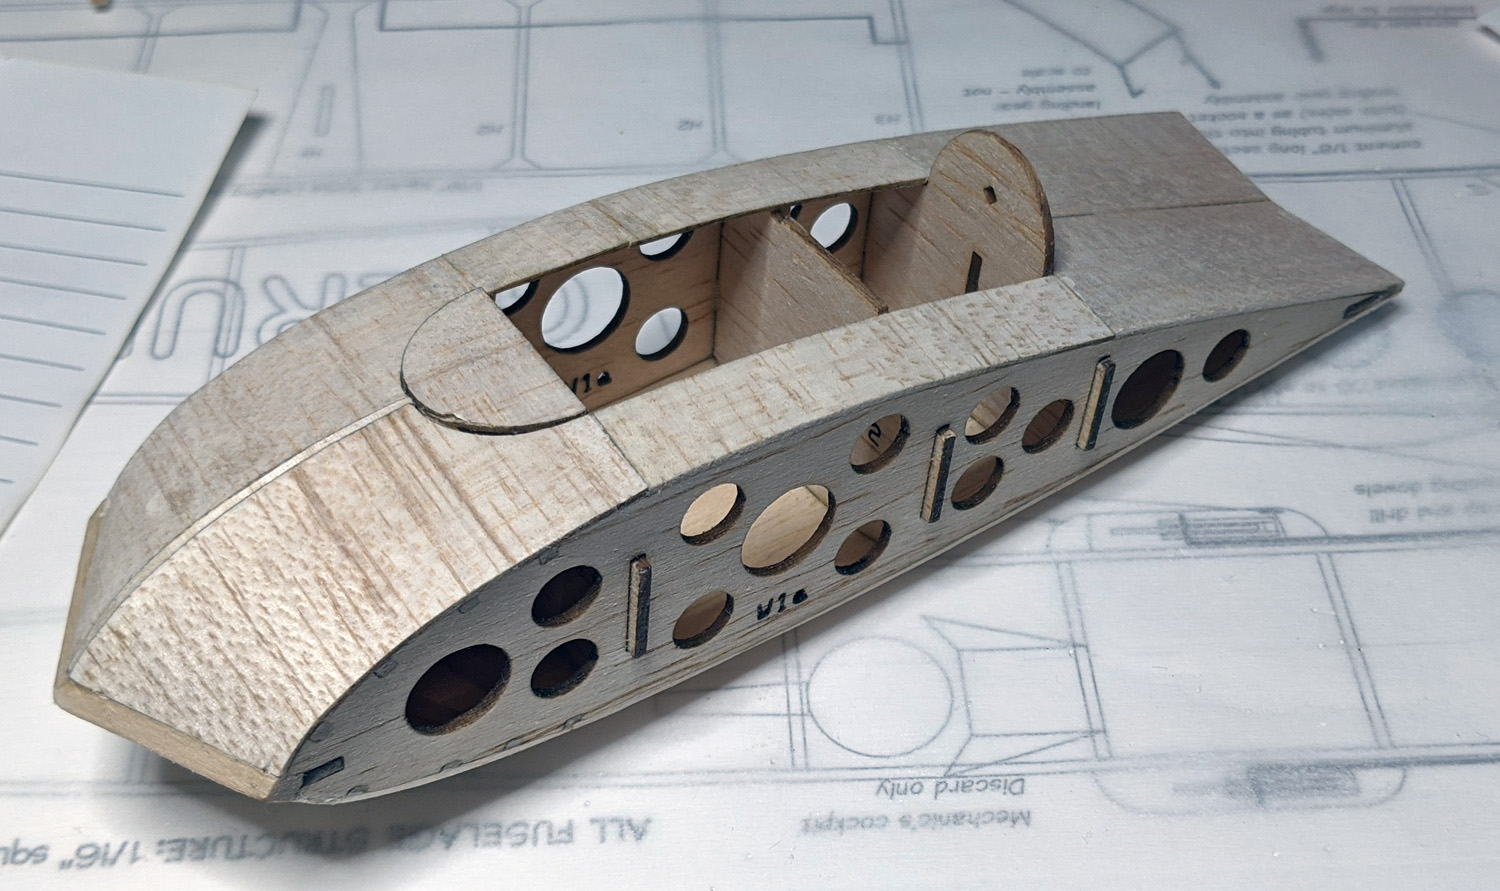
A couple days ago, I decided to step outside of my comfort zone – I am putting together a long-out-of-production P-30, that was given to me by the previous vendor. I don’t fly P-30 in competition, but our club does have a couple of P-30 events. I’ve got the fuselage and the horizontal all built and these went together in an afternoon – very quickly. This should be a good kit in the near future – no specific details yet, but soon!
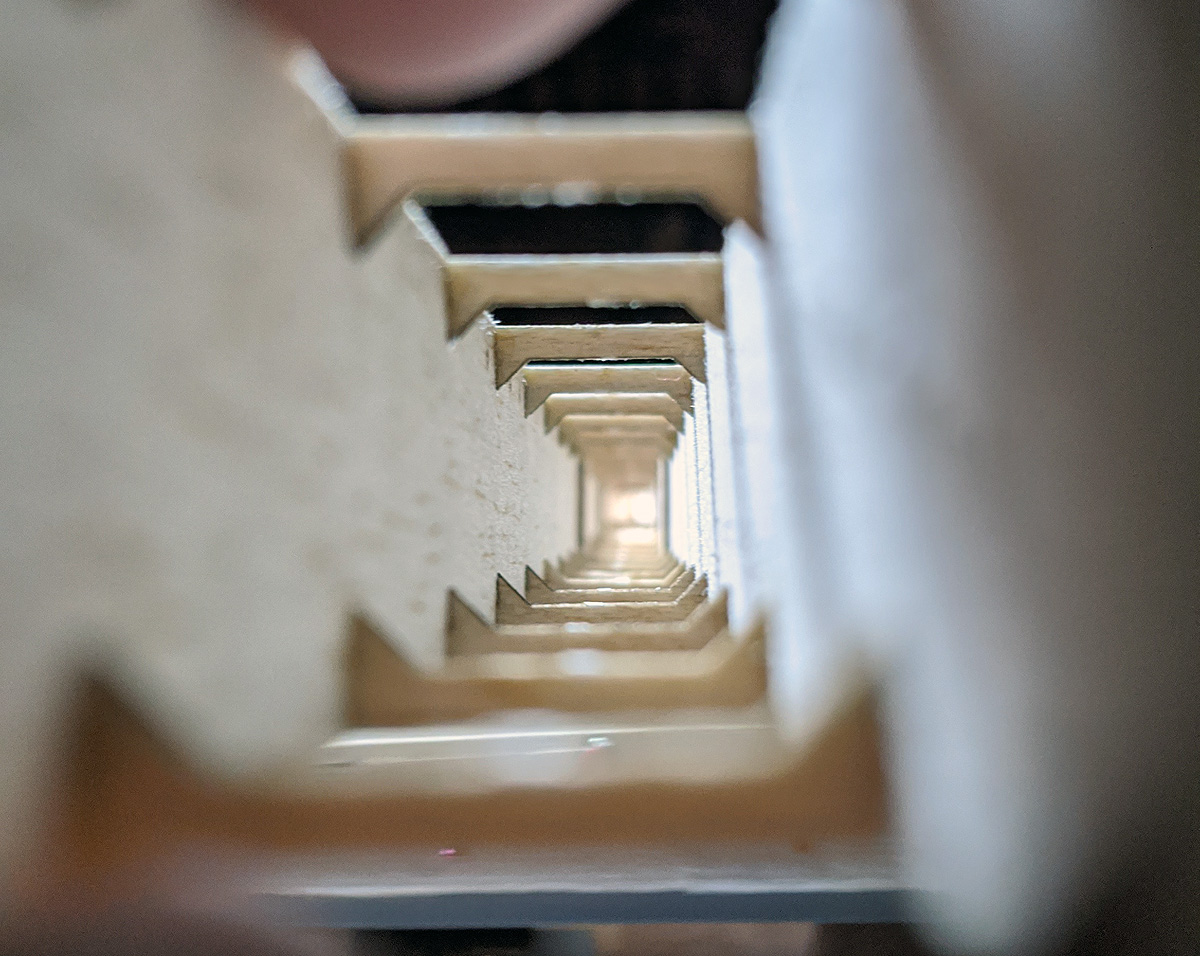
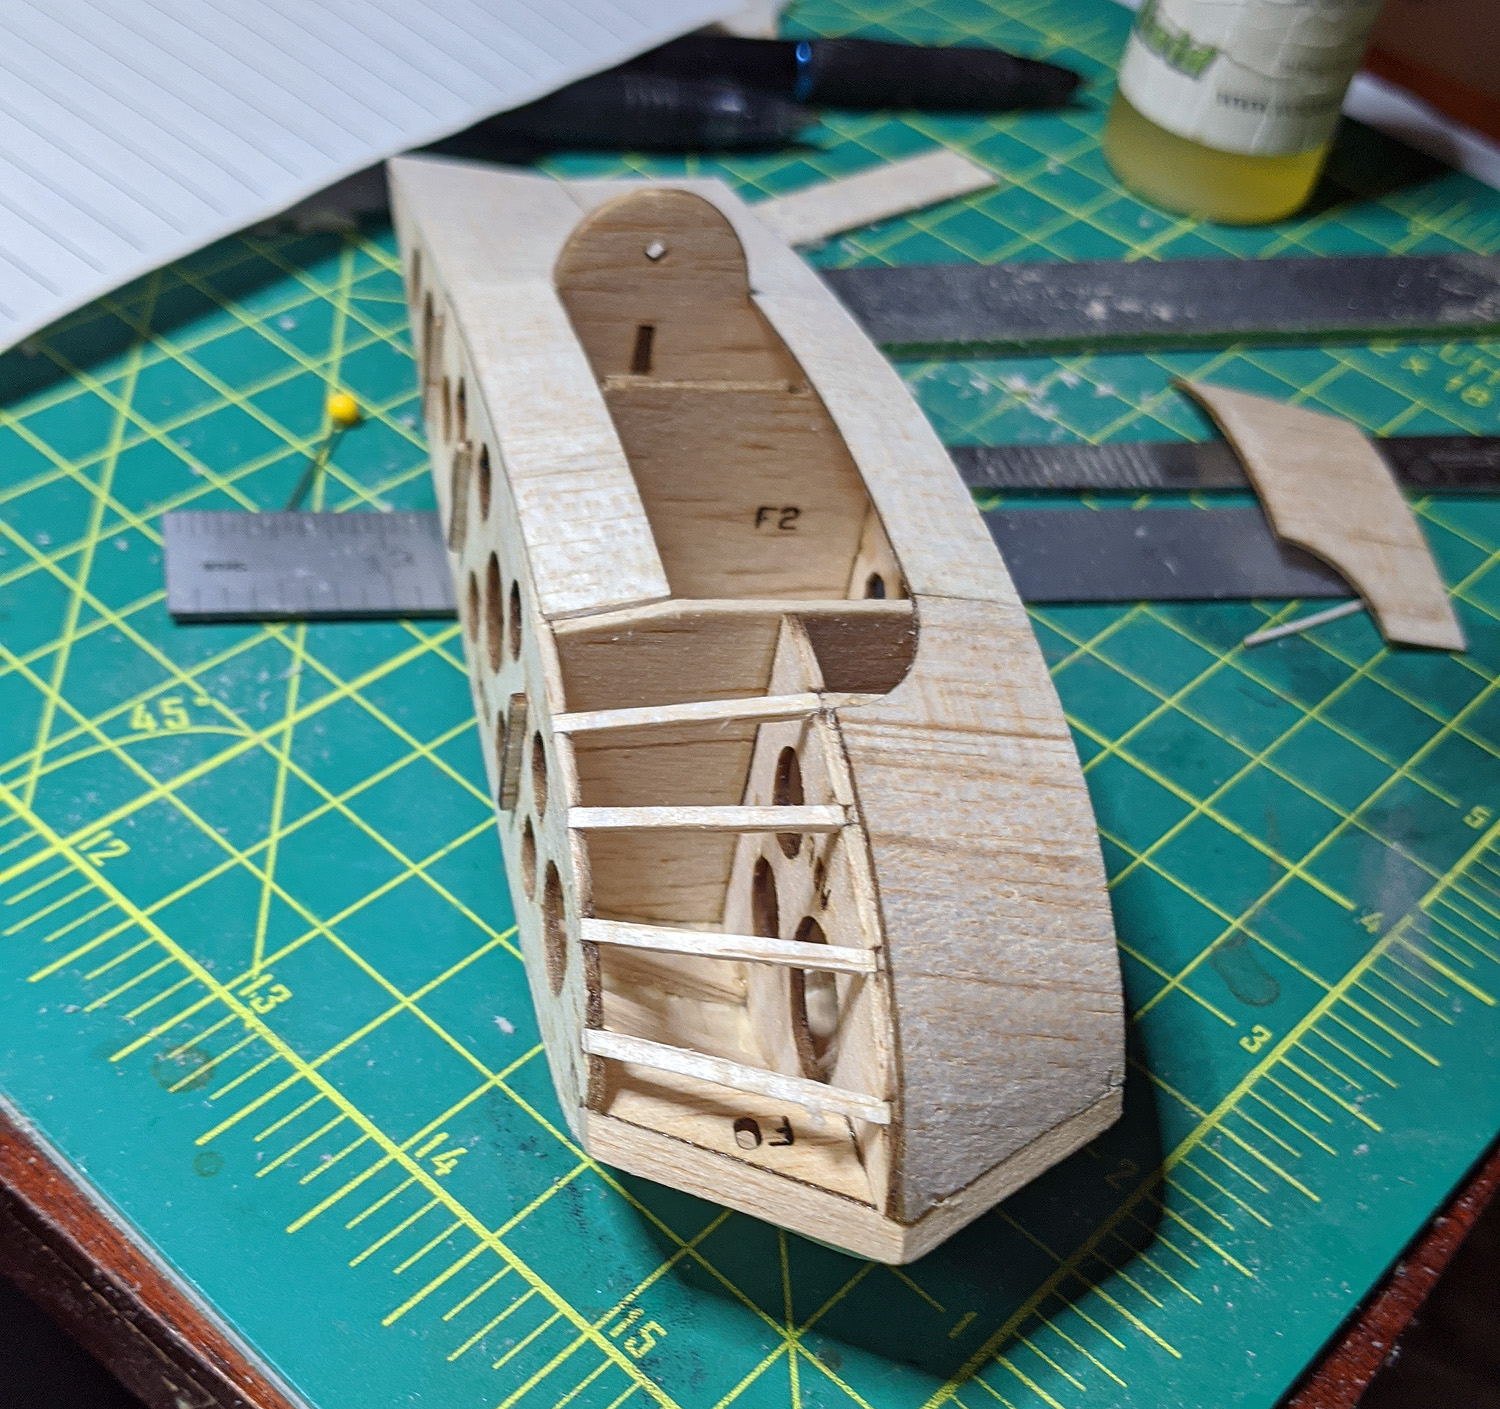
Also, here is a shot of Duke Horn’s Northrup N9M flying wing. It is his 32″ plan, that I am reworking for a laser-cut kit. Let me say – this is the most complex model I have worked on! There is so much to be worked out with regards to the positioning of all of the ribs, given that there is sweep back AND washout. Having said that, this center section was built “in the air”, not pinned to a building board, and I had absolutely no problems with doing that. The most difficult part was planking the bottom “hull” per the plans. Anyway, upon completion, this will be a short kit, also.
PHOTOS
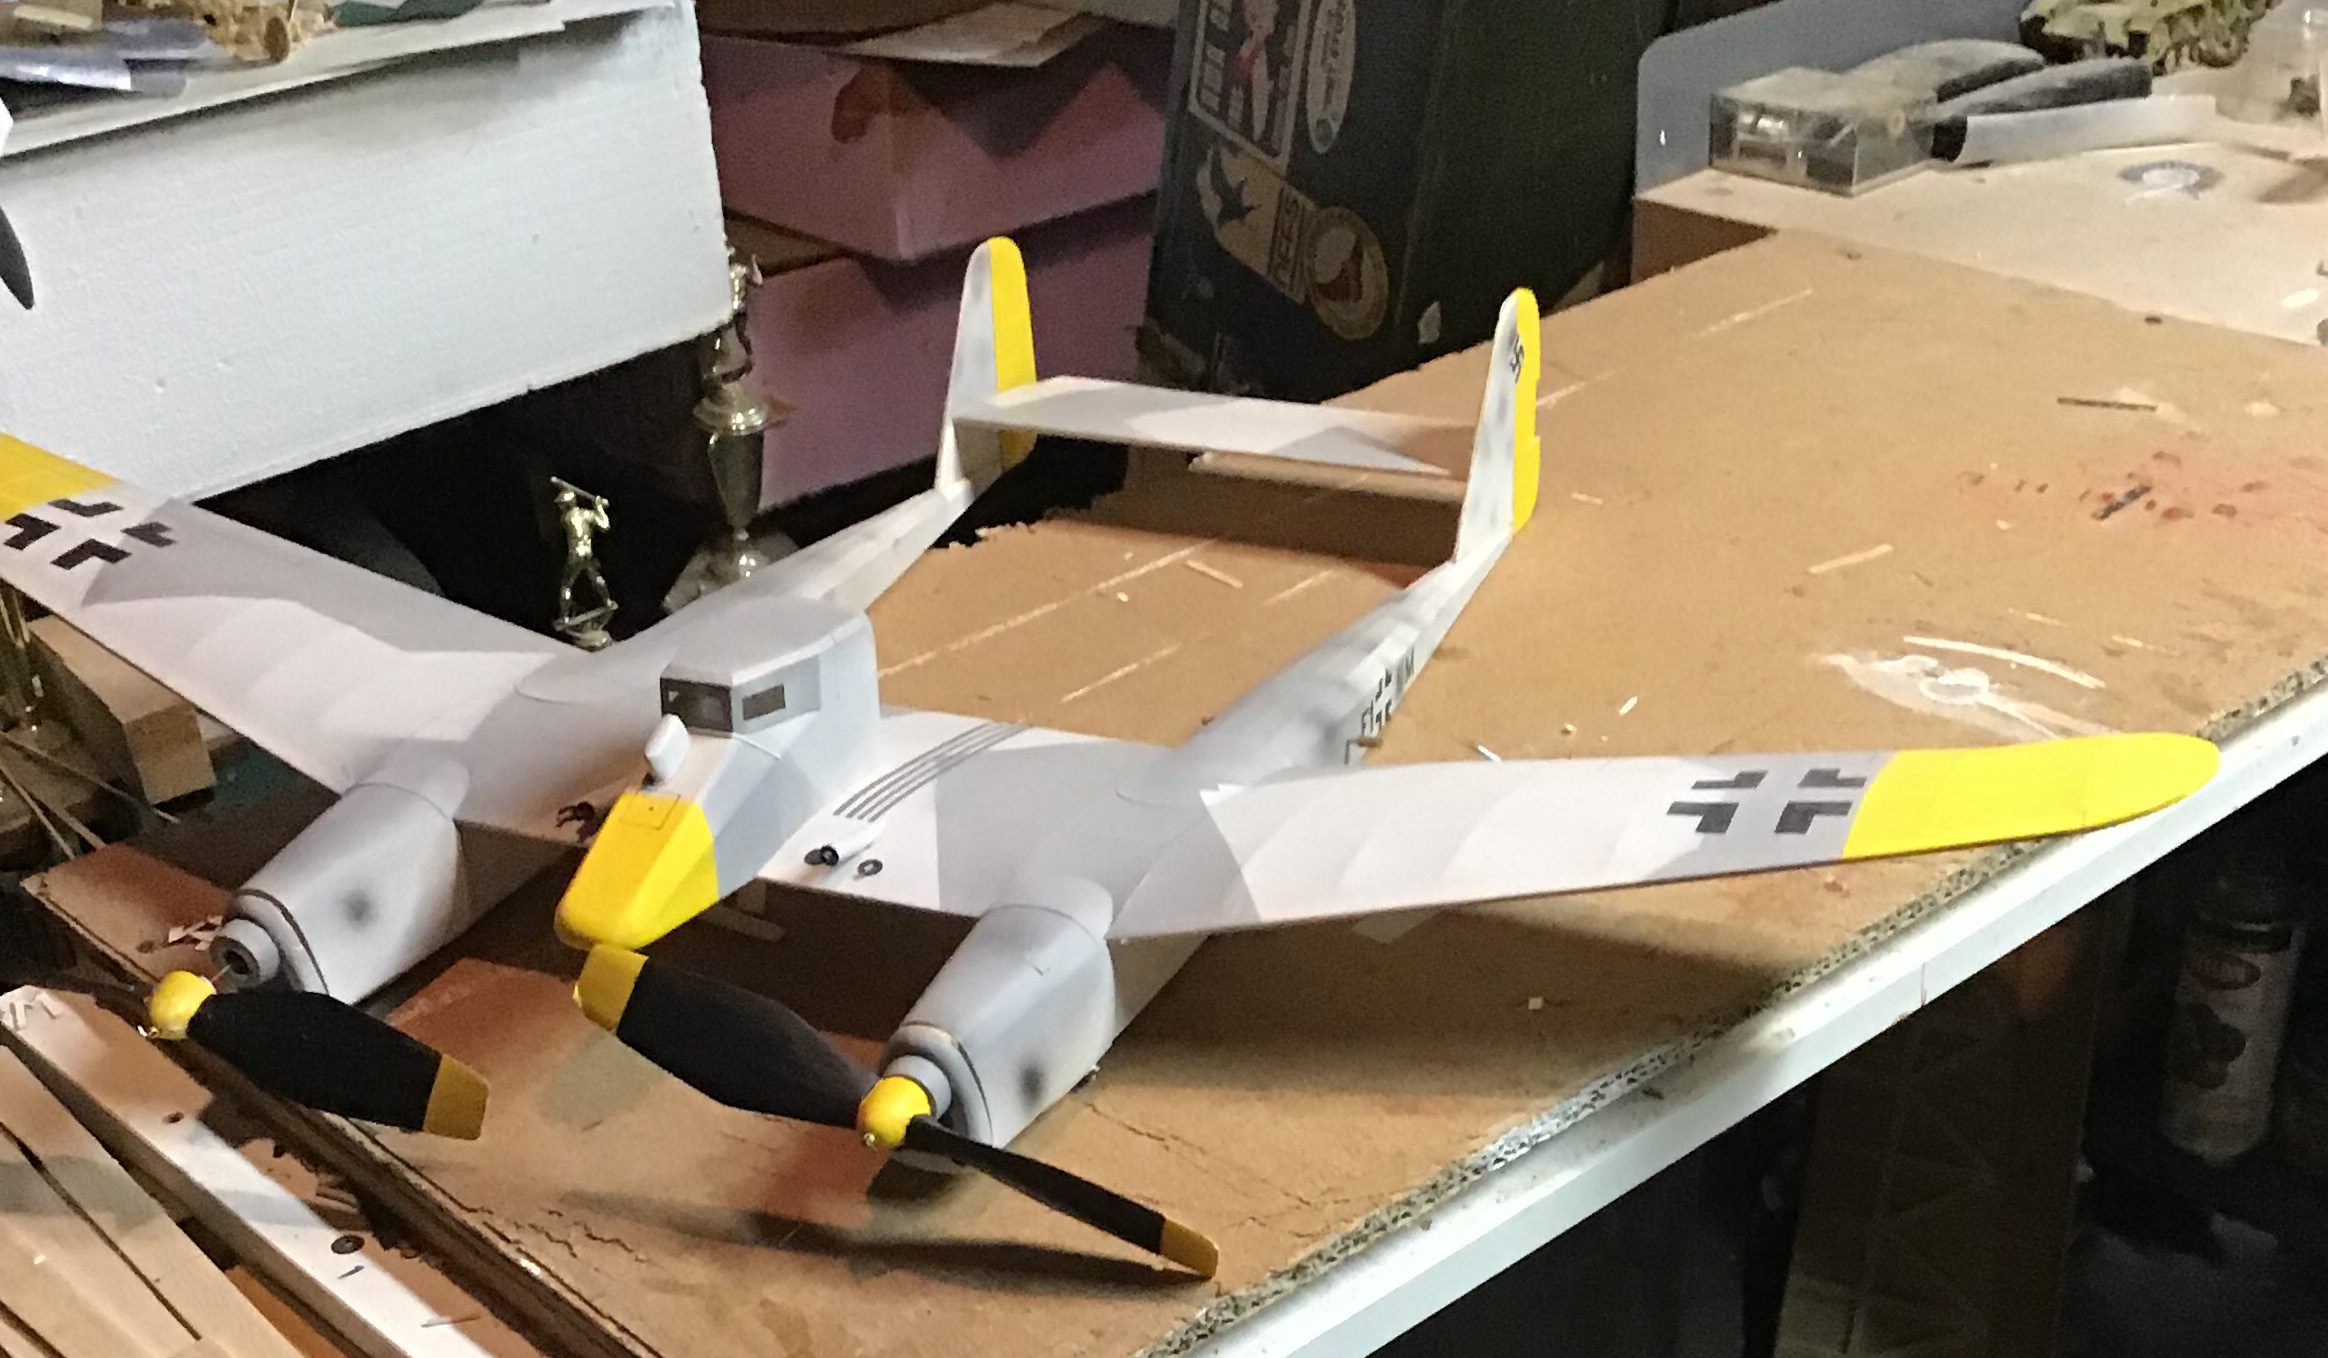
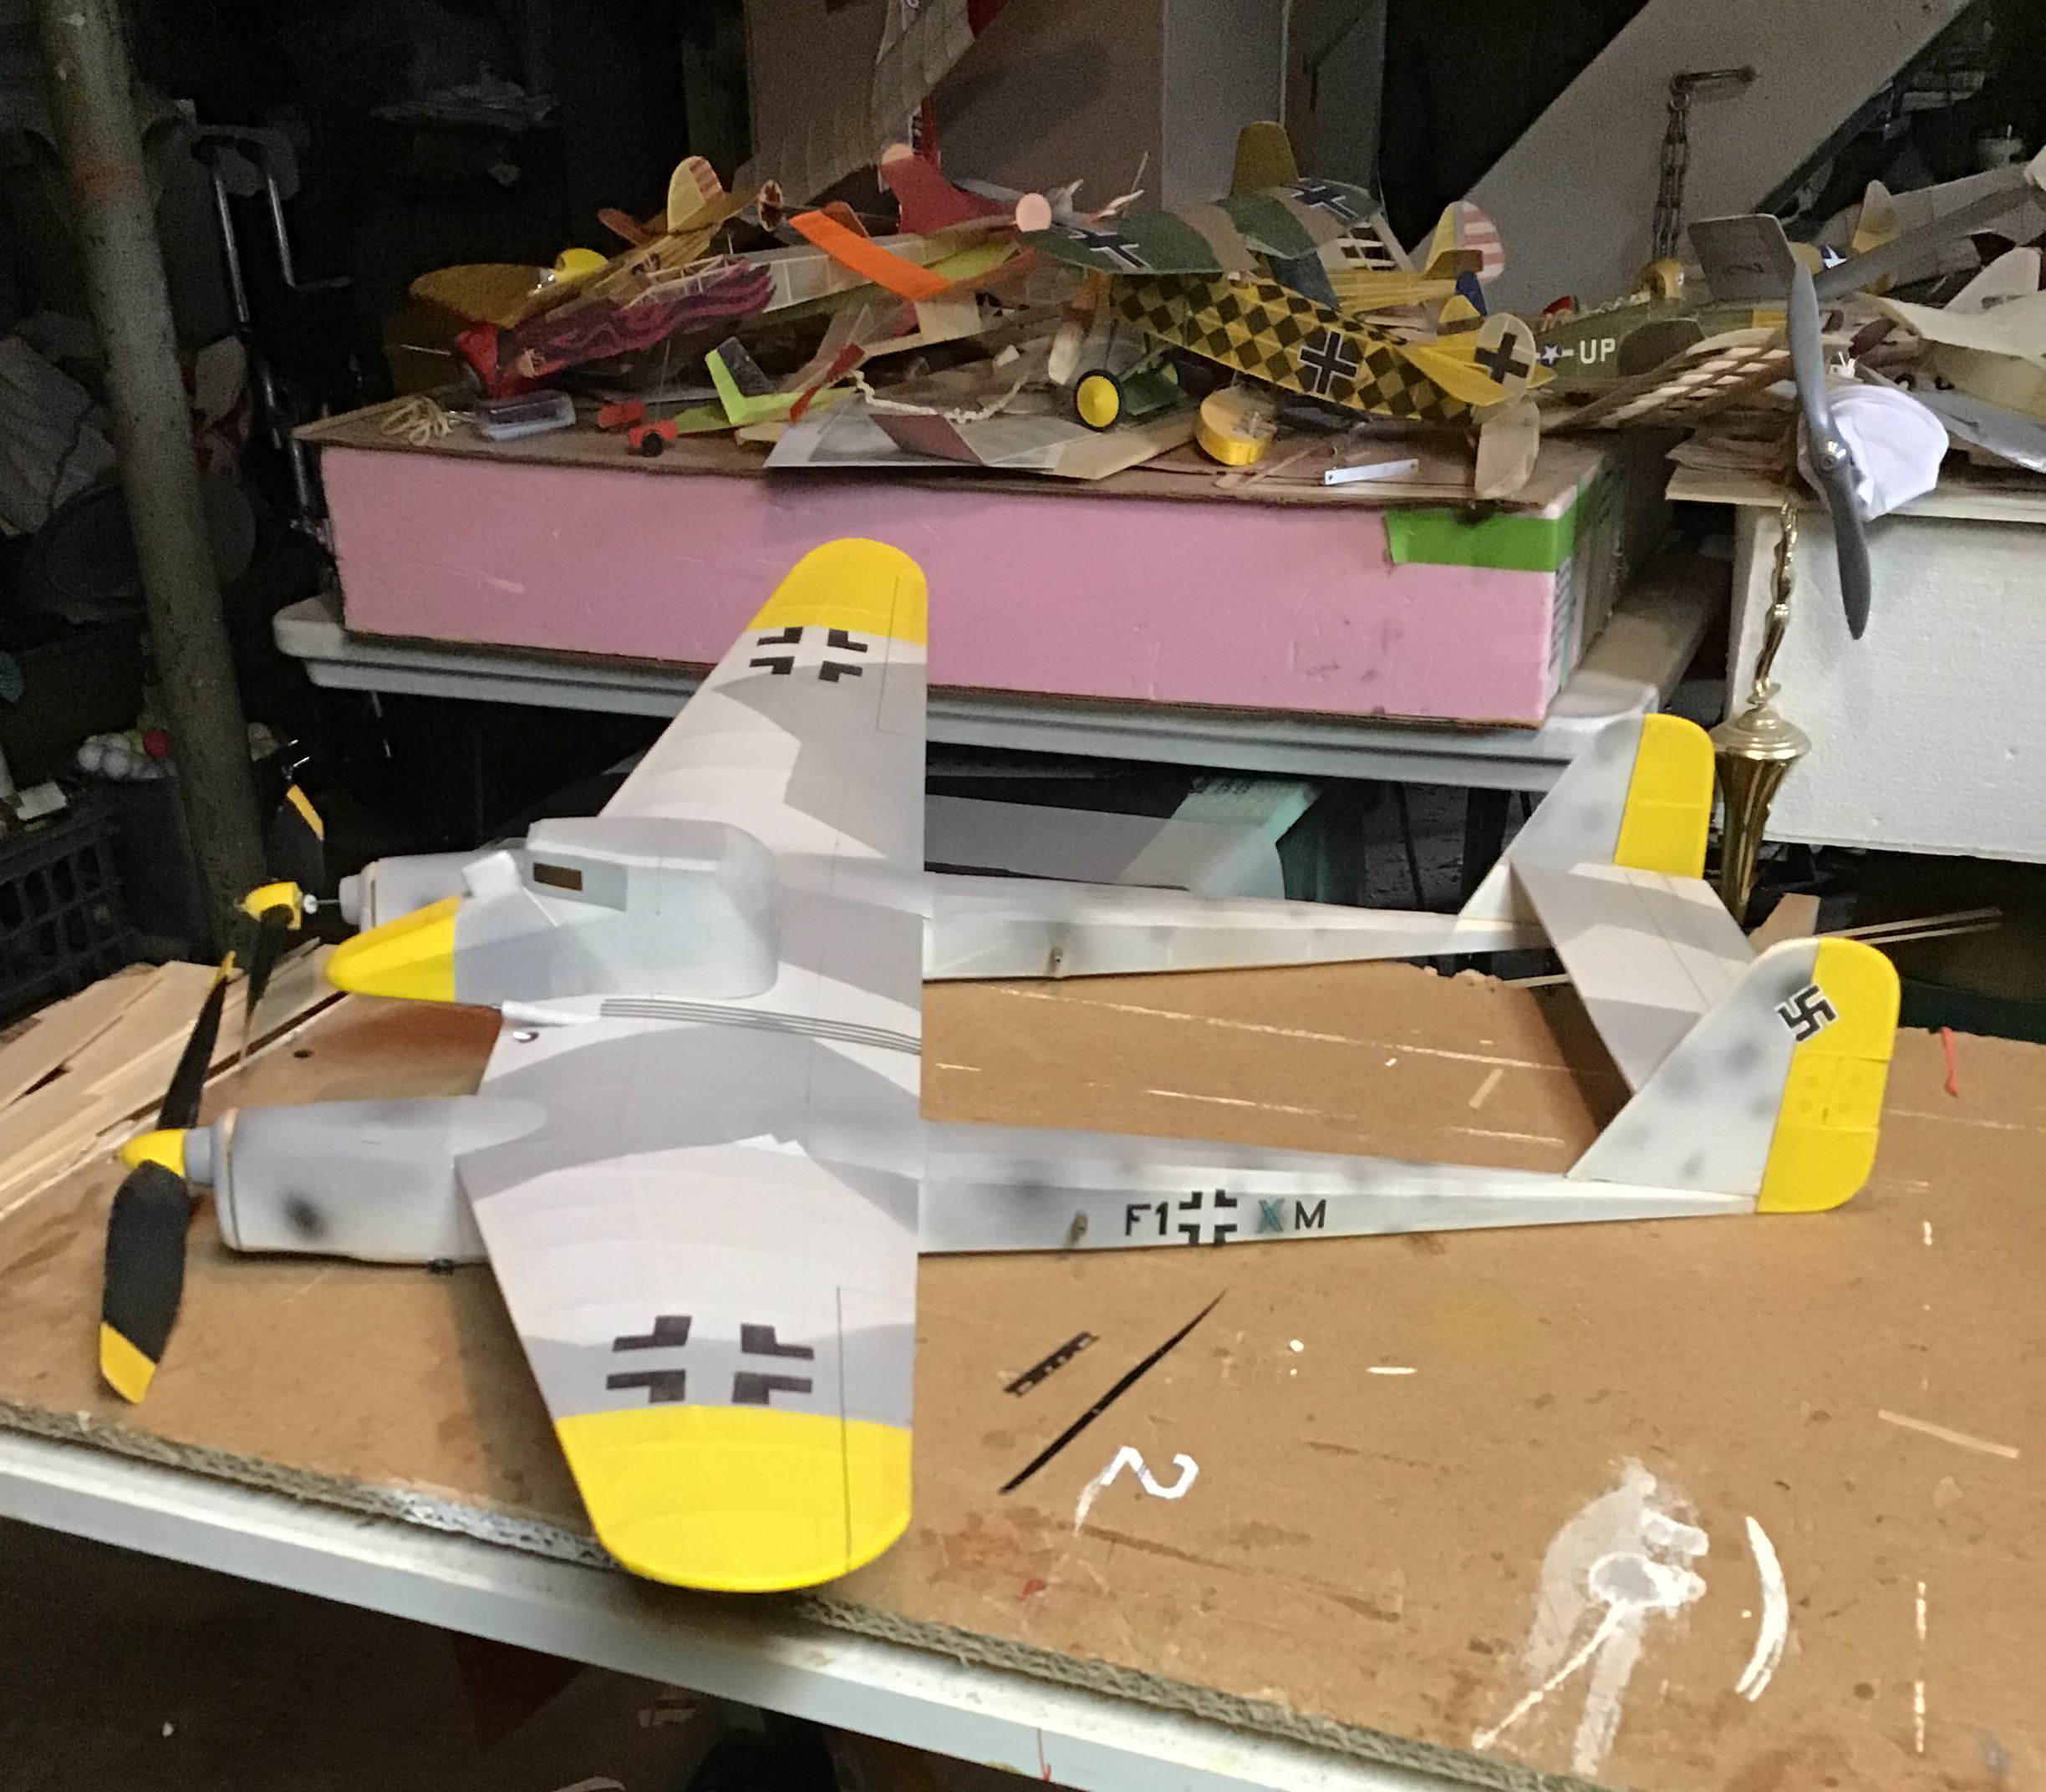
Ed Pelatowski sent me some intriguing photos. He took my Focke-Wulf FW-189 plans (in the Jumbo section), reduced the span to 30″ and built the armored fighter version of the FW-189. He reports it flies a repeatable 40-50 seconds. I always like to see customer builds, so send some my way.
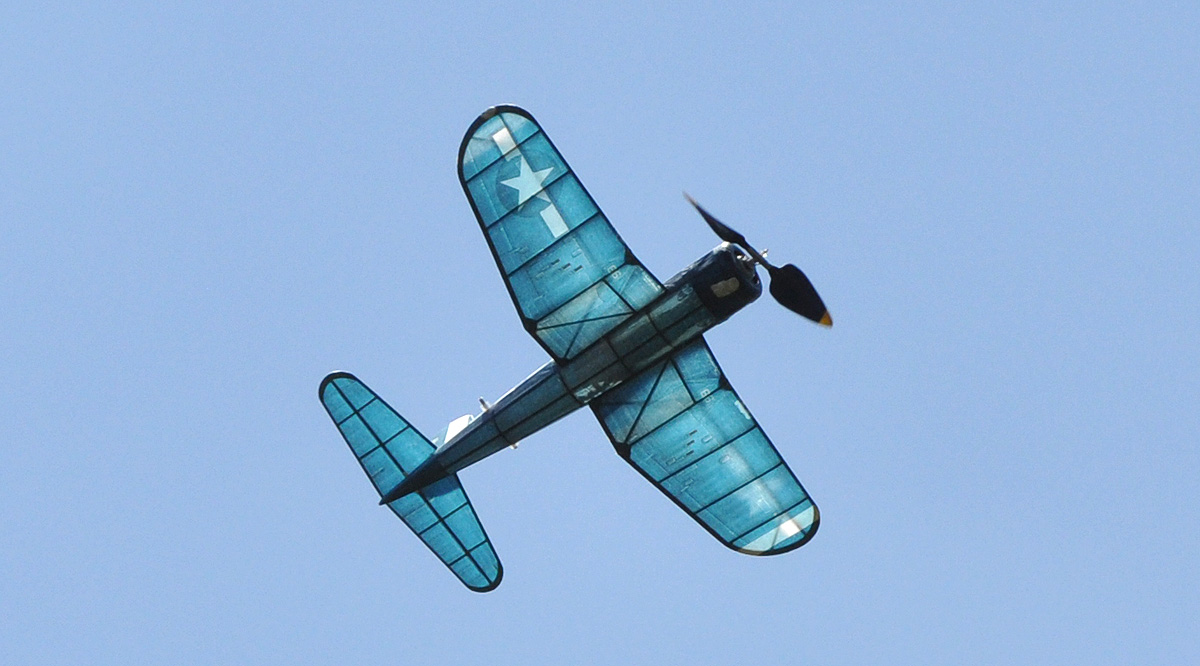
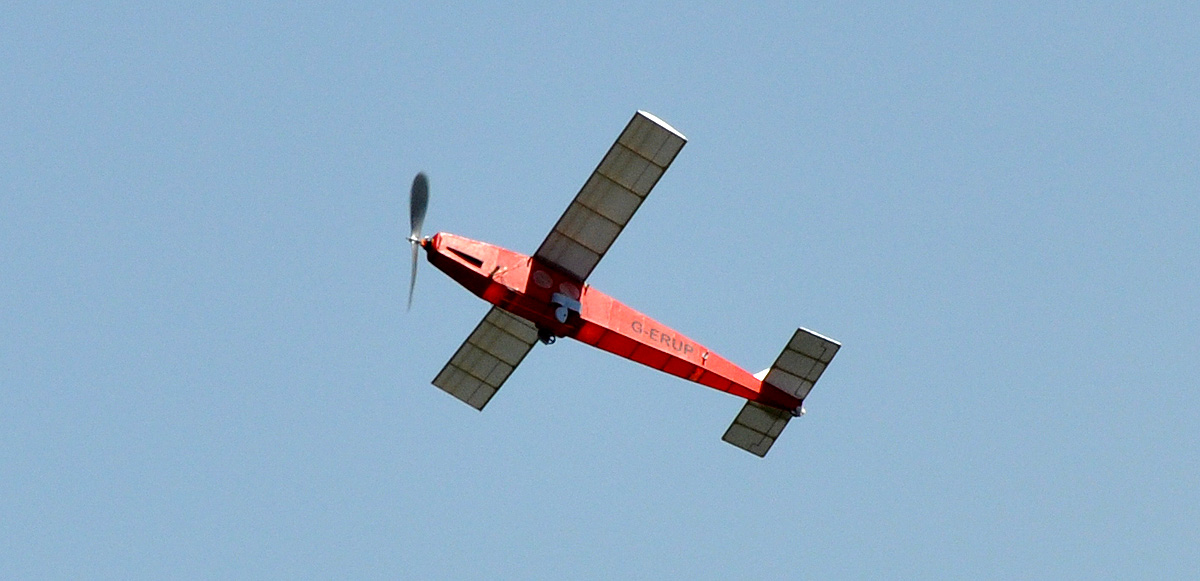
Here are some of my recent flying photos – posted elsewhere days ago.