The FAC Nats mk XXII – 2022 – a Personal Report

Well, I am “freshly” returned from the FAC Nats in Geneseo, NY.  It was so great to be there, since the last time all of us Rubber Scale crazies were there was in 2019 and the last Nats (an every-two-year thing) was in 2018.  For those of you that have been living in a cave for the last 4 years, these yearly events (non-Nats and Nats) were cancelled because of the COVID pandemic.  For half a minute, this year’s event was threatened as we could not get the use of SUNY-Geneseo for our lodging and banquet requirements.  So the Nats this year had a bit of the flavor on a non-Nats, with lower attendance and on-field ceremonies.

BUT!  We were there and we did some spectacular flying in the best weather we have had in many, many years.  On to my personal report.  Oh… sit down, have a cup of coffee (or whatever), this is bound to be a long read (just imagine how long it took me to write it!)

Travel There

Coming out of the McCook meet in Muncie (June), Winn Moore proposed that he and I ride together.  This would save us both some money on gas, since prices are relatively high.  There were a few downsides to this idea that we had to overcome:

1: I would travel from Battle Creek (SW Michigan) to Oxford, MI (northeast of Pontiac – which is well north of Detroit) to pick up Winn.  He said it makes no sense for him to go west (to my place) when we were to travel east (to Geneseo), and I said it makes no sense for me to travel north when I need to go south to the turnpike, but he won out (this time).  I drove the 2.5 hours to his place on Monday afternoon so we could pack Monday evening and be on our way early Tuesday morning (I stayed at his house Monday night).

2: We both needed to take our chase scooters (we both have a Honda Ruckus – highly recommended) and we only suspected that we could get them both in my 5’x8′ trailer WITH my sales goods.  Yes, they would both fit lengthwise and width-wise, but I had installed a shelf on the side of the trailer that holds all of my piece-parts for sale.  The vertical height of this shelf off the floor just might interfere with the bikes.  Also, I usually store my rubber and kits for sale under this shelf, next to my bike – this space would now hopefully (and problematically) be taken up by Winn’s bike – if it fit under the shelf!  Oh, and I only had two randomly-placed tie-downs on the floor to the trailer.  But I bought more to install upon arrival.

We did that first thing Monday evening after arrival.  We remove the two existing and installed the now-six tie-downs in logical places so we could strap two bikes in trailer.  We strapped mine in, facing forward, on the non-shelf side of the trailer.  Then we BACKED Winn’s into the trailer so the handlebars would not clash and strapped his down.  At first the handlebars would not  fit under the shelf, but cinching the bike down to near-full compression of the suspension allows then to fit.

We then loaded the trailer with tables and canopies and got to the business of fitting all of Winn’s model boxes and tool boxes into my car.

3:  Usually, I fill up my vehicle (was an Expedition, but now is a Navigator) with all of my flying planes so that I can fly whatever I want.  But knowing that this wouldn’t work for TWO modelers, I had to pare down my models to the bare minimum.  The first thing I did coming out of the contest in Muncie at the end of June was to print a Nats schedule and mark what events I wanted to fly and which models I wanted to use.  I pared down my collection so that I was taking only one model per event (except I took two Peanuts – they’re small and fit into the boxes).  This gave me 18 models.  This might sound like a lot, but I usually take about twice that many to any given contest.

The next challenge was to fit them into the minimum space.  I used one large cardboard Amazon box and one of my foam boxes.  The cardboard box is deep, so I could make that a two-level box, if I made supports and a shelf for the second layer.  So I had three layers of space in two boxes for 18 models.  I carefully packed each layer, successfully getting all 18 models (including four models of over 30″ span) in these three layers.  I took pictures of each layer so that I could replicate it for the return trip.

18 models in three layers (two boxes) ready for Geneseo.  Only four of them did not log a flight.

By doing this, I was able to pack up half of the back of my vehicle with my models, tool box, two large containers of rubber, one container of short kits and a could small sundry boxes.  Winn’s models would have to fit into the other half of the truck – or in the vertical open area above the bikes in the trailer.

Making this long story a little shorter – all of his five or six boxes fit inside the truck and we didn’t have to experiment with packing the above the bikes in the trailer.  Here’s a tip – the interior of a late-model Expedition or Navigator is huge; larger than you think.

Not wanting to go through Canada (I was carrying a lot of sales goods, no need to be stopped at the border and risk delays), we drove two-plus hours south to get to Ohio so we could turn east and drive around the southern shore of Lake Erie to just south of Buffalo where we took a two-lane state highway the final hour or so through bucolic western New York, arriving in Geneseo 8 hours or so after we left Oxford.  Of course, we chatted about all variety of things, but mostly about model airplanes and the upcoming contest.  For those not “in the know”, the FAC Nats are the epitome of our contests every two years.  This is the BIG ONE for us – the most important and significant event in the FAC.  We were excited and happy to be going back and we had high hopes of winning everything (and selling all my product!)

We left at 7am and arrived at the flying field at 3:30pm.  We would meet up with Clete Schenkel, Mike Smith and Pat Murray as they arrived later in the evening.  We would be staying in the Pat Murray Bed & Breakfast (his large RV) for the week.  The benefits to this are that we are usually first on the field in the morning and last off the field at night.  This leaves plenty of time to get ready early and test fly late.

Day Zero

The “first” day (Wednesday) is a non-flying day.  We got up early with no particular rush.  In the late morning, we helped set up the judging area in the main hangar, directing the tent rental setup, and setting up all my sales goods (hoping to sell one MILLION Dollars – haha!)

We got all of our models out and had them checked for compliance and/or judged for Scale.   There were many beautiful models presented from around the country – two countries, as Canada was represented, too.  You can see some of them on the FAC-GHQ Facebook feed, as I posted snapshots of everything that was on display. John Koptonak also posted many photos of the displayed models on the FAC-GHQ Facebook page.

We wrapped up in late afternoon, packing all up and clearing the hangar.  Then many went to the flying field for test flying and leisure time.  There was the threat of rain in the evening (after three separate brief showers during the day), but it eventually calmed and cleared.

Flying

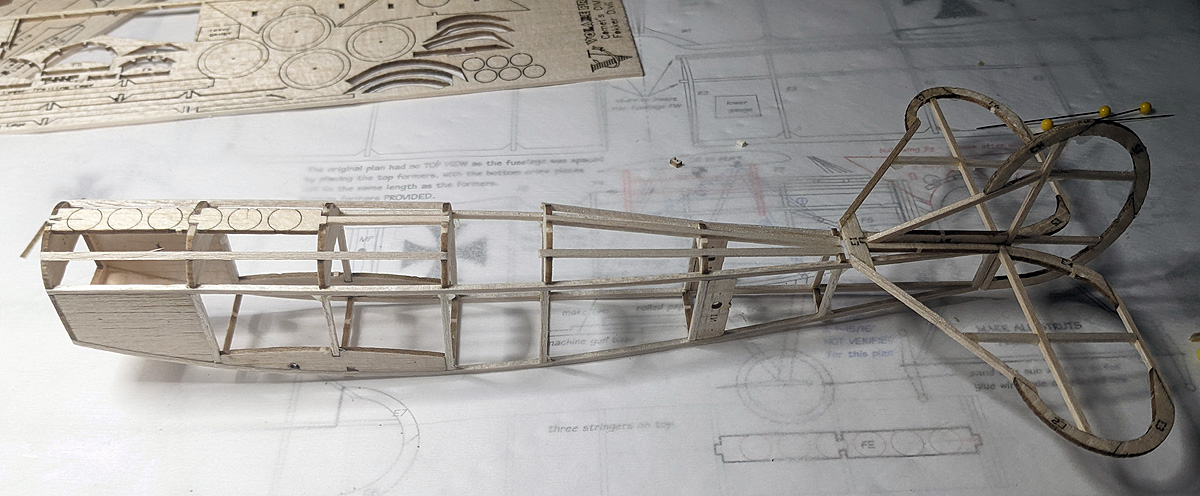
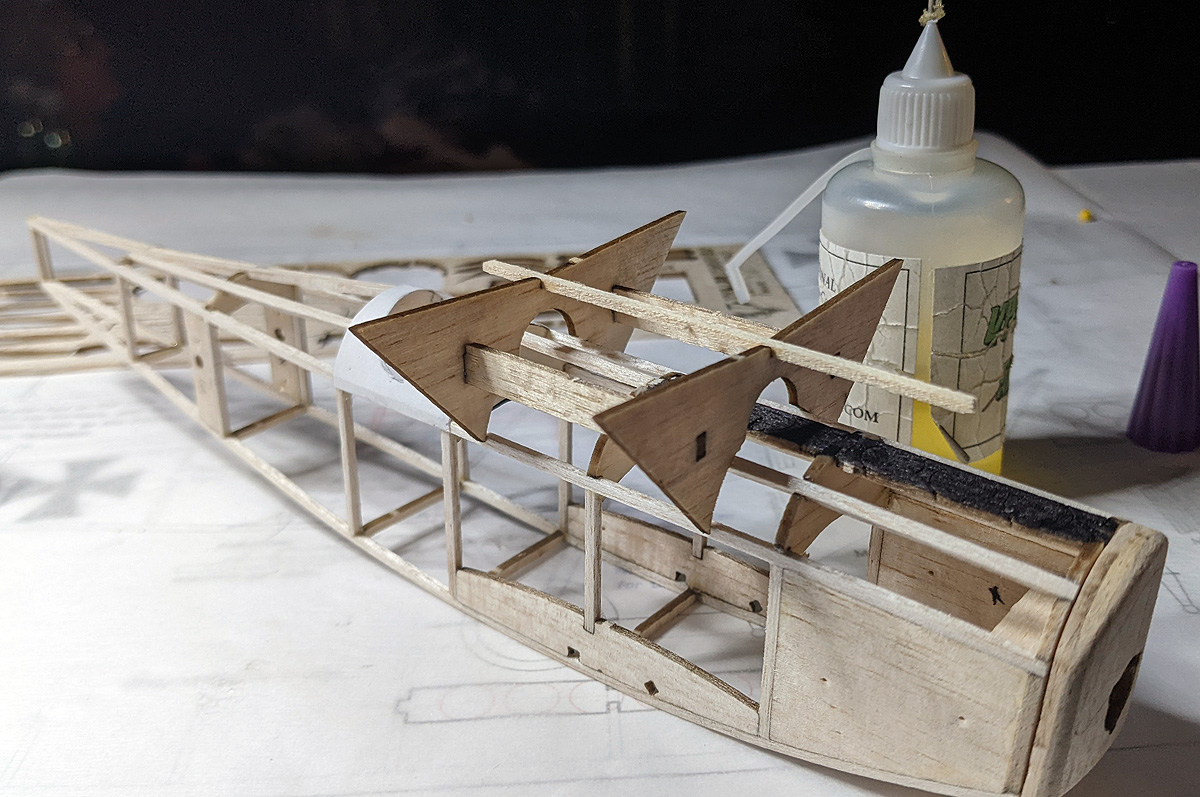
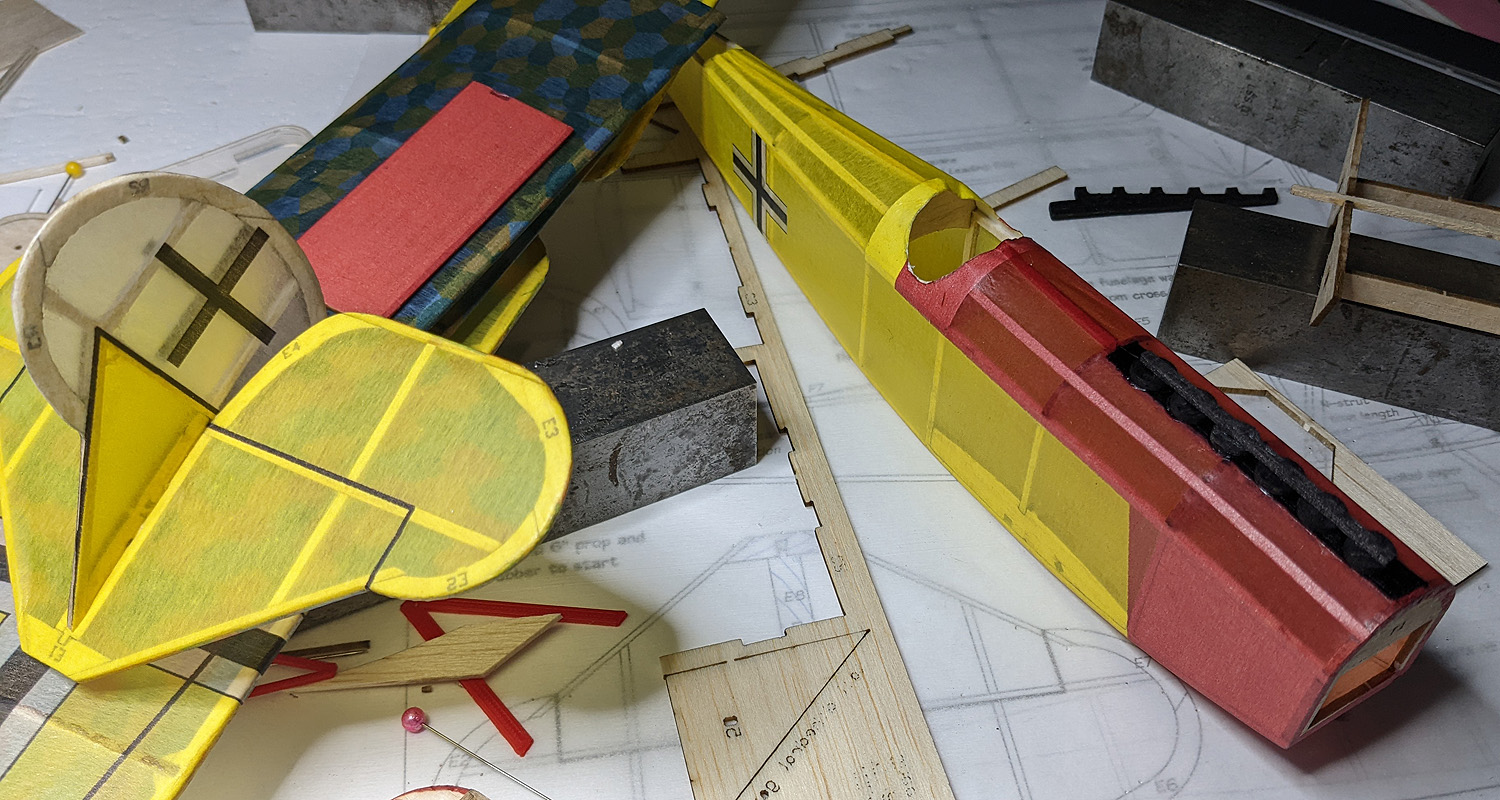
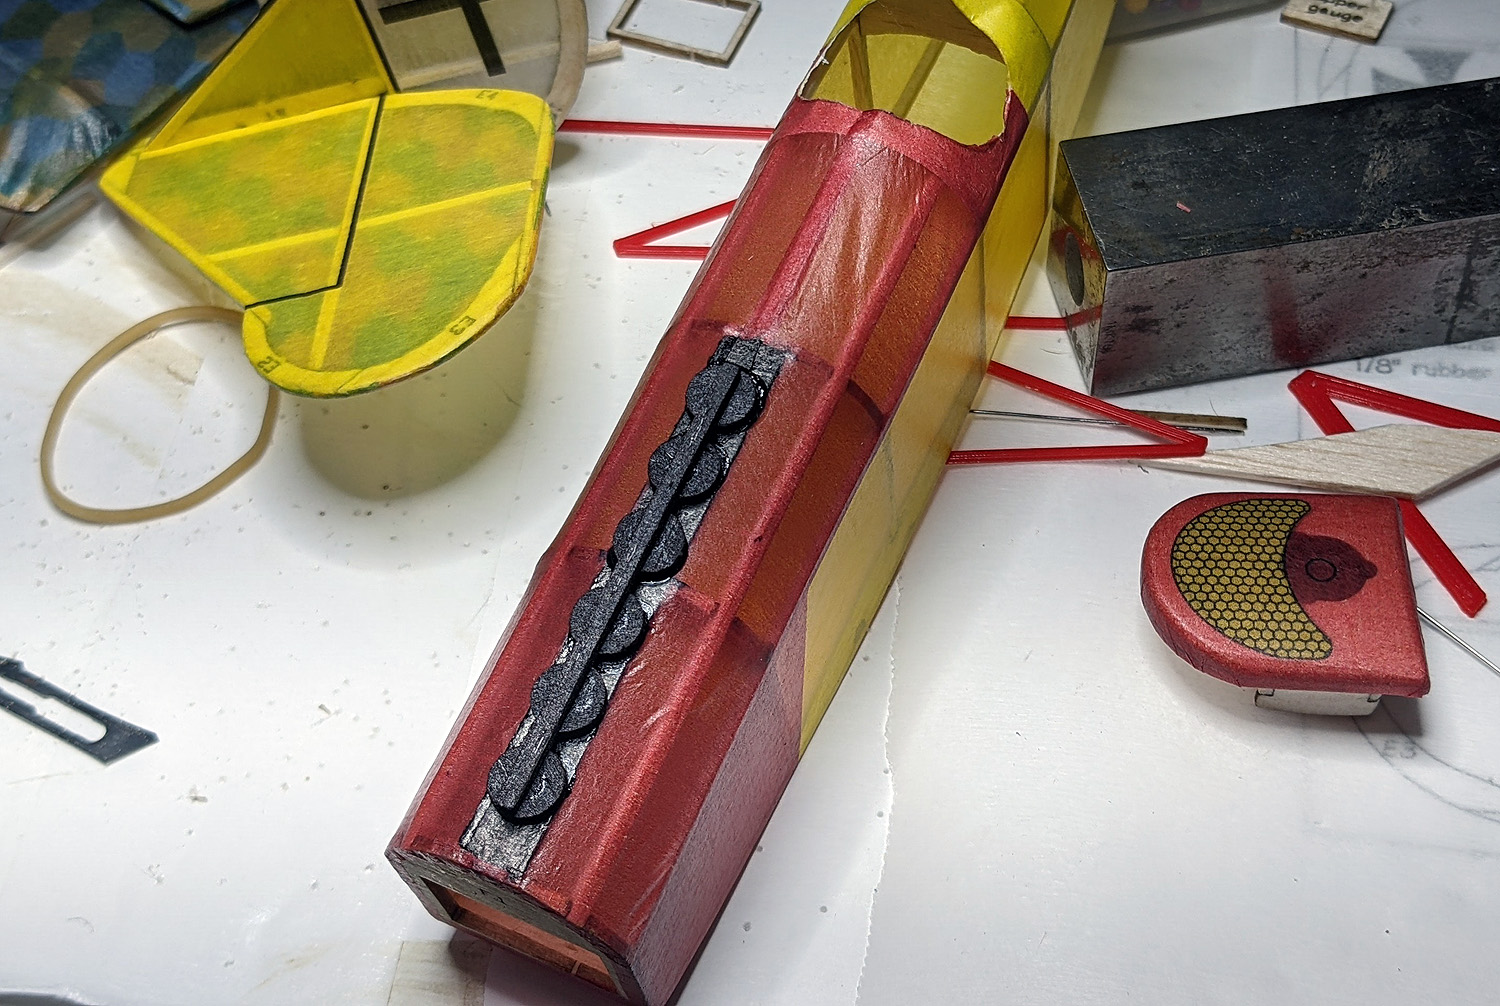
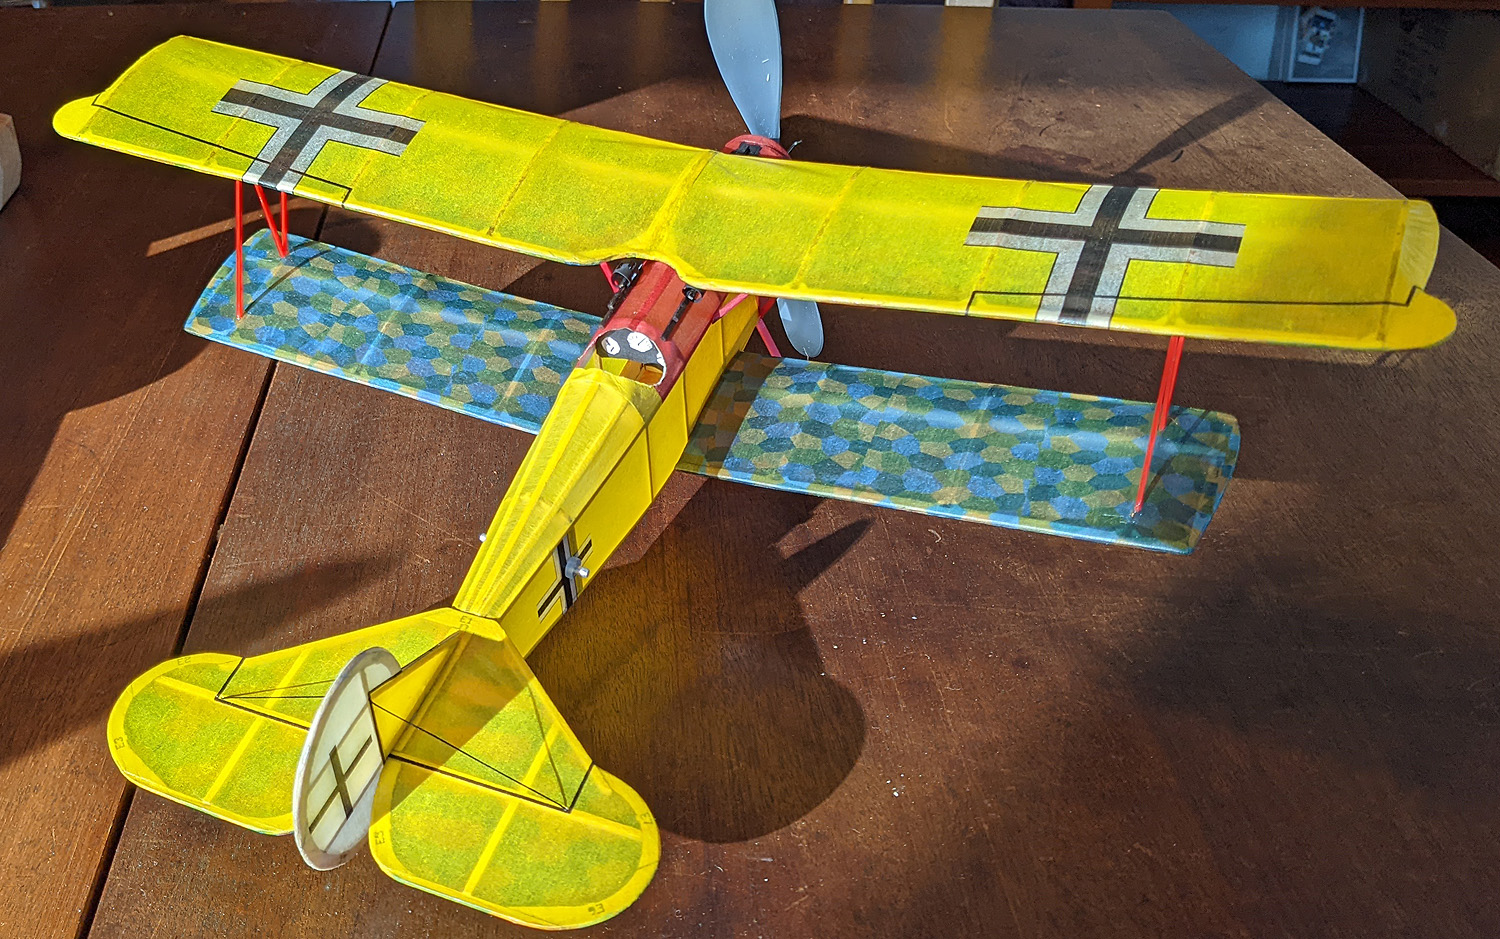
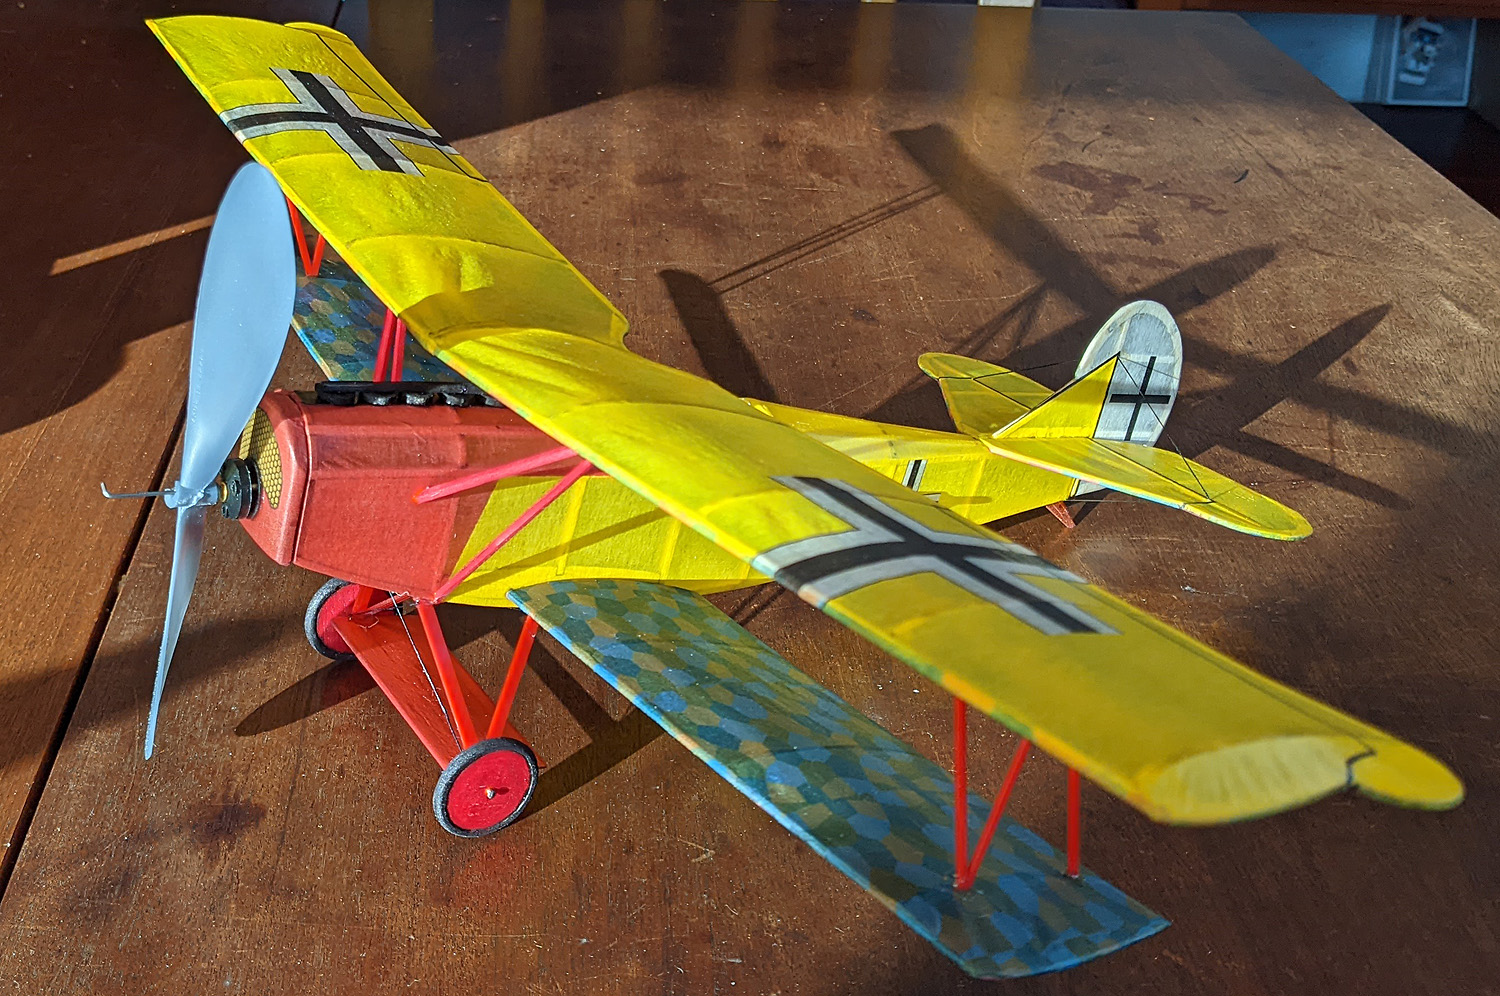
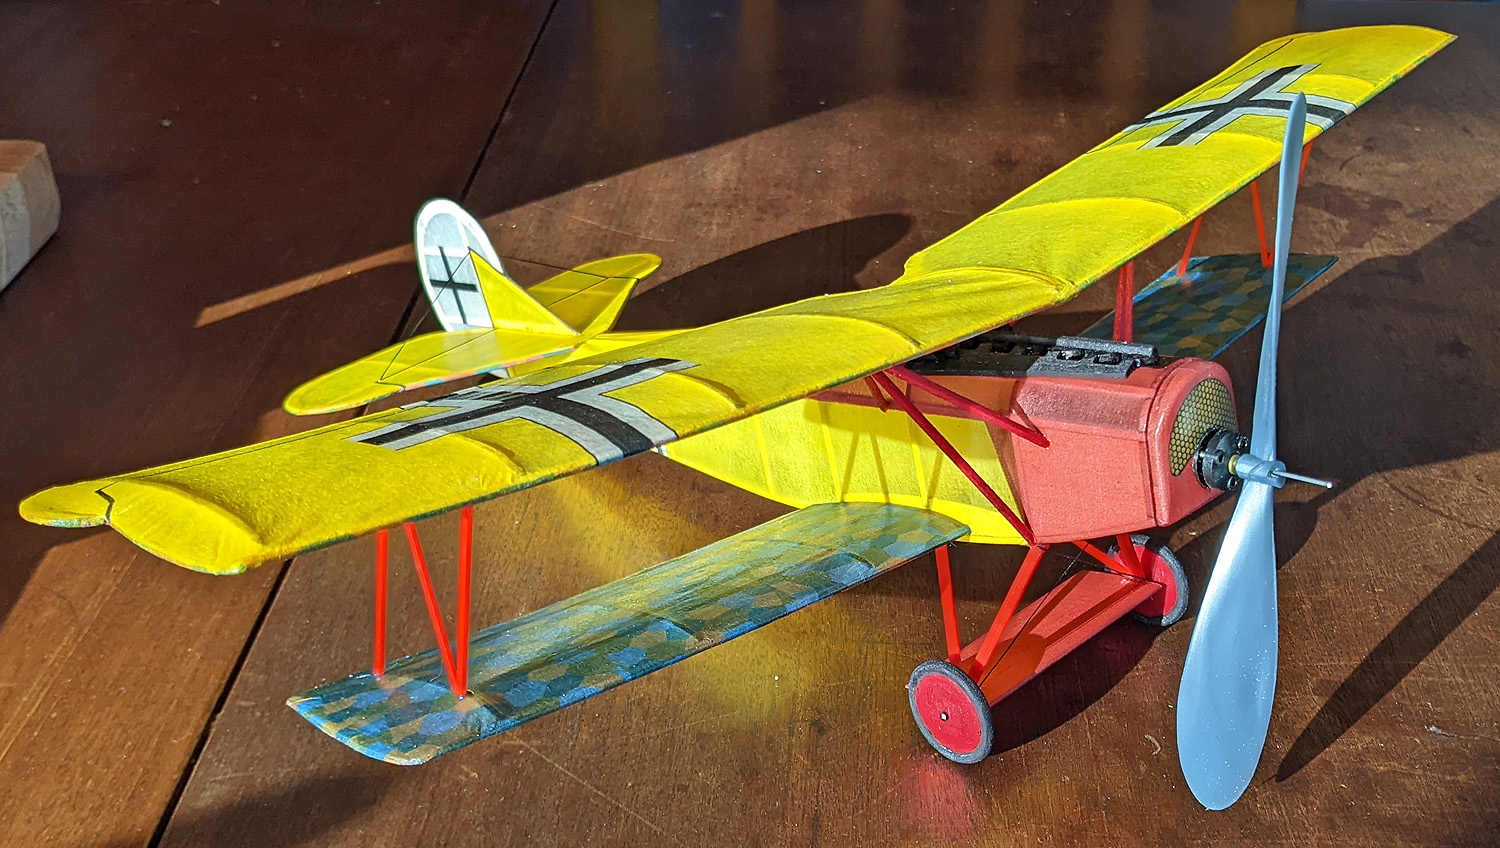
I had a light schedule for Day One (Thursday) – Old Time Stick was the only mandatory Day One event for me.  Friday and Saturday were absolutely full.  And, by tradition, the Nats Scale events require 3 official flights (averaged) to be flown.  So, ALL events were three flight events, plus testing.  It was going to be a challenge to get everything in – and weather would play a part.  All the Scale events were multi-day events.  Some were two-day and some were three-day, so the modeler can pick what day they want to fly.  If it was too windy on Day One, you can defer to Day Two.  Or like me, if Day Two and Three are too busy, you can fly on Day One.  So, I chose to fly my complicated and time consuming Jumbo Focke-Wulf 189 on Day One – After I flew Old Time Stick.

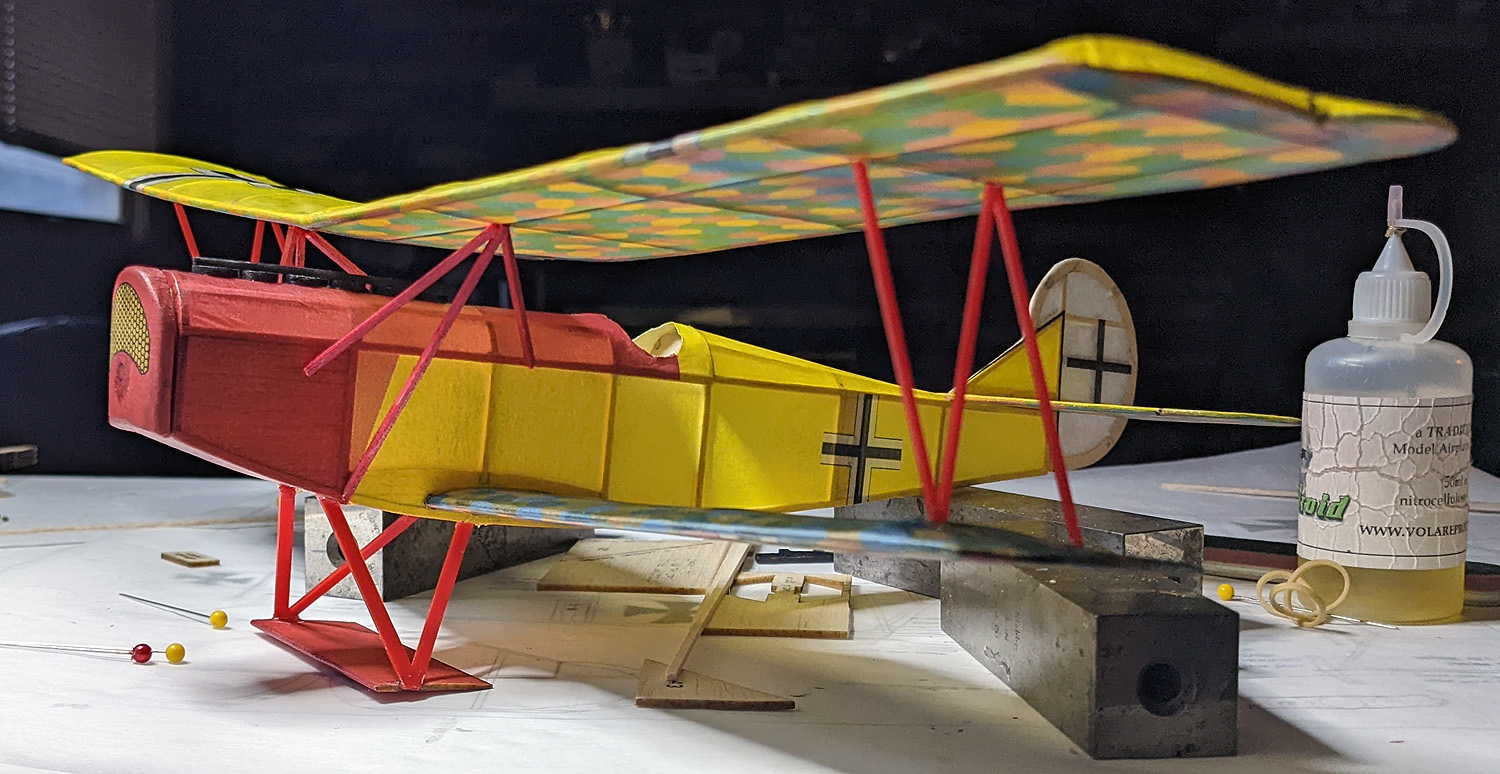
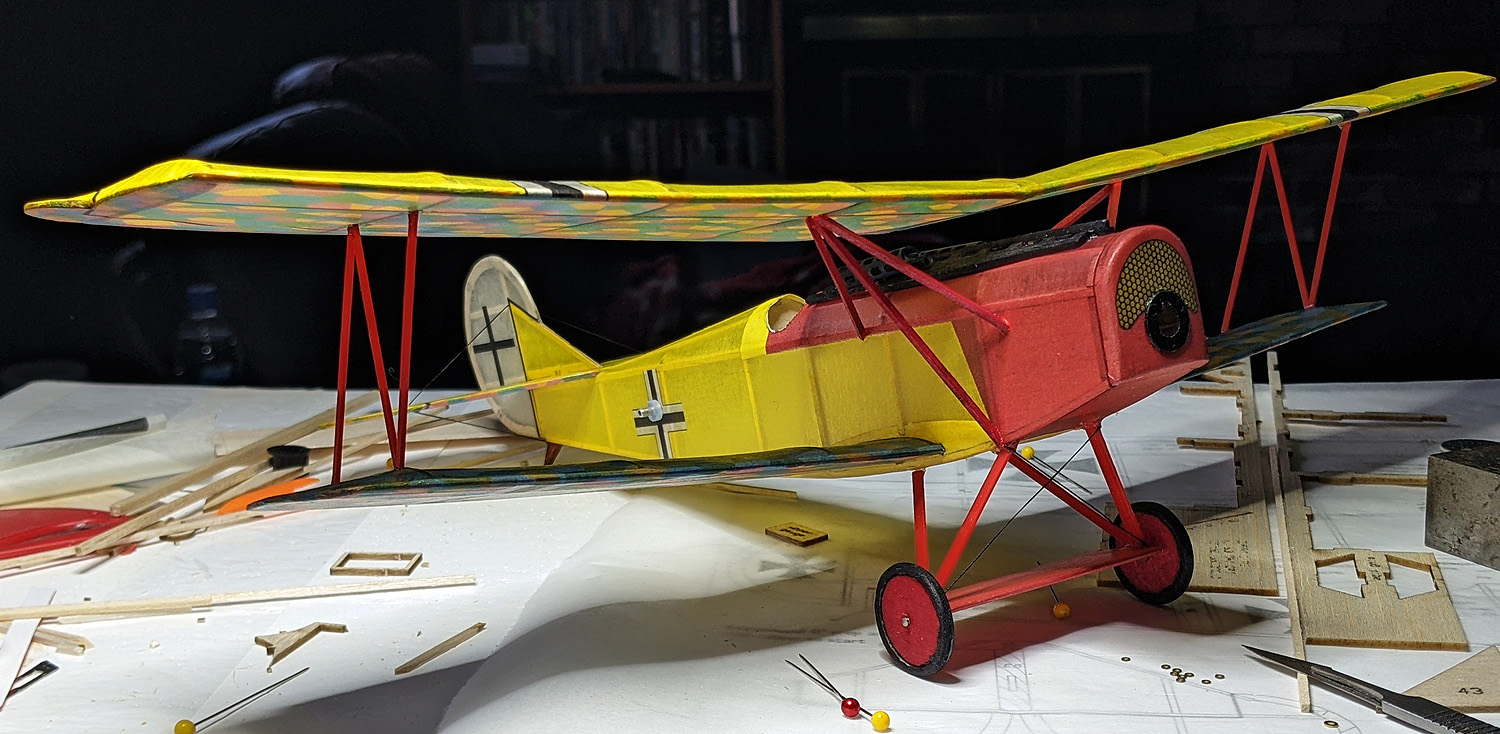
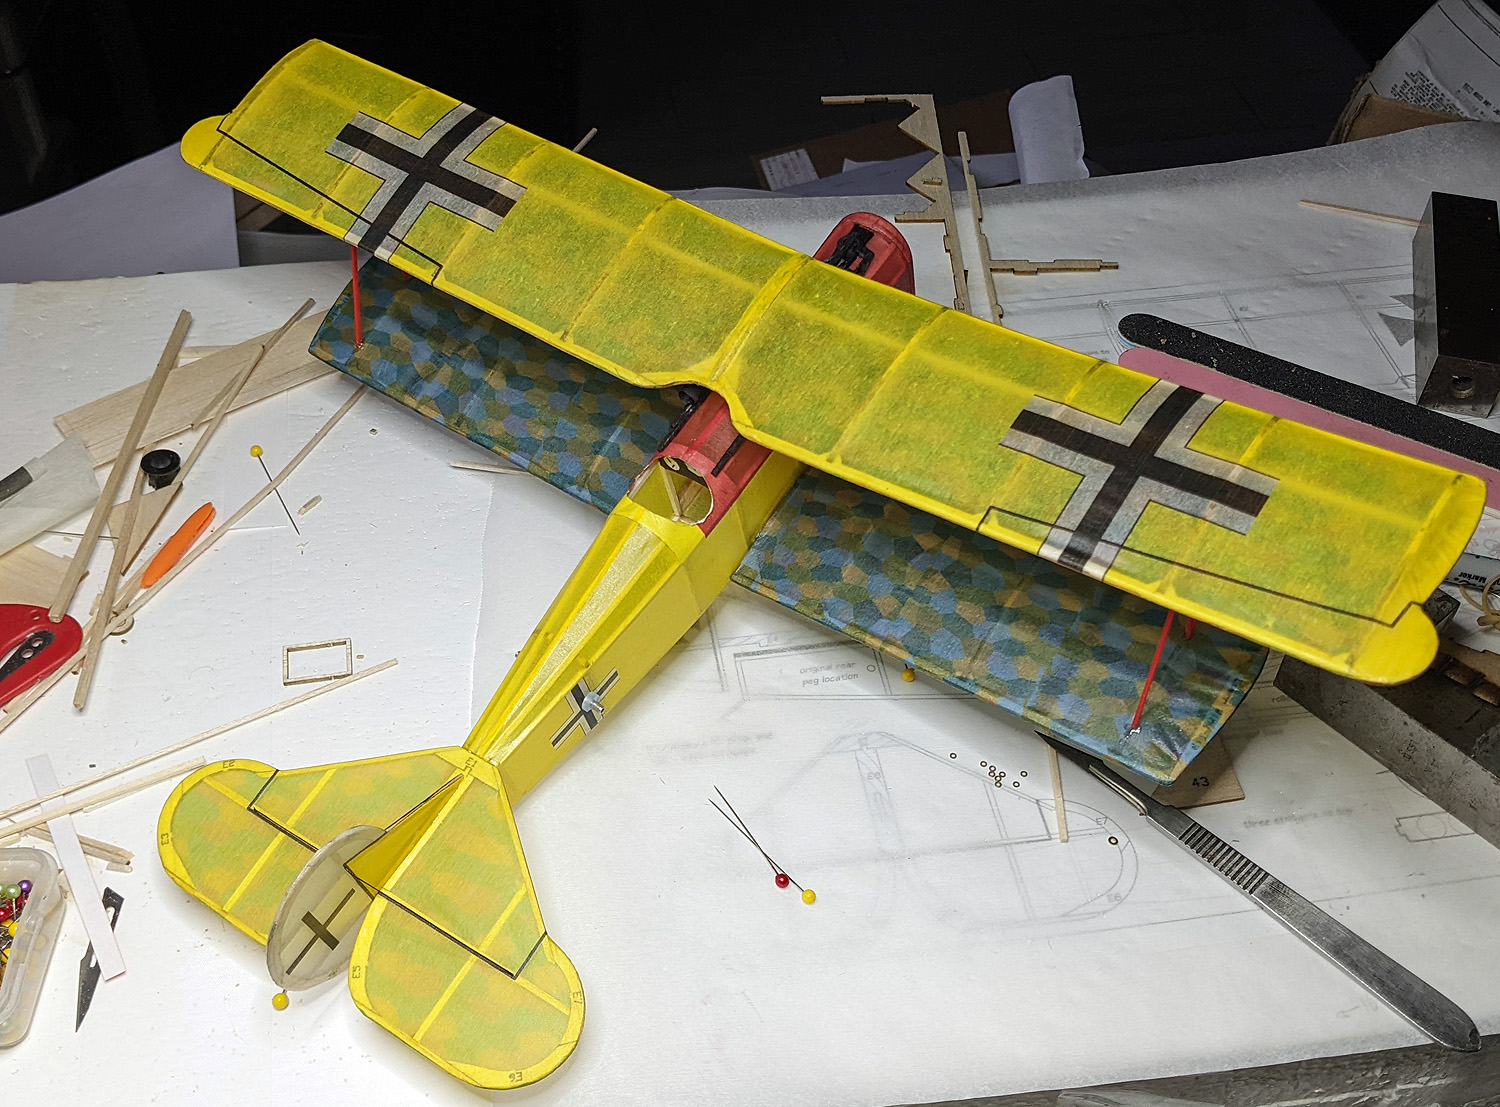
I think I flew two or three Test flights on my OT Stick Holy Ike and then went official.  I put up three maxes and was sitting pretty in first place.  By the time I got around to the Jumbo and doing additional testing, the breeze was starting to turn into a wind and I wouldn’t risk another flight in the wind.  I logged one official flight on the FW-189 at 47 seconds.  I was in first in that for most of the day, too – because no one else was foolish enough to fly Jumbo on Day One of Three.  Here is a test flight from the previous evening.  You can see it has wonderful potential, but still needs trimmed and then pack in more duration.

As Thursday wound down, it became evident that SEVEN flyers maxed out (three 2-minute flights) in Old Time Stick!  This meant there would be a fly-off.  The majority of the flyers involved and the management agreed to postpone the mass launch fly-off until the very first thing on Friday morning.

The seven of us gathered at 7:45am and went over the ground rules, wound for sound, lined up and launched seven stick models in close proximity.  There were no crashes, but Duncan McBride and I, standing side by side, went right up together.  His Korda C Stick Tractor was only inches above and in front of my Holy Ike.  It was quite the sight to see and we both thought that propellers might chew planes, but we got clear.  All seven got great altitude.  I ended up 4th out of seven, the victim of my own caution, now giving full torque to the biggest motor in my fleet.  Nonetheless, it was satisfying.

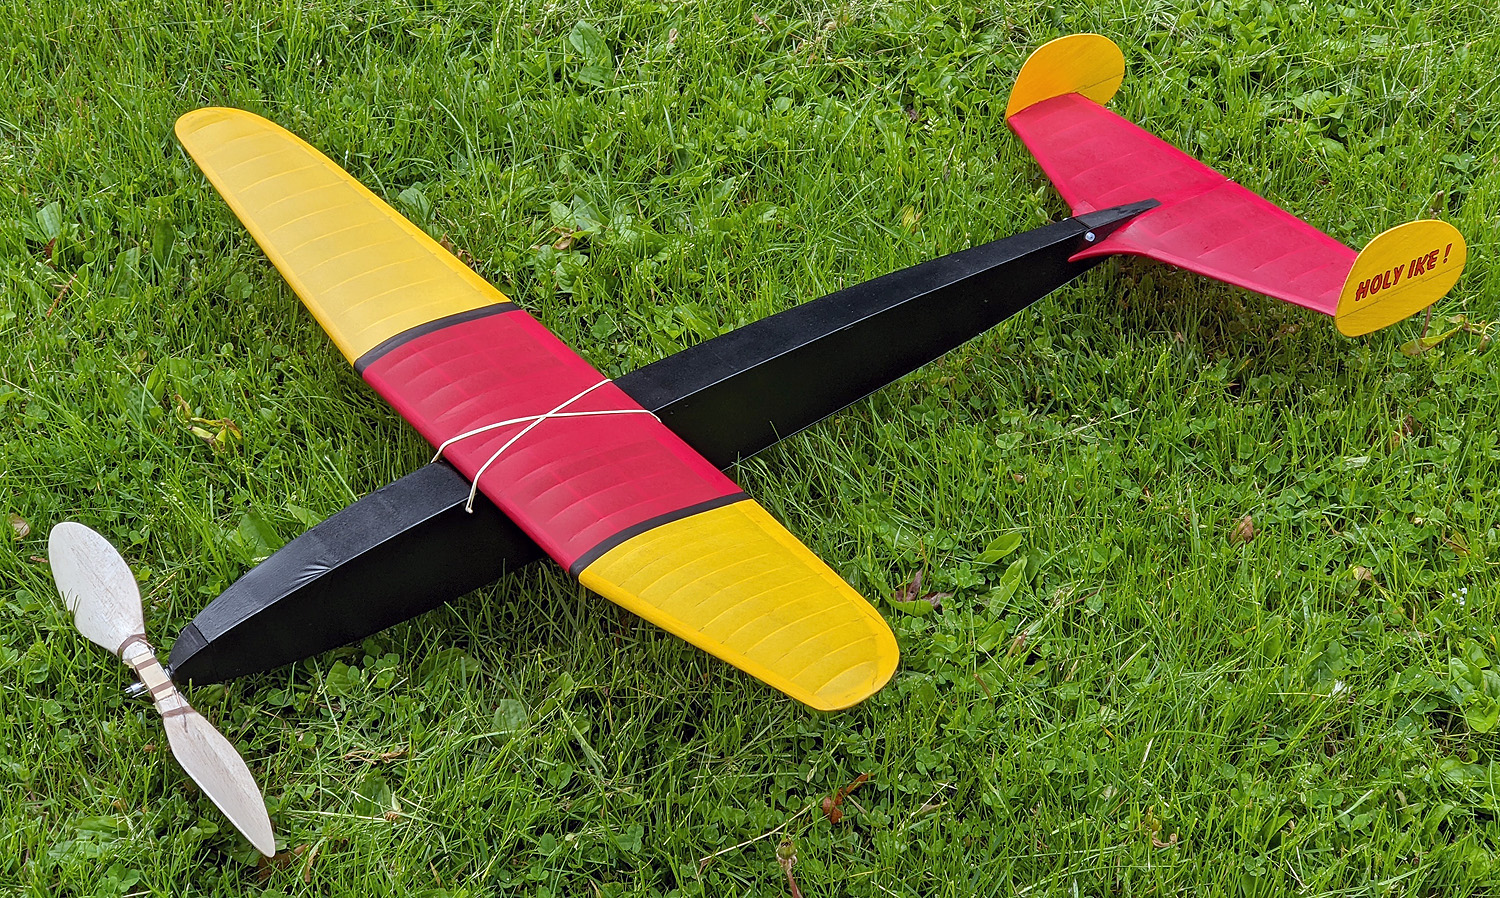
my Holy Ike Old Time Stick

After that, I went right into Old Time Fuselage, flying my Hep Cat.  This model has been a very consistent flyer – in calm or in wind – since I built it.  It even won FAC OT Stick last summer at the AMA Outdoor Nats.  I put up two maxes, but then… I dropped my third flight with an uncharacteristic 117 second flight.  The tail end of the flight was in “down air” – caught in the back side of a thermal where the air is rotating toward the ground instead of up and away.  That was a disappointment.  But I watched the scoreboard.  No one was maxing out.  As the day came to a close, Ted Allebone has logged the same score – 357 – and we were tied for first.  There would be another flyoff.  The day was calm, so we could go at the end of the day or early in the morning.  I was ready.  But Ted had already packed up his model and it was packed in the front of the truck waiting for a return to Michigan.  He declined a flyoff and took second place, giving me first.

my Hep Cat when built – in the winter

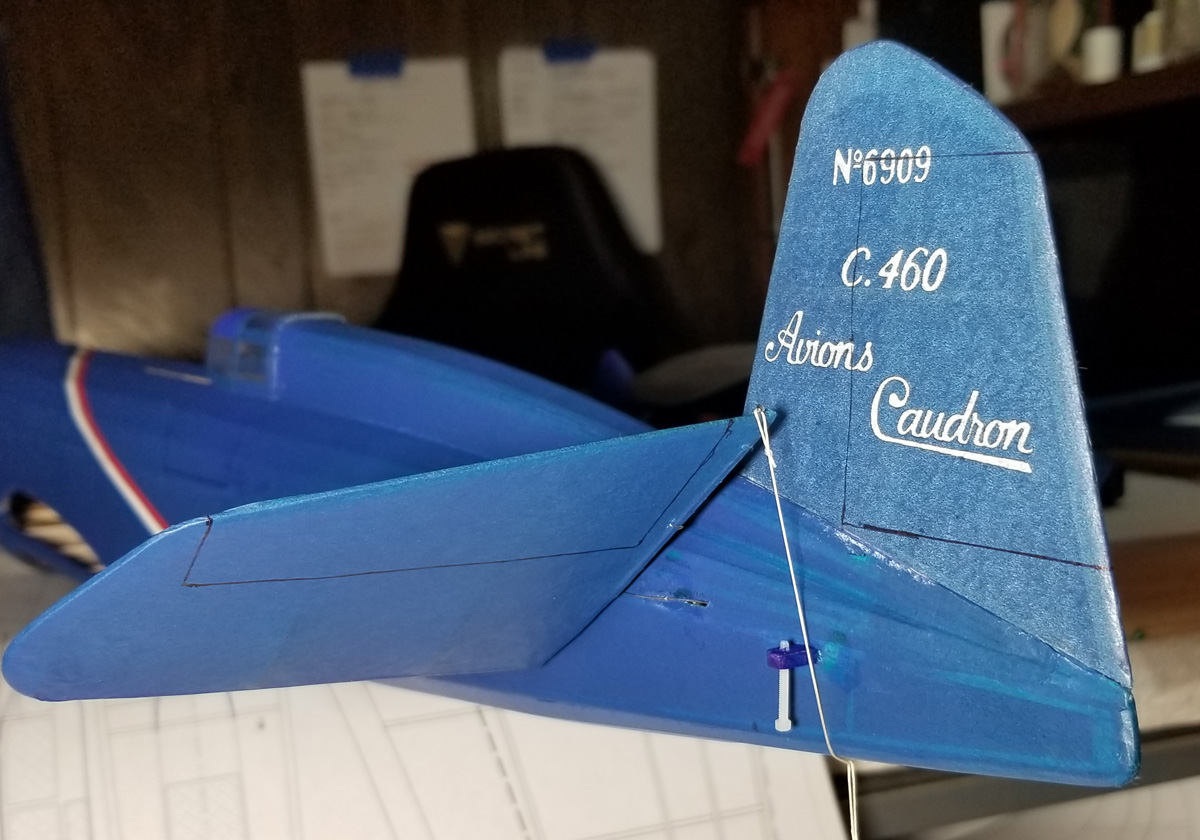
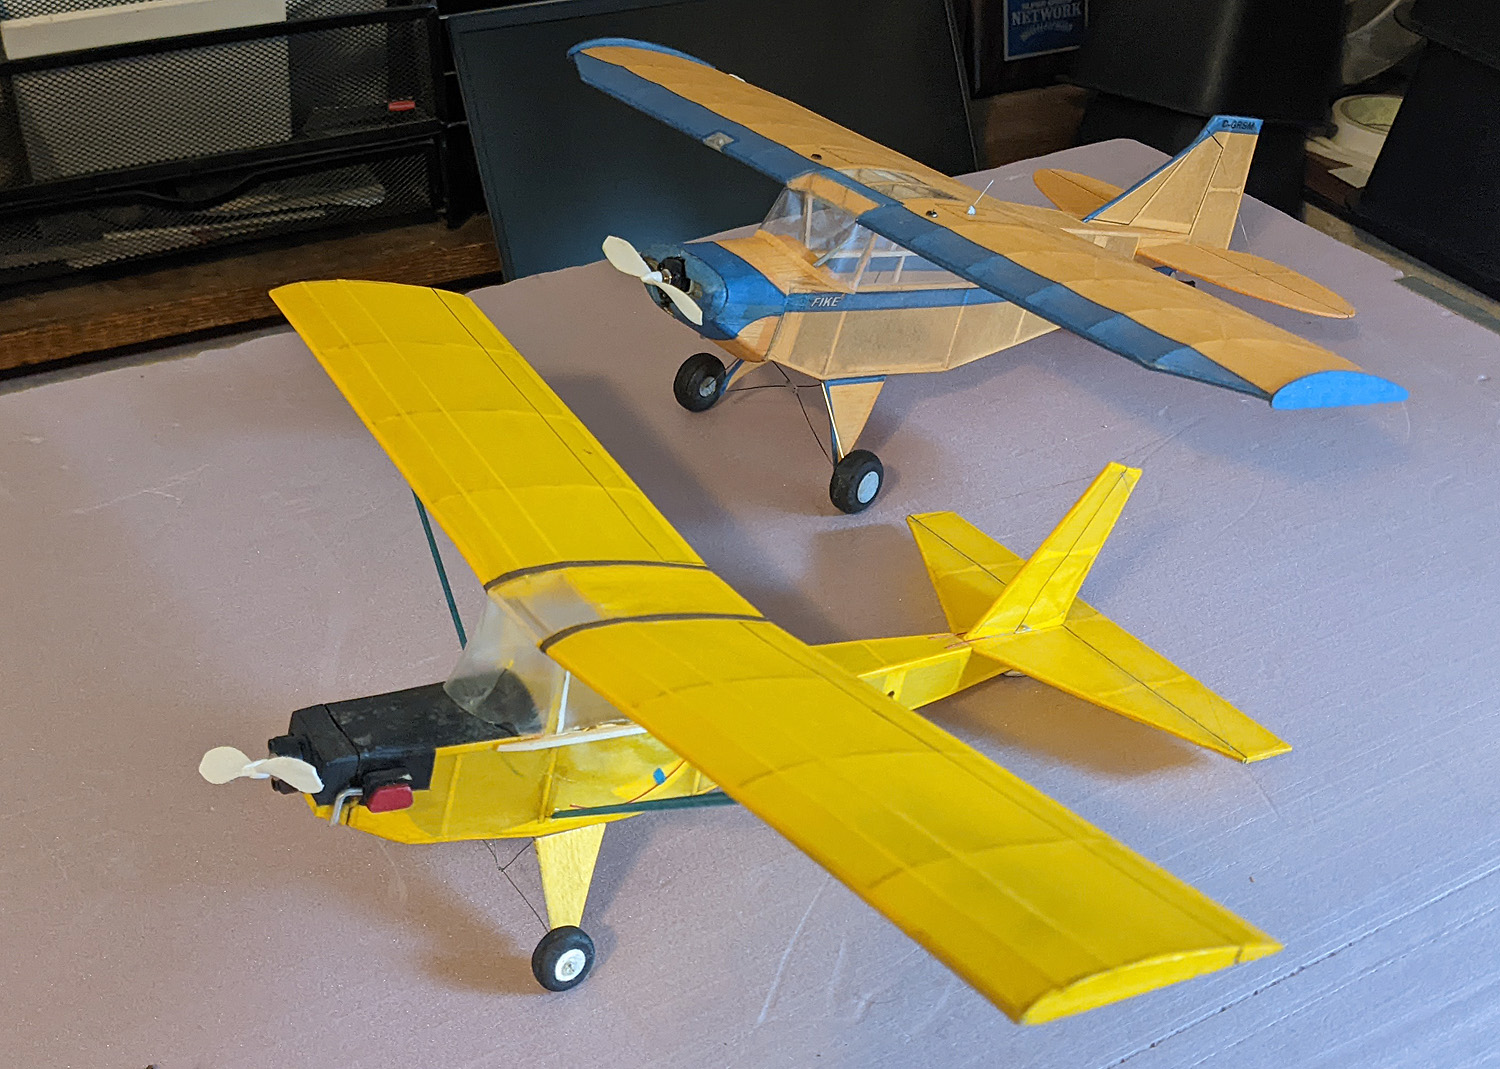
Rounding out the second day, I flew my aging Stallion in Jumbo, one terrible flight with my Dime Scale Bird Dog, broke a motor winding my Caudron in the first round of the Greve Race, tossed my Falcon Special into the ground in the first round of the Goodyear races, flew three mediocre electric flights with my Fike Peanut in Power Scale,  and three less-than-mediocre flights with my Heinkel JetCat.

I did fly my Jumbo Focke-Wulf on Friday – in WWII Combat!  That was exciting.  There were 25 or so pilots and they eliminated 7 (I think) in the first round.  I made it to the second round!  But I broke one motor while winding and was eliminated.  Some commented that they were surprised that I would fly that model (and risk it) in Combat.  But, if you can’t fly a stunning model in the biggest contest, what did you build it for?

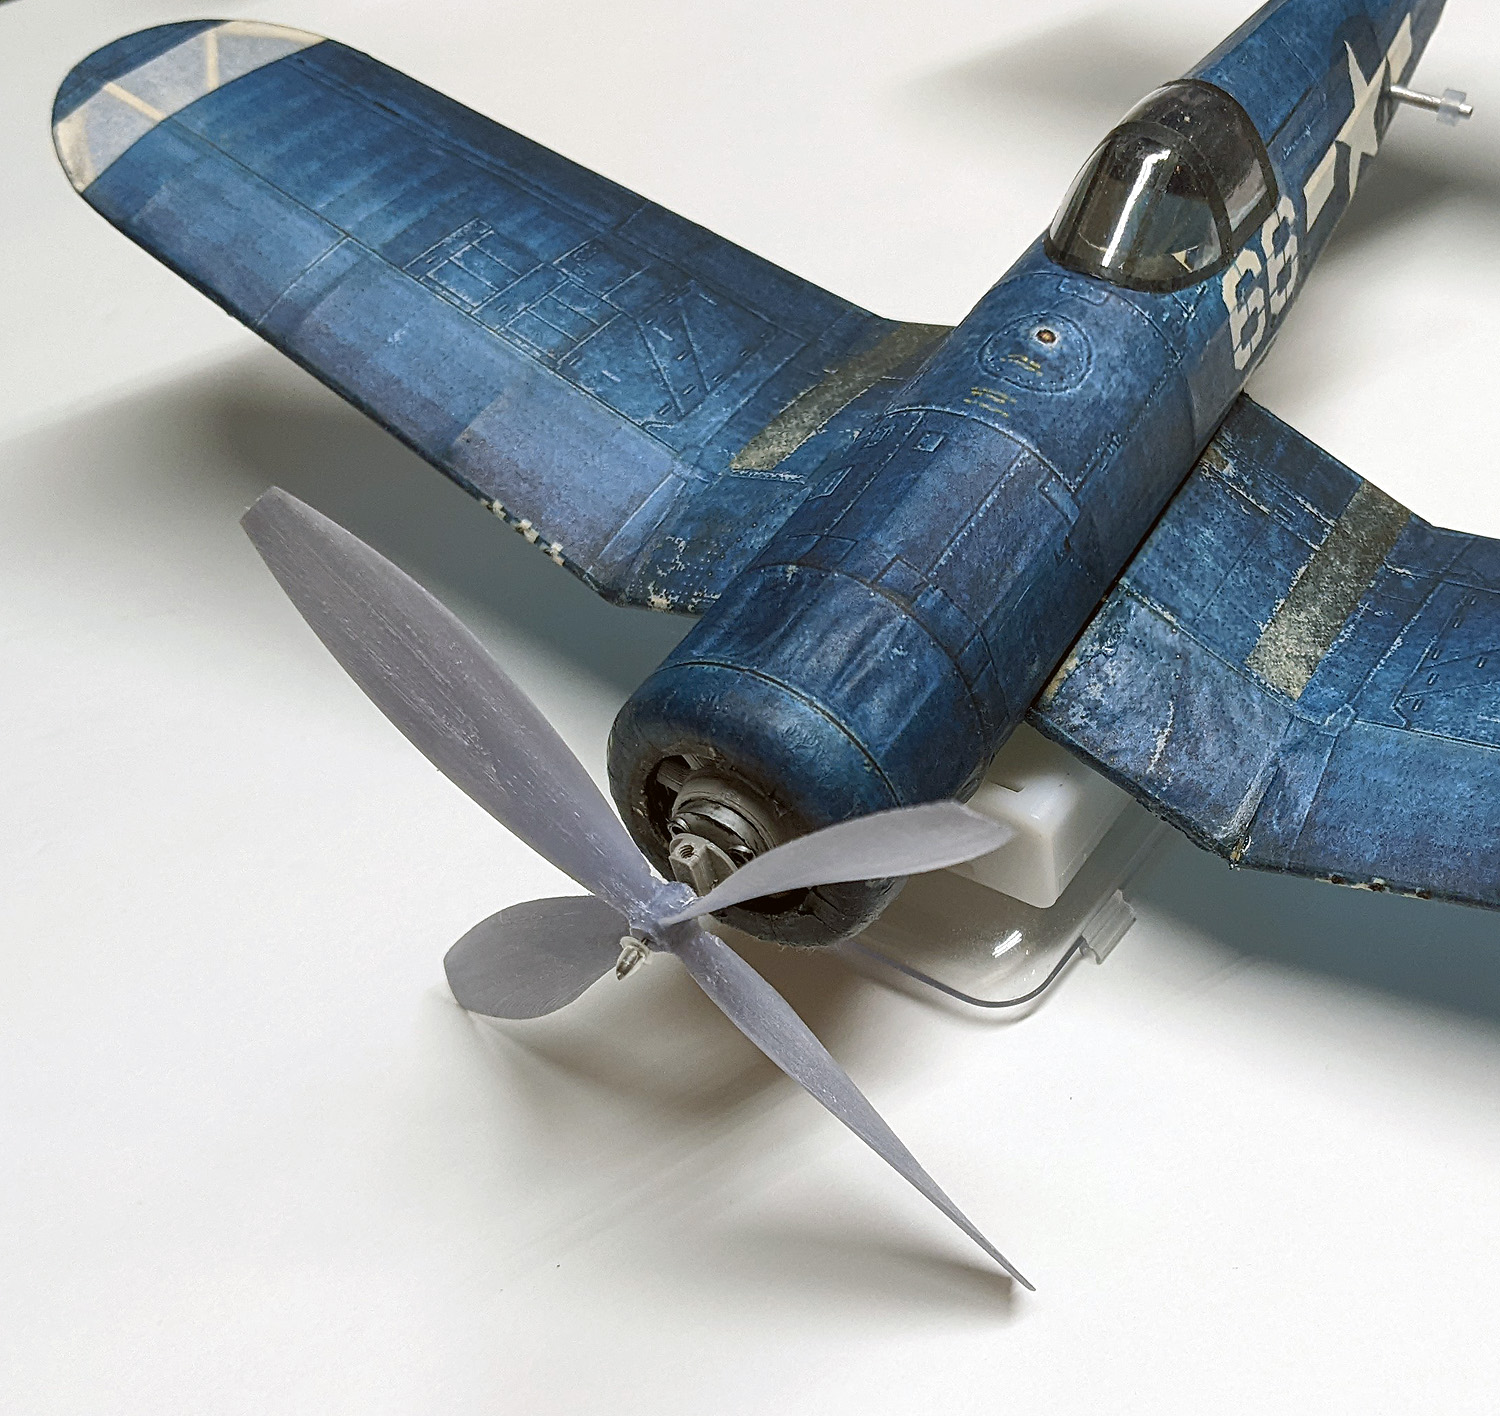
The only up-side for the remainder of the day was my little Corsair Peanut.  I logged something like a 57 second first flight, and added some clay to the tail for a floating glide resulting in a 76 second second flight.  For the third flight,  after about 20 seconds it caught a thermal and just cruised around in ever-heightening circles.  I chased to the northern edge of the field to where the bean field started and watched the pretty flight.  It was getting quite high and I felt I was seeing the last of my little Corsair, but all of a sudden, the prop locked and the model quickly spiraled down. The nose hit the dirt at about 1:45, but it sure seemed longer than that.  Only the legendary Tom Hallman, flying a 35 bonus-point MiG-DIS was able to beat me.  His three flights were all between 30 and 50 seconds, but he totaled 6 more points than me.  I am very pleased to take second place in Peanut!

The third day was much like the second: fair weather and light breezes.  It was overcast in the morning, but that gave way to clear skies.  When we flew the National Air Races Mass Launch, as we finished winding, the air was perfect and bouyant.  Pat Murray and I were hoping the Air Boss would get those watches started and not delay in giving us the “launch!” command.  Streamers were rising and – OMG, it was perfect!  Thankfully, Mike Escalante wasted no time in getting us into the air and all of us went right up into that thermal.  Pat and I were right together, climbing higher and higher into the blue sky.  For a time my Comper Swift was above his Lockheed Vega and we were enjoying the spectacle as the were rising right overhead.  Unfortunately, my Comper has a built-in DT – warps in the wing cause it to go straight in the glide if upset in the least little bit.  And that’s what happened – I got kicked out and started a slow descent to the south.  I landed and ended up in third place behind Pat and Wally Farrel (2nd).

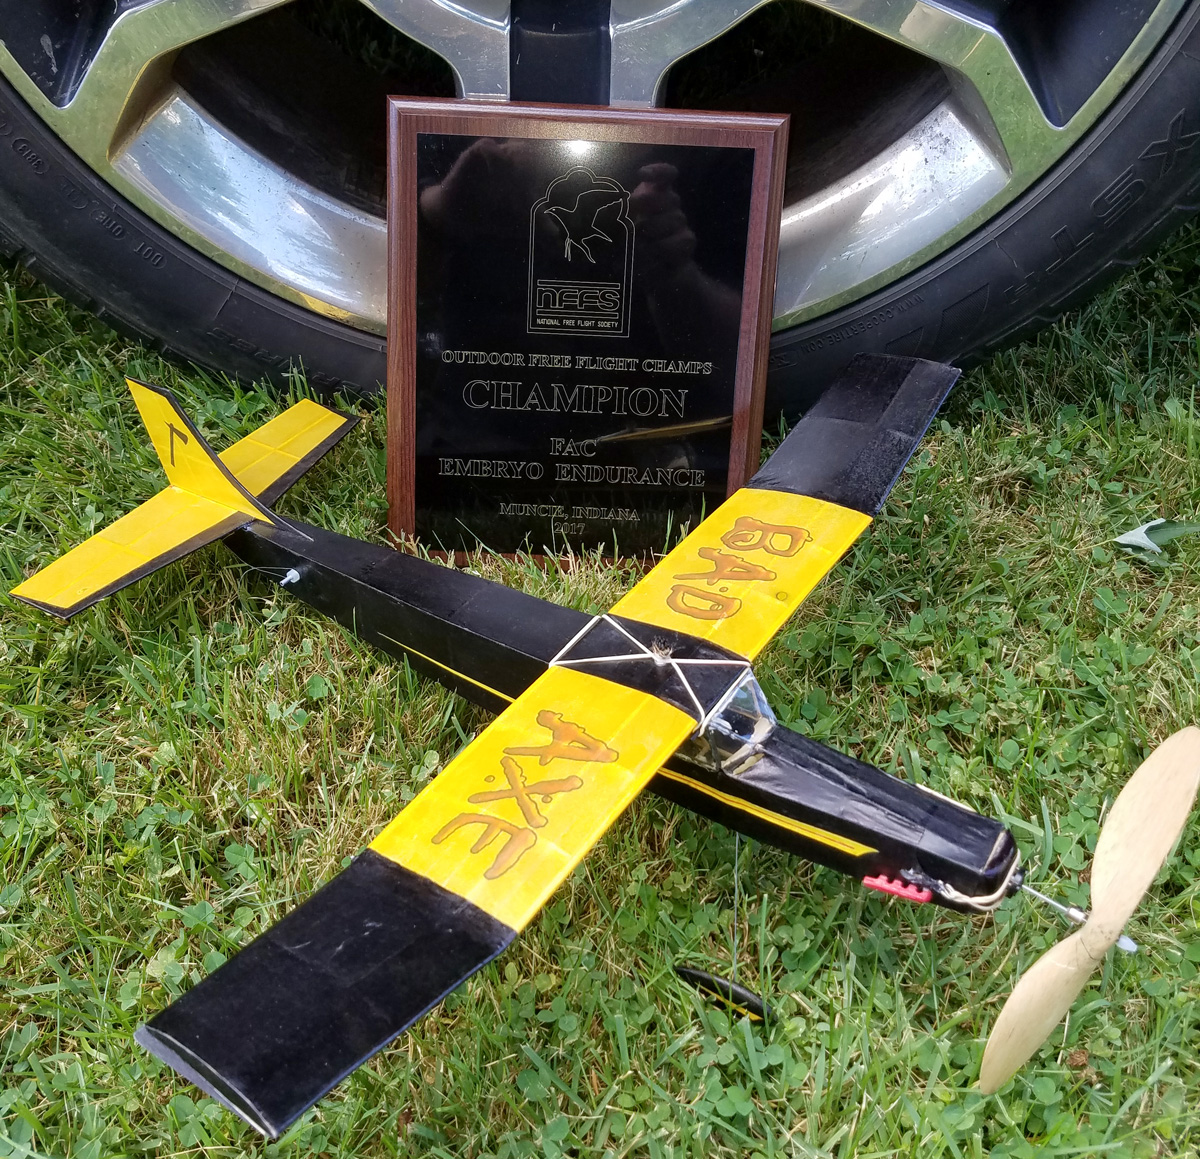
I tried to fly my Durham Stretch Limo in Embryo, but couldn’t get it trimmed right.  Again, my schedule was packed, so I had to pick and choose what to fly and set that one aside, abandoning Embryo (more on the impact of this decision later).  I turned to Half Wakefield and my Yankee IV.  I got it trimmed satisfactorily and logged three good flights.  I don’t recall what they were, but they were good flights, but not maxes, in a difficult category.  That put me in first most of the day.

Our flying buddy, Mike Smith from Dayton, had been struggling earlier in the contest and, after hours the day before, he said he didn’t turn in times because they were poor performers.  He is only 3 years into the hobby.  I told him he shouldn’t hesitate or be embarrassed to turn in times.  It helps him understand where he is compared to others, and it helps the club with overall statistics about how many people participate and so on. That must have taken hold, because he logged his flight times on his half-size Keil Kraft Gipsy – for his first kanone, knocking me into second place!  Well done, Mike!

Next up was my King Harry in 2-Bit.  This is another consistent performer for me.  Of course, not having flown some of these models for 2 years makes you relearn and readjust.  But King Harry #2 is just as reliable as #1 was (before it was lost at Geneseo in 2019).  I put up a triple max that was not matched and I took first place.

King Harry #2

My last flight of the contest was my most outstanding flight.  NoCal was flown on the last day.  This is a fun, but tricky event – there is no maximum flight time.  In June, my Folkerts SK-2 “Toots” had two 5-minute flights that landed on the field and yet, my three-flight total was surpassed by Wally Farrell with an 11-minute fly-away.  This Folkerts NoCal is one of the straightest and strongest NoCals I ever built.  It has bee solid and warp-free since the day I built it a year ago.  While it did pop out of the thermals in June, I decided to try to enforce that behavior a little bit with another small pea of clay to the nose.  I planned for performance like this:  a- climb out a little and hook a thermal, b- ride that thermal for a good while and when the thermal weakens, c- drop the nose and glide down for a good score like I had seen in Muncie last month.  Here’s what wikipedia says about “best laid plans”:

(idiomatic) A proverbial expression used to signify the futility of making detailed plans when the ability to fully or even partially execute them is uncertain

I wound up the long loop of 1/8″ rubber that drives the 7″ Peck prop.  I asked Winn to time me and checked the streamer.  I hustled out a few steps and turned to Winn, ready to launch – the streamer was going up.  I called him again, “Winn, hey, are you ready?  I want to catch this thermal!”  A couple seconds and he was ready and I launched, hoping I wasn’t too far behind it – I wasn’t.

It wasn’t a real strong thermal, nor was it very large.  My plane went up in small circles, steadily rising.  I just sat in one spot for a long time; there was so little drift.  Then I’d have to move to the next spot and sit on my bike with my head tilted way back, looking up into the blue sky flecked with small clouds.  Slowly it drifted to the south east and I followed, trying not to lose sight of the little model.  Three things helped me keep sight of it: yellow tissue, gloss clear spray, and very, very little drift.

As I got farther and farther south east on the field, I was going to run into the rocket people that were sharing the field.  I had to figure out how to get around them, not lose the model, and stay in view of my timer, so he can keep the clock going.  I navigated through their parked cars on the south edge of the filed and made it to the extreme southeast corner.  I sat there for a long time and then the model started to drift NNE.  I could still see it brightly in the sky and by carefully riding north I could keep an eye on it.

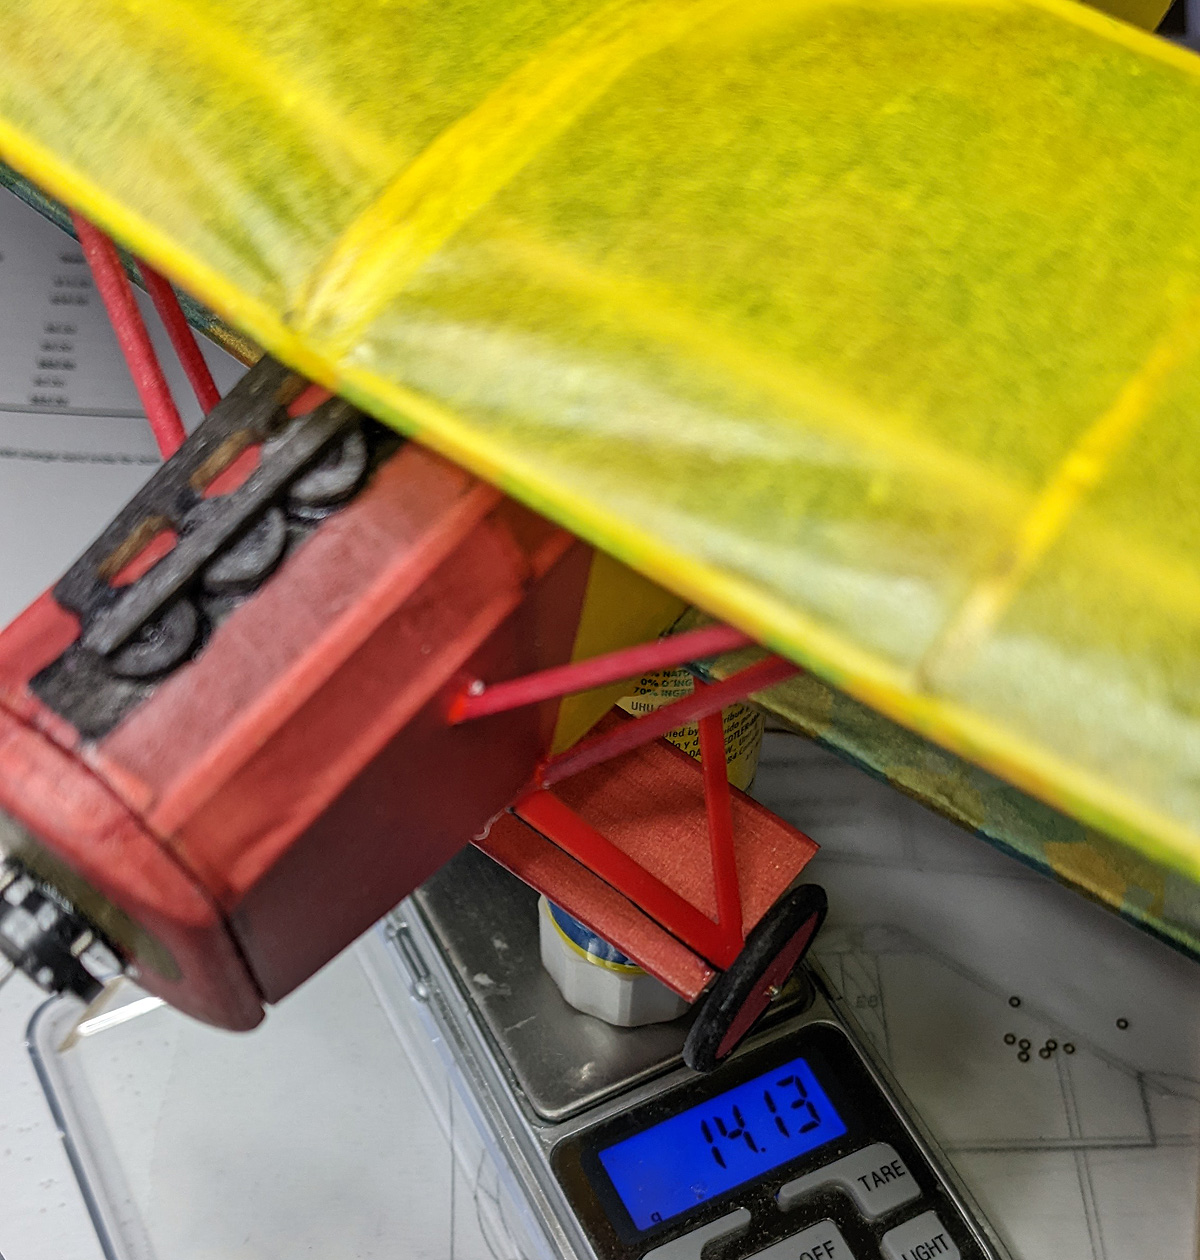
I got to a corner near the corn and stayed there.  I knew this would be the last spot I would be watching from – and the last spot where I would see my little Folkerts.  This plane was now just a flashing speck in the blue sky well east of the field above the college.  The additional nose weight had no effect on the glide.  At less than 10 grams on 62 square inches of wing area, the wing loading is so light that it didn’t take a strong thermal to carry it away.  There was a hint about half way through the visible flight that it “might” be descending, but that didn’t last long – that’s when it started drifting NNE.  It might have kicked out of one, but got picked up by another thermal.  I can imagine that it was carried a good distance from the field, maybe even beyond the town of Geneseo.

I waved my arms vigorously (a signal to stop the watch) and rode back across the field due west to our base, and while it was sad to lose a great model, I was happy that I had logged a “Wally Farrell” type flight.  Winn reported a 14:56 flight for 896 seconds.  That was going to be hard to beat.  In fact, it was roughly half again better than 2nd place.  That is the second fly-away victory at the FAC Nat for me in NoCal.  I won in 1998 with an 11-minute flight with a Hosler Fury.  In fact, that was the last time that I won an event at the FAC Nats prior to this year.

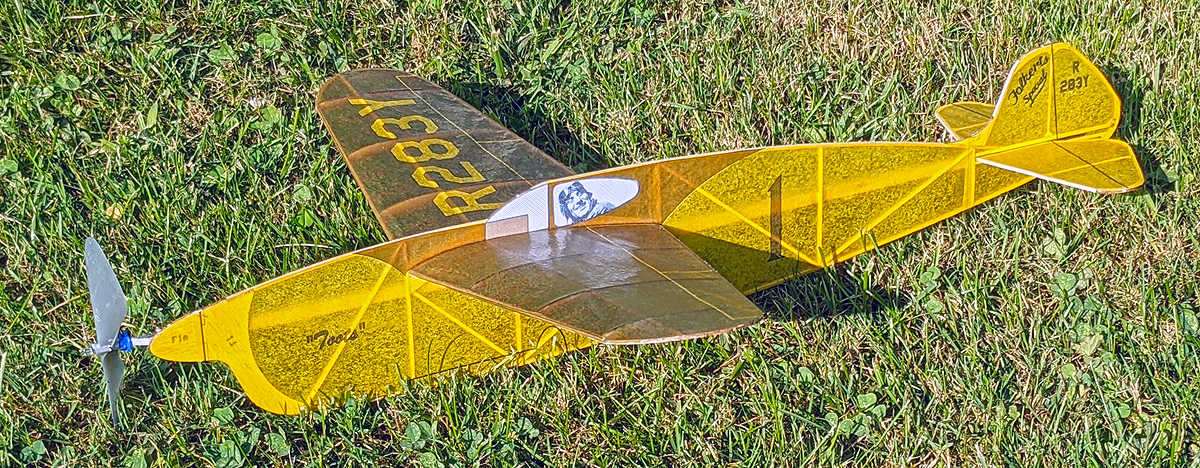
2022 FAC Nats NoCal Champ – 14:56 OOS

Ceremony #1 – Final Flight

We have a tradition at the Biennial FAC Nats:  we hold an evening ceremony for all of our flying friends that have passed since the previous Nats.  This year that spanned clear back to 2018 – four years.  In our hobby, that is mostly populated by old men, four years can suck up a lot of souls.

This year the ceremony was heart-wrenching.  I personally read four names, three of which nearly close the lid on the old Stork Squadron from Cleveland, where I cut my teeth.  Rich Weber, Del Balunek, and I are just about the last remaining members.  Del no longer flies, and Rich has been out of the loop for a few years.

This is merely a representation of what this ceremony means.  These people – all of these people – were flying friends to someone and some of them are leaving a friend or student as the only one remember their wonderful times together.  This is a FACT of our group and it is much like watching that model fly away for the last time.  We can be, should be, and were sad to have lost good friends, but we can look back and remember all of those good times flying.

This year, there were roughly THIRTY names read.  It was terrible to be standing there, listening and hearing the names ring out, spoken through cracking voices and tears of those they have left behind.  The most recent passing was of Jack Kacian, who died as Vance Gilbert stopped in at his house to visit him on Tuesday.  Jack and I had only met a couple of times at Geneseo, but I considered him a friend, as I do all of my fellow modelers that we meet up with at Geneseo.

Thirty names…it left many of us crushed for the evening.  But I am so glad to have known many of them and to be able to share in their memory.  As we always say “use the good wood”.

Ceremony #2 – Awards

A couple of general award items as I get to my personal awards.  We presented three Blue Maxes to worthy flyers this year.  The Blue Max is awarded to every FACer that attains 16 victories in competition.  You can read a more complete explanation HERE.  These were to Duncan McBride (Florida), Mike Escalante (Maryland) and Luc Martin (Quebec).

There are only two remaining “100 Percenters” – those that have attended every FAC Nats since 1978:  John Stott and Ross Mayo.  Fernando Ramos and Ray Rakow are still living but did not attend this year.

Now on to ME.  This was my best FAC Nats performance.  You could say that attendance was down (about 80 registered) but that really does not make the accomplishment any less.  As with all competitions, attendance is required and only those that attend can win.  Here is what I won:

my 2022 victories

4th in Jumbo with my Stallion
4th in OT Stick with my Holy Ike
3rd in National Air Races with my Comper Swift
2nd in 1/2 Wake with my Yankee IV
2nd in FAC Peanut with my Corsair
1st in OT Fuselage with my Hep Cat
1st in 2-Bit with my King Harry
1st in NoCal with my Folkerts SK-2

During the setup for judging, I heard Sky Mayo remind all of the judges that there was a “beauty contest” for the best WWII model.  I had a glimmer of hope that it might be me.  After all I brought that big FW-189 – I had it judged, I flew it in Jumbo, I flew it in Combat.  It is a subjective trophy (not performance-based) and maybe those that choose would choose me!

But, it was not to be.  Wally Farrell won with his Arado E.530.  Here is a photo of the winner next to my Focke-Wulf.  Both are Jumbo 36″ wingspan models.

But the evening was not over for me.  There are three overall performance trophies:  Scale Champion, Non-Scale Champion, and Grand Champion.  A person needs to place high in many of the events in each category to win champion in each sub-category and then how they placed in both categories determines how they stand for Grand Champion.

I placed well in many of the Non-Scale events (OT Stick, OT Fuse, 2-Bit, 1/2 Wake).  But would it be enough?  I under-wound on the fly-off in Stick and ended up in fourth.  I only placed second in 1/2 Wake.  And I didn’t even fly in Embryo – Embryo carries the most weight as scores are factored by the number of flyers in a particular event – and Embryo is always the most popular FAC event.   It turns out that my performance was good enough to win non-Scale Champion!

This has been a goal of mine since at least 2016.  It has taken a lot of work and practice.  I have models that max often and this was the start of it.  For years I have been working and working on this at every large-field contest.  Every flight in OT Stick, OT Fuse, 2-Bit, and Embryo has been trying to get to the point where I can be confident in placing in these events.  I am a rather humble guy (I think?) and I don’t often say I am proud of things, but I am proud of this accomplishment.  It is one of the highlights of my modeling career.

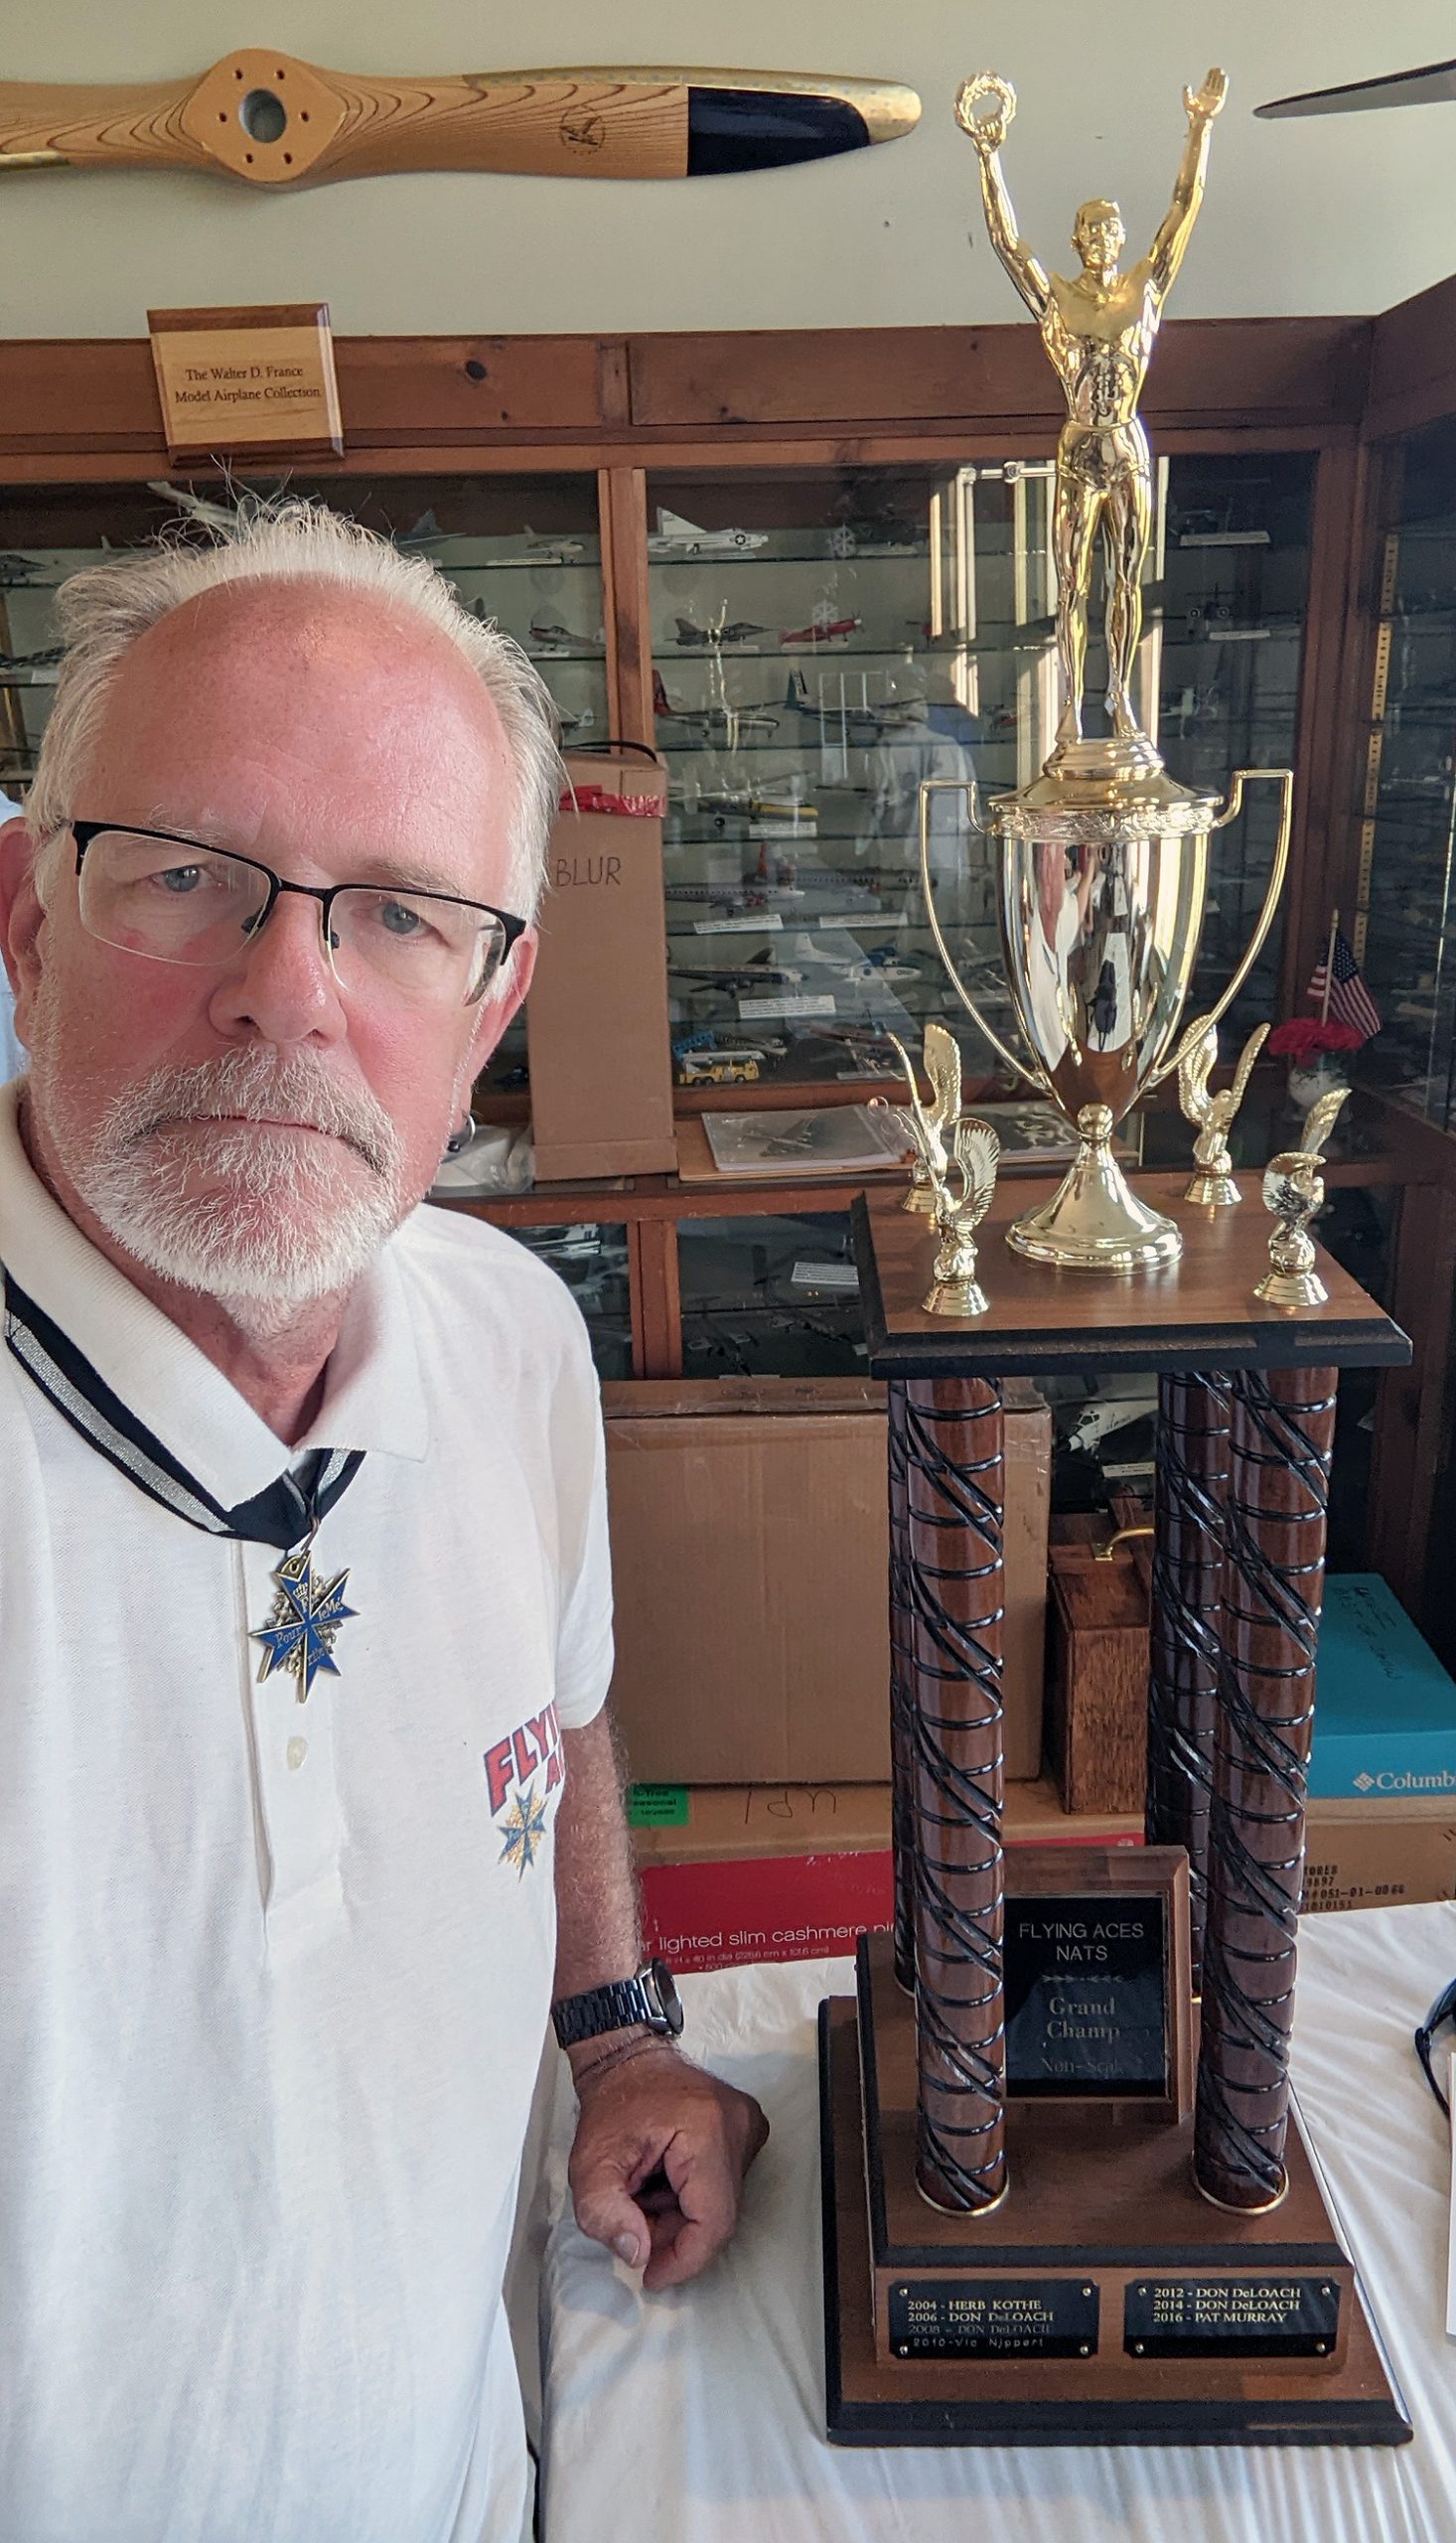
me and the FAC Non-Scale Champion trophy


Afterthoughts

It was a long trip home – 12 hours from Geneseo to my house, by way of Oxford, MI and a return to Detroit due to road construction.  I am tired.  I have been writing this for about 4 hours.  I still need to unpack my merchandise and models.

But the time was great.  Importantly, it was shared with friends.  Even the ride there and back was made better with someone riding along.  I used to travel to Geneseo with my son, Jack, and we would talk excitedly on the way about what-might-come and on the way back we would discuss how to improve for the next time.  I miss those days, but I now have new days full of memories.

I don’t know if I will be as successful in future contests, but does it matter?  Am I upset about losing 1/2 Wake to Mike Smith?  Not in the least!  I’d like to think that I have had a hand in his success and even in that specific event.  It’s not a bad thing to have someone new beat you, especially when you help them along.

I may never win Champion again, or even any event at the Nats, but I will still go and meet up with all of my friends and have a great time.  And I’ll stand in that ceremonial ring and call out names of our flying friends that have Gone West with tears in my eyes again.  If I have anything to say about it, this tradition will continue along at least as long as I can help push it into the future.

Speaking of the future, here is young Alex Kelly from San Antonio, TX and his Corsair – which he built – and flew successfully at the XXII FAC Nats in 2022.  Note the legend, Wally Farrell, watching one of his flights in the background.

Alex Kelly and his Corsair


Posted in Events, Products | 1 Comment

The Busy Month of July

I’ve been wanting to write for awhile, but a) I am not sure what to write and b) I’ve been so busy since coming back from vacation.  I do know what to write, but there are so many things, most small items, most not connected to each other, so it won’t likely flow smoothly.

POSTAL RATES

Here’s a wonderful story:  back in November or so, the Post Office said they would temporarily increase prices for the holiday season.  After the New Year, I waited and waited for the price to drop.  Silly me.  The USPS has raised prices at least twice in the last six months and they will again in mere days (10 July, I think).  Of course, they were right – their holiday price hikes WERE temporary – only to be hiked AGAIN in a couple months.

TODAY – all packages I ship to California cost me money – about a quarter.  Most other places I am able to “make” a quarter or 50 cents – that’s my shipping and handling fee.  The cost of my time to pack and ship your orders.

Guess what?  I’ll be raising my flat rate shipping charges in August.

COST OF MATERIALS

Have you noticed how “inflation” has hit you?  Virtually everything we buy now costs more than it did last year.  That includes all of the material that I use to make my kits: paper, packing supplies, ink, balsa…  Guess what?  I’ll be raising my kit prices in August.

RUBBER

Charlie Jones, et al, at FAI Model Supply is out of town/state/country for all of July.  He was kind enough to let us dealers know before-hand.  When I was in Costa Rica, I got the message.  Knowing that I have two big selling contests in July (FAC Nats in Geneseo NY and the AMA Outdoor FF Nats in Muncie, IN), I hurriedly calculated what I needed without the ability to see my stock-on-hand.  Then I doubled it.

I will be bringing all the rubber I have to Geneseo and Muncie.  Of course, it will be first-come-first-served – UNLESS – you place an order online for Delivery to one of these contests.  But hurry; time is running out for any sort of pre-ordering.

KITS

Some time last year, two things happened:  1) I passed 100 short kit designs available from me and 2) I passed 5,000 kits sold to you, my customers.  To me, these are significant numbers.  Free Flight is a limited hobby.  And my little corner of it is even smaller.  And yet, between you and I, we have hit these numbers.

Drawing plans, creating new designs, re-creating old designs, is a lot of fun for me and it is something that I do practically every day.  It is almost relaxing for me.  I would be doing this even if I was no longer selling.  But, I like to share my creations.  I guess you like most of them, as you keep buying them.  Getting back to the price hike subject, I have always tried to keep prices low but reasonable.  Your not getting full kits from me, so I find it hard to charge a lot.  You DO get parts AND plans, unlike some short kit suppliers (I feel that’s a value added).  Some of my designs will be complicated – large and complicated plans, many sheets of wood.  For these, there is no easy way to keep the prices down.

I virtually cut these kits on demand.  When you order, I generally have to cut the kit.  Over the last several months, I’ve been cutting multiple kits instead of just one.  That is so I will have a stock to bring to these two July contests; Geneseo especially.

But 100 is not the upper limit!  I am always drawing something and and it is my intention that they will be built and flown.  Then it is a small step to passing them on to you.  Well, some of those complicated ones require several big steps.

GENESEO

It was 2019 the last time we FACers gathered for our big meet in Geneseo.  Coming off the trip to Costa Rica and the contest immediately following in Muncie, I decided that there would be no new planes for Geneseo.  I simply had/have too much to do and need to concentrate on putting my best foot forward at the XXII Nats.  Then, due to gas prices, primarily, Winn Moore and I decided to ride together.  This means that I can’t just take “everything” – I have to pick and choose – AND consolidate.  We will be bringing Models and equipment for both of us, all of my sales goods (well, most of them), and two scooters.

I have selected (and pre-registered!) 18 of my models for competition.  I have them packed in two large boxes, which was a complicated process.  So complicated that I made a list of which models are in each of the three layers (one box has two levels of models), and I took photos of how they all are packed.  This is in an effort to allow room in my vehicle for all of what Winn wants to bring.

I’ll be consolidating my sales good, too; making sure that I efficiently pack all my stuff.  Getting the sales goods, one or two canopies, and two scooters into one 5×8 trailer might be a challenge, but I think we can do it.

Look for us to pull in to the flying field sometime Tuesday afternoon.  With any luck, we will be able to kick back and relax in the evening, catch up with friends and prepare for a hectic Wednesday, not to mention Thursday, Friday, and Saturday – and the long drive home on Sunday.

Here’s one tip I will send out to all FACers going to Geneseo:  DON’T FORGET YOUR DOCUMENTATION!


Posted in Events | Leave a comment

DTs – Dethermalizers – Mysterious? – Complicated! – are you READY?

Dethermalizers – the Next Big Step in your Free Flight Evolution.  Beginners often ask a lot of questions, especially on the field while watching.  One that I often answer in the negative is “do I need a DT?” – or – “what stuff do I need for a DT?”  What I tell beginners is “until you start building, trimming, and flying well enough that your models are repeatedly flying away, you do NOT need to complicate your modeling with DTs.  Come back when you are having models fly away and I’ll help you out.”

Why do I say this?  Because the beginner needs to learn to build, trim, and fly.  There is no sense in putting a DT on a model that isn’t trimmed to fly for more than 30 seconds.  Those three initial skills need to be developed to the point that the model is capable of flying OOS before the modeler needs to worry about how to install and operate a DT.  Until that time, it is an unnecessary complication.  I flew for a couple of decades before I started installing DTs.  And since then, I’ve put on plenty of DTs that don’t get much action (because the plane isn’t up to snuff, yet).

So, bunkie, you lost your plane?  You’ve lost several?  Then you need the Salvation of Free Flight – the DETHERMALIZER!  (No, not the Korda Dethermalizer OT Cabin – Class D 1941 Nats Winner – WITH a DT!)  A properly working (hopefully #1) DT will disturb the balance of your perfectly soaring model and it will no longer be able to soar efficiently and it will be kicked out of the thermal and descend to the ground (hopefully #2) and save your model (hopefully #3).

Hopefully #1 – DT’s, regardless of their type (see below), can malfunction.  During the construction of your model and installation of the DT, you will want to ensure that the operation of the timer and of the release are smooth and glitch-free.

Hopefully #2 – Sometimes, properly functioning DTs are overcome by the strength of the thermal and they sail off Out-Of-Sight, regardless of how smooth and perfect the operation.  A different style of DT action (see below) might have saved the model.  Also, “where” the model comes down may prohibit retrieval – maybe it is stuck high in a tree, or in the middle of a lake, of somewhere else where you cannot find it.

Hopefully #3 – sometimes the model will descend to the ground, but because of the type of DT action or some freak occurrence (tangled lines, etc.), the model will suffer damage when it hits the ground – or whatever it hits.

Dethermalizers have been around since the late ’30s or early ’40s.  As mentioned above, Dick Korda named a model he designed “Dethermalizer”, possibly because he integrated a DT into the design.  This article won’t be so much of a How-To, but more of a discussion the types of Actuators and the types of Actions.  All of the DTs that I know of have an Actuator that control when and how the DT Action takes place.  And the model design incorporates a method of Action.

Types of ACTUATORS

Actuators are the things that count down the time and trigger the Action.  Count down the time?  Yes – you want the DT to operate after a set time and not before.  This time will be determined by YOU, the Builder and Flyer.  Most of the time, I set my TIME based on the maximum official flight time (most often – 2 minutes).  Sometimes, I will set the time shorter and this decision is based on the field conditions – maybe it is a small field, or a particularly windy day and 2 minutes will carry the model off the field.

Regardless, all types of Actuators are basically switches that, after an assigned time, the “switch” is activated and the Action is initiated.  I will now discuss the various types of mechanisms that we most often see on the flying field (I won’t be discussing the antique Austin timers, although they still work).  Here are the types I will be discussing:  Burning Fuse, Mechanical/Clock, Viscous/Button, Electronic.

BURNING FUSE

This is one of the simplest and possibly most reliable DTs that we have.  It is basically a short piece of cotton cording that has been impregnated with a chemical that burns easily.  This fuse is lit with some sort of lighter (my favorite is an electronic, rechargeable, arcing-plasma lighter).  The fuse fits snugly into an aluminum tubing with a short length extended.  Generally a small rubber band is lightly wrapped around the fuse close to the tubing and as the fuse smoulders and burns down, it will contact the rubber band and melt or burn it and the release of the rubber band triggers the Action.  The snug installation into the aluminum tubing will extinguish the burning fuse.

a Burning Fuse installed on the tail of an Embryo model. The length of fuse from the exposed end to the small rubber band regulates the amount of time before the Action is triggered.

The SWITCH:  burning through a rubber band that is preventing the ACTION

Benefits of the Fuse Type:
– cheap
– installation is generally simple
– it is relatively light weight
– it is generally very reliable

Downsides of the Fuse Type:
– they are dependent on an igniter – a lighter of some sort – and electronic ones need to be charged.
– setting exact time is a guessing game as the rate of burn can vary with conditions
– if the fuse is damp or the day is rainy, the fuse may not light or stay lit
– a poor start of the burn can extinguish and result in no DT
– FIRE – these use live fire and they can start fires
– some modelers have burnt their models while lighting the fuse
– if the model lands before the desired time, the fuse/fire could light the grass on fire
– as a fire hazard, this type is PROHIBITED in some locations

Overall, these work well.  If the fuse is lit properly, it WILL burn down at a regular rate and it will self-extinguish.  Just make sure your rubber band is tight against the fuse and your Action is positive and you will have a light-weight, reliable Actuator.

MECHANICAL/CLOCK

These are called “Clock” types because of the way they work:  you wind a spring and it unwinds; just like an old-fashioned clock or watch.  There are commercial versions or you can make your own.  Being “clocks”, they have a very reliable countdown.  The spring is regulated somehow to slow the unwinding of the spring.  There are some very complicated multi-function Clock Timers.  These are used to manage several aspects of the model’s performance:  engine shut-off, variable incidence tails, DT action.  The ones shown here are simple, single-function timers.

Mechanical/Clock DTs. In the back are examples of a Commercially-produced single-function Mechanical DT. In the front is a home-made one. The arms with weights are added to regulate the rate at which the spring unwinds.

The SWITCH: usually the unwinding and release of a line that is preventing the ACTION

Benefits of the Mechanical/Clock Type
– these are very reliable – they count down at a constant rate.

Downsides of the Mechanical/Clock Type
– they are often too heavy for small models
– commercial versions are becoming very hard to find
– homemade versions take a little bit of experimentation to get them to work right
– homemade version require a wind-up toy – not all wind-up toys have the right clock
– they can get dirt in them
– I have had them “not work” but that is probably lack of skill in construction or setting

VISCOUS/BUTTON

Sometimes these re referred to as “Button” timers – Bob Munson perfected the viscous timer and had a Button (small) and a Badge (larger) version.  Homemade versions usually are made from rotary dampers that are found in various automotive applications:  slow opening compartment doors, etc are regulated by viscous rotary dampers.  All of these work in the same manner:  they have a chamber with an oil or compound.  In that compound is a “paddle” that is commented to a rotating shaft.  The fluid or goo resists the rotation of the shaft and this is usually at a fairly constant rate.

Munson Button and Badge Viscous Timers.

a homemade Viscous DT Kit that used a commercial rotary damper


There is another homemade viscous type that is made with aluminum tubing and Silly Putty.  These can be made with a little work.  You can find instructions HERE (PDF in the FAC Library).  There is an early version where a “trench” in the glider fuselage was filled with Silly Putty and a wire dragged through it.  I cannot find a link to that right now.  There are several how-to’s online regarding the tube/Putty versions.

The SWITCH: usually the unwinding and release of a line that is preventing the ACTION

Benefits to the Viscous/Button Type
– they are lightweight
– the original Munson timers were very reliable (current version, not so much)
– homemade versions are cheap to make and material is available

Downsides to the Viscous/Button Type
– some are temperature-sensitive
– all are dependent on a constant rate-of-pull (rubber band, spring, etc.)
– pull sources do not always have a constant rate of pull.

ELECTRONIC TYPE

Some electronic gurus have been able to produce electronic countdown timers that are light weight and programmable.  The results are a relatively light appliance that is very reliable and very accurate – to 10 seconds; some are to the single second.  There are now various products, some with multi-function, some are band burners, some trigger micro servos, and some with battery chargers built in.

one type of commercially available Electronic DT

The SWITCH: burning a rubber band or activating a servo that is preventing the ACTION

Benefits to the Electronic Type
– very reliable and very accurate
– relatively light weight
– installed properly, they can be swappable between models.

Downsides to the Viscous/Button Type
– some are very expensive
– all require programming that can be complicated
– all require on-board micro-batteries that need charging
– the batteries are so small (capacity) special chargers should be used
– charging on the field requires a power supply
– band burners may break the thin ni-chrome wire
– band burners require light rubber bands that WILL burn with the short hot pulse

All of the types listed above do one thing:  they provide a predictable delay from the start to the time the “switch” initiates the ACTION.

Types of ACTIONS

The ACTION is what takes place once the “switch” is thrown.  These Actions can take place on the Tail, or on the Wing, or Other locations.

TAIL

Probably the most common is the Tail DT where the horizontal stab is hinged.  Typically a fine line is run from the tail, along the side of the fuselage, to be connected to the DT.  When the DT activates, the line is released and the tail, hinged at the front (usually), pops up (due to spring loading or a rubber band pulling) to about 45 degrees – like up elevator to an extreme.  This will cause a nose-up condition in flight that balances out and the model sinks slowly and flatly to the ground.

The Tail-type is probably the easiest to install and operate, although there has to be enough tension in the line to keep the tail in flying position and not allow it to creep into even a degree of “up” where none was intended.  Also, Tail-types “can” still be carried away by a strong thermal, even after the DT Action takes place.  It is not common, but can happen.

Some models, because of the design where the tail intersects the fuselage, will require a two-piece split horizontal tail pivoting on a rod/tube combination.  These are more complicated installations, but Scale models often require this if the Tail Type is chosen.

the previously-shown Fuse-type DT and the Horizontal Stab popped up.

a Scale model with at Split Horizontal in DT’d position.

WING

Some models – and modelers – prefer a Wing DT.  There are two types here, too:  a Pop-Off Wing and a Pivoting Wing.

A Pop-Off Wing DT does just what it says:  once the Action takes place, the wing becomes detached from the model and all aerodynamic function is lost.  The plane falls to the ground – sometimes very rapidly (possibly damaging the model).  The wing is typically attached to the fuselage by a long string and, if done right, can act like a maple leaf and slow the descent.

Another type is the Pivoting Wing DT.  Similar to the Tail DT, the wing is hinged at the Trailing Edge.  Again, the desired angle is about 45 degrees.  This causes the same disruption as the Tail DT, but instead of a flat descent, the descent is nose-down and generally faster.  Again, this can result in damage to the model.

The legendary Jack McGillvray had a Fairey Barracuda that pivoted the wings at the high point.  You can watch the video HERE thanks to Tom Hallman.

hard to see, but there is a Burning Fuse DT in the middle of the wing. The Fuse burns the rubber band and the wing pops off. The tip of the wing is attached to the tail of the fuselage by a fishing line.

hard to see, but this is a Wing DT that pivots at the Trailing Edge.

OTHER

There are other less-common Actions.  In Hand Launch Gliders, some would use a section of pop can on the fuselage.  It laid flat while under normal flight, but the Action would release it and the natural curl of the aluminum can would disrupt the airflow around the fuselage and spin the glider down.

Other gliders use a more modern DT where the fuselage pivots just behind the wing. This is a very positive Action.

Returning to the ’40s, Chet Lanzo created a model where the wing went through the cabin and the upper part of the cabin was hinged at the rear and popped up, causing a disruption in the glide.

SUMMARY

This is not meant to be THE definitive paper on DTs.  I am just sharing common types of Actuators and Actions for the person just starting into DTs.  It will give them things to consider.  I am sure that my lists of Actuators, Actions, Benefits, and Downsides are incomplete – you may have pages to add, but this is what I came up with this afternoon.  And lastly, how you route the lines and adjust for travel and such is clearly not included in this writing.

Of course, one should always research the subject.  There are tons of articles on DTs in the FAC Library.

Posted in Builds | Leave a comment

Props, Storms, and Flying

We had storms roll through Volare Acres this week – Brainstorms!  We had rain, too, but coming out of the Indoor Fling last weekend, I was inspired to try several things.

3D PROPS

First thing, though, I’m going to talk about flying buddy, Archie Adamisin.  Archie is a third generation modeler as his grandfather and father and uncles were (and are!) modelers in the Detroit area.  Archie now lives in Kentucky, but has participated in our monthly Indoor contests as his mom and dad still live in the Detroit metro area,

Archie has raised the bar at our contests and he won the hotly contested WWII NoCal Combat event at the Indoor Fling, besting 8 other competitors in 3 rounds of flying.  His winning time with his Dauntless was over 4 minutes on the final round.

some of the formed/pressed props I made a couple years ago.

He and I have been loosely bouncing ideas off of each other in the virtual world.  Mostly they are his ideas and I add some thoughts or questions here and there.  We had been playing with forming balsa props over the last couple of years, forming them in a 3D printed pitch form.  These work nicely, but are fragile.  We have used them successfully on NoCals – in fact, his Dauntless has one on it – and I had put some on my Peanut Corsair.  I was happy with the performance, but I kept breaking them.  We also flew them on models as big as Embryo.  His Indoor Embryo has one, but high power and outdoors was rather rough on mine.

Archie’s GeoEmbrysol with a formed prop

Well, this winter, Archie has been working on a new angle:  “3D Props” – yes, that’s what he is calling them.  He’s a master at layout in the 3D world and has been creating a wide variety of 3D printed props – from the very tiny (2.25″ diameter) to large – 10″ or so in diameter, including a few P-30-legal (because they are for sale) props.

a screen grab from my Meteoro test flight video showing Archie’s P-30 prop.

Also legal are his props for Phantom Flash – he has flown his to over 3 minutes indoors.  These were verified legal by FAC-GHQ.  His “Nickel Scale” 3″ prop is now the standard for this class, as all successful flyers at the Indoor Fling were using his props.  (You will see his Nickel prop later in this write-up.)

I have printed some of his props (as part of his “R&D team”) and I asked him for a replacement prop for my Corsair.  I told him I wanted a 4-blade with a 5″ diameter, 1.3:1 P:D, and 1/2″ wide blades.  You know – for that Scale Corsair look.  He sent me the STL and also printed one himself.  I put it on my Peanut and flew it around the arena with a happy smile on my face.

Anyway, his “3D Props” are great, in my opinion.  I know that he is selling them, but I don’t know what sizes or variations – or even the price.  Contact Archie Adamisin (he’s on Facebook).

ELECTRICS

As I mentioned before, I’ve been dabbling in Free Flight Electric Scale.  I put a Rookie power plant in my venerable HiMax Peanut and have had successful, if limited, flights.  The limitations are on the restricted space in which I must fly.  I haven’t had a chance to “wind it up” to full power and give it a toss.

But I got to talking to Archie – who also has experience in electric models:  he’s dabbled in e-20 FF, but has tons of experience in electric r/c pylon racing.  I had two issues with the Rookie prop:  1) it seems small and 2) it is meant for a pusher application.  Now, as I say in my info pack provided with the power pack, you can reverse the prop on the shaft and rewire the motor leads on the circuit board – not at all difficult.

But why bother, if you don’t have to?  And – how about a larger prop?  Archie designed a printed prop at 2.25″D x 2.25″P – oh, and it is going in the “right” direction, too.  I printed one and put it on the HiMax.  He designed a lower pitch prop, too, but I haven’t tried it.

But I wanted to do a second iteration of Electric.  I am choosing models I had retired from competition and this time I selected my Peanut Fike.  This gave me two opportunities: test the new prop and test the power pack on what I have imagined is the upper limit for the little motor and capacitor – 50 square inches.

Again, I drilled out the Gizmo Geezer nose button to accept a press-fit of the 6mm motor and I added a platform in the fuselage to accept the capacitor and circuit board.  I popped on the new prop and went out in the back yard.  Success!  It requires a bit more charge (8 seconds vs. 5 seconds) to max out my back yard, but it is a much better flyer than the HiMax.  (An aside – I’ve always liked the HiMax design and I have built probably half a dozen of them in various configurations, but the all seem “draggy” and their performance has always been less than anticipated.)  Of course, Fikes seem to fly in whatever configuration, but this was pleasing.

BRAINSTORMING

So, this Indoor season, I “dominated” the Nickel season, as I was the only one that could get more than 10 or 15 seconds out of their Comet Nickel models.  I was able to get 20-30 seconds – per flight – with my Miller Racer.  Archie’s 3″ prop helped stabilize the model and it also allowed my to reduce power from a loop of 0.063″ to a loop of 0.045″.  My loop was about 9″ long and I could get about 1200 turns in it – and that was good – until it wasn’t.

Tom Sova, an Indoor (proper) flyer from Toledo was showing up at our meets and decided to venture into Scale – and he picked the Comet Nickel Miller Racer as his firs Scale model (shocking – these are twitchy little beasts).  Tom surpassed my times and then at the Indoor Fling, I took third place behind Tom (2nd) and Don Slusarczyk (1st).   My “dominance” was over.

The biggest issue for me with these tiny planes is the thrust adjustment.  My shims are always sloppy and temporary and just don’t work.  Here’s a confession:  I am addicted to the Gizmo Geezer nose button.  As Eli Manning says “I put that s&!t on everything” – except tiny planes.  They are just too big for tiny planes – in diameter and weight (1g).

Well, the brain was storming this week and I came up with a solution.  I have developed the VPS Lightweight Adjustable Nose Button.  There’s no secret in the inner workings and I fully acknowledge that I am standing on the shoulders of the giant that is Orv Olm.

Working through Thursday and Friday, the ideas just kept popping and I now have four iterations of this little gem: generic, a custom nose block for my Miller Racer, Phantom Flash, and (something I’ve been wanting for YEARS) NoCal.  The generic version plugs into a 1/8″ hole (the standard I cut for my kits – based on the Peck Nose Button size) and weighs 0.34 grams – 1/3rd the weight of the Gizmo Nose button!

My Lightweight and the standard Gizmo

the generic weighing in at 0.34g

three variations plus the standard Gizmo

My Miller Racer with a 3D -printed Nose Block AND integrated Lightweight Adjustable Nose Button – oh, and Archie Adamisin’s 3″ Nickel prop.

The printed nose block with integrated adjustable nose button allowed me to remove all the ugly shims off the nose of my Miller Racer and produced consistent left hand climbing circles of 20+ seconds until I popped the motor.

Neither the Phantom Flash nor the NoCal have been installed yet, but I expect great things.  The NoCal version is 0.4g and the PF is 0.5g.

I have really been wondering if I should even mention these, but excitement (and pride) got the better of me.  I do not know if I will be selling them – “why” you ask?  Well, they seem to print ok (sometimes small parts can have a rather high rejection rate), but the real reason is that they take about 10-15 minutes each to assemble.  So what is the cost?  Ten minutes to print, 10 minutes to assemble – that’s a lot of time – and I don’t want to saddle myself with producing 100 of these (I like “inventing” but “production” not so much).   They take 12 holes drilled in four different sizes, three holes “reamed” and three holes tapped and then assembly and gluing.  One thing is for sure – they won’t be any less than the Gizmo Geezer nose button.

So, it has been a busy week!  Now I’ve GOT to get back on the Focke-Wulf 189.  Essentially, all that is left is to cover and assemble it.  I’ve got to get it done before June due to family events in the beginning of June.

Posted in Builds, Products | Leave a comment

New Products – ELECTRICS and Tissue Paper

Three new products:  Peanut Electric Power Packs and Asuka Tissue in Blue and White.

Firstly, As I have run out of Esaki, I now have Asuka Tissue in White and Blue (Black is on back order).  The white is Bright White and the Blue is very close to Esaki Blue.

Next, I have taken delivery of the Electric Power Packs from WSAT in the Netherlands.  These are the power packs in “the Rookie” model.  I have used for Peanut Electric Free Flight.

Here is the product link.

Here’s a video of a test flight on a rather breezy day.


Posted in Products | Leave a comment

NEW PRODUCT – Meteoro P-30 Short Kit!

I’m not a big P-30 competitor; I only fly in 2 or 3 informal P-30 events a year – if that many.  However, I love Rubber-Powered Free Flight and when I see a model with style, I like it, whatever the event category.  If it has twin tails, I’m usually hooked.  If there is some “swoopiness” beyond mere basic functionality, that’s a definite plus.

So when I’ve seen photos of Omar Grassetti’s “Meteoro” P-30 online, I was attracted to it.  I contacted Mr. Grassetti (he’s in Brazil, but “online” is just like around the corner) and he emailed me the plan and gave me permission to kit the “Meteoro”.  I drew up the parts over the winter and built the model last week (started it on Tuesday, finished it on Saturday).

With a geodetic wing and tail and sheeted fuselage, this builds to a VERY strong P-30, mine is a little heavy at 50+ grams. Mr. Grassetti indicates he designed it for windy conditions. With nearly 125 square inches of area, it should have no problem soaring into thermals.

I adjusted the wing for best glide, gave it 50 winds in my back yard, and watched it climb, transition and glide clear across my yard into the woods.  I am sure this will get up and go with the best of them – or at least, with the best of who I fly with!  I hope to give it a real test this weekend, if the weather cooperates.

You might notice that this sport model is not in my standard Black/Red/Yellow livery for sport models.  That is because There is a certain cartoon that is entitled “Meteoro” in Spanish – Speed Racer.  So I’ve colored this model like the famous Mach 5 and even integrated the “M” into my model’s markings.

I’ve made Mr. Grassetti’s drawing fit better on my printer, added some comments, translations and annotations, created a supplemental instruction sheet, and produced 6 laser-cut parts sheets.  You will have the option to add a Gizmo Geezer P-30 Prop Assembly.

You can find the Short Kit HERE.

Here are some build pics – not many as it built fast.

Posted in Builds, Products | Leave a comment

Weekend Update – Small Steps and Small Successes

It seems like forever since I posted, but the calendar says its only been 10 days.  I did take a bit of time off to visit my brother in Alabama.  Then, I had to concentrate on filling orders from those days off (still not all caught up).  Also, I’ve been a bit stalled on building.

I had one boom of the Jumbo FW-189 done and – part of the reason for the building stall – I had a particular jig set on the building board to put the boom sides together.  I didn’t want to tear that down because I knew it would be better to leave it and build the second with it rather than tear it down hope that I could put the second boom together the same way with a different jig.

So, nothing on the building board changed.  Therefore, I could only build if I didn’t disturb that setup.  And the only way to do that was small projects.  I think I did a JetCat between building “booms”.  Haha, no building booms so far this year; I’ve been pretty slow.

Anyway, I decided to build that second boom this weekend.  The jig worked great.  I started on Saturday and – slow and steady – finished up on Sunday.  Now, I just need to build the fins and a new, finalized, cabin and I can shift gears to the second half of any build: covering and final assembly.

two booms, the wing center section, and test cabin #3.


I’ve been slowly working on another project.  This one has been on-going for years – since at least 1994, maybe longer.  It is one of my favorite planes – Johnny Livingston’s 1933 Cessna CR-3.  This will be an 18.5″ span model.  Why that size?  That’s a slightly-involved story.

A few years earlier, I had built Tom Nallen’s Livingston Monocoupe Peanut model.  That got me into researching the Monocoupe, Livingston, and the CR-3.   I learned that over the years, Livingston had done many, many successive (and successful) modifications to the Monocoupe and it became a very potent race plane.  He then replaced it with the CR-3.  He did two things that influenced me:  1- the wingspan of the Monocoupe ended up pretty close to 24′ – which would convert nicely to 24″ – making a nice model, and 2- he took the motor from the Monocoupe and had Cessna build the CR-3 around the motor.  The CR-3 came out close to 18.5′ span, so continuing with a 1′:1″ scale, 18.5″ would be the size for the CR-3 model.  Wouldn’t it be great to have models of Livingston’s racers; the Monocoupe and the CR-3, in the same scale?  (P.S. I have collected 13 pages of photo documentation of changes Livingston made to the NR501W Monocoupe over the years he owned it – too much?)

I still have plans to do both, but for some reason, I’ve pushed the CR-3 much closer to the front of the build list.  I have been re-working the old plans for years.  I hope I am moving in the right direction.  The old plan certainly had potential:  Paul Boyanowski built the prototype back in ’95 and it flew great, winning its first contest.

Anyway, how much nose weight will the big, round-engined, short-nosed model need?  I am hoping its around 10 grams.  It is completely backwards to start a build there, but here is why I ask.  Here is another project that worked out this weekend – the dummy Warner Scarab engine for my 18.5″ model.

It all started with this photo of the original nose of the plane.  Notice the simplicity of the engine installation:  simple cylinders, a simple cover over the crank case, and simple baffles between the cylinders.  I like simple – and usually can do simple.

Next match the simple real to the simple model.  I only need to do half an engine – the front half.  Figure out how to lay out the cylinders and the crank case and how to integrate  a nose plug into it.  Not terribly difficult (remember to keep it simple).  All that was left to do was to convert the two-dimensional line drawings into 3D printed parts.

I made one and it ended up about 10.3 grams with the Gizmo Nose Button front half.  I decided to try again, thinning the parts as much as I dared to make them lighter.  I saved over a gram on just the seven cylinders and 2+ grams overall.  Attempt #2 weighs 8.1 grams.  I need to make a new nose plug and I might be able to trim a little off of that, too.

I will admit – that’s a funny place to start on a flying stick and tissue model.  Maybe I will get to the rest someday!

glue the cylinders to the crank case

first attempt finished

attempt 1 on the left, #2 on the right

attempt 1 on the left, #2 on the right

finished #2

I think that will work for the model – it seems like a good representation of reality

Posted in Builds, Products | Leave a comment

I’ve Got the Power! Electric Scale

I am a dedicated rubber-power guy.  I don’t do gas; I’ve thought about compressed air and CO2; and electricity just seems to be too hard (assembling circuitry isn’t for me).

But a year or so ago, Vincent Merlijn, in the Netherlands, put out a foamie Free Flight kit he calls “the Rookie”.  This looked simple:  the motor and circuit is pre-assembled, the storage is a capacitor soldered to the circuit board, and you simply charge it with a 3- AA Battery unit.  Plug the battery pack in, wait a few seconds, unplug and launch.  What could be simpler?

Immediately, I thought of powering a Peanut with this unit and ordered some.  When they arrived, I took a look at them and set them aside.  I was still a little intimidated and unsure.

Well, yesterday, I decided to do this project and try to get an existing Peanut retrofitted with the drive train and give it a test.  I chose my Peanut HiMax.  The 10g model never really flew like I wanted it to – probably a result of an improperly matched prop and rubber combo.  And, unless they max regularly, high-wing Peanuts are generally not competitive in FAC Peanut.

So, I took the model off the pile (of old models – yes, it is a true pile of models; one of several around the house) and started to do surgery.  The first step was to mount the motor.  I measured the diameter of the motor (0.237″) and selected a #1 drill (0.228″) and a new Gizmo Geezer nose button and carefully drilled out the front half of the GG button.

This allowed a press-fit of the motor into the nose button and I could swap out the existing GG nose button for the now-electric nose button on the HiMax nose block.  I used the GG nose button because I love the how it makes thrust adjustment so simple.  If it works for rubber power, it will work for electric power, too.

Next was mounting of the circuit board onto the model.  A little bit of thought had to go into this.  I wanted it as far back in the model as practical (the model was nose heavy).  Also, the charge socket had to be accessible and I wanted it to be on the bottom of the model.  I knew the charge system was “instant-on” – once I unplug it, the motor is going full speed and I need to launch.  So I had to consider exactly how I was going to do this (hold the model with my right hand where I would to launch, plug in the charger with my left, unplug and toss).

I cut a hole in the tissue, and made a sheet base to hold the circuit board.  Then I ran the motor to the nose and glued the board in place with CA.  Through some trial and error, I glued the noseblock in place and just had the GG button as the removable part for assembly (temporarily removable – friction fit).

the first (unsuccessful) board installation. plugging in broke the board off the mount so a new platform was made (not shown).

My first venture to the back yard was a 50/50 success:  it would take a charge and powered flight was achieved, but I did a terrible job of solidly mounting the circuit board – the insertion force of the charger broke the mount.  Back inside and re-engineer the mount.  It took some time, mistakes were made, but I now have a solid mount.

you can see the nose of the motor in the GG nose button. Also the tiny prop that pulls the plane around. This is about 1.875″ diameter (48mm?)

After a couple of partial charge flights, I was able to get a climbing turn dialed in and managed to fly off my tiny field into the surrounding pine trees about 30 feet up.  After much persuading with my pole, the model came down, but suffered a good deal of strut damage.

what happens when you are not careful with the Thin CA. Apparently, it wicked into the charge port and it refused to switch from “charge” to “run”. The LED shows it is charged, the charger is unplugged, but the prop is not turning!

I now have an electric-powered Scale Free Flight model! The power unit weighs in at about 4.5 grams.  This was a 10 gram model so all-up weight is now 14.5 grams.  With 32.5 square inches, this works out to be a 0.45g/sq.in. wing loading – not terrible.

I will say this:  for all of my worries, this was an easy project.  Of course, except for the new thrust settings, the model was already trimmed.


Posted in Builds | Leave a comment

NEW PRODUCT – Fleetwood Flyer Old Timer Short Kit

I decided to take a short break from my Jumbo Focke-Wulf to build a tiny Old Timer – the Fleetwood Flyer.  This was one of seven “Victory Models” designed by Louis Bucalo in the war years.  The wing is the same dimensions as the Shaft, but has a different dihedral setup.  This model was published in the August 1943 Air Age magazine.

It is a very quick build with the longest part being the amount of time it takes for the rolled tube fuselage to dry (one day).  One curiosity was how to attach the single wheel landing gear.  Here you can see the original plan and one of the article photos of the prototype.  Note the photo seems to show a double wire strut.

I decided to 3D print a Landing Gear saddle.  It has a hole and a notch to accommodate the single wire.  The test print worked very well; exactly as designed.

I will provide two sheets of laser-cut parts:  one sheet (1/16″) has all of the ribs, the wing tips, trailing edges, fin parts, wheel discs, and wing pylon.  The other sheet (1/32″) has the tail cone, the tail winglets, and the blank to roll the tube fuselage.  I will also be providing the 3D printed LG saddle.

I did move the pylon forward to better locate the CG properly and efficiently.  The new, optional location is shown on the plan.

my prototype turned out to be a pretty-light 10 grams!

Below is a short video of a test flight.  It doesn’t make 20 seconds, but you can certainly see the potential.  I was running out of flying space on the breezy day and didn’t want to push my luck.

This model qualifies for FAC events:  2-Bit, OT Fuselage, and Victory Models (Pinkham HandbooK).  I will be flying it as my 2-Bit model at the local Cloudbusters events this summer – until it flies away, of course!

You can find the product HERE.


Posted in Builds, Products | Leave a comment

NEW PRODUCT – Comet Fokker D.vii Dimer!

My recreation of the Comet Fokker D.vii Dime Scale kit A26.  I have had this kit on the drawing board list for several years and I finally bit the bullet and did it up this winter.  I finished the plane in January, but weather prevented me from test flying it until today.  I was able to get some successively better test flights out of it with a high time around 38 seconds on roughly 600 turns on a loop of 1/8″ rubber.  The prop is a Peck-style 7″.

The tissue is representing Lothar von Richtofen’s plane.  Of course, for Dime Scale, you can simply go with Comet’s recommendation – all red.  This tissue template is available for free download on my Tissue Page.

You can get the Short Kit HERE.

One of the things that worried me was mounting the wings.  I’m not a builder of biplanes, so my experience is limited.  I designed a jig to hold the wing in place while the struts were mounted.  You can see it in the build photos below.

Posted in Builds, Products | Leave a comment