the AMA Nats and my Return to Peanut

My personal Contest experiences, with photos and a video.

Right after the FAC non-Nats in Geneseo, NY last week, we had the AMA Nats in Muncie, IN this week.  That makes for a busy and tiring two weeks.  EIGHT dedicated FACers made it to both events.  Besides Pat Murray and I, Mark Rzadka (NY), Clete Schenkel (IN), Mike Smith (OH), FS Gilbert (NJ), Doug Griggs (MD), and Duncan McBride (FL) attended both events.  Pat and I managed 16 FAC events under the NFFS management umbrella for the entire AMA Free Flight Nats.  Most events were well-attended with about 10 or so contestants in Dime, OT Stick, Embryo, and Jet Cat.  Three events could not award kanones:  Scale Glider (two entries), Simplified Power Scale (one entry – but others flew – I don’t know why they didn’t get times recorded) and WWI (essentially cancelled due to wind).

Wednesday was a spectacular day with light breezes and plenty of sun – and a mysterious mid-day chuck where the the air “looked” good, but was nothing but down (that lasted for about 2 hours).  Thursday and Friday were increasingly windy but generally nice days.

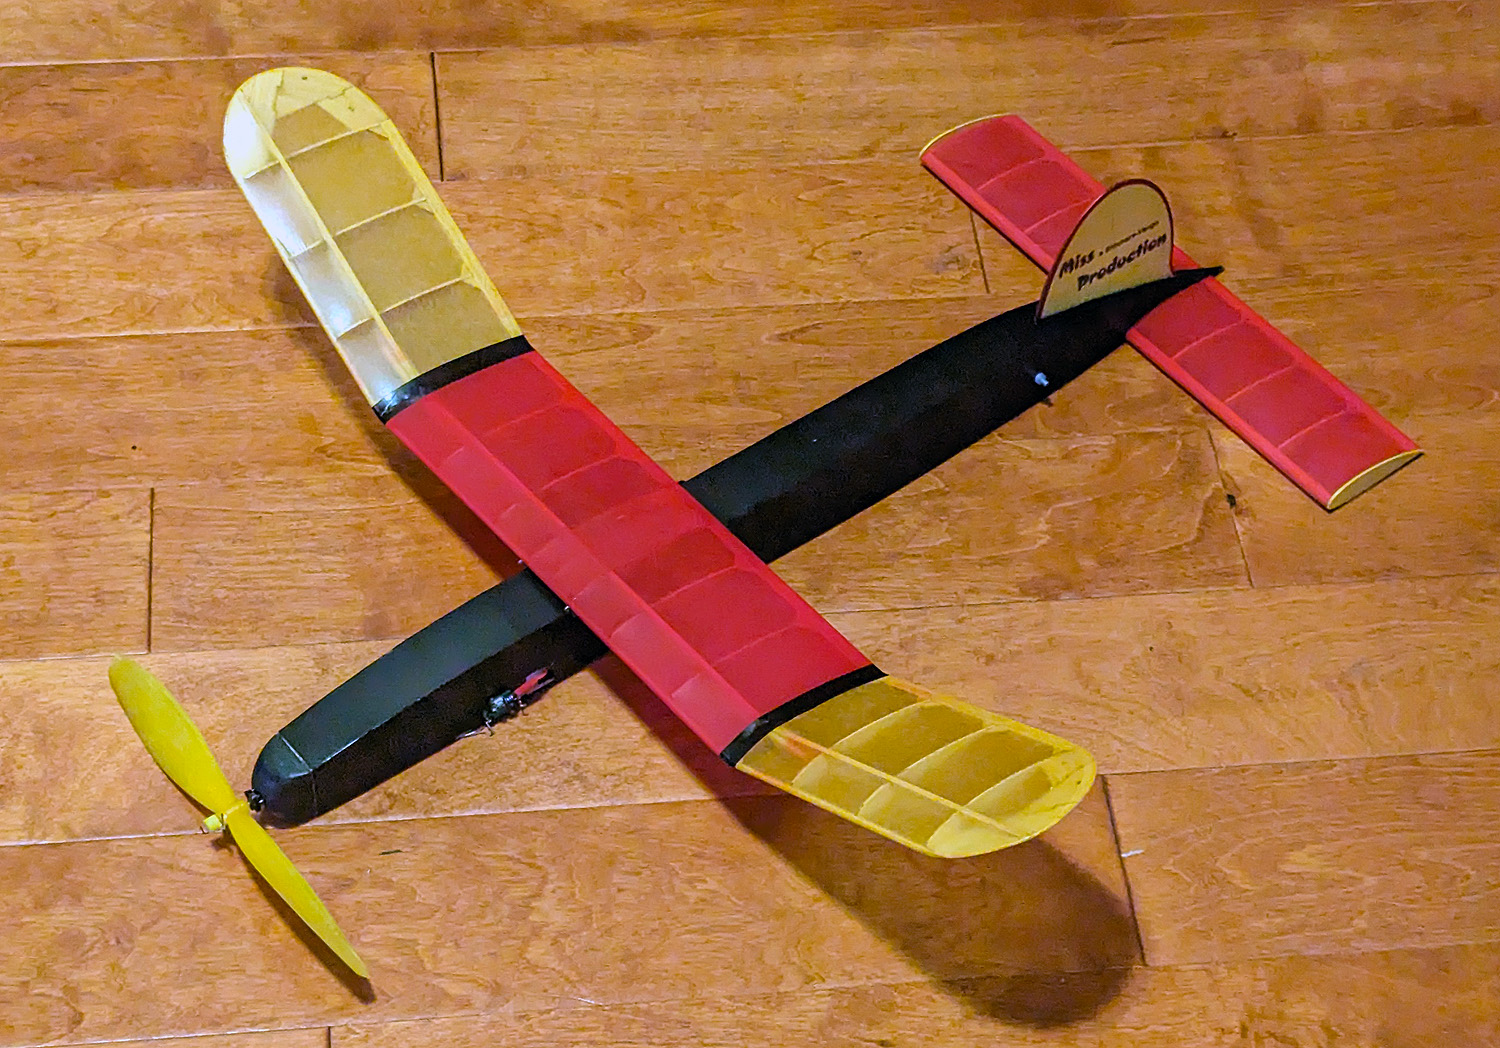
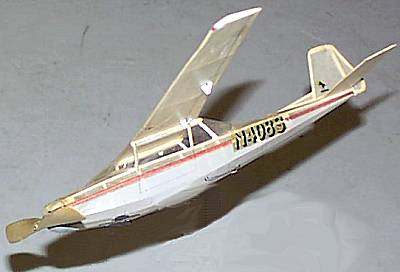
On the first day, I played with my Schweizer glider and placed first (out of two) with a best flight of 60 seconds.  My Dime Scale Bird Dog placed third on the basis of a max fly-away deep into the corn where I chose to let the battered plane rest in peace.  I tried twice to max out in OT Stick with the Holy Ike and the Miss Production, but this was in the “down air” time (which was verified by other Free Flighters on the other end of the field).

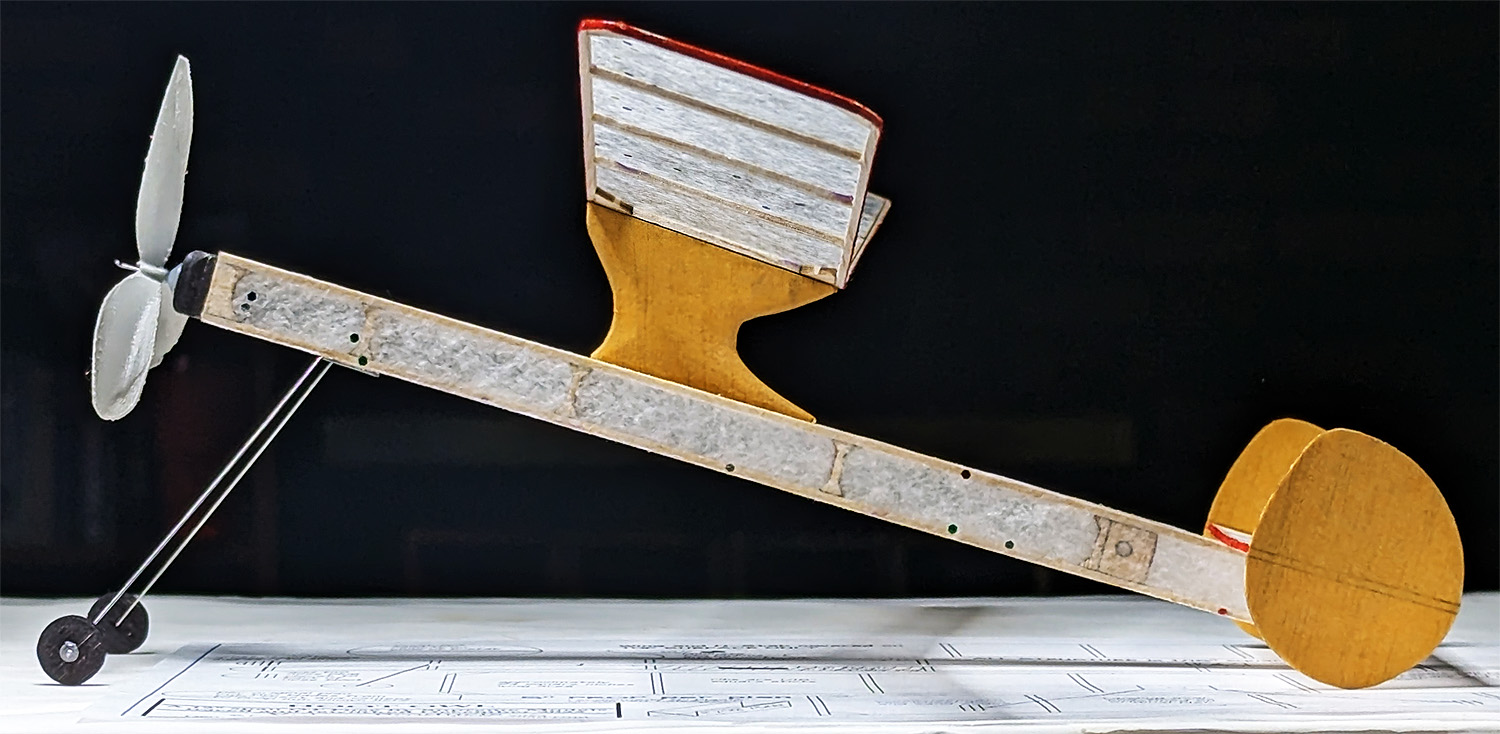
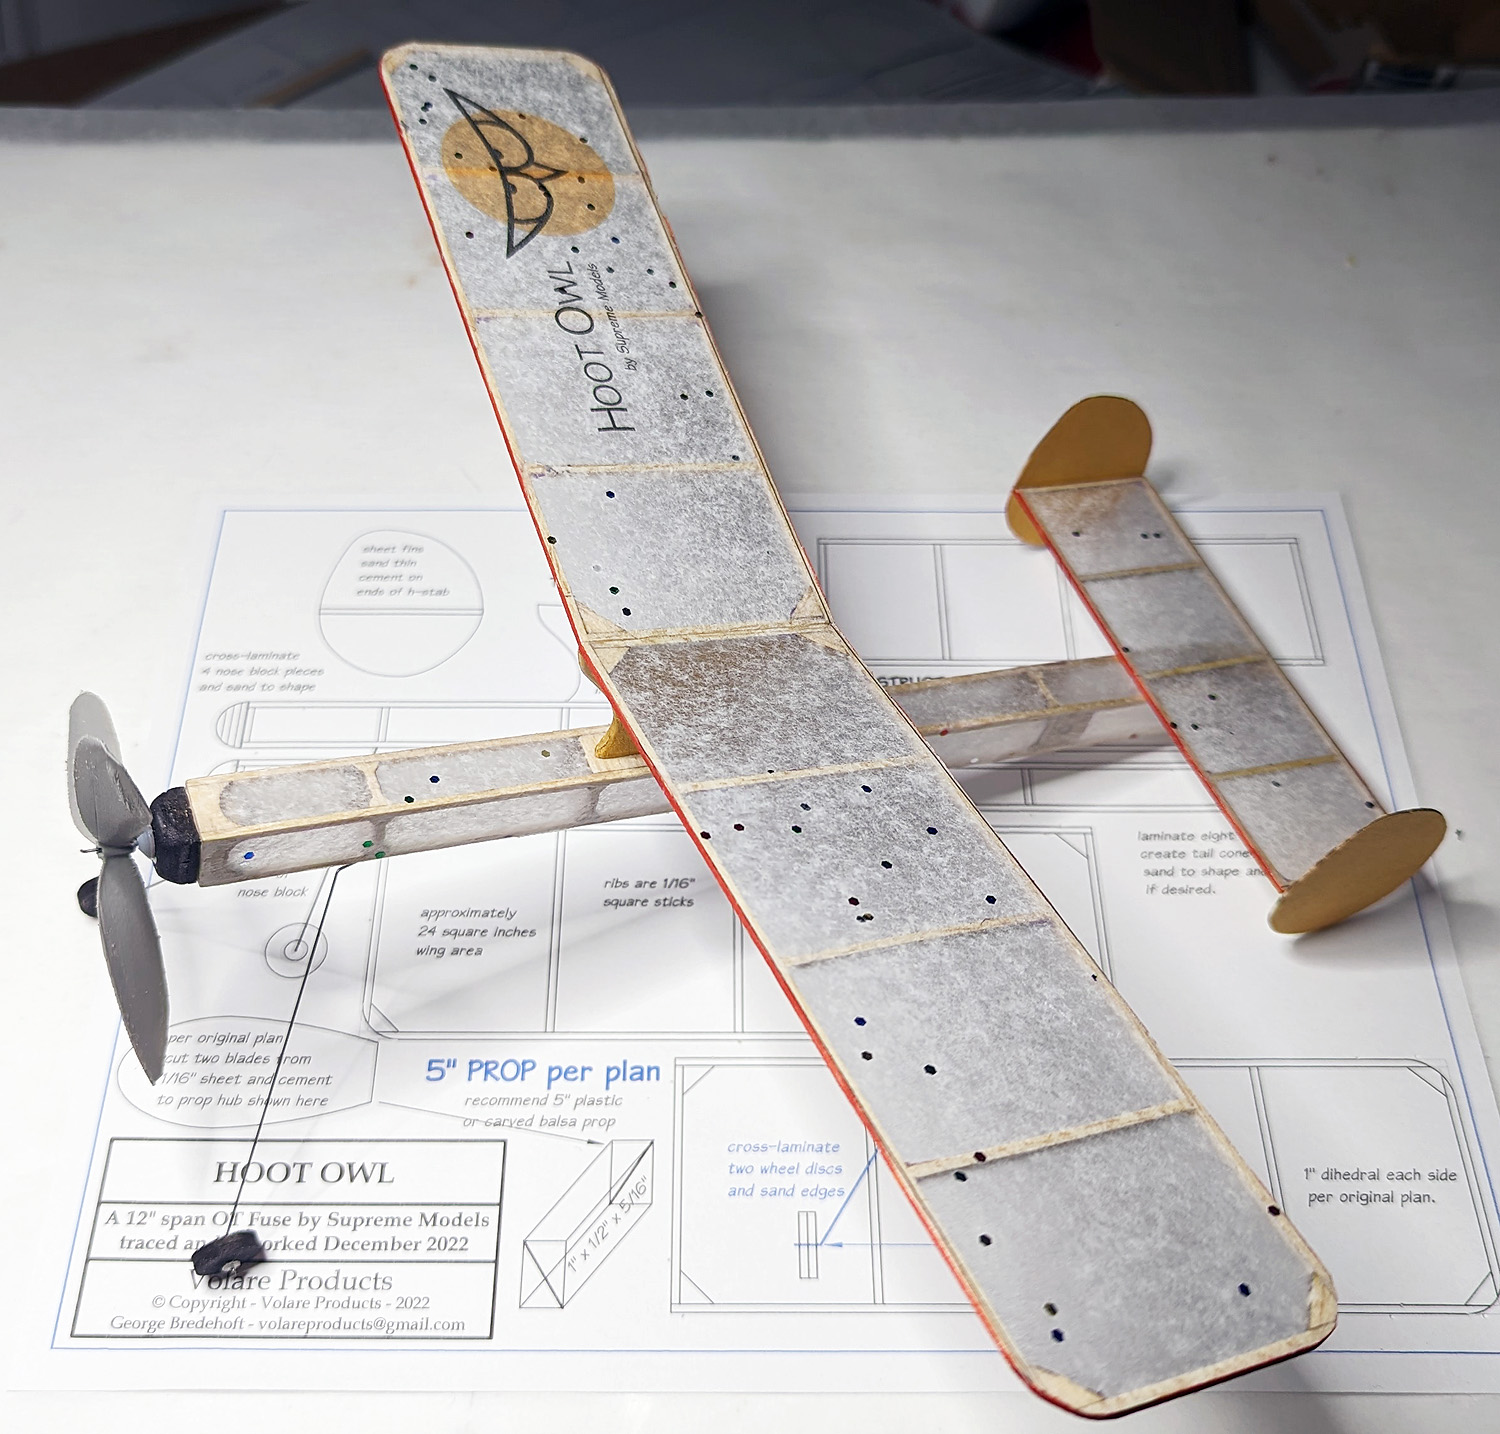
On the second day, I did triple-max in OT Fuselage and beat Pat Murray in a two-person fly-off.  The windy conditions prevented others from achieving triple-maxes.

Friday, the third day, seemed to be destined for little action as the day started windy and it just kept blowing.  People were likely to choose not to fly and some people even went home in the morning.  Some of my Friday planes were broken on Thursday and I wasn’t going to chance my Jumbo twin Focke-Wulf 189 in the wind.  I would put up some Peanut flights, because I’m not “that” scared of the wind – haha (Peanuts bounce much better than larger models).

I had brought my 30″ B-52 (single prop on the nose) along just to push it to the limits.  It is battle-worn and on its last legs.  I built it in 2017 and have never got it powered correctly as it just limps along and stalls out.  The stalls cause damage on landing and, although it was designed with pop-off wings and motor pods, repeated rough landings were taking their toll.

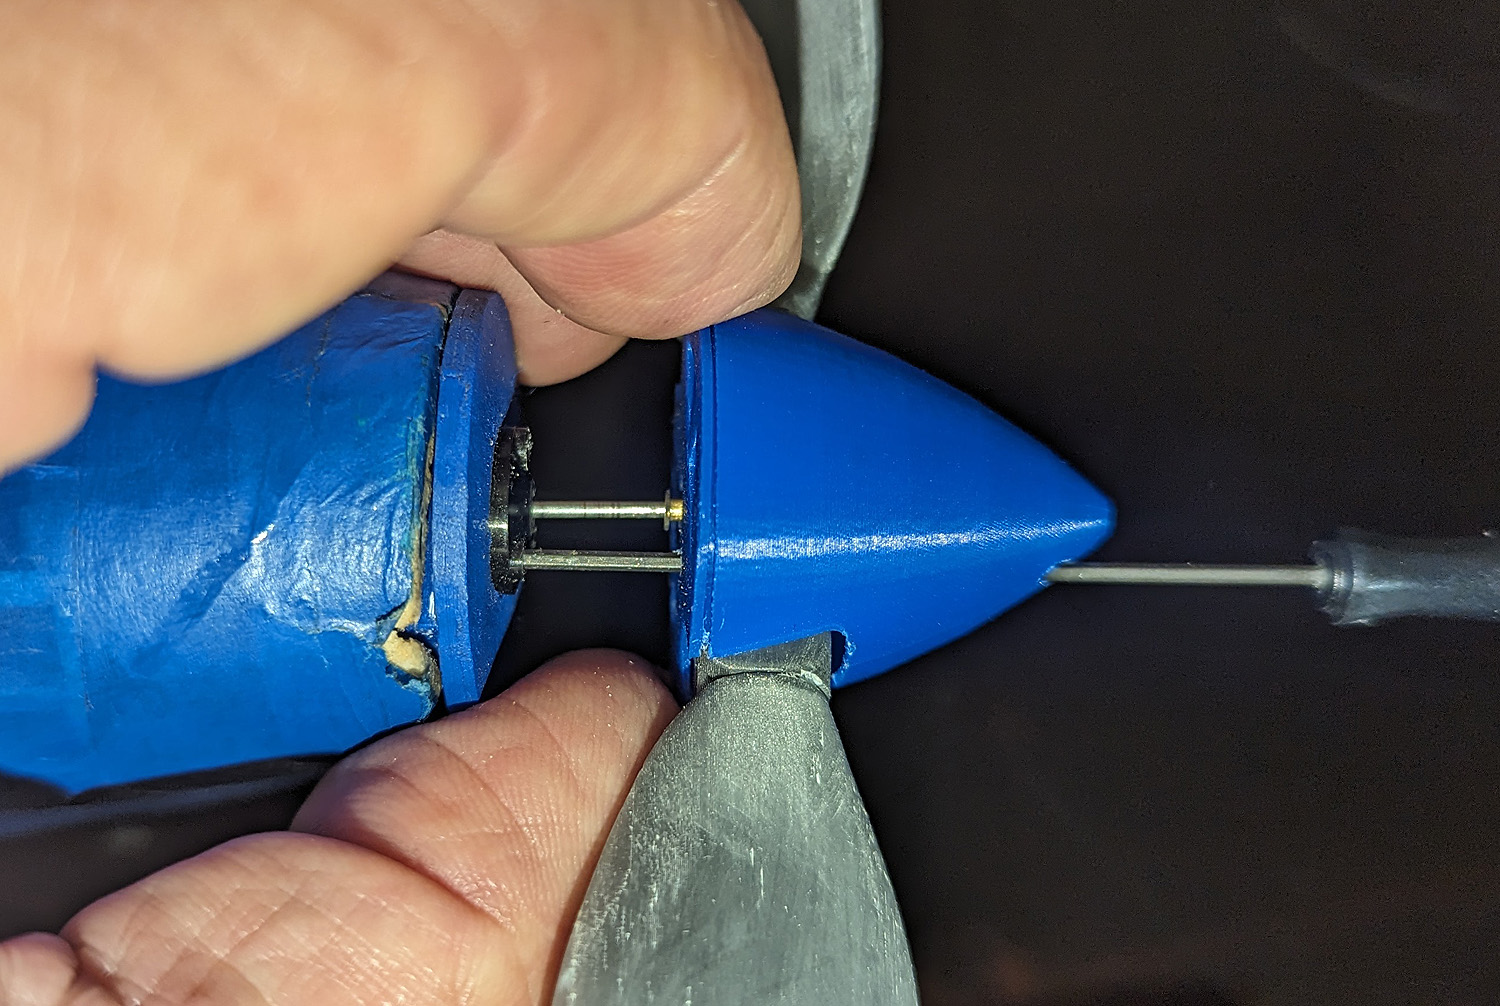
As I prepared for a flight, I broke the motor winding.  So I had to make one on the field.  The old motor had been made of multiple loops of 3/16″ and I didn’t have any in my box, but I did have 3/32″.  Sometimes, making motors on the field in not the best practice, even for me (they are now calling me “Field Motor Marshal” since I am seemingly always making motors on the field) and I got confused in the conversion from loops of 3/16″ to loops of 3/32″.  I got the loops right but the length was way short.

During this motor making madness, I realized that 4 loops of 3/16″ is the same size motor that I use in all my OT Stick and Fuse models!  I needed to wind ti to the same torque values that I do in those events.  I installed the short motor and wound it to “5” on my winder with is about 20 inch-ounces.  I walked out into the clearing and faced the wind and gave it a nice level launch.  Oh wow – the thing went up flat and fast – so much better than ever before!  It got sky-high but the motor ran out – but it glided down to a nice soft landing 36 seconds after launch.

Being the smart guy I am, I immediately dug out my Hep Cat and took the (longer) motor out and put it in the B-52 and wound it up.  I noted that one of the 6 loops of 1/8″ was broken, but that was ok with me – I wasn’t going up to max torque (“6”) so this motor would do just fine.  I wound it and got about 1200 turns (previous short motor flight was about 700) – this was going to cruise nicely.

Again, I launched into the wind and the climb-out was fantastic.  It got way-high again.  The speed, etc. caused one of my slip-in jet pods to fall off early in the flight (after the flight, Tony Ross virtually walked right out and found the stray pod!)  As the big bomber came around into the wind, something upset it – it did a slight nose up and it descended in a high-speed vertical dive from altitude.  This ended the future of this model.  You can watch a not-very-good video here:

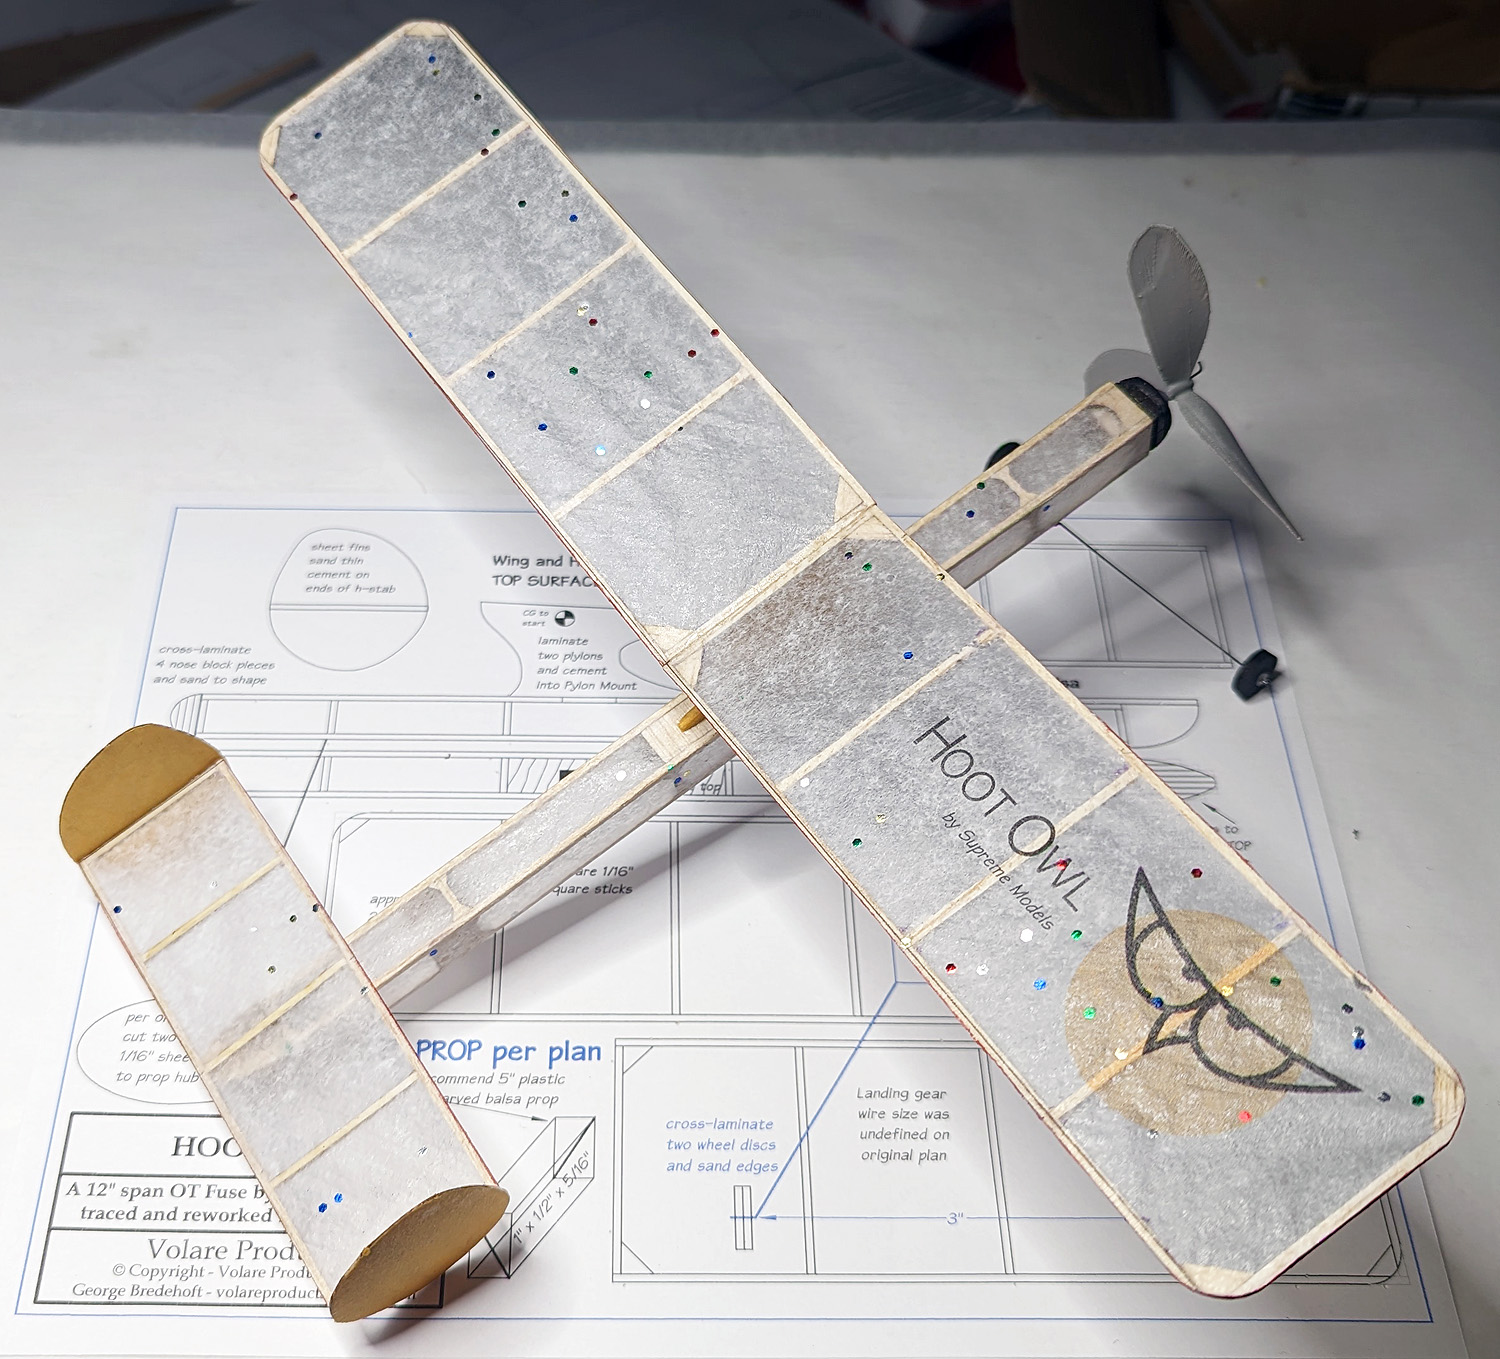
Peanut was another story.  I entered my trusty Corsair, but apparently it doesn’t like the wind and failed to make any impressive flights and Pat Murray was winning with his little Fairchild.  FAC Rules allow for a second model, but I had to choose which one.  I tested my Aircraft Design Stallion but it was rocky and unstable in the wind.  I then went with my BD-4.  It has a much larger wing and behaved much better, but still I tweaked it a little.  I wound about 2500 turns into the 1/16″ motor and walked out to a launch site and waited.

Pat waits often, checking for thermals.  I didn’t use any electronic aides, but was just trying to feel the air – in that stiff breeze.  I told Pat (timing) “I don’t know if this is good or not, but I am going” and launched it.  The model dutifully climbed up circling and eventually found to lift. It went higher and higher and farther down field and I chased it on the bike.  Finally, it started severe porpoising, like the motor came off the prop shaft and went to the back causing a tail-heavy condition.  That was probably a good thing, as the 7-gram model eventually fluttered out of the thermal and down to the ground – at 2:54 – a max.

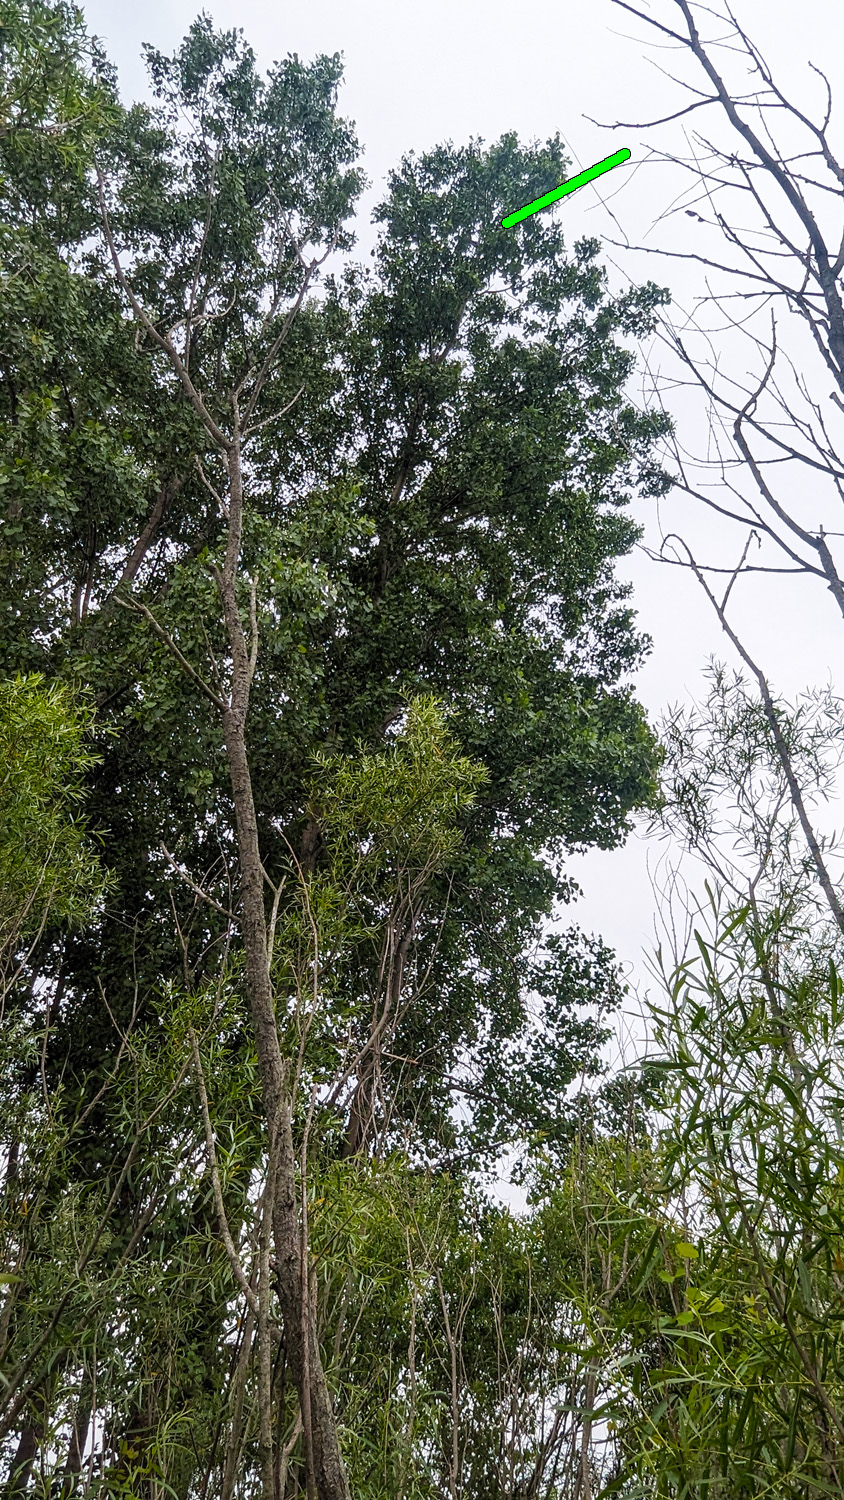
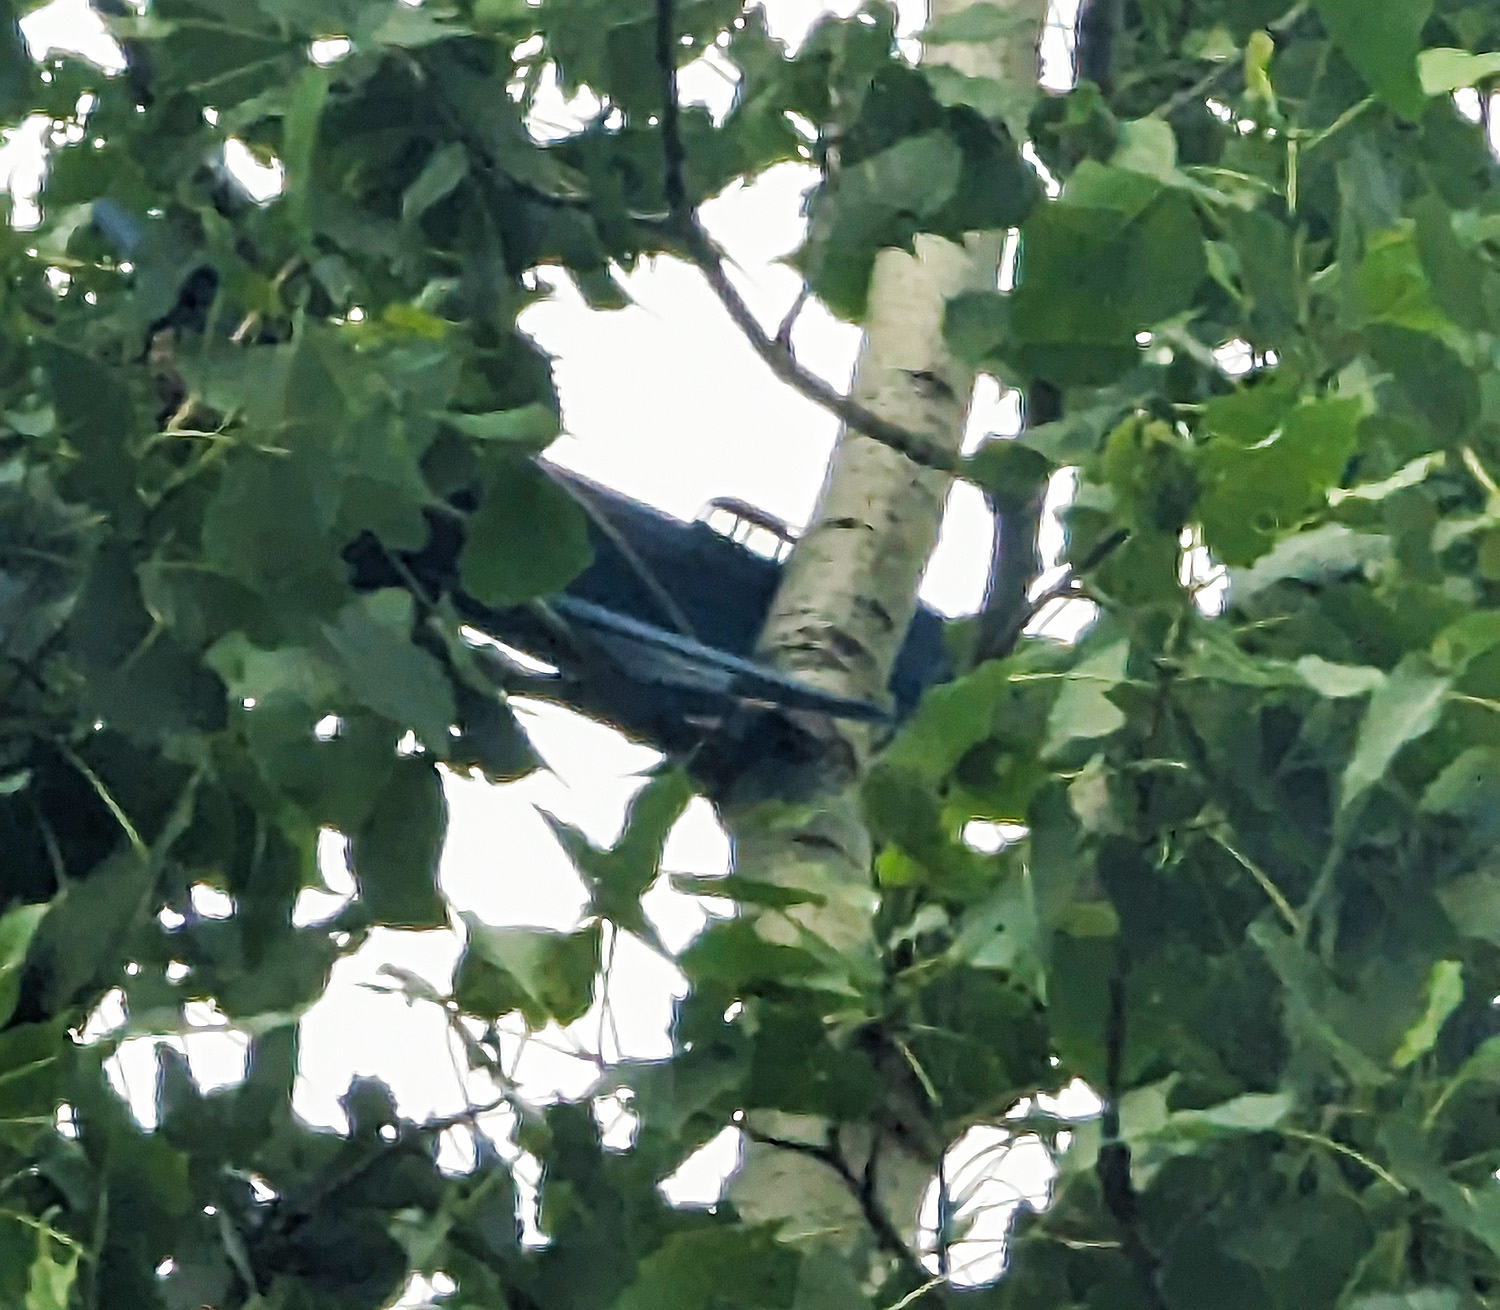
Maxes are hard to get in these conditions and I was feeling a little confident.  Pat got out his second model and was going to fly it.  I had judged his Witt’s V racer and we had the same scale scores – he would have had more, but he didn’t have a spinner (!)  Still, he would need a max to tie me and, while the plane had maxed before, it would be hard in the wind.  I noted that he was struggling to get good times and went off to talk to someone else.  When I turned around, two guys in the pit area were looking far afield with binoculars.  Pat had maxed (about 4 minutes) but they felt he lost the little green and yellow model deep into the corn – or farther.  Uh-oh, he maxed and we were tied.

Pat returned WITH his model!  It had gone very far to the south, past the corn field, past the airport (!) and Pat, by a stroke of luck, saw it come down!

Neither of us wanted to fly again for fear of losing our models, so we decided to throw our fates to chance and agree to flip a coin.  Rick Pendzick has made some FAC coins for just such a purpose and Pat had one (the loser of the coin flip get the FAC coin as a consolation prize).  He let me call the toss.  Ugh.

This coin toss not only meant a Kanone in the FAC, but the winner of Peanut Scale at the AMA Nats gets their name engraved on the Walt Mooney Perpetual Trophy that is kept in the AMA Museum!  I had won this event at the AMA Nats in 2012, 2013, 2014, 2015, and 2016, but had been shut out since then.  I wanted my name back on that trophy, but now it was out of my hands.  Mark Rzadka had the coin and told me to call it in the air.  I called “heads”…

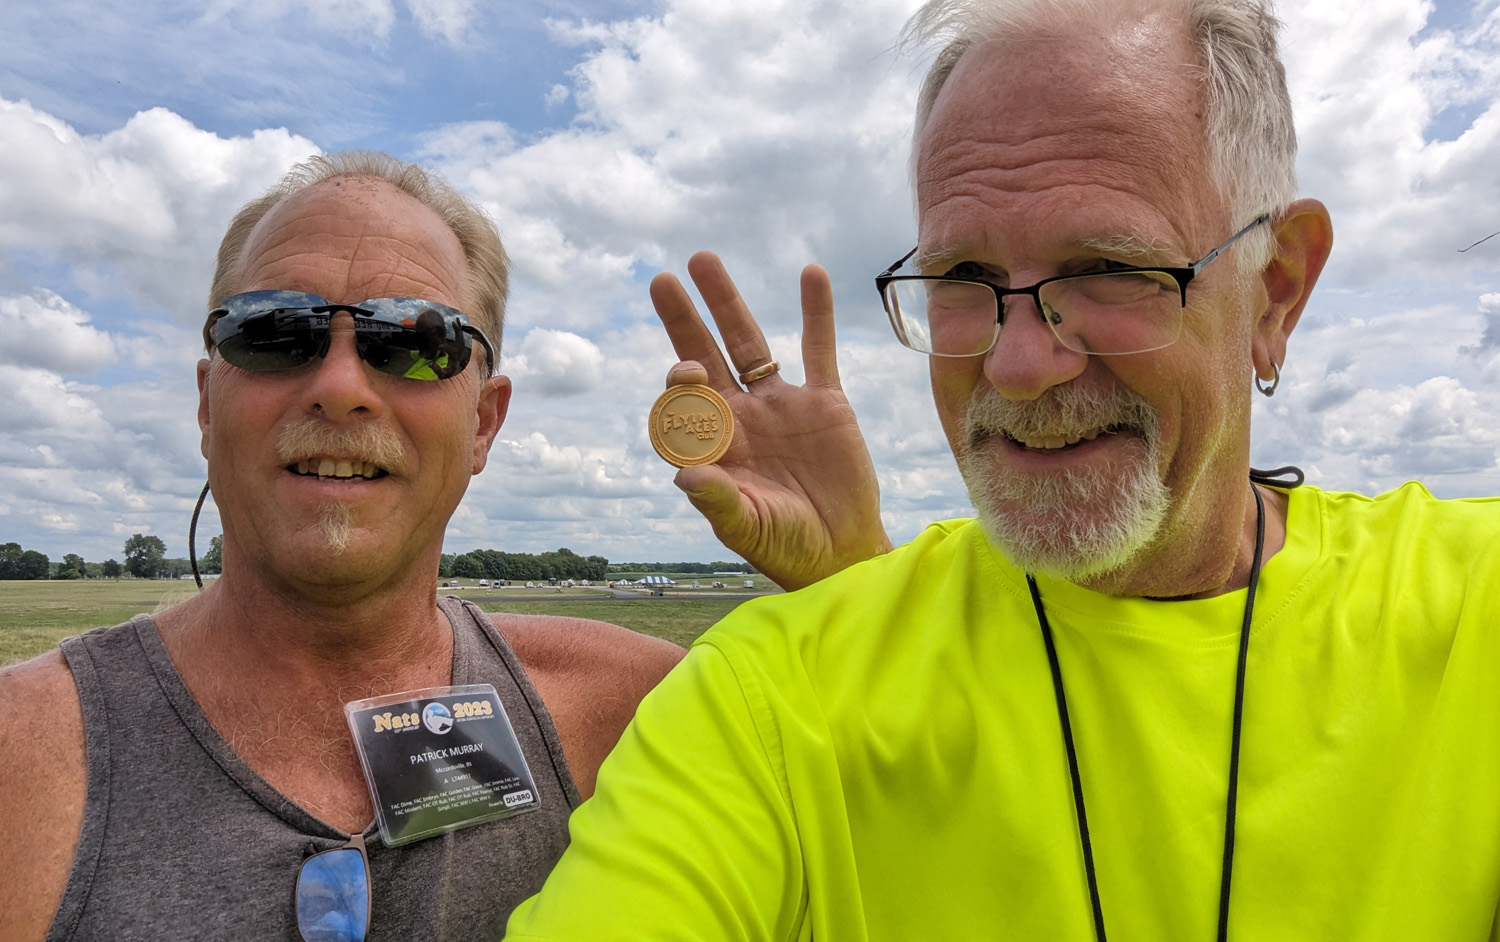
Pat Murray and I – with the FAC Coin – all smiles BEFORE the coin toss to determine the AMA Nats winner in Peanut Scale.

The 2023 AMA Nats Peanut Scale Champion with the Walt Mooney Perpetual Trophy


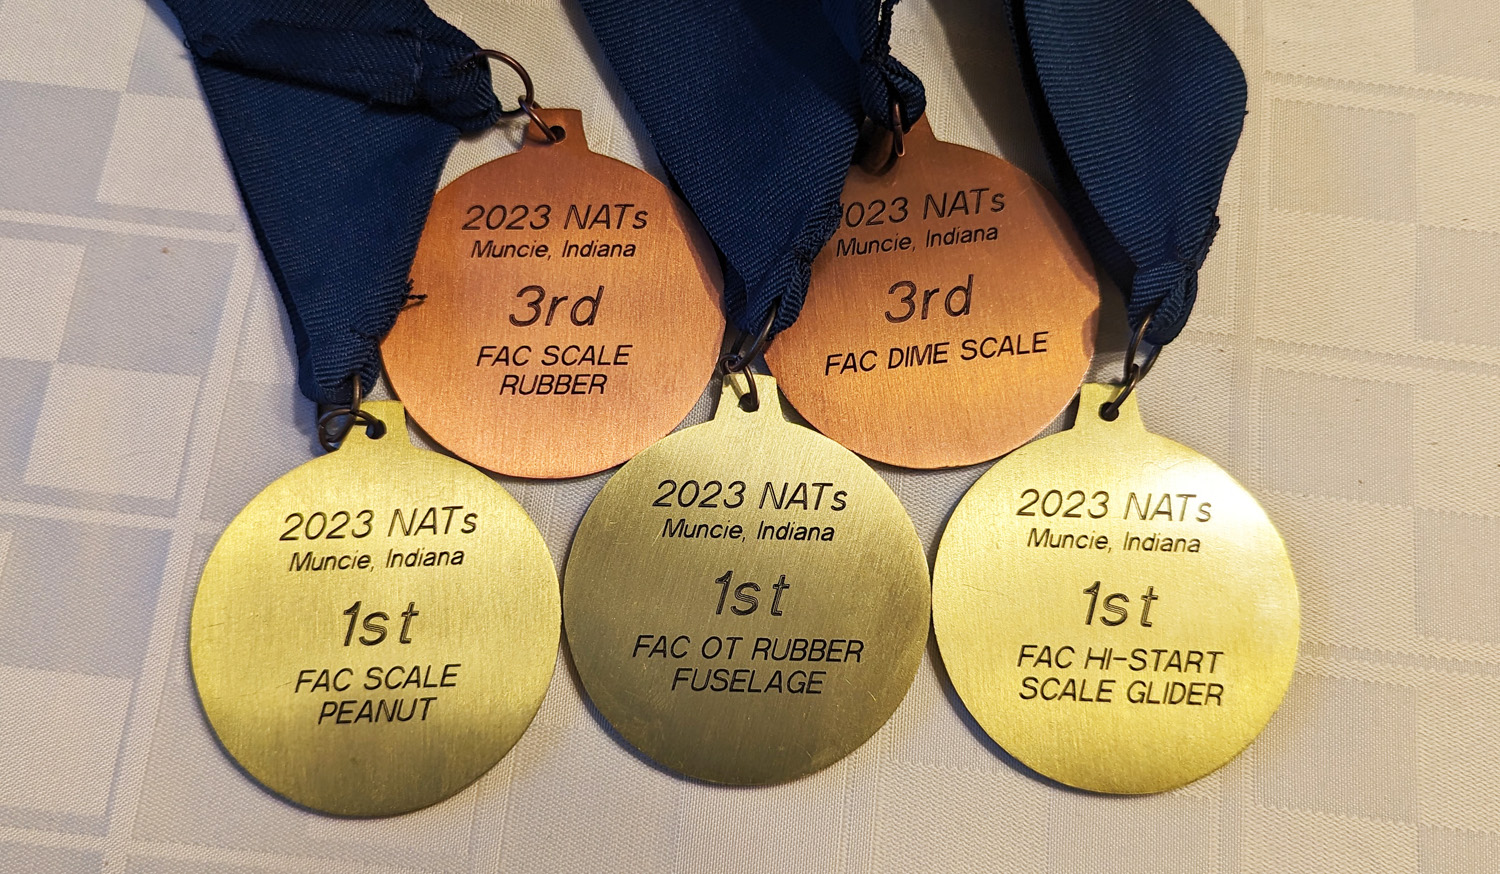
My AMA Nats medals: 1st in Peanut, 3rd in Scale, 1st in OT Fuselage, 3rd in Dime, 1st in Scale Glider

Posted in Events | Leave a comment

Testing a New Prop

My Elmendorf Special Racer – video below.

After I lost my Caudron, I remembered I have a nearly-new Elmendorf Special to fly.  I had built this light-weight for Indoor Flying, but that never really worked out.  So, maybe I could get it to fly for the Greve Races in Geneseo.

The Elmendorf Special was the Keith Rider R-5 in its original livery.  Later, this plane would be more famously known as the Jackrabbit.

I developed a kit for the Elmendorf immediately after I created the Jackrabbit kit from the Tom Nallen plans.  There were only minor changes from one to the other, so why not create the two versions of the same plane/plan?

I am really liking these props that Archie and I are printing.  I decided to try my “embryo” prop on this model.  Basically, it is a 7″ diameter, 9″ pitch, 1″ wide blade printed prop with a Larrabee profile.  I “guessed” at the blade cross section where the spinner would fit and put those cutouts in the printed spinner.  It all looks good, at least.

So, last evening, after recovering from our son’s wedding the night before, I got the 16″ span racer out, complete with its “indoor” motor – a loop of 1/8″ rubber.  After a few test glides/flights, I had added a lump of clay to the tail to balance the heavier prop and changed the thrust in the Gizmo Geezer nose button and had some success.

Here is a test flight on about 700 turns.  I am still pondering if I need to go up in power (it landed with a significant amount of turns) – or if this size motor will be good, once torqued up.  It just might be ok.  Next stop:  Geneseo.

Posted in Builds, Events, Products | Leave a comment

Planning and Preparing for Geneseo

Coming out of the McCook meet at Muncie (17/18 June), I knew I had some work to do on some models.  I had neglected repairs, etc over the winter and it showed when I went to Muncie.

One of the models that needed work was my Caudron C.460.  I only fly it in the Races (Greve or Combined) and only on big fields.  The last few times I have flown it, it has been first model out of the mass launch, usually flying downward and landing in about 5 seconds after half a circuit, if that much.  Frankly, it has been embarrassing.  This model won the 2019 AMA Nats FAC Scale event with a max, so it “can” fly – it just hasn’t lately.  At 50g on 88squares, it is a little heavier than I like, but when it is well-trimmed it gives a nice flat glide and is a pleasure to watch.

So I decided to “fix” the model before Geneseo.  One of the first things I did was to design and 3D-print a new prop.  I have been using a carved prop, but have had so much success with printed props recently that I decided to convert this model to a printed prop.  Archie Adamisin and I have been trading idea back and forth to create some pretty good props.  Two things that I have suggested and we have been able to implement are Larrabee profiles and folding props.  I don’t know that Larrabee shapes are “the best” but a) I like them and b) they seem to do as good as other blade shapes.  As for the folders, they sure save the nose of the model when landing.  The bigger the prop and the heavier the model the more force is exerted on the frame on landing.  I am sure we all have had noses torn out on less-than-perfect landings.  Well, hinged blades help reduce this damage.  Of course, in the FAC, the blades must not fold before landing – and these don’t – there is enough friction between the blade and hinge to keep them open while freewheeling.  Also, centrifugal force keeps them open, too.

Here are some images of the prop, spinner backing plate, and spinner that I drew up and printed for the Caudron.

Testing in the back yard showed that my Caudron was out of trim (we knew that from poor performance).   I changed several things:  tail weight added, decalage reduced, and thrust settings changed.  This was before much power could be added since my small(ish) back yard cannot accommodate big flights.

I headed for the Cloudbuster “contest” yesterday even though the wind was supposed to increase to unflyable by mid-day.  There was a little wind when I got there, but not terrible.  I set my DT to 60 seconds and got to testing the Caudron.  My initial setting needed more tweaking as I worked up power.  Again, tail weight, decalage, and thrust all needed minor changes, but it was flying again.  Winn suggested a small amount of weight on the right wing to flatten the attitude when circling to the left – that worked.

I upped the power again; maybe something like 1200 turns out of a possible 2000?  The prop pulled the model up into the wind – not fast, but gradually and purposefully.  It seemed to be just enough power to counter the occasional gusts that threatened to destabilize the flight.  The tip weight had opened up the circles to big-field size and the model slowly rose while going downwind.  It got higher than expected and was very far downrange when it looked like it hit near the top a large tree – I thought I saw a flash of leaves or something indicating it was in the tree rather than behind the tree.  Winn couldn’t tell – he lost it in the same tree, but didn’t know if it was in front, in, or behind it.

I went to find the model.  I crossed the airport, and then was finally at the tree on the third property, after passing through some rather dense undergrowth.  In fact the undergrowth surrounding the tree was about 12-foot high.  This would be a difficult search if it had not gone in the tree.

I gave the tree a glance, then moved on past the tree.  When planes disappear “in trees” they are usually behind (or in front), so I pressed on.  The bushes did open up a little beyond the tree, but still, you couldn’t spot anything anywhere – it was going to be nearly impossible to find the model, especially since it was so high when we lost sight of it – it could be anywhere.

I went back to a vantage point where I could see the tree and where I thought it went in.  This tree was something like 80 feet tall – maybe more.  I studied the “corner” where I thought the plane was for a time and then I saw some straight lines that looked unnatural for a tree.  I got my phone out and zoomed in – yep, there was the model – at an impossible height.

I went back a few hours later, after the wind had really picked up.  The model was still wedged into the tree.  I even took a video of how much the wind was moving the tree, but the tree wasn’t releasing the Caudron.  So that’s where it stays.  So much for a respectable flight at Geneseo.


Posted in Builds, Events, Products | Leave a comment

Summer 2023 – Unbelievably Busy

I don’t know how I am going to manage the rest of this summer.  All of a sudden, nearly every week from now until mid-August is occupied. Next week, I am visiting my brother, who is suffering from cancer.  My younger son is getting married at the end of June.  We are (hopefully) moving Superior Props north, some undetermined time between now and mid-July.  I have the FAC non-Nats in New York a week in mid-July, followed by the AMA Nats the very next week.  Almost immediately after I return, the Mrs has scheduled a two-week trip to Europe.

This will have a severe impact on my business.  Many of the exiting orders and any orders placed between now and mid-August will likely be delayed.  I will have merchandise at Geneseo and Muncie and if you want to place orders for pickup/delivery for either contest, go ahead – I will try to get them prepared.

Since I do kits pretty much on-demand, I may or may not be able to have kits ready for these events.  I will try my best, but understand, there might be significant delays in fulfillment.

If you have an order placed and cannot wait, I recommend you contact me and we can cancel the order.  If you can please be patient, I will do my best to get things sorted for you as soon as I can.

Apologies in advance.

Posted in Customers, Events | Leave a comment

New Products and Products Delayed

There are TWO NEW Short Kits and some other product news.

It is always a pleasure to see photos and videos from other modelers.  In Connecticut, John Koptonak does a great job of documenting the Glastonbury Modelers’ indoor contests.  While watching his monthly Facbook videos, one model caught my eye – Peter Kaiteris’ Crossbow Bostonian.

I contacted him and asked about converting the Bostonian to Embryo.  Just as we were starting out talks, the Bostonian plan arrived in my mailbox in the FAC News.  Peter and I worked to redesign the Crossbow to meet Embryo requirements and soon sent him a prototype short kit.  I have a strong urge to build this, also, but I have already built two Outdoor Embryos this calendar year and have yet to really fly either of them and my building board it packed with other projects.

But Peter was diligent and got right on the build.  He made a couple of suggestions and soon had a ready-to-fly model.  And boy does it fly!  Maybe you have already seen Tom Hallman’s video of the first day out with the Crossbow II.  It is amazing that on its first ROG test it puts in a max!  Under overcast conditions!  Here’s the video and you can find the Short Kit right here.

The second new kit was equally inspired.  I was surfing the web for a possible Peanut Subject (Scaled Composites Vari-Viggen) and ran across Frank Scott’s SAAB Viggen JetCat plan from a 1973 American Aeromodeler issue (OMG, that’s 50 years ago!).  I chatted with Michael Smith about possibly reprinting in his McCook Squadron newsletter (Frank Scott’s home squadron) and Mike told me he already published it – and had built one.

Well, I loaded up the plan and traced it in my CAD program and gave it a couple of enhancements to fit all the pieces together like puzzle pieces – and I added strakes on the bottom of the wing.  I build my prototype and flew it in the back yard.  It seemed stable, but unremarkable; I was getting about 10 seconds a flight.  I have a stack of built (and un-kitted) prototypes that get 10 seconds – they are disappointments and part of the frustration of the JetCat event for me – so 10 seconds was…meh.

But then I added a gurney to the rudder and it started to give some decent flights.  Importantly, (and in typical canard fashion) it didn’t like to stall.  I mean, if it was tail heavy, yeah, it pops the nose up and flutters to the ground.  But I have had several that would seem to glide well – until they got slow.  THEN the nose would go up and that would be the end.  This one showed none of that.  With minimal nose weight, it would keep the nose down and cruise, never lifting and killing the flight.

I started applying more power and various angles and soon I was getting 14-15 seconds in my limited back yard.  It would do a nice steep climb up and have a real nice transition into a flat, wide glide.  Very good.

I took it back inside and gave it a quick spray with Design Master Gray – and I printed and cut out markings from bond paper and glued them on, old school style.  I snapped a pic and within 10 minutes I had my best flight with it – a huge climb flipping into that flat glide – but the light breeze was taking it east toward the trees.  It went into a pine tree well above 40 feet at 16 seconds.  I couldn’t even find it.  But I did the next morning, as the wind had knocked it down.

By the time I found it the next morning, I already had a new one cut and a prototype kit shipped off to Frank.  I created a tissue print and built the second prototype this week.  We will give it a good test when the weather dries out a bit.  You can find the full kit here.  (By the way, that is SEVEN new kits this calendar year – so far!)

PRODUCTS DELAYED

My dad turned 84 this January and is “retiring” from the Volare Products Production Facility (as he calls it).  He won’t be cutting props any longer, nor making any hardware.  Clearly, this is another important transition point for Superior Props.

But we have a plan.  I am working with one of my modeling buddies (a player to be named later) to transfer the Prop Shop to his home and he will take over making props.  This transition has started (we went down to my dad’s for introduction and instruction), but it will not be complete until we move all of the equipment and get it set up – and get everything back into production.

Now, I have a good deal of bench stock of standard Superior Props, but most folders are built on demand and not stocked.  This week, the first resulting order refund occurred as I did not have a 9″ 4-blade prop in stock.  This might be occurring more frequently, but our plan is to be operational by early summer.

Posted in Builds, Products | Leave a comment

Marching On – 2023

New products and a short review and look forward.

Wow, 2023 is (just about 1/4) of the way through.  That means SPRING is coming to those of us in the northern hemisphere.  I am sure us flyers are looking forward to getting outside.  This year has been pretty busy for me already.  Three months in and I have built FIVE models already – and I have a 6th model ready to cut and build.

The weather was (almost) nice this week and therefore I had a chance to test fly two of those new models.

First up:  Pres Bruning’s Ayres Loadmaster Peanut.  Pres is an artist and his plans are artwork.  I am sure everyone has admired them repeatedly.  When the FAC announced they would be having a Pres Bruning Mass Launch (for any of his designs), I just had to build one.  I chose the Loadmaster.  Please read about my build HERE – there is a lot more than on this page. Find the Short Kit HERE.

And you can watch my test flight video here:


Secondly, I was “challenged” (well, I challenged myself) when a customer asked if I had a Free Flight version of the Ugly Stick.  For those of you who are Pure of Heart and have never been tainted by the street-walking attractions of radio control, the Ugly Stick is an ever-popular bastardization of the Fokker Eindecker.  It has been built is virtually all rc sizes and is a sport plane (not at all Scale) for those fun days at the rc flying field.

At first I was taken aback – I don’t do rc – and besides, there is no “category” for such a model.  Then I got to thinking…I could make this fit into Embryo.  So I did.  I am providing Dural-style 3D-printed landing gear and over-sized (for Embryo) 3D-printed wheels.  To “punish” you for wanting a rc replica, I eliminated the wheel pants, cabin/cockpit, and any DT design.  In addition, I am providing balsa parts to build your own 2-stroke replica (that will get you that FAC Embryo 1-point Bonus for exhaust!)

Surprisingly, this model might just be a great flyer!  Find the Short Kit HERE.

Here’s a video:

March 2023…  I looked at the calendar and said, “well, April 1st will be 10 years since I started this business”.  But I was wrong.  I took over Shorty’s Basement and started selling products under that name on April 1st, 2012.  That means 10 years has come and gone and we are starting on our 11th year in business.

Things have changed a lot (including the name).  Most of the product line has changed.  Superior Props has been added.  And I no longer sell kits from other manufacturers.  But I have produced 120 different kits of my own and sold nearly 6,000 of them.  Building and flying is what I love and the kits are a by-product of that.

Speaking of Superior Props, a change is coming there, too.  My dad, who turned 84 this year, and has been widowed for 3 years, has decided to move on to a different setting:  the Netherlands.  He has been spending nearly half of the year, in short segments, over there for the last 2 years or so.  Now he has applied for a resident’s visa and expects to move over there on a more permanent basis.  As a result, we are looking to move the Prop Machine to a friend’s house so that my dad will no longer be saddled with having to make props for me.  This should be accomplished some time this spring, hopefully before summer.  But keep in mind, there may be shortages or downtime on the Superior Props product line.

I do have stock-on-hand for nominal-sized Freewheelers, Gollywock props, and some Old Timer Freewheelers.  I also have one or two of some of the more popular Old Timer Folders, but most of those are made to order.  Just keep that in mind as we transition.

Onward and upward, everyone – much like that Ugly Stick I built – but try to stay out of the trees!


Posted in Products | 2 Comments

Filament Fun and Future Flying

3D Printing, Propellers, and Models.

According to the old clock on the server, it’s been over a month since I posted on this blog!  For Shame!  Today, I’ll cover some things going on at the Volare Headquarters.

Archie Adamisin (you can contact Archie – 3D Props via email HERE) and I have been collaborating on some 3D printed propeller designs.  I say “collaborating”, but it is really more like “Hey Archie, can you draw this up?” since I am not nearly at his level of 3D design.  He’s been doing great with his P-30 Props and others, probably overwhelmed with people wanting them.

Back in January, I laid out and printed a folding prop hinge design and it was successful.  Well, it hasn’t been proven in flight at all, but it functions as intended.

This was not designed to replace the hub on our Superior Prop Folders, but actually for FAC models – where we are restricted from using folders.  Actually, the rules state:  “Props that fold or feather before the model lands are prohibited in ALL FAC EVENTS.”  The key words here are “before the model lands” – we can use them to save the prop blades or the fuselage from breaking on the ground strike, as long as they are held open in all other parts of the model’s flight.  So this hinge does not have the offsets that allow the blades to fold back flat against the fuselage, it will just need to flex upon landing.

Of course, what is a prop hinge without blades.  Here is where I fail in my self-taught design.  I cannot design props (although I can interpret and modify Archie’s prop designs).  So Archie was called upon to integrate a propeller design and hub hinge design into one.  He did a great job!  You can see the results in the photo below on the top – a 12″ diameter, 15 pitch, Larrabee blade layout*, folder printed in white ABS.  The blades were printed individually and this layout produced a very smooth blade with almost no artifacts that cleaned up easily.  I thought it was a little heavy at 11.5 grams, but it turns out that a 12″ Chinese prop is just over 12 grams.  It is a very pretty prop, if nothing else!  I can’t wait to try it out this summer.

* – I have been trying to make props with the Larrabee layout for a couple of years now.  Most of my efforts to date have been with formed props, but again, I asked Archie if he could change his prop layout to use the Larrabee stations and values.  I am glad he is up for such challenges, because now we are experimenting with printing props with the Larrabee blade profiles.

You can read about Larrabee propeller ideas at the NFFS Technical Library (here).  In theory, they are the most efficient blade design.  If you are really intrigued, you can also download a spreadsheet that will produce blade width values at 100 stations along the radius, if you input the diameter, pitch, and blade width (you can even integrate blade flare, if you want).  You can also find that spreadsheet in the NFFS Technical Library (here).   I have been using this spreadsheet to develop blade shapes that I can convert to DXF files and import into my CAD program and then laser-cut blanks for forming.

Well, Archie created the blade design that would utilize my hinge and the Larrabee blade widths and the folder is the result.  Then he also converted his regular non-folding prop design so we could experiment with the Larrabee designs in other props.  The red and white props shown above are my props that I will be trying on Embryos this summer.  They are ABS (white) and PLA (red) and are 6.5″ in diameter, 8.125″ pitch, with a 1″ blade width.  The red weighs 3 grams and the white weighs 2.5 grams.  I have been having problems printing these larger props (larger than my Peanut props) in ABS as the heat while printing warps the prop.  This didn’t happen with the folder blades as they were printed flat and wide, while the necessity of printing a 2-blade, one-piece prop means the blades are somewhat on edge and I reduce support to leave less “scarring” and artifacts on the blades.  Anyway, I am hopeful these will work!  (Aren’t they pretty, too?!)

The last little model-related thing in the photo is a little clamp of clothespin style design and operation.  Modeling friend Mike Smith sent out some files well over a year ago, and I have modified those.  I find these useful while building; clamping things together (obviously) while glue dries or holding a part while dope or spray dries, or whatever.  These are 1.25″ long and sprung with a dental band.  They can open to about 3/16″ maximum grip.  I am thinking of selling them at, say, 4 clamps for $3.

I am also redesigning my Small and Medium Bobbins.  Currently, the user has to assemble them and some have had (very mild) complaints about the 2-piece designs.  So, I am working on whether single-piece units are viable.

As for the “Future Flying” aspect of this post, I have finished my “Miss Production” Old Time Stick.  If you are a “MaxFax” subscriber, you saw that this was an old design that Dan Driscoll found.  The Maxecuters decided to honor Dan with a memorial one-design at their Kudzu meet in the spring.  I had similar thoughts and had started work converting the MaxFax sketch into a plan with laser-cut parts when they announced the one-design.  I completed the work and have it on my site as an early sales item so that flyers on the east coast could get the kit and build it before the event.  So, clearly, this short kit has not been flown to date.  At least two have been built now, mine and one by Duncan McBride in Florida.  His will probably get in the air sooner than mine, as his weather is more conducive to Free Flight in the February/March timeframe.  The short kit can be found in my shop for a early-bird price of $20 (that price increases soon).  Here is a shot of my finished model.

Lastly, I have been working on an outdoor Embryo.  This one is to honor a long-departed Cloudbuster, Tom Groening.  The hand-drawn plan was published in the Cloudbuster Newsletter in the last ’90s and I grabbed it when Dave Livesay pushed a bunch of plans to the web many, many years ago (I think that’s where I got it?)  As I told Winn Moore, who built kit prototype #1, there are probably three people that remember Tom:  me, Chris Boehm, and Dave Livesay.  There might be one or two more Cloudbusters that do, too.  I have intended to do this model for a long time.  I remember Tom and this Embryo and it is a shame that he was taken from us too soon – he was murdered in a home invasion in 2003.  So, 20 years later, this model will fly again.  I am calling it the “Dragonfly”, since there was no name and “Tom Groening’s Embryo” is just a little too clunky.  The new plan will appear in a future issue of the Cloudbuster’s newsletter and the short kit will be available as soon as either Winn’s or my model flies successfully.  Here are a couple of photos (my bones, Winn’s covered model).  I’ll write up details on this later, as it is quite a quirky design and build.


Posted in Builds, Products | 1 Comment

Pondering Peanut Power and Propellers

I’ve been building Rubber-Powered Free Flight Peanuts for just about 40 years.  I imagine that I have built 50 or more Peanuts.  And yet, I still am looking for better performance.  Where can we find those last little bits of performance?

There are a couple of obvious considerations:  subject matter, stability designed in, straight building, and weight are some of the most obvious.  For several years, I’ve been predicting basic performance or a potential subject by measuring the wing area and guessing at what weight I can build the model.  By dividing the weight by the wing area, we can come up with Wing Loading.  Having kept track of all of my models for an extended period, I can compare a potential subject to past models and, knowing how past models flew, I can guess that a new model with similar numbers might fly roughly as well as the old model.

Checking my records, I see that my Peanuts have had wing loadings as low as 0.22 g/sq in (Fike, BD-4) and as high as 0.46 g/ sq in (Stuka).  The average of 13 designs that have been built and flown (and have detailed records) is 0.33 g/sq in – that’s a good target for those of you who are looking to adopt this sort of tool.  But I have come to believe that this is just the start – there are other considerations – such as your power pack; the prop and rubber combo.

Everyone knows that the prop and rubber combo is important.  In fact, you can also add that to your “predictor” tool – just keep track of what all of your old models have used and when you get a new model and calculate the Wing Loading, you can start with a similar prop and rubber combo.  Everyone should do this – and they probably do, even if is inst as formal as keeping a spreadsheet.  But…there’s more…

When I first started building, I used plastic props, as everyone does.  In fact, one of my first Peanut designs that I did in the late 80s shows that I used the Guillows prop (now hated by me).  But my go-to props were the Peck props – 5″ and 6″ grays that were – and still are –  the standard for so many.

As I started to look for better performance and build lighter, I started using wood/carved props.  These were designed from formulae found in such places as Don Ross’ book and elsewhere.

Both the Maule and the Stallion were built very light (for me) and flew away.  But I still used mostly plastic props until maybe 8 years ago.  I started using Superior Props (6″ is the smallest we make) and stacked props.  But the problem was – I would almost always get beat at a larger contest.  I might be able to get 60 seconds or so.  And I had some Peanuts that I just could not get to fly, even given relatively low Wing Loading and lots of rubber.

Last year, as I got beat again in Peanut by Pat Murray, I asked him about his Peanut Fairchild.  It would zoom up and get great long flights while I was still stuck around 45-60 seconds.  He told me he uses a 4″ plastic prop.  I was amazed – that is a tiny prop.  But it got the wheels turning.

In the meantime, I had been working with Archie Adamisin, helping him sort out the 3D printing of propellers, mostly for larger and sport models (Archie sells some great P-30 props, possibly game-changers).  With his help, I printed a 4-blade prop for my Peanut Corsair – and I started getting some really nice flights with it.  But look at the prop … its not very wide.

I had been trying wood props with a 5″ diameter and up to 1″ blade width.  I got decent (sub-60 second) times, but this “skinny” 4-blader really allowed the model to fly better.  By the way, the model weighs about 10 grams (0.27 g/sq in WL) and uses a loop of 3/32″ rubber.

The next adventure was my Peanut Stallion.  Again, I tried to build as light as I could and it came out to be 7 grams (0.32 WL – its got a really narrow wing).  I had imagined and hoped that I could fly it on a loop of 1/16: rubber. I decided I wanted a scale-looking prop and changed the parameters to print out a narrow-bladed, 4″ diameter, 5″ pitch, 3-bladed prop (and spinner).  While I figured it would work, it did much better than I imagined and I get around 70 seconds indoors with regularity.

Things started to click – or gears started to turn – or something.  In my most recent Peanut build, I projected that I could get similar results with the BD-4 if I could keep it light.  My model again weighed 7 grams, but has a fatter wing so it has a 0.22 WL.  I took the Stallion prop, changed it to 2-blade, increased the diameter to 5″ and the pitch to 6.25″ and kept the blades skinny.  Compare this picture to a Peck 5″ prop.

The result – on a loop of 1/16″ rubber – was 84 seconds indoors.  Astounding for me.

Here is a question – have I (and to a greater extent – we) been over-propping our Peanut models?  We all have been using 5″ diameter plastic props with a fat blade (Peck) because that is what has been available. We also know that a higher pitch than is available on the plastic props is better for duration.  These props that I have printed have narrower blades and a higher pitch than the Peck props, especially for the 1/16″ motors.  The 3/32″ motored models have a wider blade.  I am a convert – I’ll be printing props for my Peanuts from now on.  I feel I have two good sets of data – for 1/16″ powered light-weight Peanuts and for 3/32″- powered middle-weight Peanuts.  But of course, I’ll keep experimenting and adding data points.


Posted in Builds, Products | 2 Comments

POW! Peanut Performance! The Bede BD-4.

I flew my Peanut Bede BD-4 yesterday and was surprised/impressed/shocked by the results.  Photos and video below.

I did something that I do not usually do:  I released this short kit at the very end of December without my “obligatory” 20-second-minimum test flight.  But I knew it would fly.

I drew up this model/kit after being inspired my fellow Cloudbuster, Chris Boehm.  Chris has a habit of building the same model over and over.  Recently, he published a Peanut BD-4 plan in the Cloudbusters’ newsletter and built two of them.  He might have used Bill Hannan’s plan, I don’t recall.  I don’t have any particular love for the BD-4 – it is very plain in design (intentionally), but I thought I would build one just for fun.  I drew up the tail-dragger version and used the simplest color and markings I could find to produce an all-white model with black registration.  Build it quick, cover it simply, get some flights, and move on.

At the Cloudbusters’ January Indoor Contest, I was finally able to put some power on the model and give it a test.  I tried my 10″ test motor – yup, still flies the model – nothing spectacular, but trim is still good (had to add some tail weight).   I made a 20″ motor – a loop of 1/16″.  The model weighs 7 grams, so it should fly on 1/16″ rubber (more on my logic here in a different article).  And the long motor might help with the needed tail weight.  I tried flying right and it wasn’t the best performance. So I dialed in left thrust instead of right and the model perked right up.  I did a flight and it was over 70 seconds!

I added a little bit more tail weight and wound in about 2000 turns (a 20″ motor has room for more) and filmed this spectacular 84-second flight!  I think it is still a bit nose heavy (see the last 10 seconds of the flight) and I think there is still more duration to be had on this little model!  Needless to say, I am feeling a bit better about the BD-4.  I’ll probably be losing this outdoors this year.

Posted in Builds, Events, Products | Leave a comment

Starting 2023 off the right way!

2022 is over and now we are on to 2023.  I almost forgot my traditional New Years Day flight in my back yard, but I got the flight logged in the late afternoon.

But this is about a new model!  I started this a little after midnight on New Years Eve/Day  before I headed off to bed.  I picked up the original kit last year and was surprised when I received it.  I knew it was an Old Time Fuselage model, but it is SMALL – only a 12″ wingspan!  The fuselage is built-up and the rubber is enclosed (so it should be good for the Flying Aces Club OT Fuse and 2-Bit events), but is only 1/2″ square on the outer dimensions (and only 3/8″ square internally).  The model came out to 5 grams without rubber (on 24 square inches of wing area).

I finished the model yesterday and put rubber in it and tested it today. It literally flew without adjustment.  I did try some right thrust, but it was too much, so I took it back out.  This is no side thrust, no down thrust, no nose weight, no tail weight – nothing but rubber.

Here is where to find the Short Kit.

Here is a test flight video and photos following.


Posted in Builds, Products | Leave a comment