This is the first of at least three articles I plan to write about the contests this weekend. I will be writing them in order of most recent to that which occurred first (reverse order). This is the most recent; happening in the last hour of the second contest.
I have waited all of August and September for the big Flying Aces Club Outdoor Champs & Ted Dock Contests (from here on called FACOC/TD), hoping that the combined four days of FAC Free Flight Flying would be everything that we envisioned when Pat Murray, Winn Moore, and I sat around last year in Pat’s RV planning for this year. We had hoped that the combining of the two end-of-year contest would attract more flyers and create more fun and good times.
We had THREE DAYS (Thursday, Friday, and Sunday) of EXCEPTIONAL weather, and the other day (Saturday) was very good in the after noon and the “bad” part of the morning was much better than nearly all of the time at Geneseo this year – it was overcast on Saturday morning. For all the rest of the days, we had light breezes and sunny skies, with temperatures in the high 80s.
Attendance (strangely) was down with about 40 registered for the Outdoor Champs; usually we get 50 or so. However, many stuck around for the Saturday and Sunday Ted Dock contest, doubling previous attendance there. One of the events on Sunday was Phantom Flash. My model was the last one I packed getting ready, as I looked around my shop, looking for models that I forgot to pack. I built it (my 9th PF) in April for the Cloudbusters Indoor Fling. I built it light and trimmed it and got about 2:30 on it indoors and won the event. I took it to Geneseo and couldn’t get a flight at it was way too windy for this particular model. But, I took it to the FACOC/TD just in case.
Well, the weather was perfect for MY plane. You could just tell on Sunday that there were little bubbles of air all around the field, all day long. My plane has a 4.75″ prop and a long loop of 1/16″ rubber, so it isn’t very powerful and actually it flew around about 10-15 feet high, looking a lot like a wounded duck (slightly tail heavy) until it would find one of those bubbles and then, up it would go. My first flight in the morning was a 6+ minute flight that went from the south edge of the field and landed at the r/c “center stage”.
I put it away for awhile and concentrated on other things. I got it out in the afternoon to work on the remainder of the best 3 of 6 flights. I kind of alternated between 50-60 seconds (no lift found) and maxing. I was down to two remaining flights and needed a single max. On one of the earlier flights, I would up and headed to the table to find Wally Farrell waiting for some good air. I told my timer, (my son, Jack) that I would launch when Wally did and follow him right on up. Wally maxed and I missed the bubble. My 5th flight also failed to max. By the time my last attempt rolled around, there was Wally, again at the table, in the same situation as me – needing a max to have 3 on the books. By the way, no one else was recorded as approaching 3 maxes, so it looked like it was going to be between Wally and I for the number one spot.
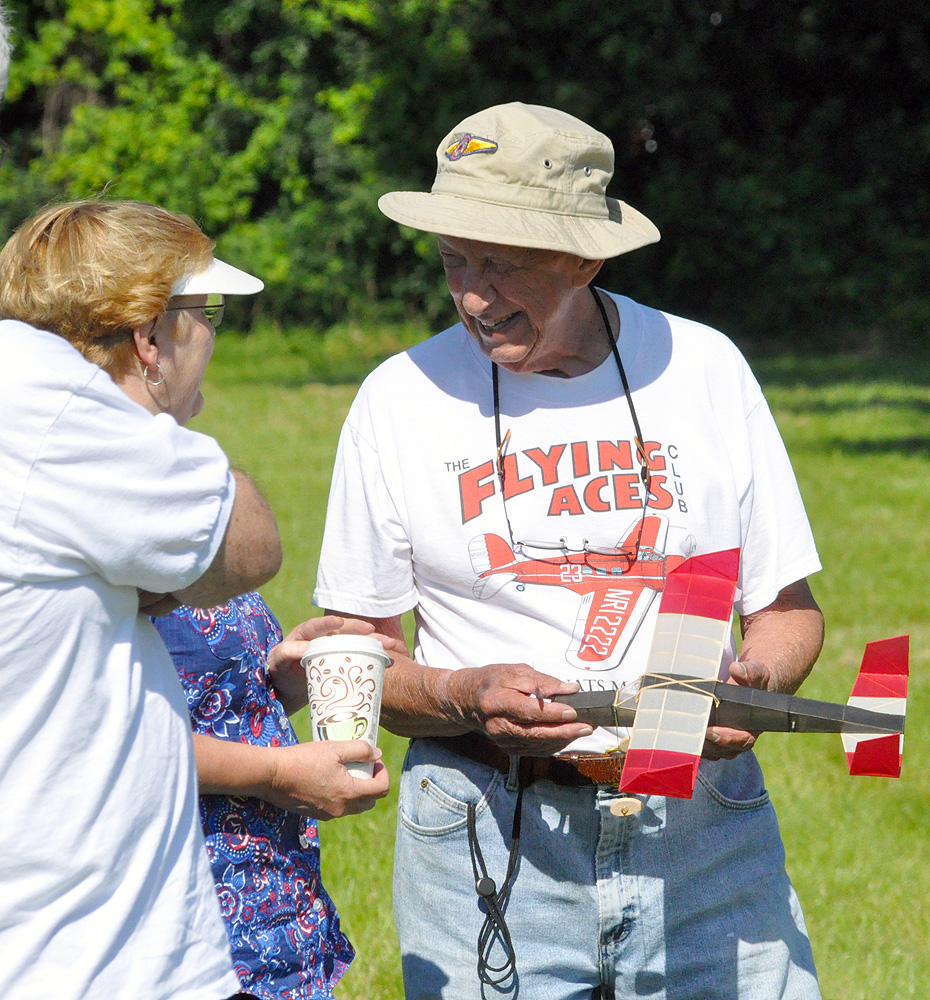
Wally was there, waiting for that thermal. As I walked up, I made a decision. When I got there, Wally said “George, I will certainly let you go if you want, don’t let me hold you up.” I said, “I’m going first this time, Wally. We both need a max – see you in the Winner’s Circle!” and launched, not even waiting for air. It wasn’t 20 seconds before my wounded duck was going up, up, up. Wally launched about that long later; I assume he saw my plane. This time he missed the bubble and I maxed out.
That’s just the first part of the story! Now there was about 1 hour left in the contest.
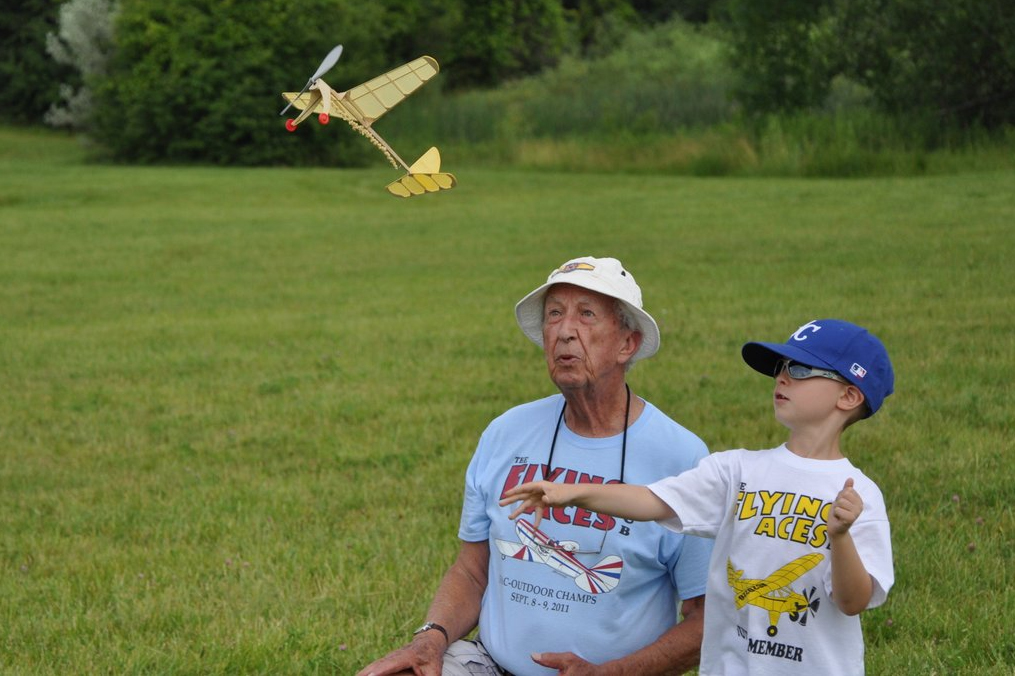
My son, Jack, has more success at our small, local meets, than bigger meets – he always struggles at the big meets, crashing planes, etc. These four days were no exception. After I flew my Phantom Flash, he casually said that he would fly his – the first one he has built. We had about an hour left, so he had time to log some flights. Well, his first one was a max. He was powering his with a Sig Sleek Streek-type prop and a used loop of .080″ rubber from my recently departed Peanut Barracuda – because he had to make a motor and this was laying on the table – easier and faster than making up a loop of 3/32″.
He brought his plane back and wound up again, but didn’t max. On his 4th flight, he got his second max – a 9+ minute flight that appeared to be lost. I watched it with binoculars until I lost it – but it was coming down. I used the android app that plots a bearing and when he came back, we took off to the other side of the cemetery, with a 50% hope of even finding the plane. We got back on the line on the other side of the cemetery and I explained that the possible location was a wide path because a) I lost it in the air and b) the bearing line is just a general direction and should not be considered perfect.
We quickly exhausted the cut grass between the cemetery, the AMA HQ farmhouse, and the soybean field beyond. If it was in the beans, we both knew the search woudl be futile. We both took a couple pathways that were between the fields but couldn’t spot anything. Here he was with 2 maxes, 2 flights left, and no plane. I turned around and started back, as did he. I wandered on my bike to the HQ house and looked around there, basically to get a glimpse of what looked like full-sized aircraft bones around the barn. As I turned to look to my left, where Jack was coming from toward me – I spotted his plane on the yard! He picked it up and we headed back, knowing we had limited time to get in one more max.
Jack broke that motor winding and as he made a new 3/32″ motor, I went out to help Winn Moore with his last Jet Cat flights. I asked Winn, “you know what would be neat?” He knew and replied, “if you two had to have a fly-off?” All Jack needed to do was put up another 2 minute flight and that would happen. He came out with his plane with the new motor and did just that, landing at about 2:15.
Winn and Pat Murray decided a Mass Launch single flight would be the fly-off, so Pat stooged for me and Winn stooged for Jack. We walked out in the field where Pat had pushed together two card tables and we lined up – Three! Two! One! LAUNCH! As my plane gracefully lifted up, I heard Jack’s plane hit the ground right away and he said “well, that was anti-climactic” – he had torque-rolled in. Probably the fatter motor, imperfect wind angle, and unfamiliar feel to Pat’s winder combined to give him a bad launch. I won with no contest.
However, at least for me, it was so much fun to max out and then help him max out and have the two of us compete for 1st and 2nd in the event. It was a perfect cap to a perfect four days of flying. Yes, sometimes I still beat my kids – on the flying field!
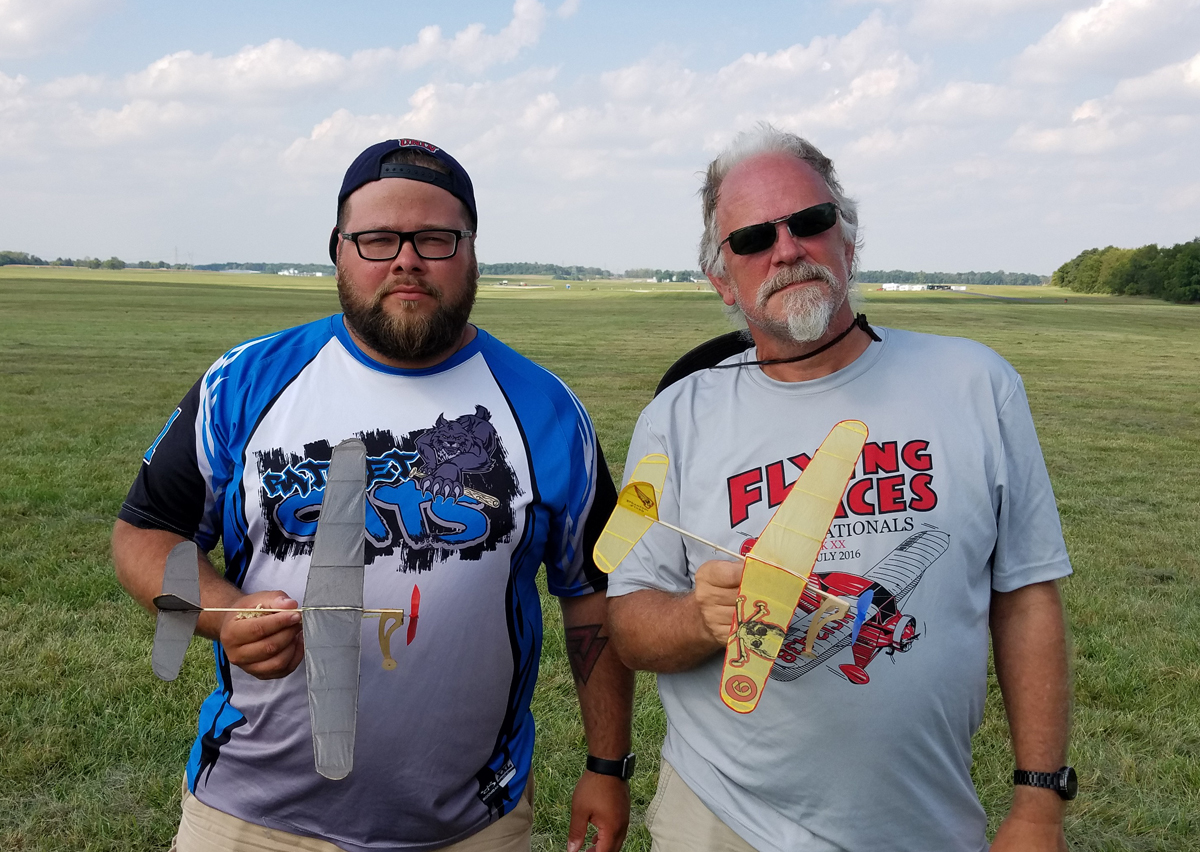
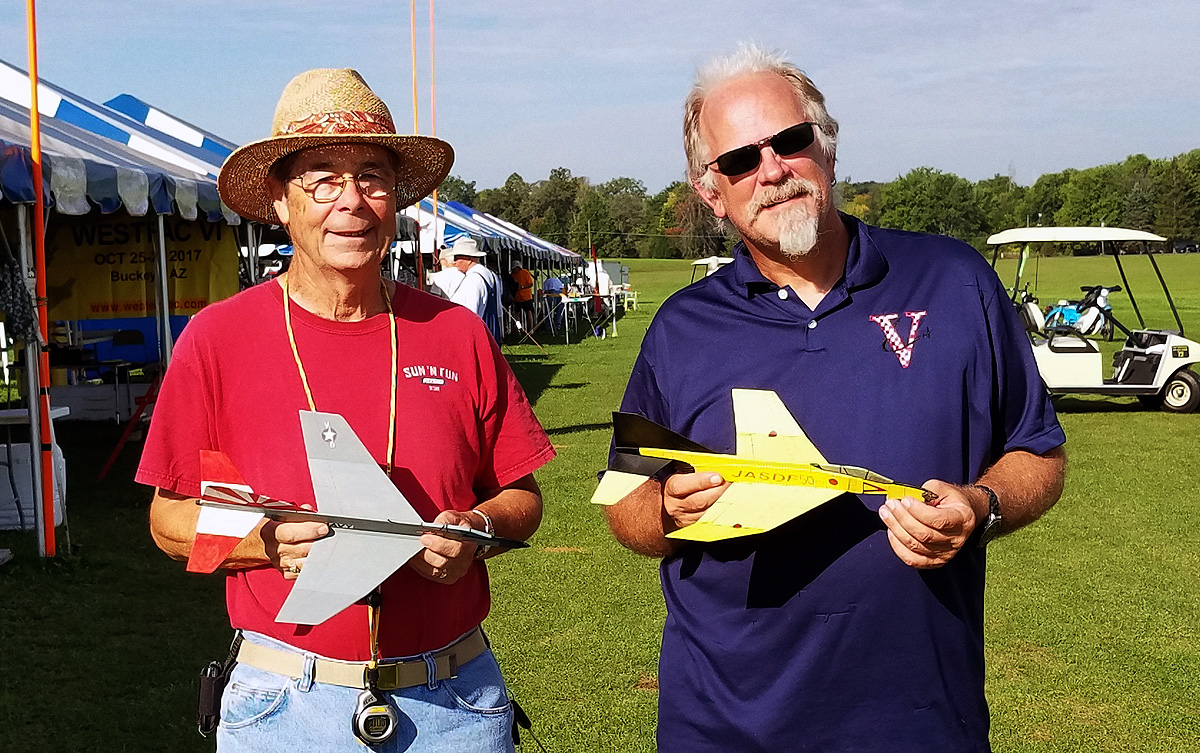
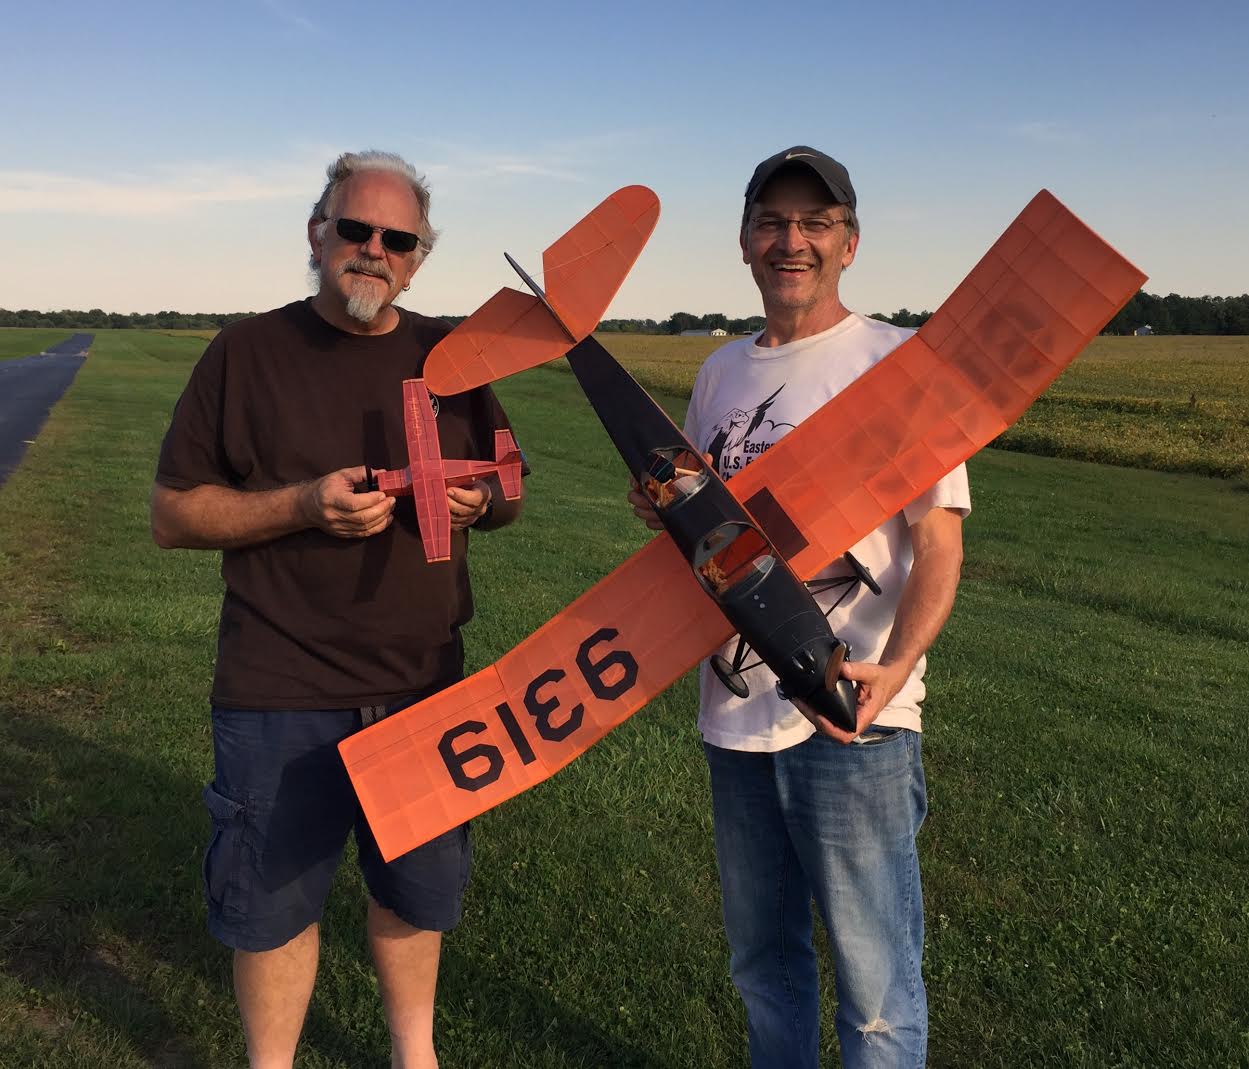
two tired guys after four days of flying.

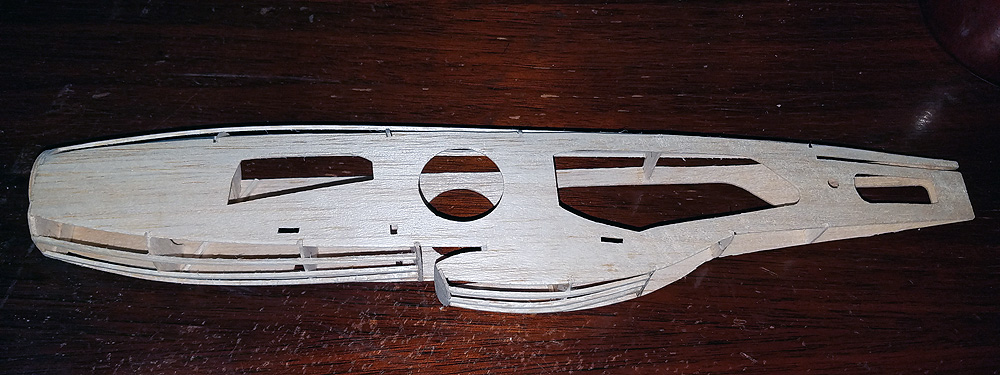
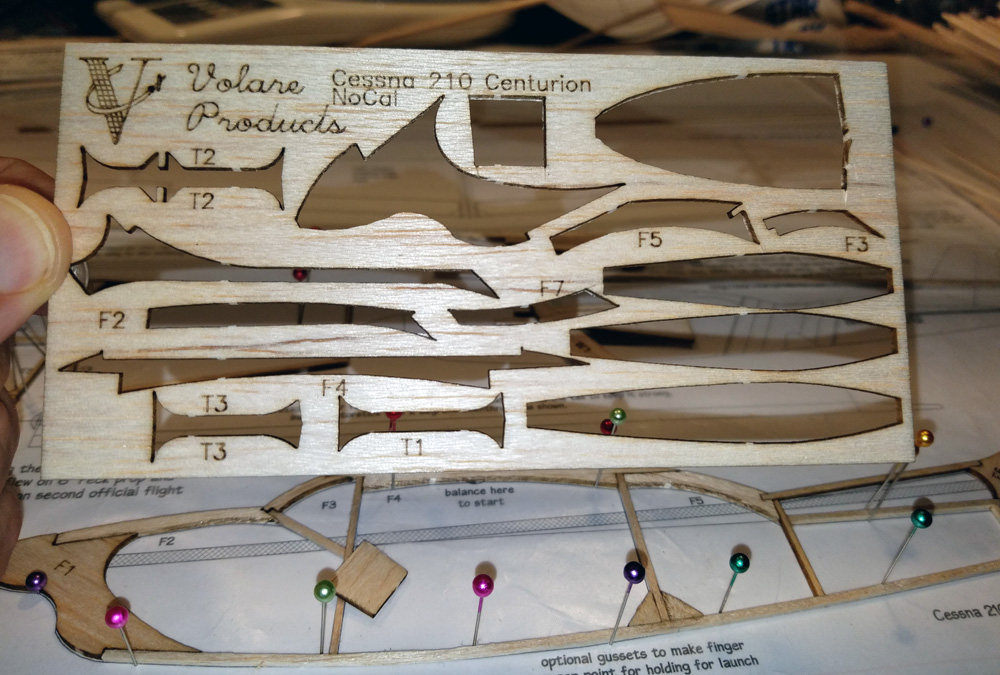
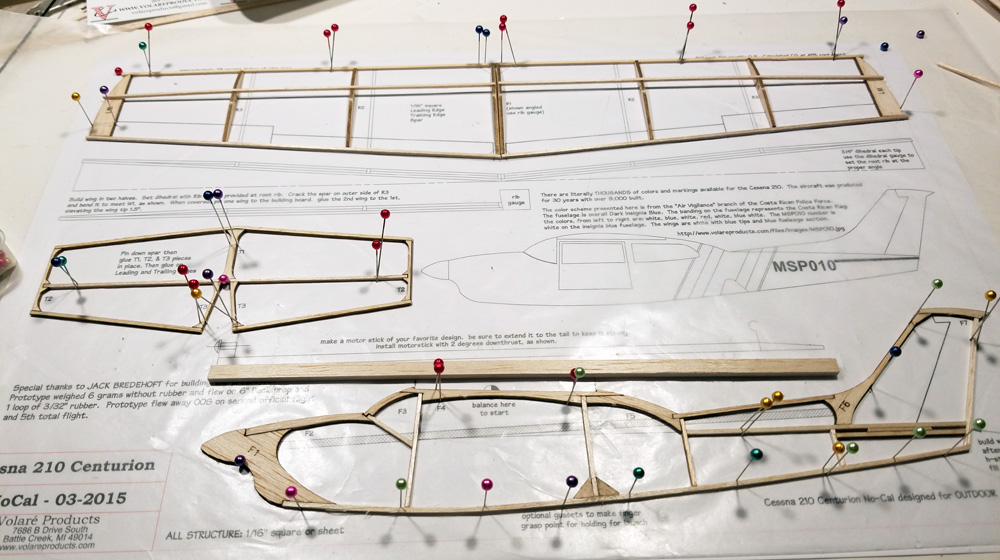
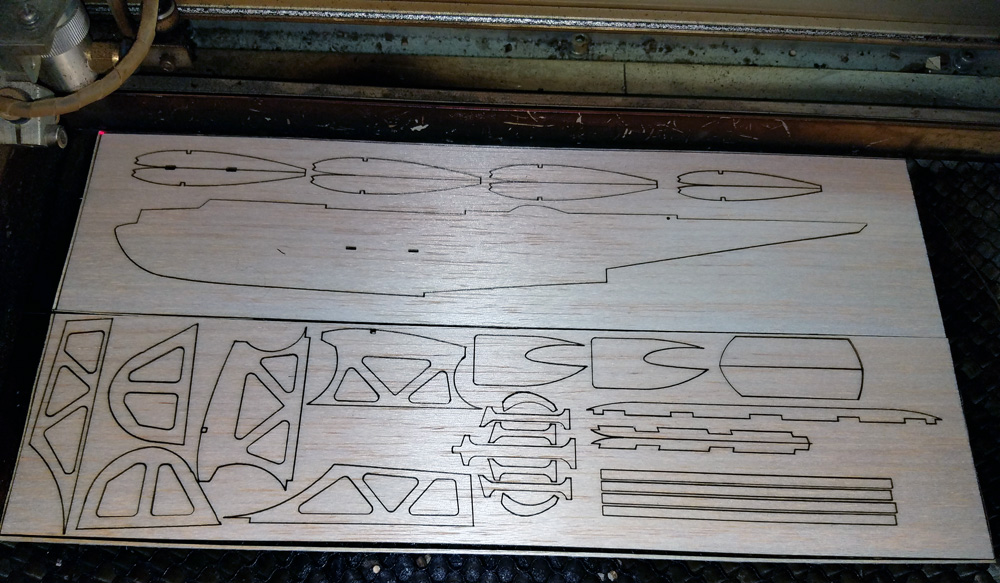 This is the laser-cut parts: two 3″x12″ sheets of 1/32″ balsa. There is a little extra wood here, but remember, I build for Outdoor.
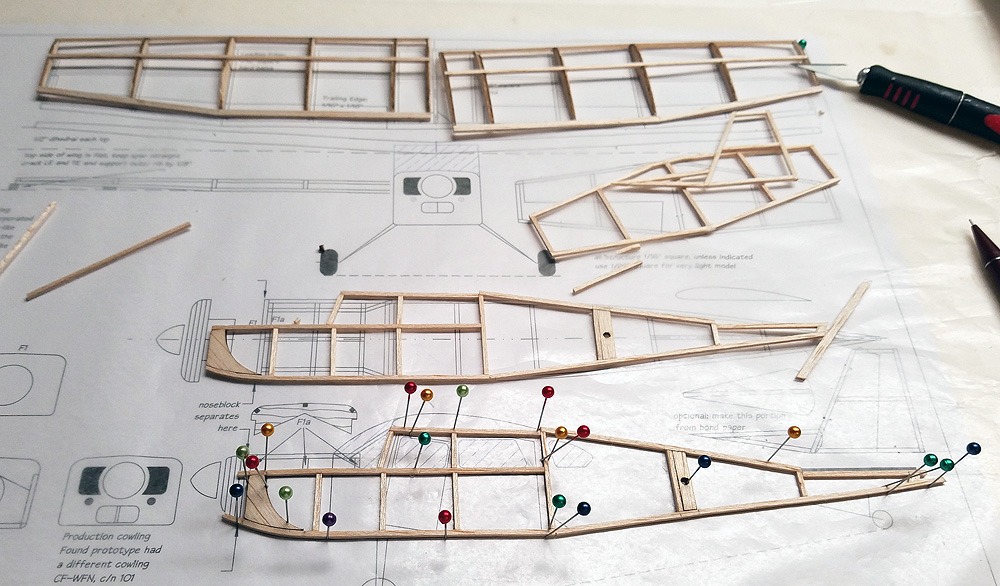
 All of the parts separated and laid out, ready to assemble. Note that the pylon and the two vertical tail pieces have double, cross-grained pieces. This was done because these areas are under some extra stress.
 Various parts assembled – the tail structures and the pylon. Note that the pylon and vertical tail interlock with the fuselage.
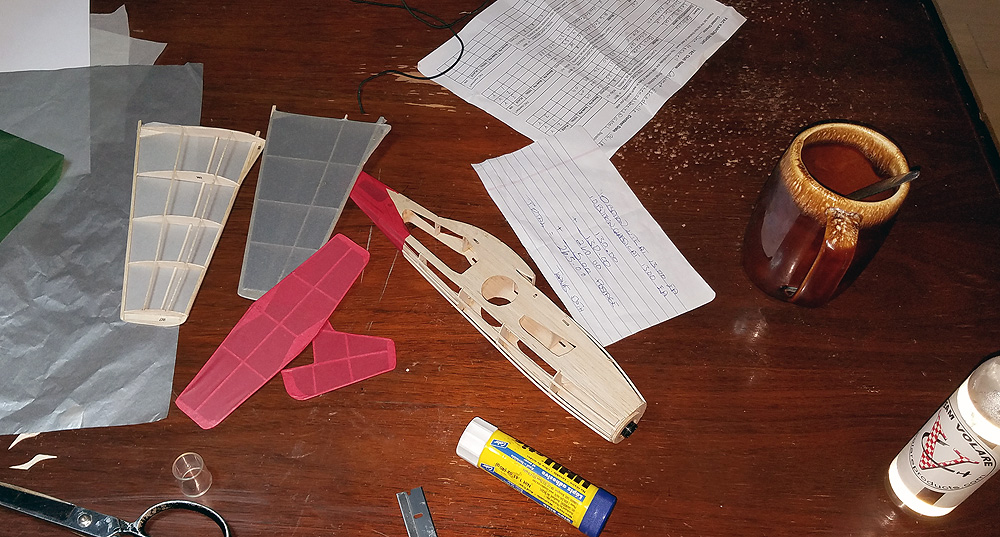
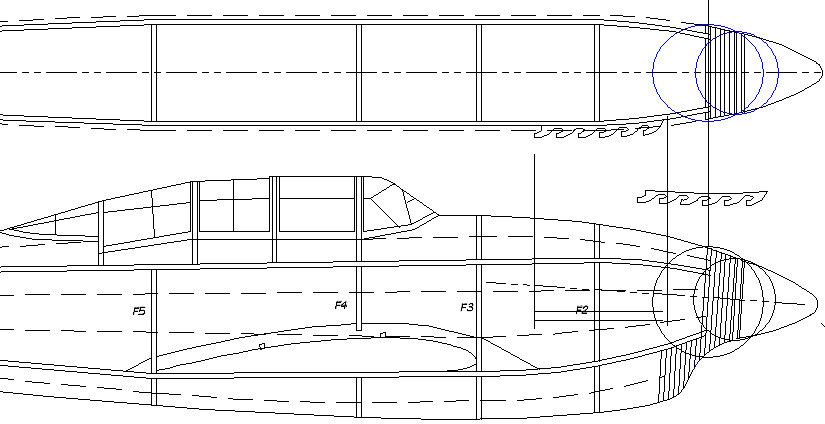
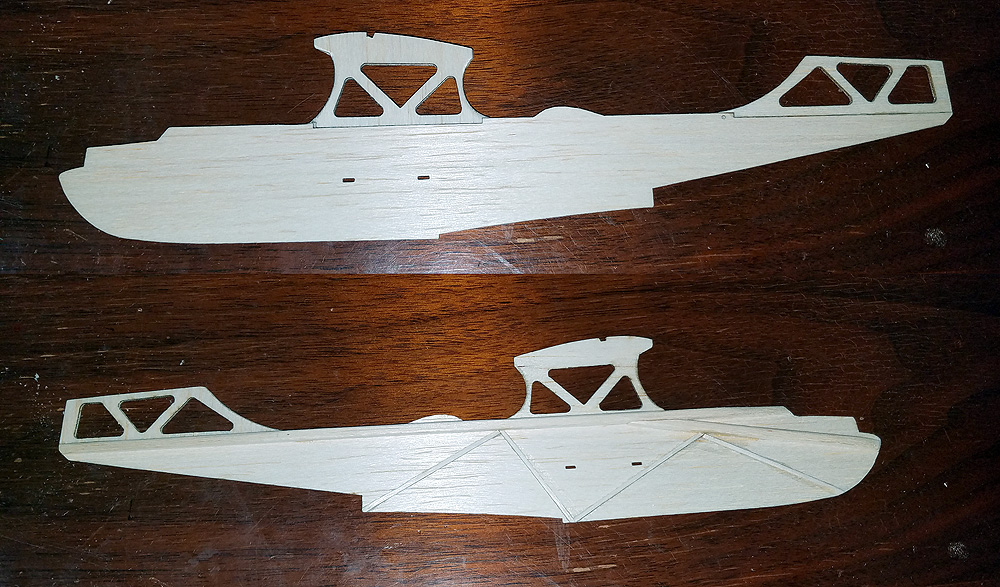 A detail of the fuselage. 1/8″ square stock (light) has been added to the fuselage as a structural spine. Also, small strips of 1/32″ have been added to the back side to prevent flexing in the sheet fuselage.The two holes in the middle of the fuse will anchor the wing struts. Also note that the pylon will slip fit between two ribs and locate on the wing spar.
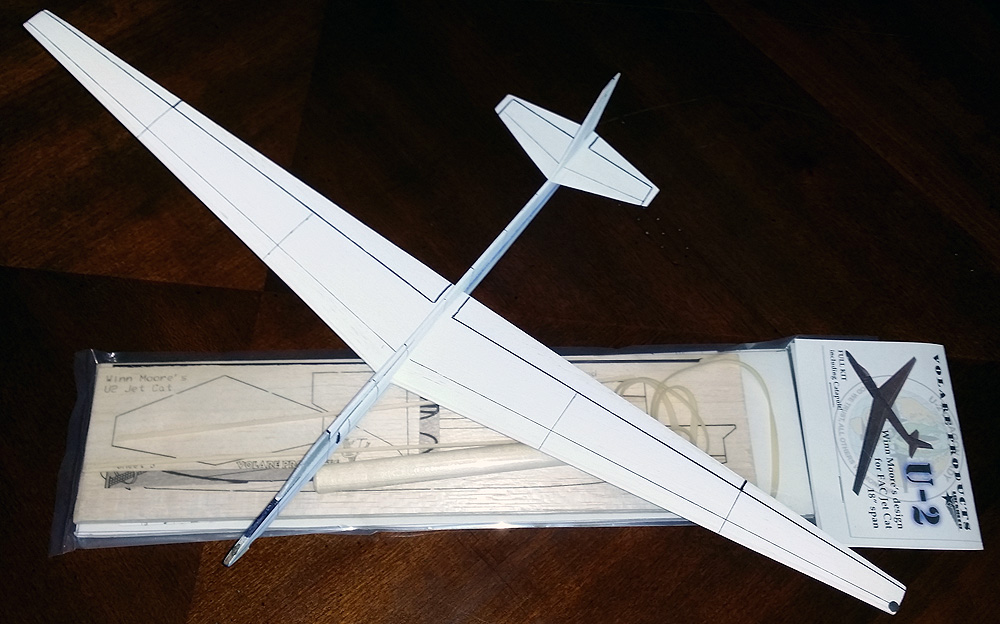
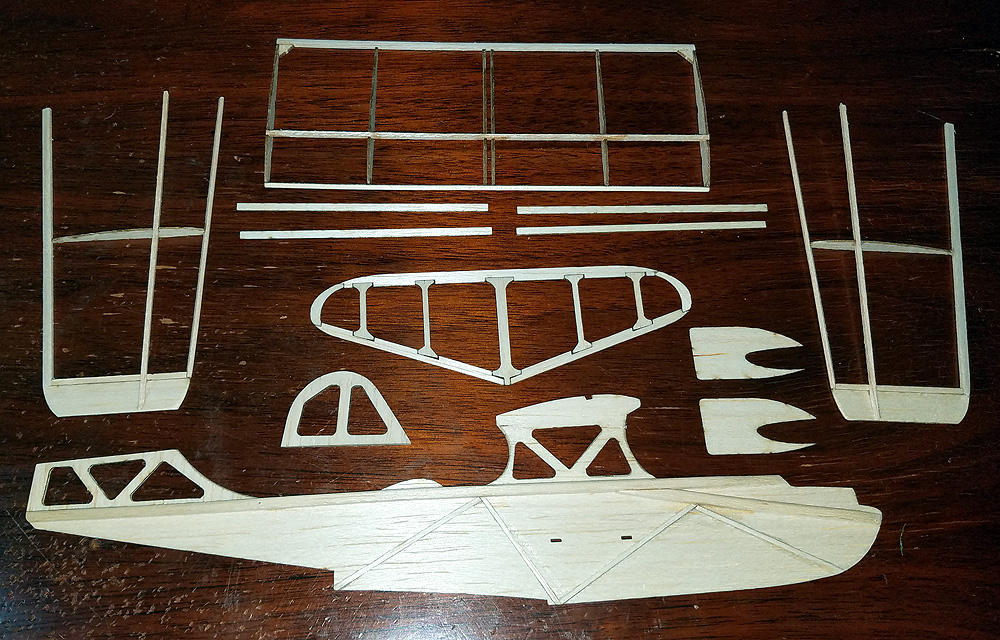 All pieces assembled; now on to covering. I chose black tissue – for the Black Cats – very simple for a NoCal.
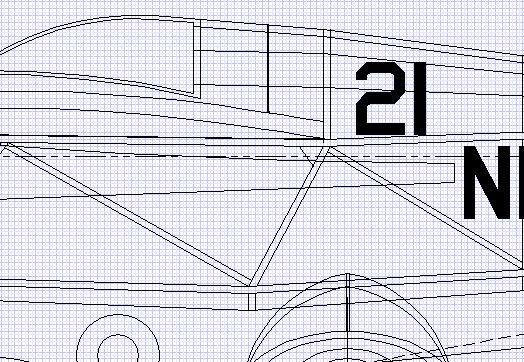
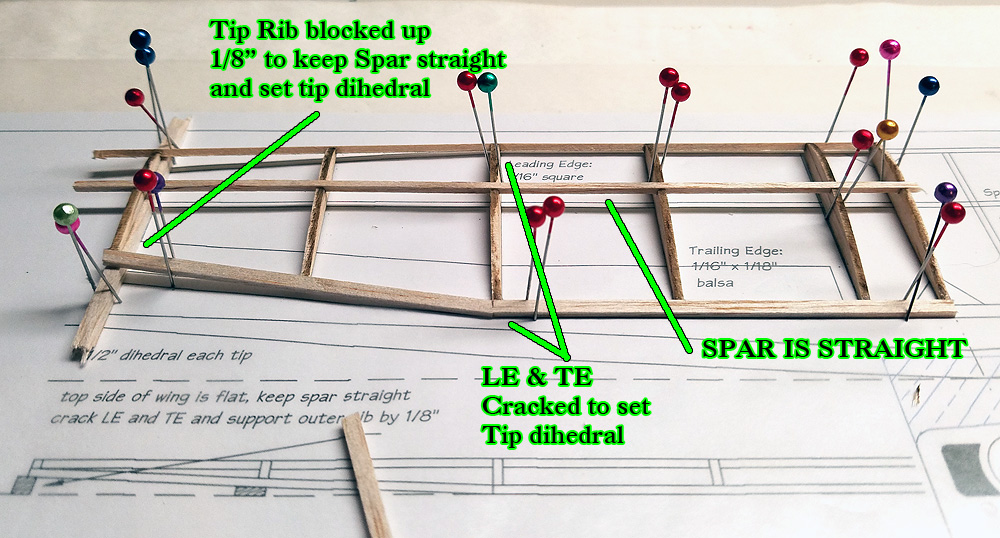
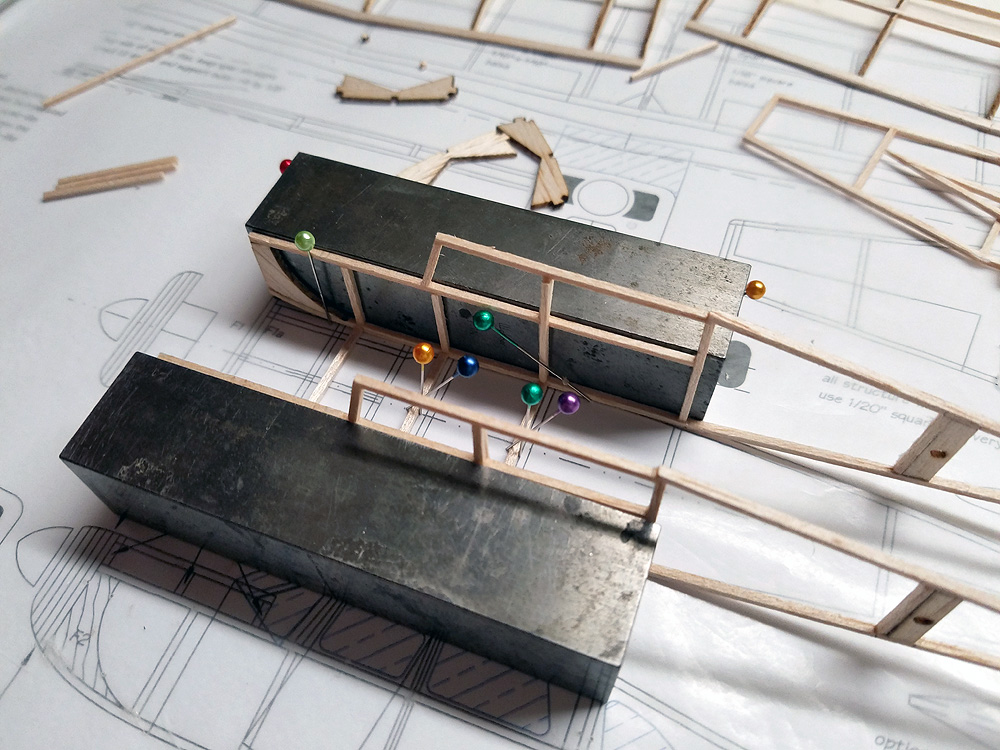
 Center Section detail: short 1/8″ square motor sticks are added to the nacelles. Also, 1/8″ square cross braces from the front of the nacelles to the rear of the pylon. This really prevents flexure of the wing. Note that the motor sticks re on the OUTSIDE of each nacelle. The nacelles have been moved out quite a bit from scale – because props have to clear the fuselage and each other. I will be using 4″ props. I use crumpled tissue on the H-stab and wing to try to combat warp-age. See that the dihedral break ribs are notched to accept the struts.
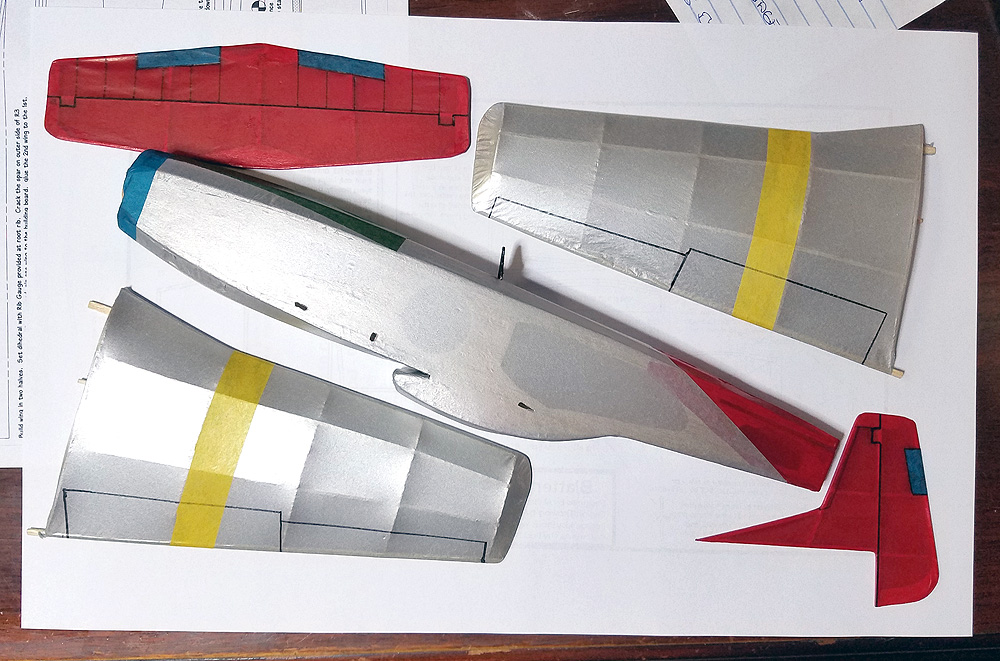
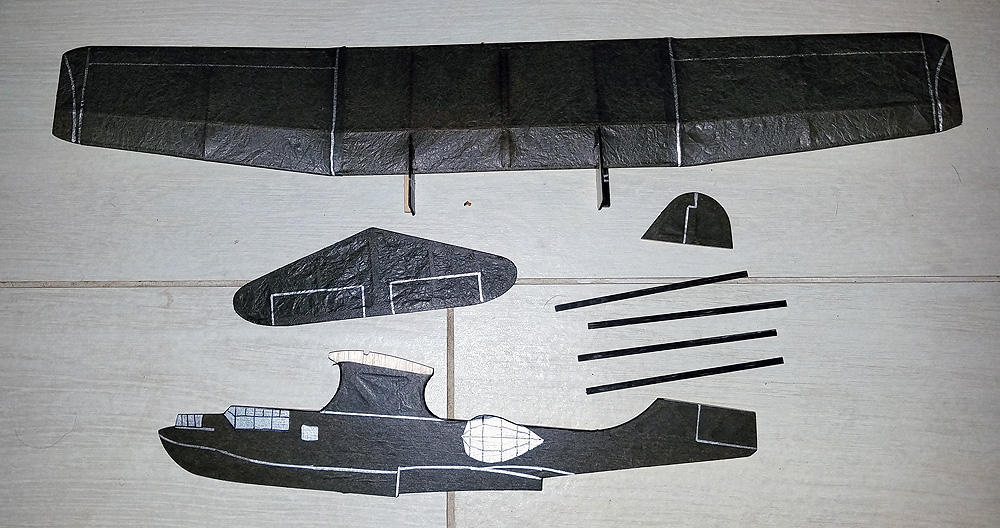 All pieces covered, decorated, and ready for final assembly.
 Rear motor peg detail. I will be running two motors (each a loop of 1/16″, maybe less) from the prop to the rear motor hooks. this hook is just ahead of the vertical fin and embedded into the 1/8″ square fuselage spine. Taper the 1/8″ from this point rearward to save a little tail weight.
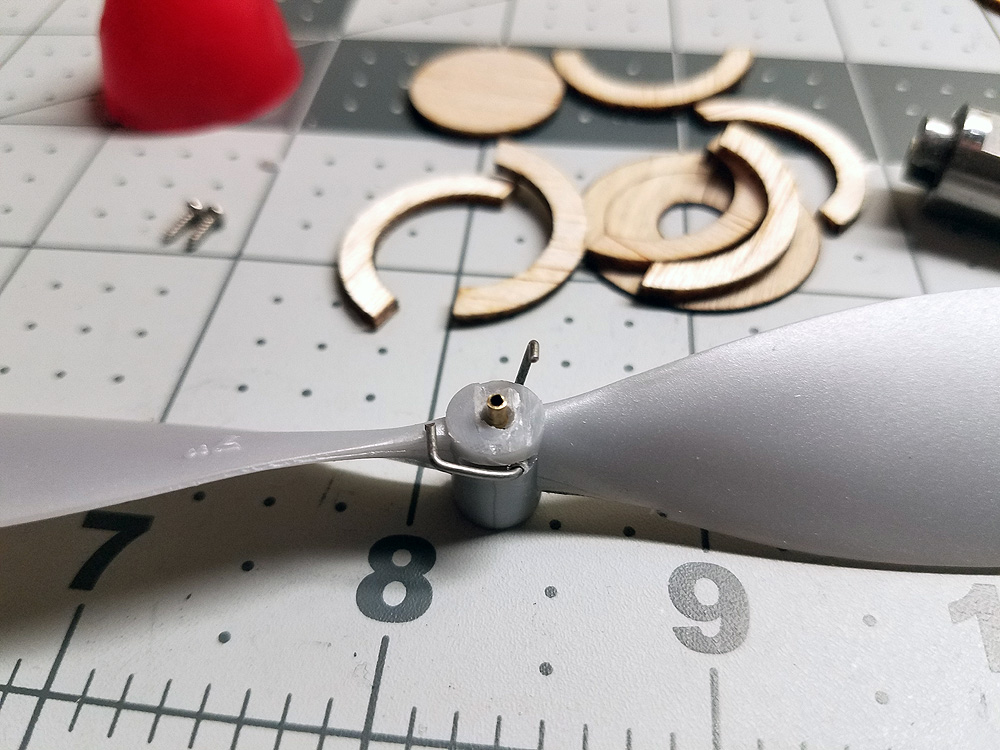
 Detail of the nose bearing and motor stick. Note that the prop shaft must be long enough to clear the wing leading edge. Care must be take when loading the motors as they run under the wings and inside of the two struts. Wind the motors from the rear.
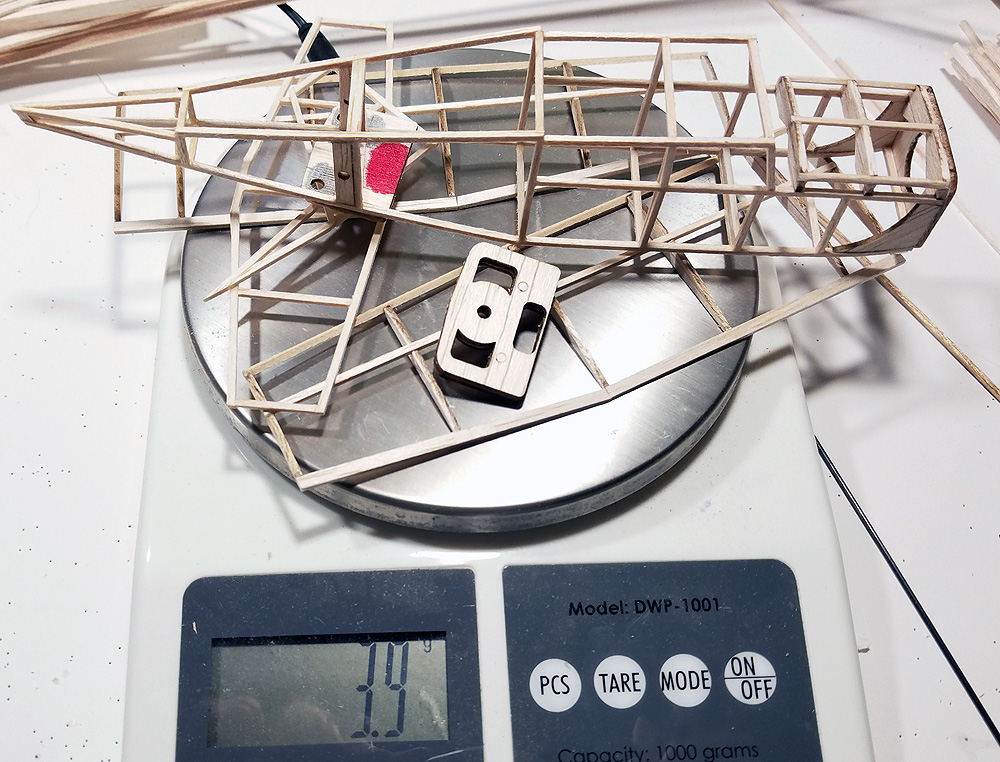
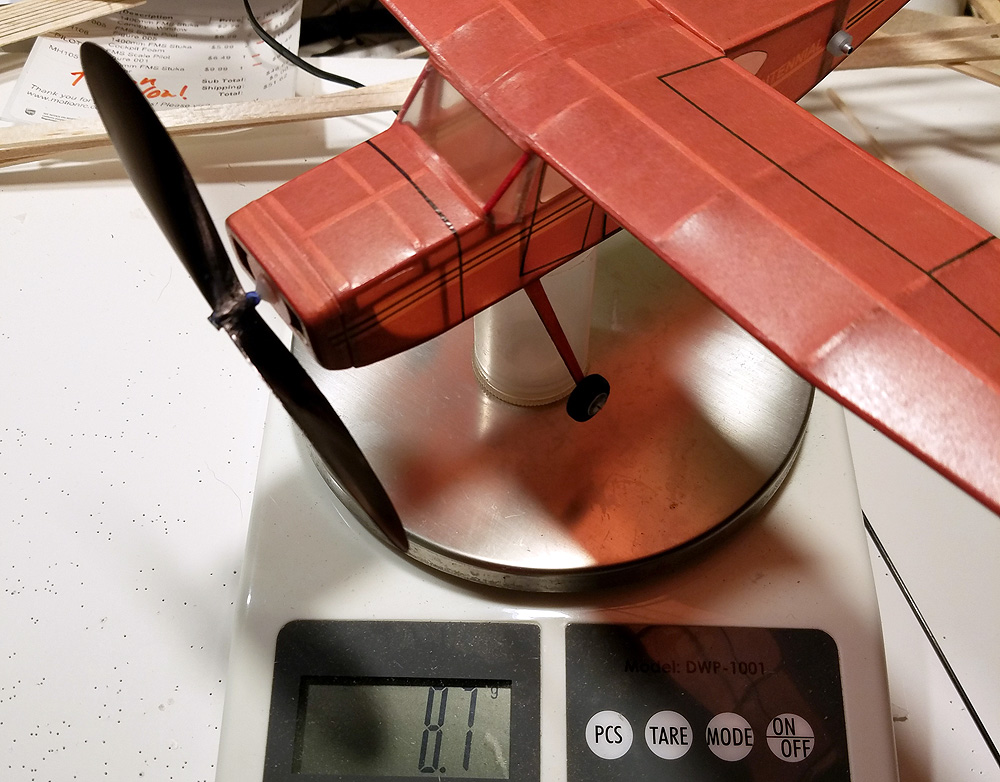
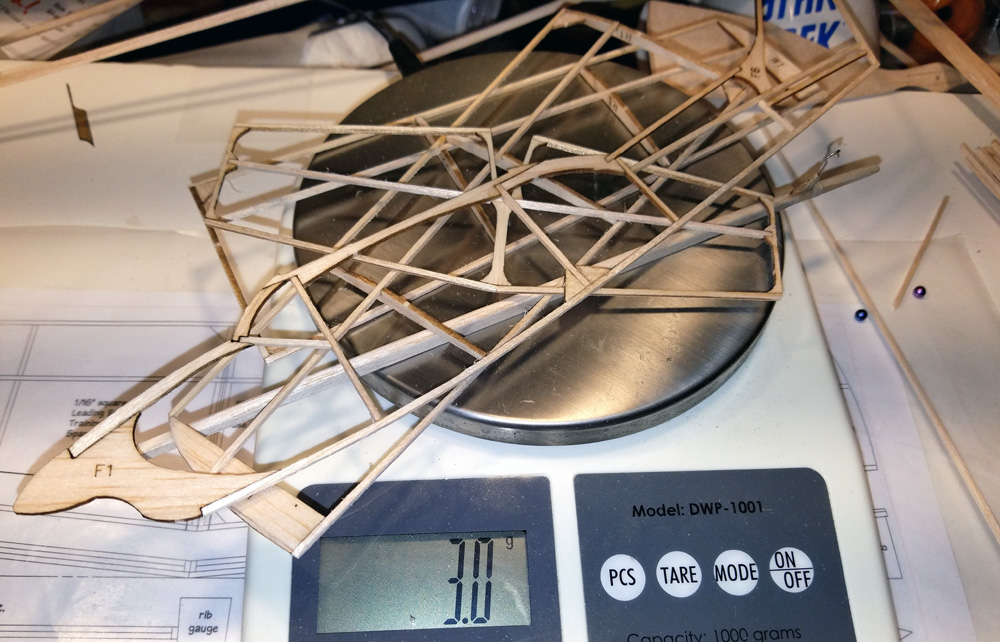
 All done, ready to fly. This weighs 8.5 grams as shown (without rubber). The props weigh 1 gram each. I might have been able to save half a gram if I had scraped the Yoshida props, but I did not. Prior to the prop installation, I had to have a glob of clay on the nose to test the glide. After the props, no clay was needed to attain the same glide. Some might be needed once the motors are in place.