Volare Products – New Year’s 2018

I thought I’d do a short New Year’s post since I have been a little lax in posting recently.  I say it often, but I’ll say it again – I’ve been busy.  The end of December marks the half-way-point in the busiest time of the year for my business – I guess that corresponds to building season.

Apart from the business, I always feel like I never get much built.  I make a list in the fall of to-build planes and I always seem to get about 20% of it built.  But, doing a rough count this morning, I see that I built at least 16 models in 2017, and that is probably short.   Still, the latest Fall List shows only two complete and two frames built out of twelve proposed models.  I did finish two Peanuts and built 3 Jet Cats in December, so I do get some things done.

The Peanuts complete my proposed small plane list for Indoor this year, although I do have to cover a Low Wing Trainer that I hope to toss into Scale just because I don’t want to damage any of my outdoor planes indoors.  As shown in my last post, I have the tissue ready to cover the 24″ Cessna C-34.  I need to consider if I want to print markings on it or do them by hand.  Other than that, it should be finished before outdoor season.  In the very near future, I will be starting a Jumbo Aircraft Designs Stallion.  This is a favorite plane – I did two Peanuts, a NoCal, and a Jumbo years ago.  It’s a high-wing, so no bonus points. On the other hand, my earlier Jumbo was a floater – nearly guaranteed maxes, so I will probably fly it more often in events like Simplified Scale or Modern Civilian (insert devilish grin here).

Then I will probably start another jumbo for the Airmail Commemorative Event at the FAC Nats.

Business-wise, 2017 was a good year; you generous customers kept me busy all year long.  The only down-side is keeping up with orders, and keeping supplies stocked.  And I am having some issues with some of my suppliers and materials.

Making new kits is the favorite part of my business.  I now have 44 kits/combos available.  And I appear to have released 10 new ones in 2017.  Here’s a surprise:  I count another 10 very close to release.  I had hoped to release one today, but that might not happen – I have some final kit assembly to do on that.

I have the Peanut Barracuda and the Peanut Pegna nearly ready.  The Pegna needs to fly successfully (I am 100% sure I over-propped it and it wouldn’t fly last month – the prop has been replaced).  The Barracuda just needs kit finalization (remember, it will include a vacu-formed canopy).

The Cessna needs to be finished and flown.  I do have that out for a prototype build – and it is being covered and the builder reported no problems with the parts.  I believe he is going to do micro r/c, so when he flies it, that will not satisfy my requirement for the design to fly – so you all will just have to wait for that kit until Spring.  Oh, when it flies, I will also publish all the documentation that qualifies it for FAC Thompson Race!

Old-Timers – I have five nearly ready.  OK, four are nearly ready, the fifth needs the drawing and parts finished before it can be built.  One of the four is one that I hoped to release today.  the other three – one is have successfully built and flown, and two are being prototyped, with one of those undergoing test flying.

I also have one contest-winning Embryo ready to be built.  And two Jet Cats to finalize kitting.  See?  That’s ten new kits nearly ready for the New Year!  And I hope to release the Jumbo Stallion and several others over the course of the coming year.

So, I am anticipating more good things ahead in 2018.  I hope you are, too!

Posted in Builds, Products | Leave a comment

December Update – a Busy Time of the Year

Blog posts have been few for the last couple of months.  Various things have kept me busy.  As some of you surely know, it is building season and some of you are keeping me busy filling orders (not a bad thing!)  Here are some short blurbs about some fo the things that have been going on here at Volare Products Headquarters.

You might have missed them, but I did two write-ups on Documentation of some obscure aircraft.

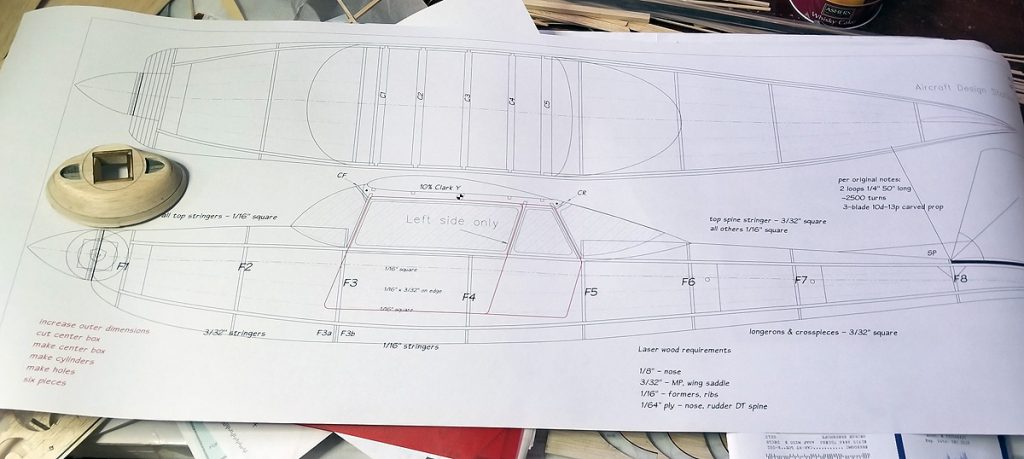
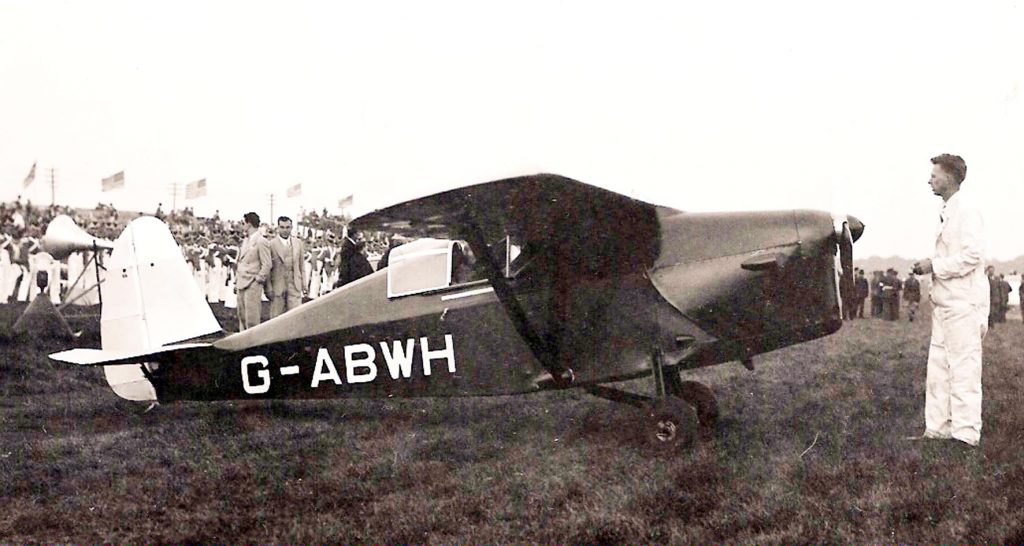
One was the sole Comper Swift to fly in races here in the United States.  This documentation qualifies the model for Flying Aces Club Greve Races.  You can find the article here:  COMPER SWIFT – RACING IN AMERICA

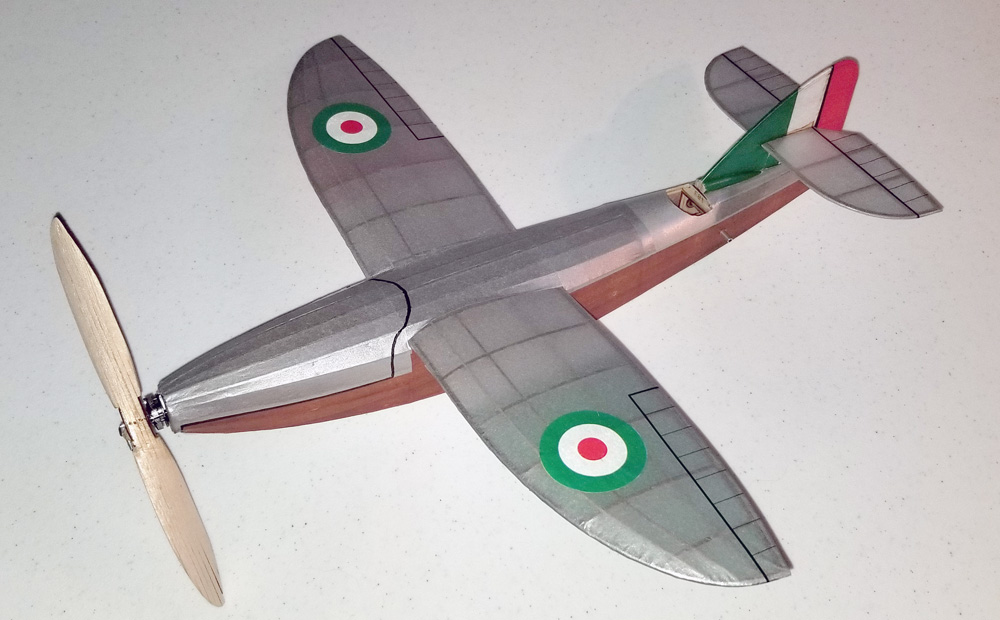
The other was a more representative color scheme for the Pegna P.C.1; a shoulder-wing, flying boat that was never completed and never flown.  But the fact that it was never flown doesn’t prohibit it from Flying Aces competition.  You can find my proposed schema and the reasoning behind it, here:  PEGNA P.C.1

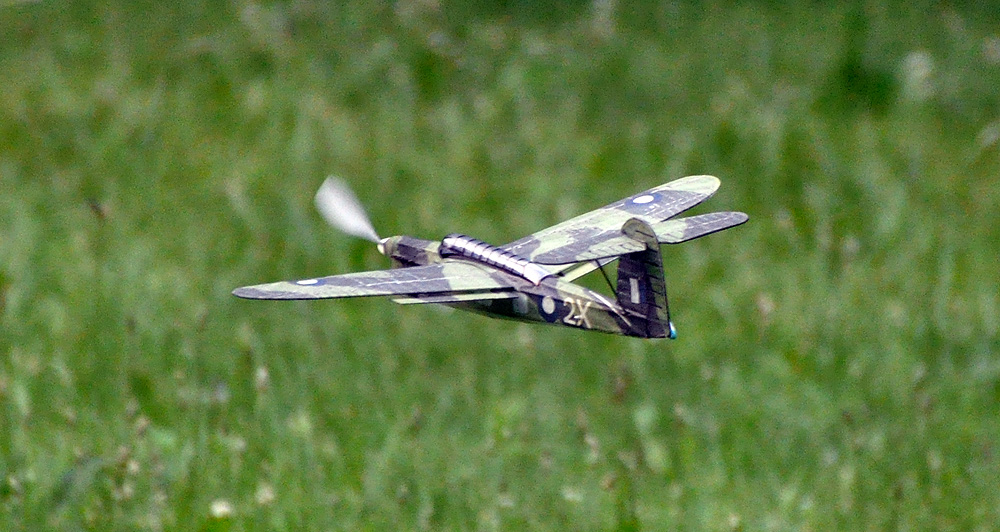
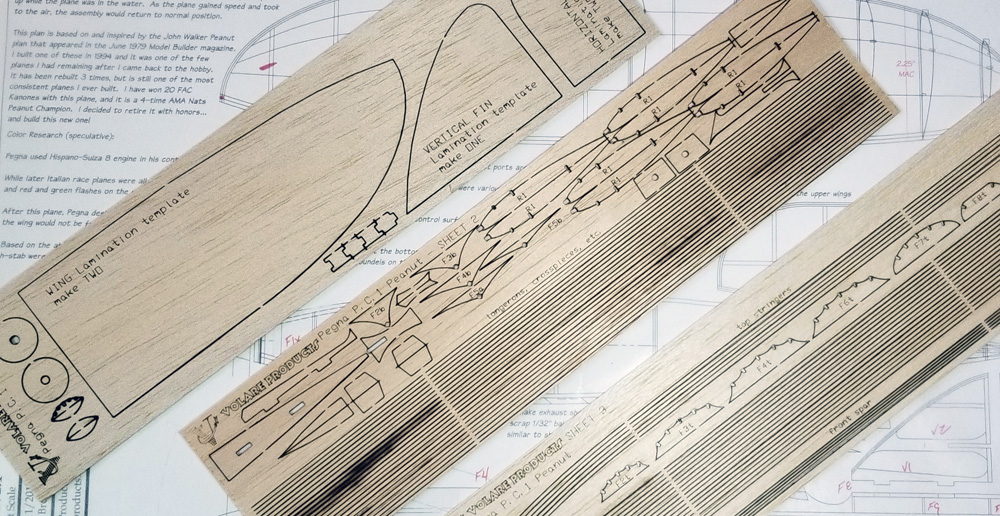
Speaking of the Pegna, I have drawn up a new set of plans for the Peanut version.  I retired my faithful and venerable Peanut with honors after it won its 20th Kanone.  I have built another which is complete except for some minor detailing to be finished this week (before the next contest).  Once this version,in its new color scheme, has flown successfully, I will release a short kit.

I bought a rather cheap HP Color Laser Printer (M252dw) and used it to print the colorings for the Pegna.  I was inspired by Jim Buxton, who posted some photos of laser-printed tissue on Facebook.  the quality of laser printing marking over ink jet printing is a step up – better quality, as you might expect.  Toner is much more expensive, but I plan to use the printer for nothing other than printed tissue, so maybe the cartridges will last quite awhile.

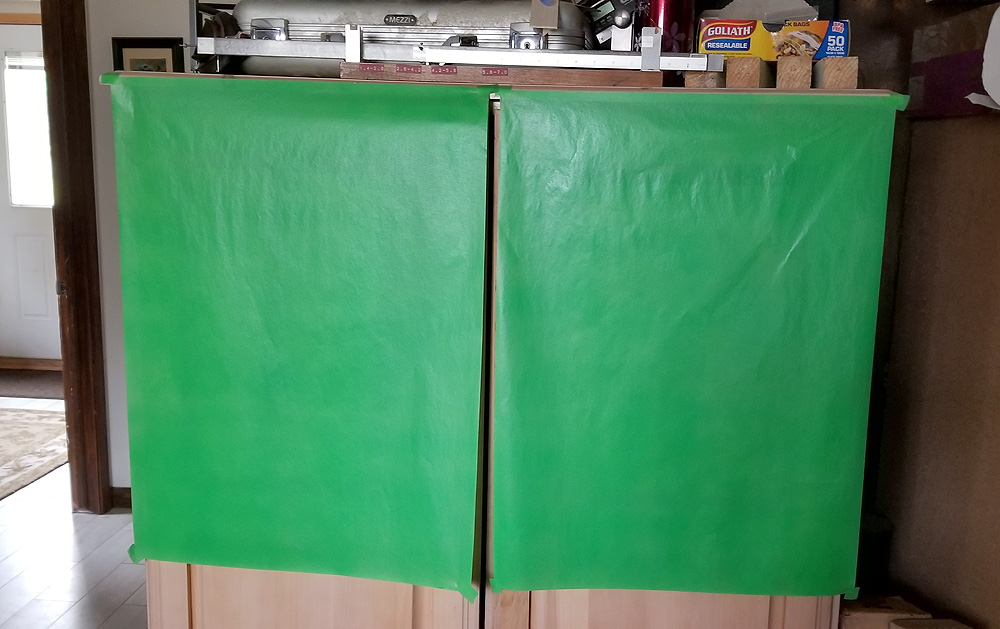
It was “warm” last week (mid-50s) so I was able to spray paint two sheets of tissue paper for my 24″ Cessna C-34 (now I can start covering).  If you recall, this will be for the FAC Thompson Races, so I am restricted to a specific color.  In time, there will be another documentation article providing all of the information necessary to qualify this specific airplane for Race competition.

Esaki White tissue paper sprayed with Design Master floral spray

I have three Old Timers, all falling into the FAC 2-Bit category, out for prototype work.  I know that all three have been under construction:  one has not yet been completed (to my knowledge), one was just finished yesterday and is awaiting test flying, and one has already flown over 60 seconds (but I am giving the builder an opportunity to really wring it out before releasing it).

I have been involved in some online discussion about how to increase the popularity of Peanut Scale modeling.  I am a strong proponent of Peanuts.  They have a couple of benefits that maybe people don’t realize.  Since they are small, you can fit more into a given area, whether that is a single box or the trunk of your car.  Also, again since they are small, it is nearly impossible to add all of the details that you could/should add on a larger model, especially Jumbo or something like that.  So (in my mind) it is more forgivable to leave off some of the tiniest details (this includes simplifying fuselage contours, etc.  Yes, they are a little bit trickier to trim out and a little bit more fragile during the building, but they are fun.

So, during this discussion, I wondered if I am doing enough?  There was mention that no one is really promoting Peanuts in the way that Walt Mooney and Bill Hannan did – and that is true.  There are a few kits available, but not very many.  I will try to help that situation along:  I will put more effort into building and releasing Peanut Short Kits so that there are more available for modelers (I think the fact that there are so few kits hinders building because now modelers must scratch build almost all Peanuts).

Finished and ready to fly.

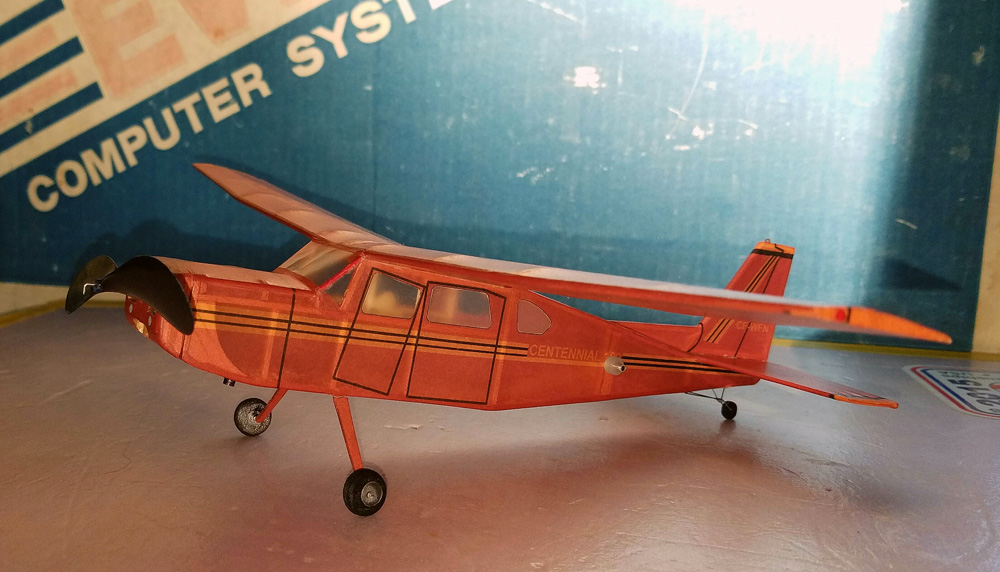
Here is my pathway:  I have two available today: the Chambermaid and the Found Centennial.  I will shortly have the Pegna P.C.1 and the Fairey Barracuda (including canopy).  I plan on doing the same for my Stuka (plans need clear instructions on how to build – it’s really not that difficult).  I have a Goodyear racer just about ready to build (and I can always turn my Falcon Special II into a short kit, with some reworking of the plan).  I will work on another basic and simple high wing and I have a popular biplane just about ready to build.

I am trying to engineer special pieces into these kits that will allow easy alignment of the tail pieces to each other and to the fuselage.  And I am experimenting (so far, successfully) with providing laser-cut strip wood for building.  The strip wood will be specifically for the kits where I will be using 1/20″ and 1/32″ wood.  All of this to make it easier to build the models.

In addition, for my personal fleet, I am working on another quick kit build (someone else’s kit) that should encourage people to build this model that will fit into FAC Scale, Modern Military, and Low Wing Military Trainer.  And I intend on having two Jumbo planes ready for Geneseo – one for Jumbo/Simplified Scale/Modern Civilian and the other for Jumbo/Golden Age Monoplane/Airmail Anniversary.

AND… I am drawing up the next One-Design for the FAC Outdoor Champs (details to be released in the near future).

Whew…back to packing orders!

Posted in Builds, Products | 2 Comments

Stacked Props – A How-To?

It’s been a busy autumn and now I’m under the weather, so things have slowed down and that’s not good, as I’ve got lots to do.

So, while I’ve been sitting here doing nothing, I’ve been thinking about a couple of projects that I have coming up.  I plan on building a couple of Peanuts this winter and I want to go with a pretty big prop – 6″ diameter with 9″ pitch (1.5:1 PD Ratio).  This is higher than our standard PD Ratio on Superior Props (1.3:1), but I wanted to try something different.  By the way, this is pretty aggressive for a Peanut.  Most Peanuts run 5″ props, and if they do go to 6″, it is a plastic at about 0.9:1 PD ratio.  We’ll see how it goes later, but now – my prop building process.

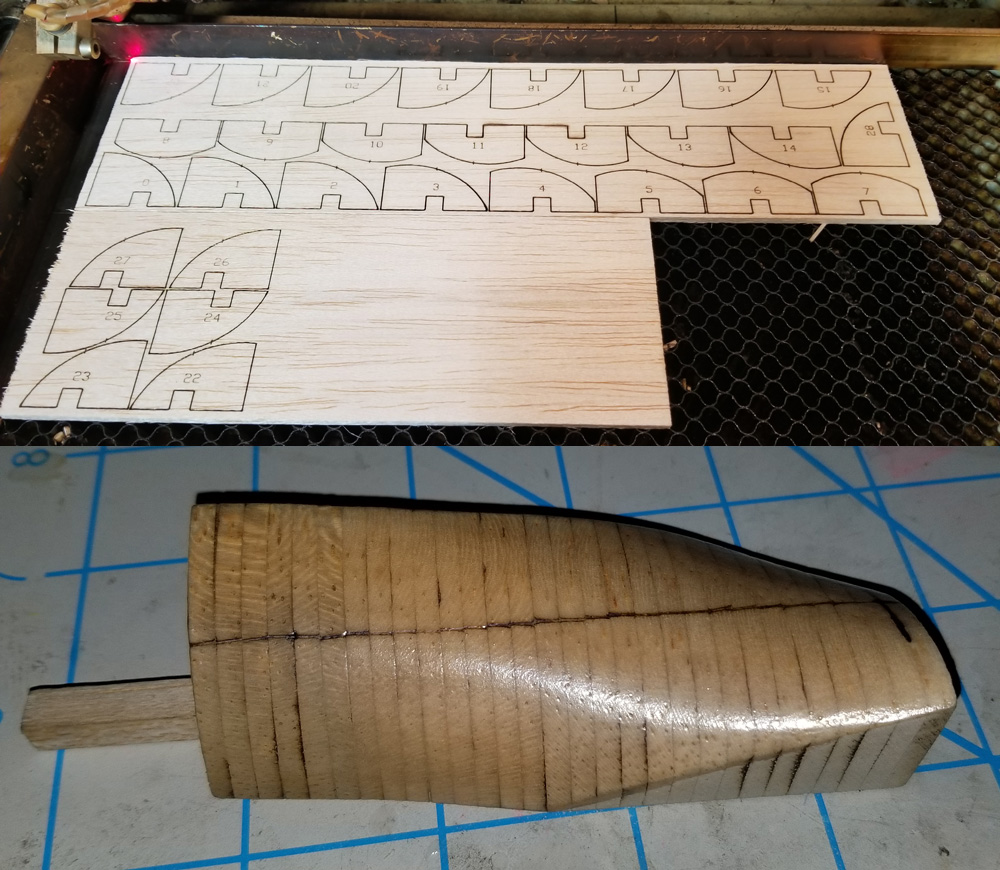
I started with thinking of molded prop blades, like the “can” style, but built on a prop pitch block.  If you are on Facebook and follow some Indoor Free Flight groups, you probably have seen some very beautiful pitch blocks that guys have made for their indoor props – think F1D props.  I thought that would be a good way to do.  So I made one.

I calculated the angles at each station from zero through 3.25″ (exceeding the radius) and gave each section a 5″ diameter radius to create undercamber (just like molding on a 5″ can).  And … actually, I made two, because I stacked the sections backwards the first time and made a reverse block.

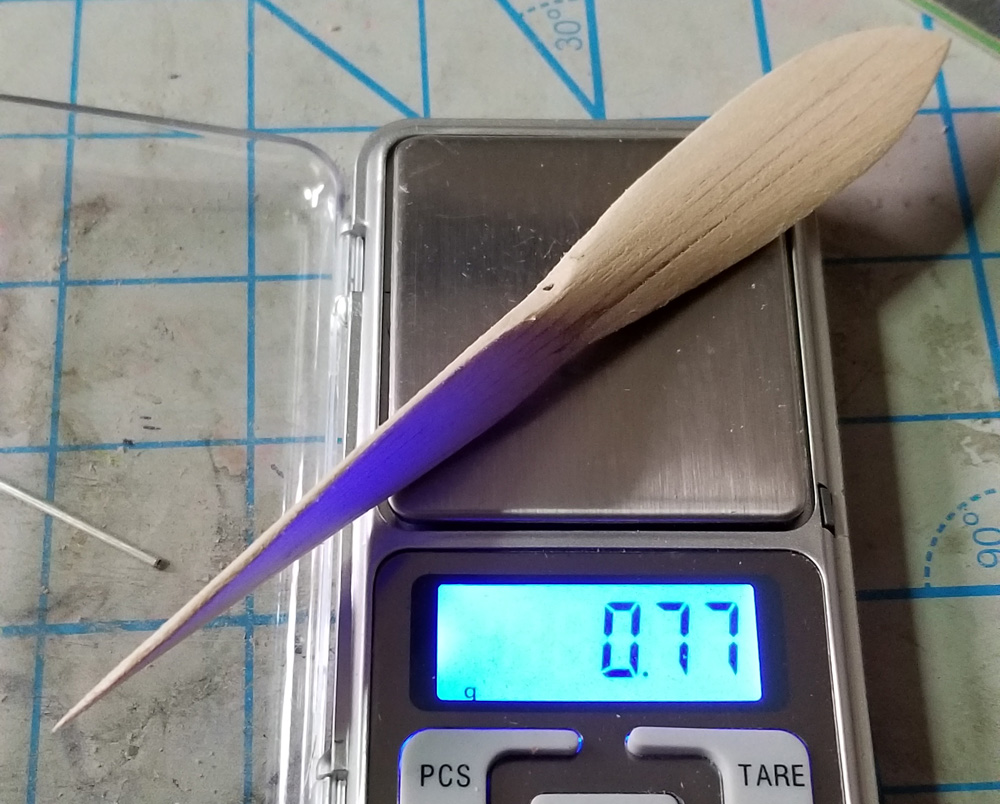
While I love the look of this and know it would work well, I just don’t think I will use it.  I wanted to use 1/64″ ply blades and I cut some out, but they are weighing about 1.5 grams without any hubs or anything – just the two blades.  I wanted something lighter.

I then switched gears and went with a stacked prop.  I call them stacked because you take a stack of sticks and pivot them around the prop shaft and the resulting angle creates the pitch.  I calculated that 1/4″ x 1/16″ sticks would work well, if the tips were overlapped 1/8″***.  This method of generating a pitch is very old – like back to the Wright Brothers and maybe earlier.

*** – CORRECTION – originally I typed overlapped 1/16″.   The correct overlap is 1/8″.

Here is what I did.

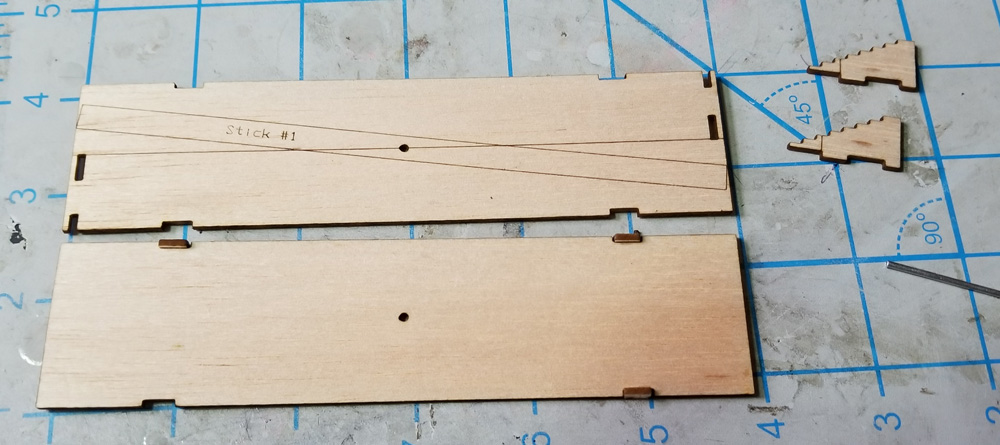
First, I designed everything in my CAD system and them cut out the parts.

These are the parts that make the fixture to accurately stack the sticks.

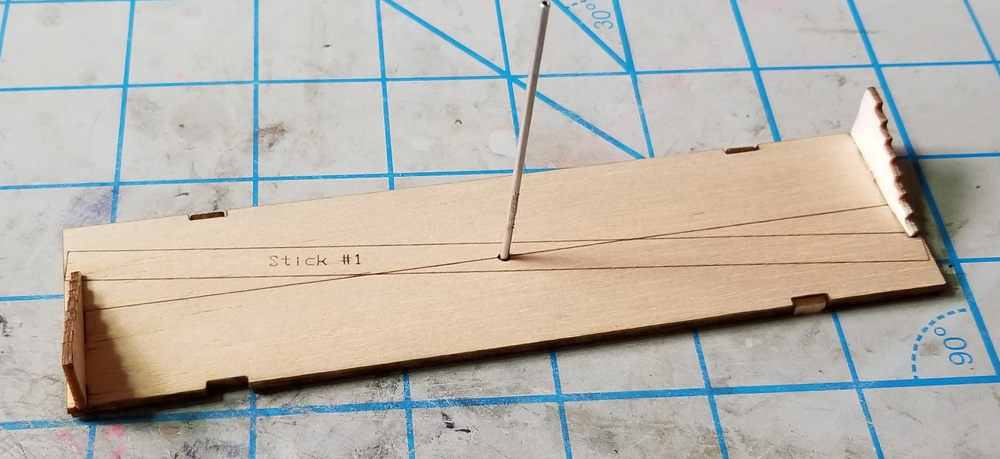
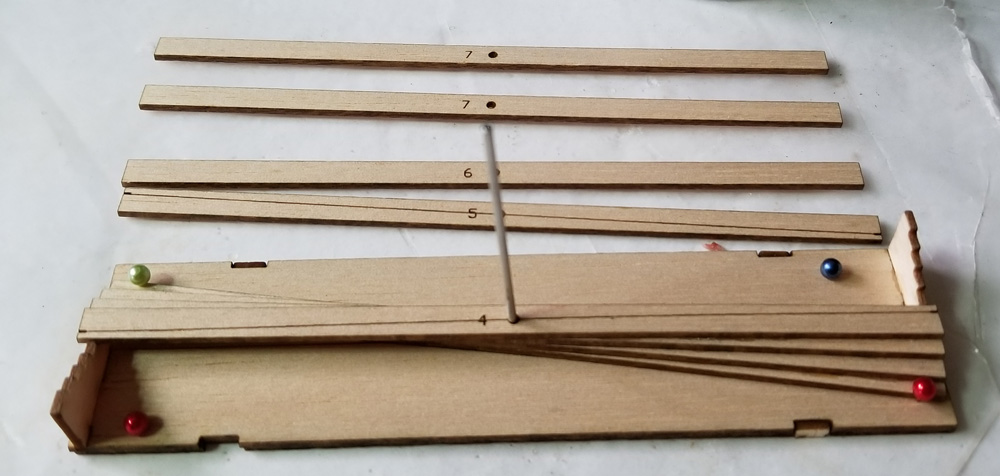
This is the assembled fixture with a  1/16″ aluminum tube as the axle (prop shaft bushing).  The tube will not be cemented until the final finishing of the prop.  Right now, it is just for alignment.

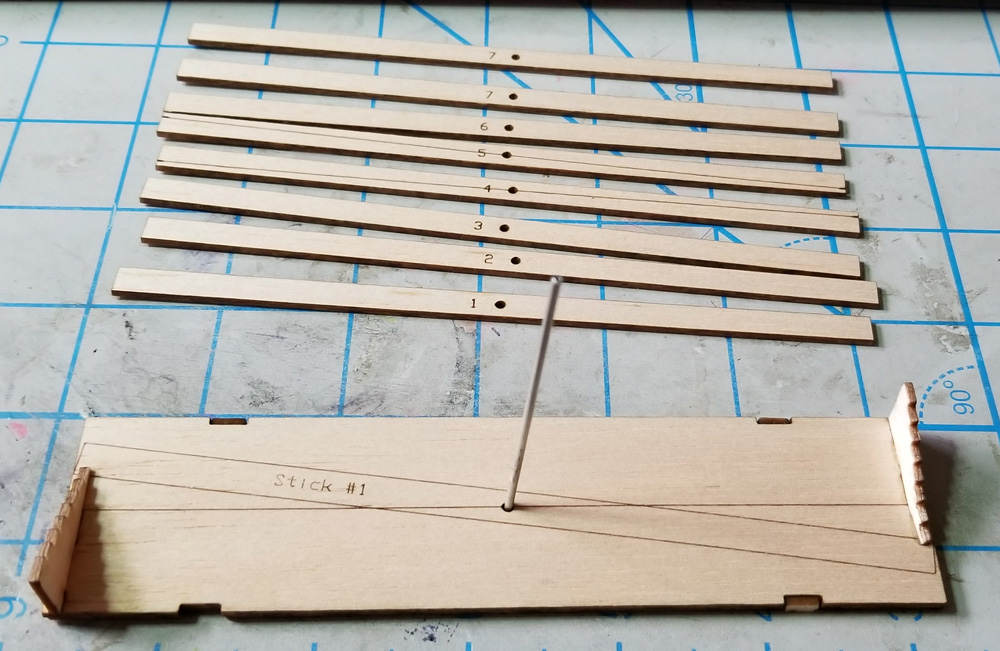
Here are all of the sticks, ready to go.  They are marked and numbered for no real reason, as each stick is the same.  Having said that, sticks 4 and 5 are marked on the end to indicate the centerline of the blade.  This will help me when I lay the blade pattern on and trace it.

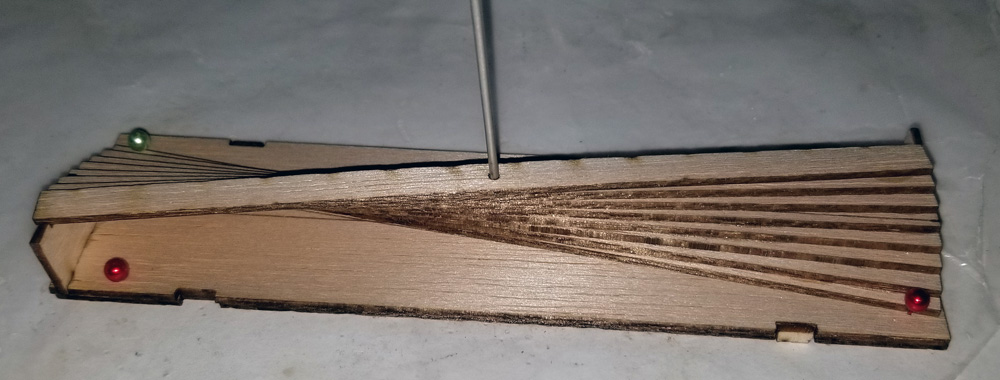
Stick #1 was laid in place, but not glued to anything (you DO want to remove the prop from the fixture, don’t you?)  Then the next sticks are cemented onto the previous stick.  This shows the process half way through.  Oh, you need to use the tip jigs for proper stick placement.

Here are all eight sticks stacked and glued.

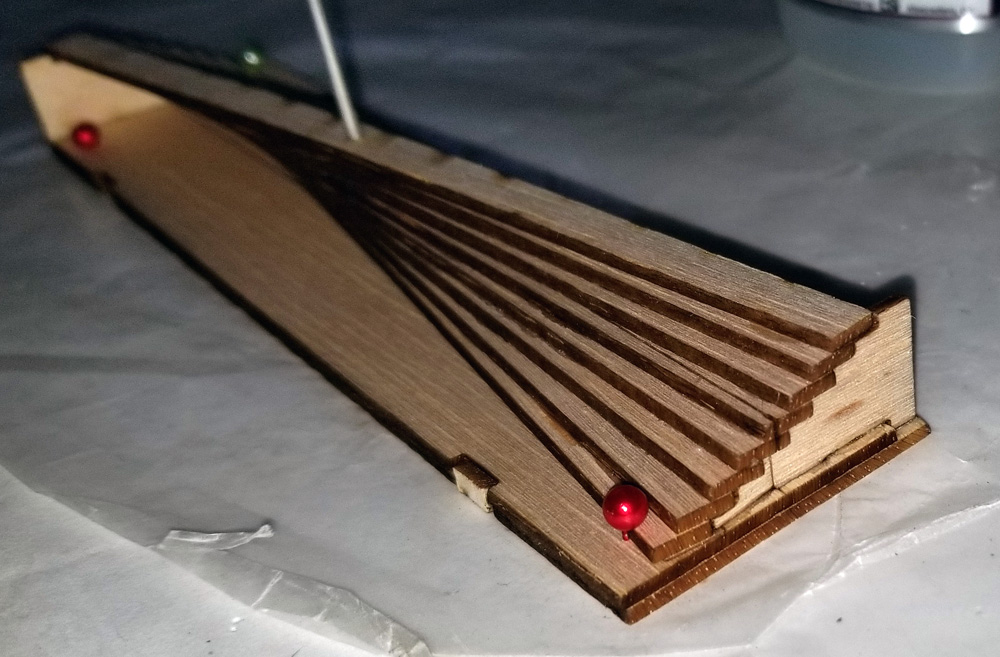
You can see the stair-step stacking on this end view, all set in place with the tip jig.  You can also see the blade thickness will be just under 1/16″ at the tip – plenty to sand away.

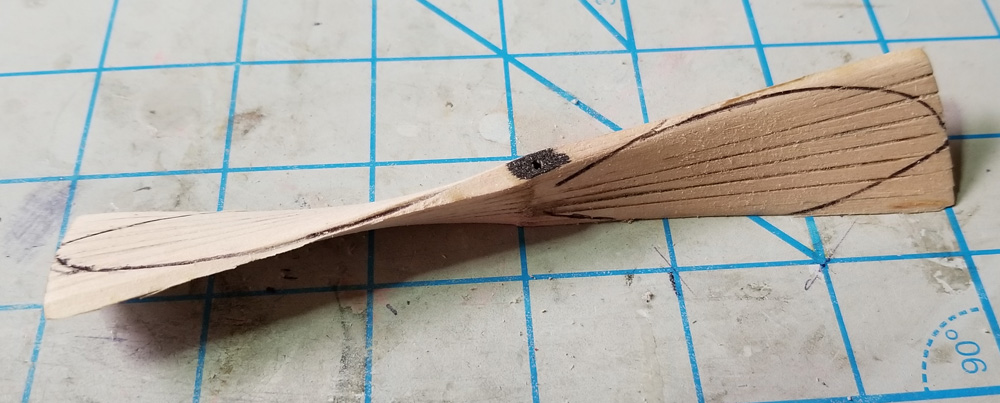
Here I have started to sand the high corners away.  This method really saves wood; you’re not carving away most of a block to get thin blades.

I traced my blade templates (I DO like the chinese prop blade shapes!)  I then carved the excess away and started thinning the blades by sanding.

Here is the prop all ready to finish.  I need the tubing for the shaft, some sort of clutch, fitting the prop to the spinner, and probably some sort of finish on the bare blades.  I am sure that I can get the whole assembly to be around 1.5 grams.

Posted in Builds | 6 Comments

BLUE RIDGE SPECIAL – available now*

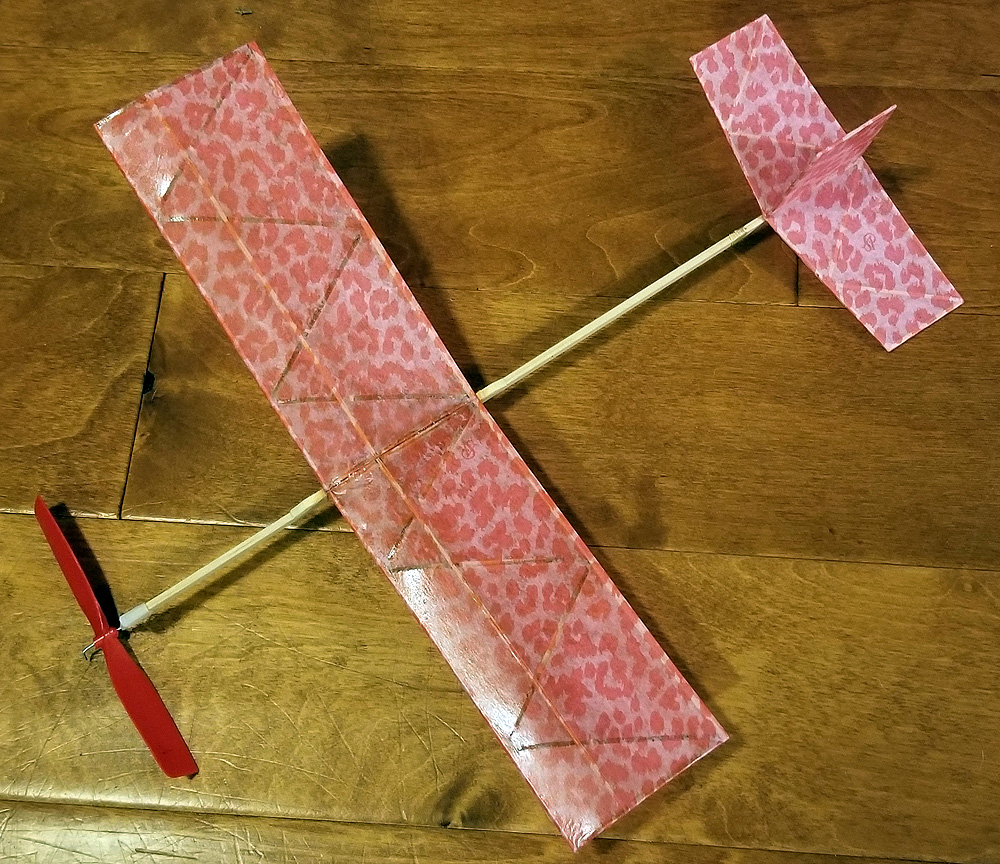
Ever since I took over this business in 2012, there has been a continual demand for the Blue Ridge Special.  Why do people want them?  Because they are quick to build and they fly like stink!  You might have seen my recent video showing how high it climbs on minimal turns (I’ve posted the video at the bottom). Unfortunately, the most recent kit went out of production and I only ever sold a few, even though people wanted them.

This summer, I came to an agreement with the previous owner of the kit.  I now have the rights to Phil Hartman’s Blue Ridge Special.  I have developed a set of laser-cut pieces for the kit based on the work the past owners did.  And I am happy to say I will be offering this plane in FULL kits and SHORT kits.

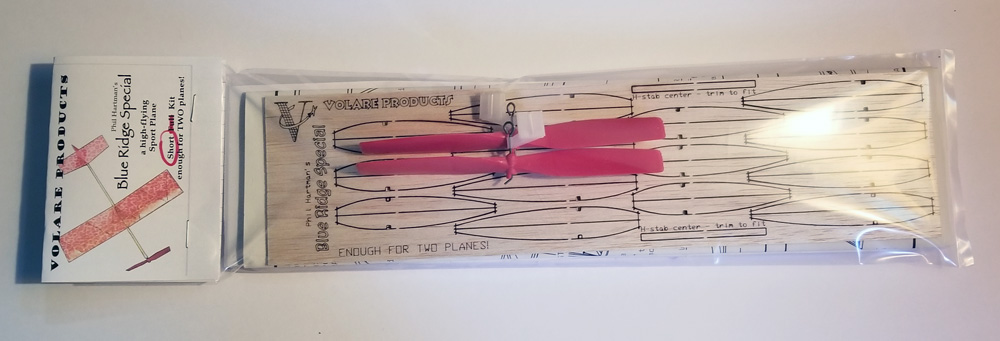
TODAY – the Short kit is available for purchase.  The short kit contains the original plans, original notes, supplementary short kit notes, laser-cut wood, and two propellers.  TWO propellers because, as I laid out the wood, I realized that I could supply enough material for TWO airplanes!  The full kit will be the same way – enough for two planes.

In addition, since I know clubs want to buy several of these, I have built in a 10% discount for purchases of 10 or more.  And – I can provide an additional discount for School Projects.  (I am sending 10 short kits out to Maryland today for a school!)

You can find the Short Kit RIGHT HERE for $10.  I will have the Full Kit available as soon as I get all of the material collected to start packaging.  It will be $20 for the Full Kit (enough material for TWO planes).

P.S. this is now a Provisional One-Design Event in the Flying Aces Club (much like the Phantom Flash)  and eligible for a Kanone!

Posted in Products | 1 Comment

Keys to FF Success – Part 2 of 3 – Thrust Adjustment

Last week, I wrote about CG location and Trimming your model.  This week, I will cover part 2 of 3 – Thrust Adjustments.  I will give you a little background and then I will talk about some items that I feel have revolutionized – yes, that’s a big concept – the way we fly our planes.

For ever, modelers have been told to put in “a couple degrees down and a couple degrees right” in their models to counter-act the torque produced by the wound rubber motor.  This is not isolated to rubber power, as FF and r/c gas and electric have to do the same thing – and even full scale aircraft have to be designed to manage the torque from a fully revved engine.

But one problem I have had with this general instruction is – how do you measure the two or three degrees on the field – and who does this?  Yes, these small and precise angles can be drawn into plans and the draftsman, especially in CAD, can shot these exactly.  But in application, after the model is built, how do you add “one more degree”?  While the requirement is real, the instruction is impractical.  Shimming the noseblock is the traditional way to get the offset you need – even if you have built per direction, often an adjustment needs to be made to obtain good performance in the powered section of the flight (remember – don’t adjust the CG/Trim!)

Setting the new angle on the field is not an easy task.  Be sure to bring a box of wood scraps with you of varying thicknesses – my box has sheets and sticks from 1/8″ thick down to 1/64″ plywood.  Inserting these at the top and side of the noseblock will help you obtain the correct angle for the prop shaft.  Gluing and sanding are part of this process.  It is long and tedious – and can result in an ugly nose area on your model.

Even later, on a trimmed model – trimmed in both glide and power – you will need a minor thrust adjustment on the field for the specific conditions.  I still get teased by my flying buddies about my old practices of winding the model, walking out in the field, and scanning the ground for just the right sliver of grass or clover stem to set my thrust for that next winning flight (ok, not all of them were winning – and I still do this on occasion today).  And I remember ad one mass launch event where a very competitive and successful modeler was about ready, but needed a shim of “about 8 thousandths” to finalize his model (yes, he really said that).

But something has come along that has truly changed the way that I fly and the way that other modelers trim their models.  And I believe these products have provided hundreds of modelers with an easier path to success than just about any other product available:

GIZMO GEEZER PROP ASSEMBLIES and ADJUSTABLE NOSE BUTTONS

(Full disclosure:  I sell these, but this is not a sales pitch.)  Now, in an effort to make my thrust trimming easier, I have tried at least two other brands of adjustable nose buttons.  I found that either they don’t hold the thrust angle, or they were too complex in their method of setting the angle.  Then I tried a Gizmo Geezer Prop Assembly.

photo by Gizmo Geezer

This assembly is a complex piece of engineering that provides a simple way for the average modeler to apply that complexity.  They take care of the following issues for the modeler right out of the box:  better rubber management, better thrust adjustment, and better propeller performance.  How do they do that?  Here’s a run-down:

Better rubber management.  Modelers throughout time have had problems with the motor.  As turns get higher, and knots get bigger, the motor starts to bind on itself while unwinding.  This is especially true if the motor is significantly longer than the hook-to-peg distance – which is most of the time for us looking for more duration.  When we get long motors, they start to bunch at the rear.  This wastes the turns as they are never unwound and it disturbs the balance of the model, making it tail heavy, and ruining the glide.  One way to avoid this is to braid the motor.  But this is a minor science that requires experience gained over time – how many braiding turns do I use and in which direction?  These are debatable issues that, while they do have answers, are eliminated with the usage of the Gizmo Geezer Prop Assembly.
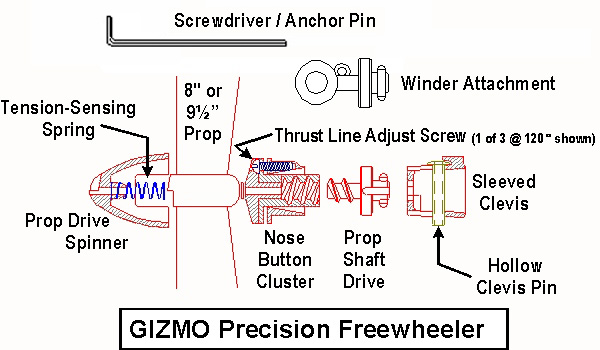
drawing by Gizmo Geezer

This prop assembly ELIMINATES the need for braiding motors – completely.  In fact, the instructions tell you NOT to braid the motor.  Why?  Because of the remarkable engineering that Orv Olm put into this item.  This mechanical marvel relies on the unwinding motor to activate the freewheeling mechanism.  To put is simply, there is a small compression spring in the nose of the assembly.  The size of this spring is critical because it only activates when there is very few winds left – BUT JUST ENOUGH to keep the motor from becoming slack.

As the spring overpowers the motor, the freewheeler disengages from the prop, and withing two or three more motor revolutions, an internal screw engages the rotating motor into the stationary noseblock.  This stops the motor from unwinding – the motor is now perfectly stretched between the noseblock and the motor peg without binding or bunching.  One additional benefit to this locking motion is that you can wind your motor and install the prop assembly and the motor will not unwind.  You can walk around without the danger of the motor unwinding accidentally until you give the prop a couple of turns with your finger (just like winding with the prop) and this transmission lock disengages and you are ready to fly.

Better Thrust Adjustment.  Included in this package is a simple, efficient, and effective method of thrust adjustment.  The nose button itself had BUILT-IN adjusters.  These are in the form of three screws located around the perimeter.  They are equally spaced (120 degrees around the circumference) and they provide an extremely easy method for the modeler to change thrust – on the workbench or on the field – and that thrust setting doesn’t change.

I, personally, put a single screw at the bottom of the nose button and then have two spread out across the top (some modelers choose to invert this – with the single screw at the top).  The single screw, when screwed in, will add downthrust.  When screwed out, it will take out downthrust.  The upper screws will provide left and/or right thrust.  These are steel screws (currently with a hex head) with an interference fit into the plastic so the plastic grabs them – and they retain their setting regardless of how hard you crash your model.  Of course, as you use them, you  will crash your model less and less.

Better propeller performance.  The Gizmo Geezer, from the start, realized that plastic props are not very efficient.  Typically, they are at something around a 1:1 Diameter/Pitch ratio.  A better-performing ratio for rubber models is something slightly greater.  Gizmo Geezer takes standard plastic props and resets the pitch on each one to 1:1.25.  This ratio grabs the air better, reduces zooming, provides a slower and more deliberate climb-out, and extends the run-time of the motor (by slowing down the prop).  And these assemblies are available in 7″, 8″, 9.5″ (for P-30), and 10″ diameters.

After some time,  Gizmo Geezer received feedback that modelers wanted more.  It was very difficult to swap props on the prop assembly.  Modelers wanted to use the nose button and its wonderful adjustment capabilities with their own props.  So now the Adjustable Nose Button is available separately.
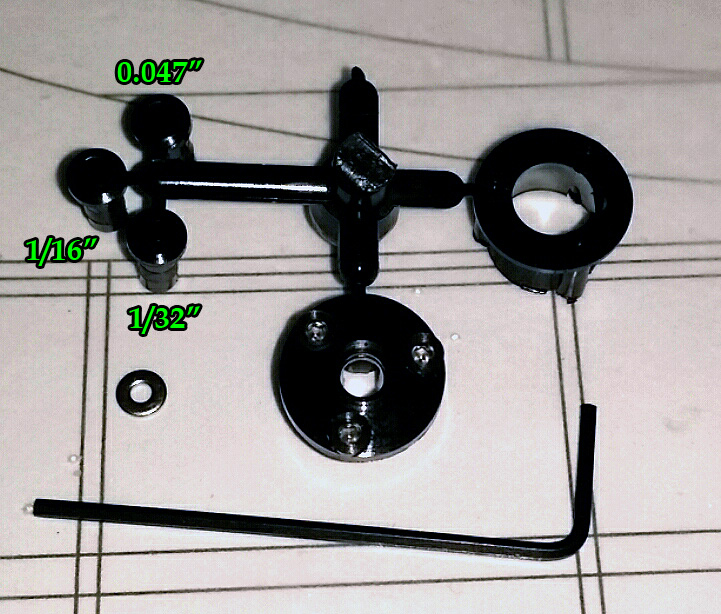
At first, the nose button was available assembled, but this has changed.  The modeler now needs to do the final assembly on the product, but this is to his (or her) benefit:  now the modeler can select the prop shaft size they want for their particular application.  The original nose button was designed for an 0.055″ prop shaft.  This is an unusual size but it was selected for durability.  But modelers were often drilling this out and re-bushing the hole for their specific application.  Now all they have to do is select their desired prop shaft (1/32″, 0.047″, or 1/16″), install that bushing and complete the assembly.

The Gizmo Geezer Prop Assembly opened my eyes to how to finally apply thrust adjustments with precision.  And once I was able to use just the nose button, my modeling and flying really started to improve.  No more finding a sliver just right for each flight.  No more ugly shimmed and sanded (or not sanded!) front ends on my planes.  Thrust adjustments are easily made right on the field and are now usually 1/4 turn or less of one of the screws.  Once you start using them, you can learn how to tame that model.  Zooming can be controlled with a little bit of right – or a little bit of down – depending on what you need.  These have helped me become a better flyer and I use them in all my models, Scale and Old Timer, excepting the smallest Peanuts.

The final article in my Keys to FF Success will be on Winding to Torque.

Posted in Builds, Products | Leave a comment

Keys To FF Success – Part 1 of 3 – CG & Trim

I have decided to analyze – and share – the things that I consider to have brought me more success in my recent flying than I have had in all of my previous years of flying.  This goes beyond the basic “building straight”.  I will cover three things that I feel have brought me success:  CG & Trim, Thrust Adjustments, and Winding to Torque.  Each will be a separate article.  Now, I am not in discoverer or innovator of any of these, but simply apply knowledge that others have passed along.
As a last comment, I am no “expert” and I am not meticulous in application of any of these things.  I might have a few more wins if I was a little more dedicated to absolute accuracy, but everything in life is a trade-off.  I am flying pretty well these days, and I do strive to improve, but I tend to feel that third-decimal-place accuracy in some of these things is a waste of time and effort.

CG & Trim

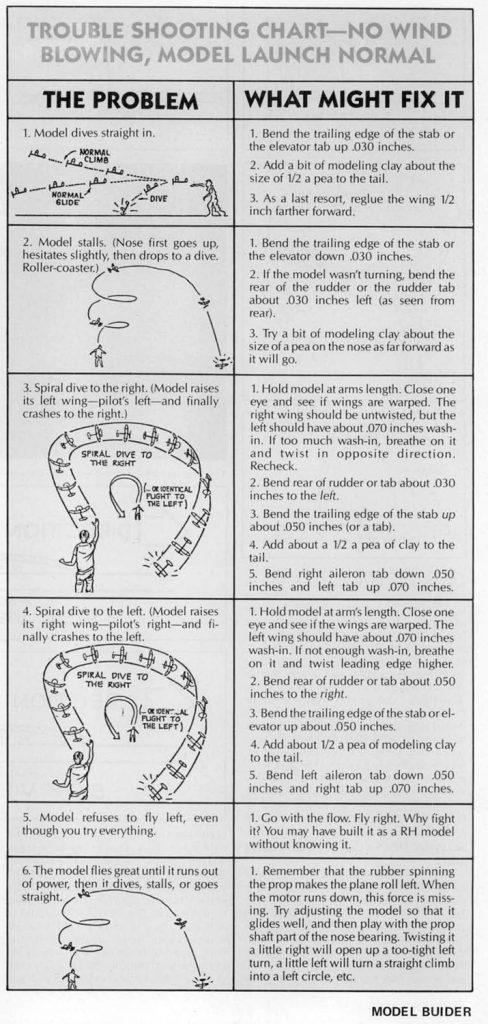
Good general trimming advice by Bill Warner in his “Hey Kid…” series in Model Builder magazine

Way back when, I, like most others, went by the “1/3rd of span” rule of thumb for CG location and followed general trimming instructions like those shown in Model Builder or Don Ross’ book.  Also I followed various “10-step trimming methods”.

These are helpful and I had a degree of success, but in my experience, they are too generic.  I would have trouble establishing a glide.  At first, I thought I was having issues with the propeller and I adapted a process that I still use today.

Some recommend removing the prop and replacing it with weight and finding the glide.  I don’t do that – I simply load a short test motor and give it a 100-200 turns – just enough to sustain a glide.

My logic is that I am not having the prop act as some sort of brake or rudder.  With the motor turning the prop and providing minimal thrust, I have removed that problem from the equation and I am actually seeing how the model will behave at the tail end of powered flight.  This practice gives me a good starting point for applying power.

But this is not the real starting point.  Shortly after I came back to the hobby, I went to the FAC Nats and witnessed Don DeLoach win Grand Champion.  A little bit after that, Don wrote an article for the FAC News that explained why he could win at so many events.  If you have ever spent time with Don while he is flying, you will know that he is strict in his application of his own processes.  And, obviously, if the guy can dominate in Scale AND Endurance, he’s onto something.

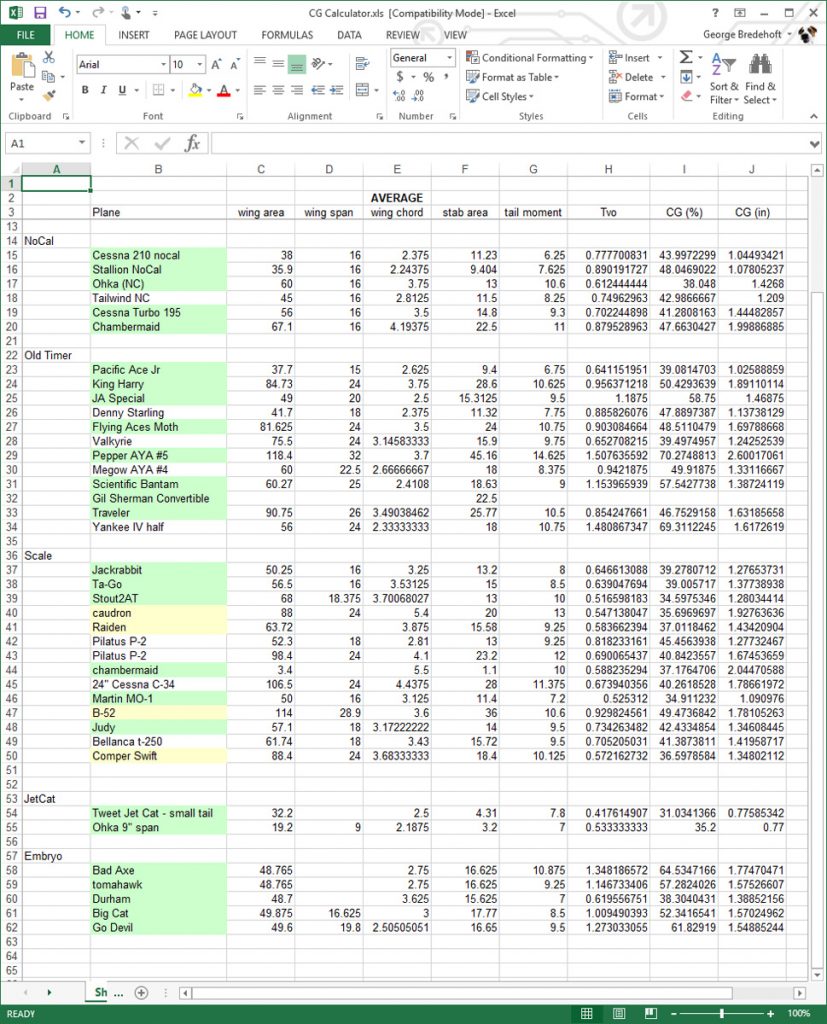
Don’s article (now archived HERE) gives an introduction into trimming a model that goes way beyond the generic trimming methods mentioned above.  Don’s practices rely heavily on William McCombs’ Tail Volume Calculations.  Don’s article gave me enough information to set up a process that includes a spreadsheet to calculate this relationship between the wing, the tail, and the tail moment (distance between the wing and tail).

a screen shot of my spreadsheet

I now use this on EVERY model I build (and design).  In the design phase, it will tell me whether my tail is too small so that I can increase the size.  It tells where the CG should be on the wing in both percentage and inches.  This is where your model should balance on the wing.  You need to know this to start your glide tests.

It also allowed me to calculate a better location for the wing on the Jimmie Allen Special.  I reported this in THIS ARTICLE – and I have had more than one person tell me that this process turned their unreliable JA Special into a good flying model.

In  my spreadsheet, I have separated the models into different types so that, in my mind, I can compare apples-to-apples.  I have categories for Peanut, NoCal, Old Timer, Scale, JetCat, and Embryo.  In this way, I can make a slightly-educated guess how a prospective model might fly compared to known good flyers from my past.

I believe that because I have applied this technique, my models are performing better in the test gliding process and therefore are performing better when they come to flying.  I almost never need to adjust the elevator, at least nothing more than a small tweak.  I am experiencing less occasions of models stalling out or diving in during these glide tests.

And, of course, the follow-on to the discovery of the CG location and the glide settings is to NOT CHANGE THESE SETTINGS when you apply power, not even the elevator.  Because of a longer motor, you might have to add weight to re-establish the CG in the proper location, but never stray from the settings that created a good glide.

The next article will be on Thrust Adjustments.

Posted in Builds | 9 Comments

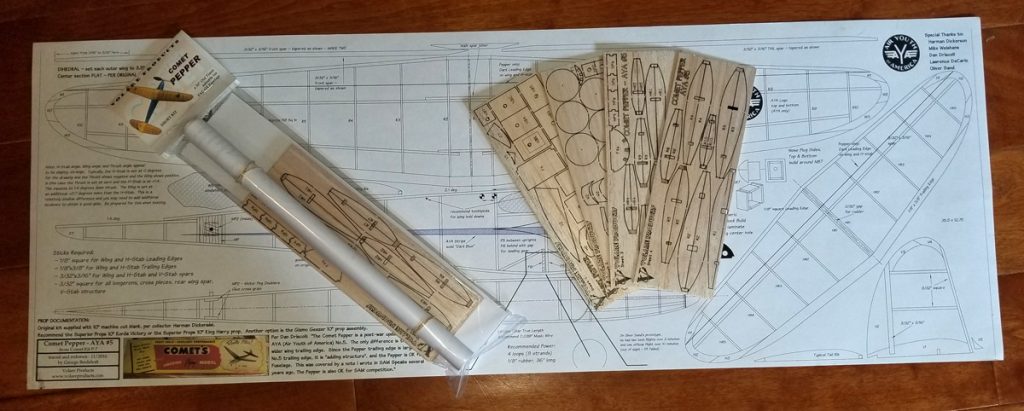
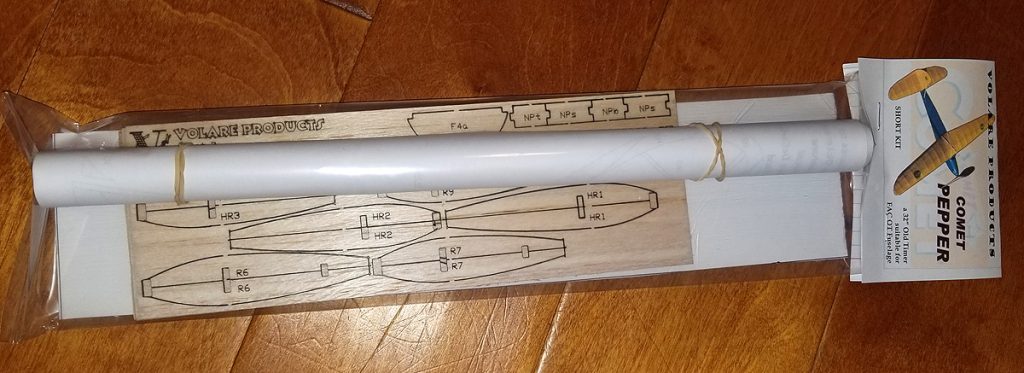
COMET PEPPER – Available Now!

I have finished up all of the details necessary to make this Short Kit available to you.  I’ve mentioned this model several times before.  Let me add this: this model is an incredible soaring machine – you’d better add a DT!

Find it HERE.

Posted in Builds, Products | Leave a comment

Glorious September Free Flight

Just got back from the FAC Outdoor Champs and the Ted Dock Memorial contests – two, two-day contests held back-to-back at the wonderful AMA Flying site in Muncie, Indiana.

Where do I start?  My son, Jackson, and I arrived Wednesday afternoon.  We met up with my parents and went out to eat.  My dad spent Thursday with us at the contest – he wanted to see his products in action.  He does the machine work on the propellers and other mechanical gadgets that we make and sell.

The weather was excellent – except for fickle drift on Thursday and 30 minutes of spotty rain on Sunday, we had four days of beautiful weather – calm winds of no more than 5 mph or so and blue skies on Friday, Saturday and Sunday (Thursday was heavy overcast).  You could not wish for better weather.

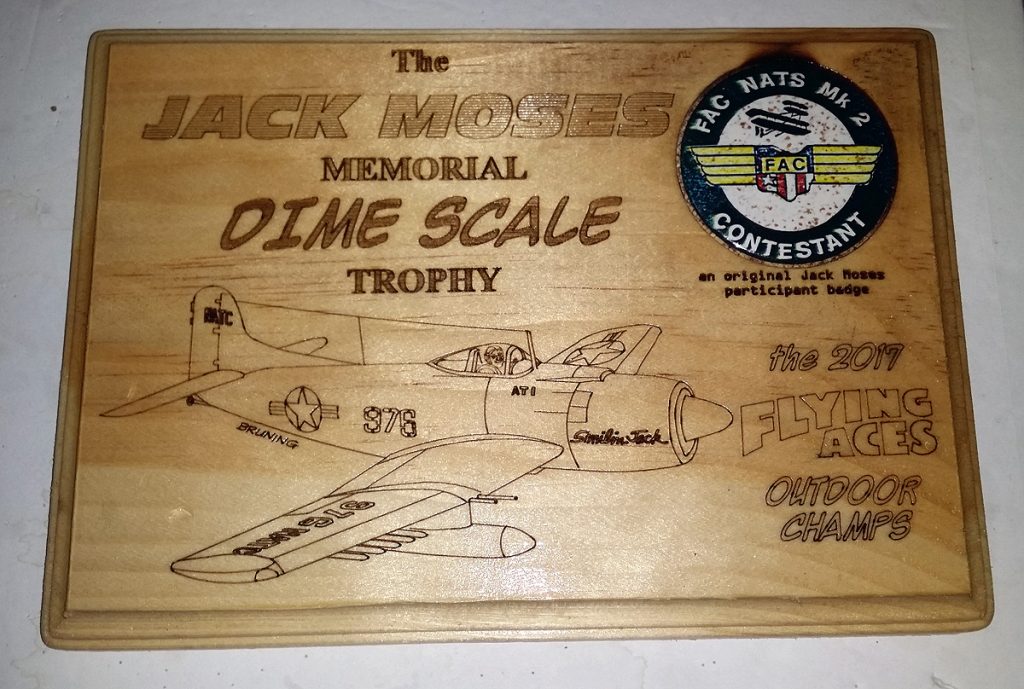
The FAC outdoor Champs (Thursday and Friday) were dedicated to our late friend, Jack Moses.  He was a terrific modeler, wonderful person, and a great friend to all who met him.  He passed away last year while we were all attending the 2016 Champs.  Our hearts were heavy last year but we flew on, knowing Jack was Smilin’ down on all of us.  The choice of the One Design for the 2017 event (the kit registrants received and the image on the t-shirt) was the last model Jack was building – the Martin Mauler from Mike Nassise was on his building board.  In addition, we the event organizers, decided to create a Jack Moses Memorial Trophy.  Jack loved Dime Scale planes, so the winner of Dime Scale at the Outdoor Champs will receive the trophy.  It will include one of Jacks participant badges from the FAC Nats (Jack went to every Nats from the first one to his last, two months before his death).  We have several, so this should be a thing for 10 years or so.  Here is the first, won by Harrison Knapp.

Here is a shot of Jack’s BMJR Tailfirster P-30 in flight Thursday evening.  I bought this at our club auction and will fly it when we fly P-30 in his honor.  It flies great; I got over 2 minutes in this late evening air.

In fact, on Saturday, I flew it in the Ted Dock contest and at 3+ minutes, the DT went off at high altitude (in a strong thermal).  The force of the DT broke the glue joint on the thread holding the Canard at angle and the canard thermalled away.  The rest of the model took another minute to hit the ground.  Now I need the plans and/or patterns for the canard so I can keep flying this model.  Can anyone help me out?

My new Comper Swift flew “off the board”.  This is a 24″ model and sports a 9″ Superior Prop (carved balsa).  I finally settled on 2 loops of 3/16″ for the motor.  I was generally getting 75-80 seconds or so per flight.  I flew it in the Greve Races and it did real well – fourth at the Outdoor Champs and second at the Ted Dock!  It needs some micro-trimming to turn it into a serious competitor.

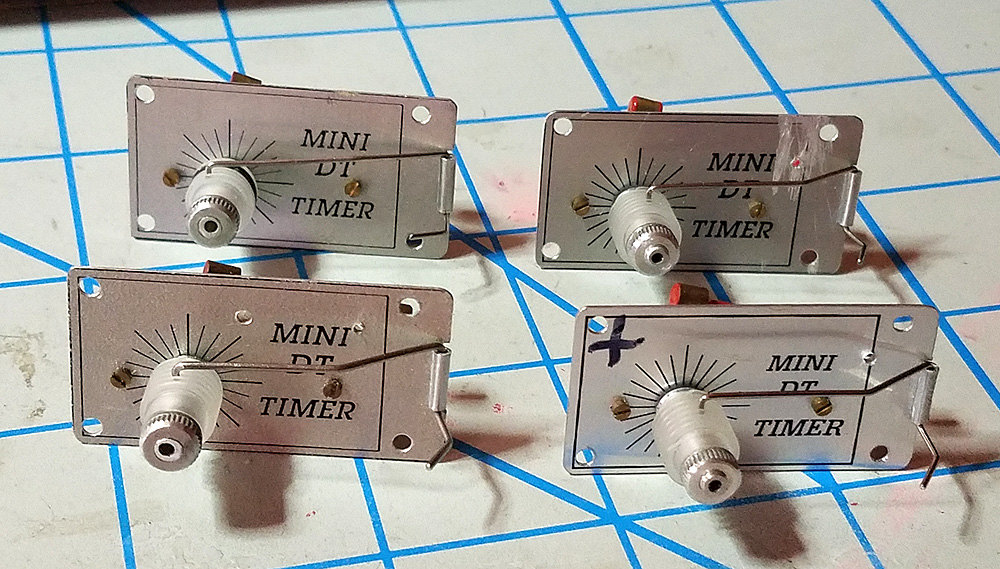
My “newer” Comet Pepper finally redeemed itself from the debacles in July.  I took some time to trim it to ROG off the table and it paid off – with one minor problem:  when it came time to set the DT, my homemade mechanical “tomy timer style” DT must have broke.  It would only last for about 40 seconds at full winds.  So I had to lock down my DT to fly at the Outdoor Champs.  The day was heavy overcast with light and variable breezes – on occasion.  It really was a great day for flying.  There was a little bit of bouyant air, but no real thermals of any size.  Therefore, I was able to fly with little risk to my plane.  I made my three official flights:  5:45, 2:33, and 7:59 – even the last one landed only a couple hundred yards from the launch table.

The day at the Ted Dock was different – full sun and 5 mph winds.  I had some trim issues and that started to spread out my flying into mid-day.  I really like to get my big planes – those that can max in no air – out of the way early in the morning when thermal activity is lightest.  My last flight on the Pepper went over 3 minutes and the model drifted over the corn.  As you can see below, I was able to find it without much issue.  I somehow dropped my middle flight with a 1:58 and ended up in second place.  This plane flies GREAT.  I don’t have it trimmed for a rocket climb yet, but it really does good as it is.  It glides like mad.

“Peppercorn”

I’ve got a handful of these DTs now; I think I will put one in the Pepper. They are just over 5 grams each whereas mine was a little over 3.  I hope to trade some weight for reliability!

For those that are interested,  Here is a brief summary of my results from the two contests:

  • FAC Outdoor Champs:
    Peanut Scale – Pegna P.C.1 – 3rd place
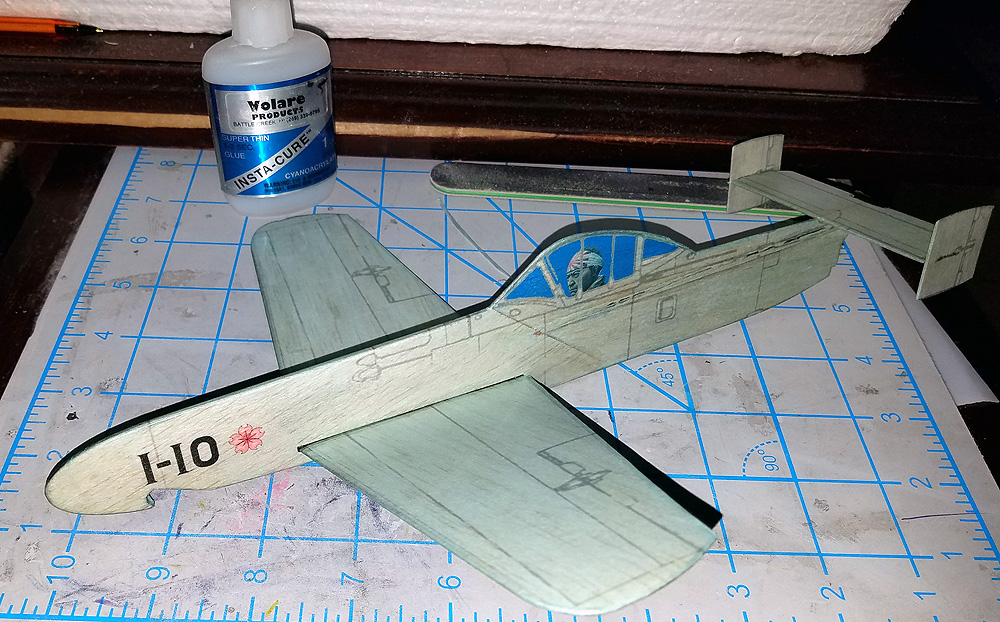
    Jet Cat – Ohka – 2nd place
    Goodyear Race – Falcon Special II – 2nd place
    Old Time Stick – Wanderer – 2nd place
    Old Time Fuselage – Pepper – 1st place
  • Ted Dock Memorial
    AMA CLG – 2nd place
    Greve Race – Comper Swift – 2nd place
    OT Fuselage – Pepper – 2nd place
    OT Stick – Wanderer – 2nd place
    Phantom Flash – 1st place
    2 Bit – King Harry – 1st place
    Embryo – Bad Axe – 1st place

There’s a story behind nearly all of these and more, but I won’t go into all that.  However – a word to the wise – Check and RE-CHECK your models, especially during Mass Launches.  I got knocked out of WWII because I failed to notice warps in the tail of my Judy.  I lost the 2nd fly-off in OT Stick because I neglected to check how my tail was sitting (the same thing happened at the launch of the Dawn Unlimited).  Lessons Learned:  Check and RE-Check!

NATURE – one thing you can count on when you stay at Muncie is that you will see some nature that maybe you don’t get to see everyday.  Here are a couple shots I took this weekend.

Moonrise, Saturday morning, just before dawn

Sunrise, Sunday morning

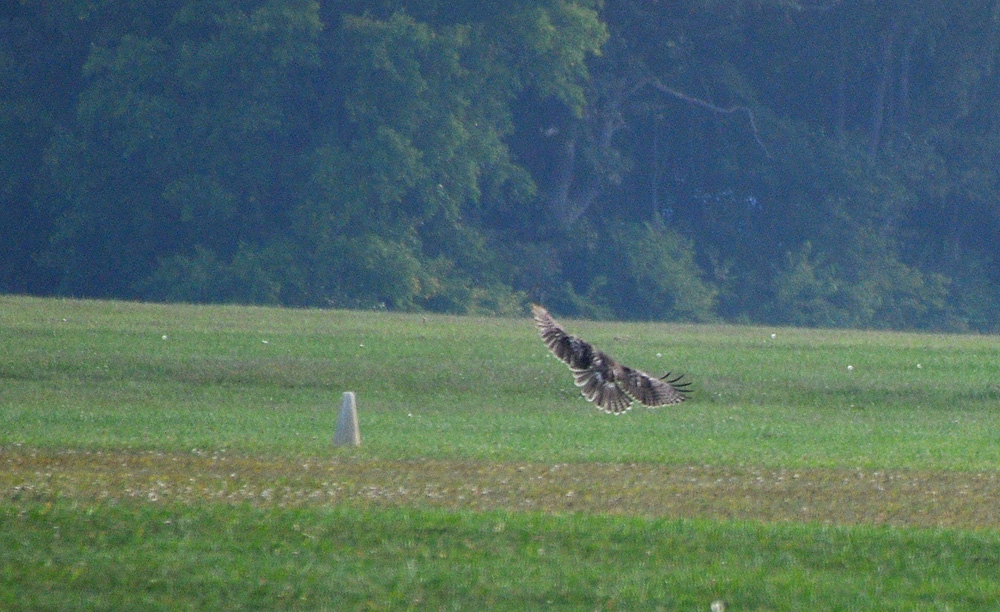
A hawk that hunts the flying field

Maybe the best part of this event is the cameraderie.  It is smaller and more personable than the Nats or non-Nats.  We have a great flying site and we can share the experience with our friends.  And flying in the evening, after the pressure of the contest is just about the best.

I’d like to thank my son, Jack, for taking and posting several videos during the four days.  I couldn’t be bothered to take many photos for a variety of reasons, but his videos were imaginative and fun.  You can find them on the FAC-GHQ Facebook page (or most of them).

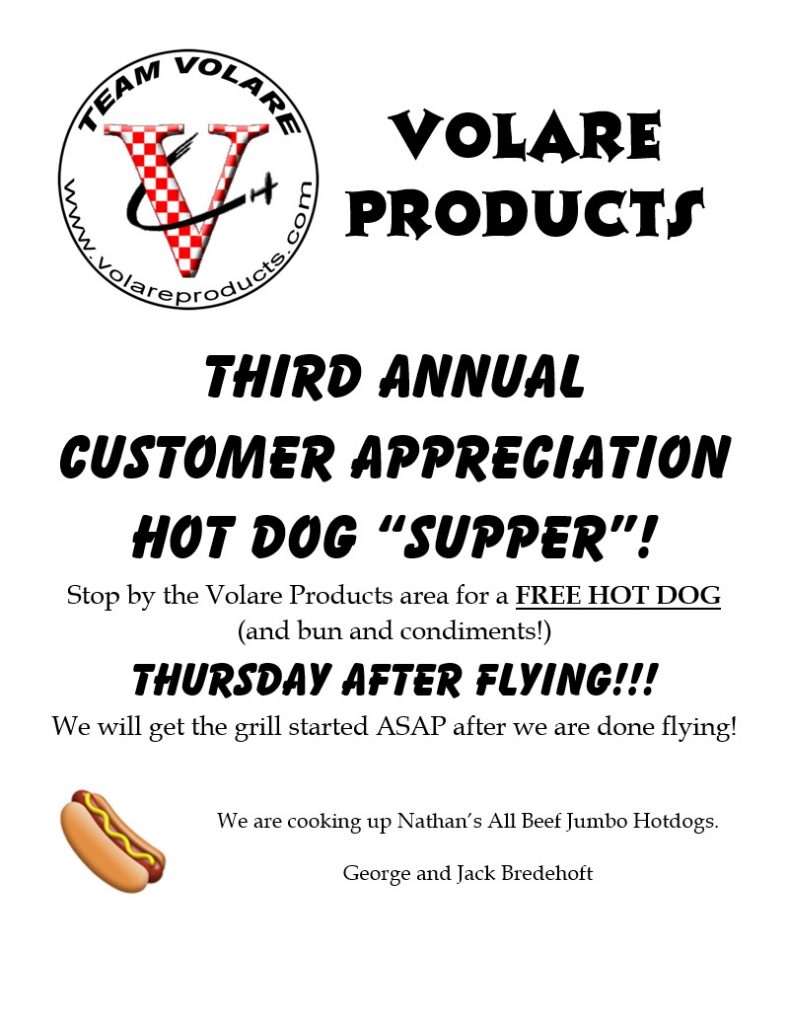
Of course, we have chosen the FAC outdoor Champs as our opportunity to thank our friends and customers with free grilled hotdogs on the first night of the contest right after flying.  If you are a member of Sam’s Club, these are the same giant Nathan’s hot dogs that you get at the cafe inside – they are huge and tasty.  We cooked up about 50 for the flyers and families.

3rd Annual Volare Customer Appreciation Hot Dog Roast

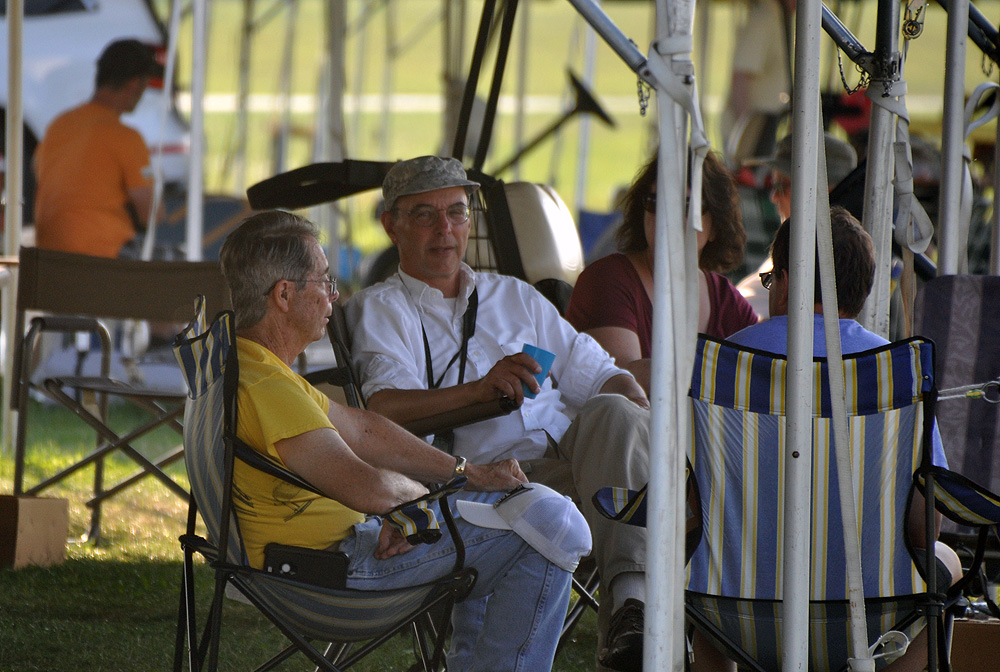
Harrison Knapp and Mark Rzadka taking a break and sharing some downtime

Stew Meyers and Ray Rakow having fun.


Posted in Builds, Customers, Events, Products | 1 Comment

NEW PRODUCT! – Ohka Jet Cat FULL Kit

I’ve had this kit ready – and packaged since July.  Some of you may recall my Build write-up (here).  I have had a handful of kits ready to sell – and had them at Geneseo and Muncie.  I wondered why no one had even nibbled on them.  Well, it turns out that I never put them on the website for sale – until this morning.  Find it here.

This little (9″ span) jet cat is a very easy build and a blast to fly – it is my favorite.  From the start, I knew it had potential, as I lost the prototype.  My launch technique for my second one worked out to be: left shoulder into the wind, launch the model at full power STRAIGHT UP, and watch it zoom high and kick out, just right, at the top.  It has a floaty, bobbly glide, maybe not in a full circle, but duration is good for about 20 seconds without lift.  I have won one contest with this model and I won’t be surprised if I win another someday – or if it hooks a thermal and goes away.

The kit is a FULL kit – two 1/32″ balsa sheets, one 1/16″ balsa sheet, one 1/64″ ply sheet, two bass leading edges, two 0.005″ carbon fiber strips (for the fuselage sides), and one FAC-legal catapult.  Also, you can download the tissue print design (as shown above) for free right here.

Next, I will have the Comet Pepper online soon!

Posted in Builds, Products | Leave a comment

Customer Appreciation at the FAC Outdoor Champs!

If you need just a little more incentive to make the trip to Muncie next week, this should be what pushes you over the edge to show up!

We are going to say “thank you” to our loyal customers for helping us grow our business and helping us help you. If you attend the first day of the FAC Outdoor Champs (Thursday, 14 Sept 2017), stop by our tent area and have a free jumbo hot dog on us!

See you there!

Posted in Customers, Events | Leave a comment