Boy, you take a couple of days off for Thanksgiving and the orders pile up! I’m working on them, but people seem to be stocking up on supplies (lots of little things). Also, lots of orders for parts that require me to make things – lots of hands-on time for me. Oh well, I asked for it!
Things that I have been doing in non-production hours:
The Nunez Peanut Yak-3 is still sitting on my building board; the bare plan, vacu-formed pieces, and cut parts staring at me, telling me to get busy. That’s my next build, for sure, but I don’t know if I will get to it before our next Indoor session (Dec 10th). Or maybe I will as Michigan is currently restricting such gatherings until the 9th – they might extend, which would cancel our December meet and give me another month to build before January.
I couldn’t help myself and took my light-weight He.178 JetCat (6.5 grams light for a 10.5″ span!) outside on a calm morning this week. It certainly shows potential, but it is hard to trim in my yard: I had it bouncing off all four “walls” (tree lines) in my back yard. I’ll get some Gurney flaps on it and hope to get it flying like I want, but that will need to wait until Indoors.
I’ve been concentrating my drawing time on the Gene Smith Cessna Cardinal (21.5″ span). Gene designed it as Keel and Former. I think I finally have the shapes of the formers finalized, along with stringer placement (12 stringers in addition to the four keels). To me, this is the hardest part -not only do I have to locate the stringer notches on each former, but I have to make sure the notches on ALL the formers result in a nice smooth flowing line, avoiding dog-legs in the stringer as the test build is completed. Usually, I have to change the location of one or two notches when I start to build. I’ve got the formers about 95% converted to parts/cut layout and the sheet placement has started – about 60% complete.
Well, it’s time to finish my lunch and get back to making those parts!
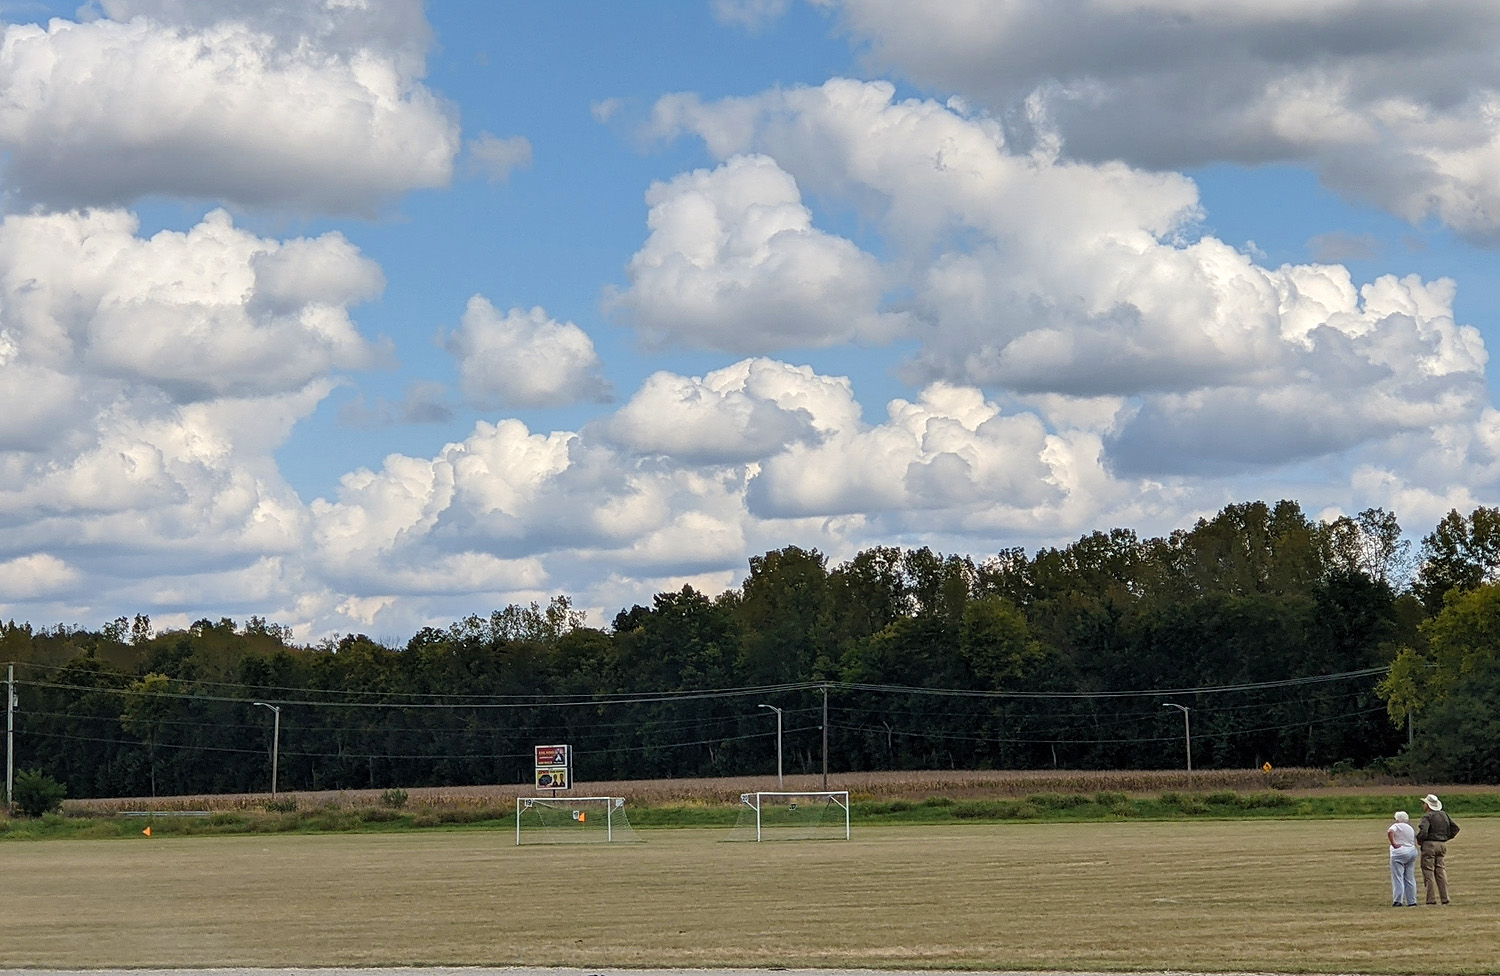
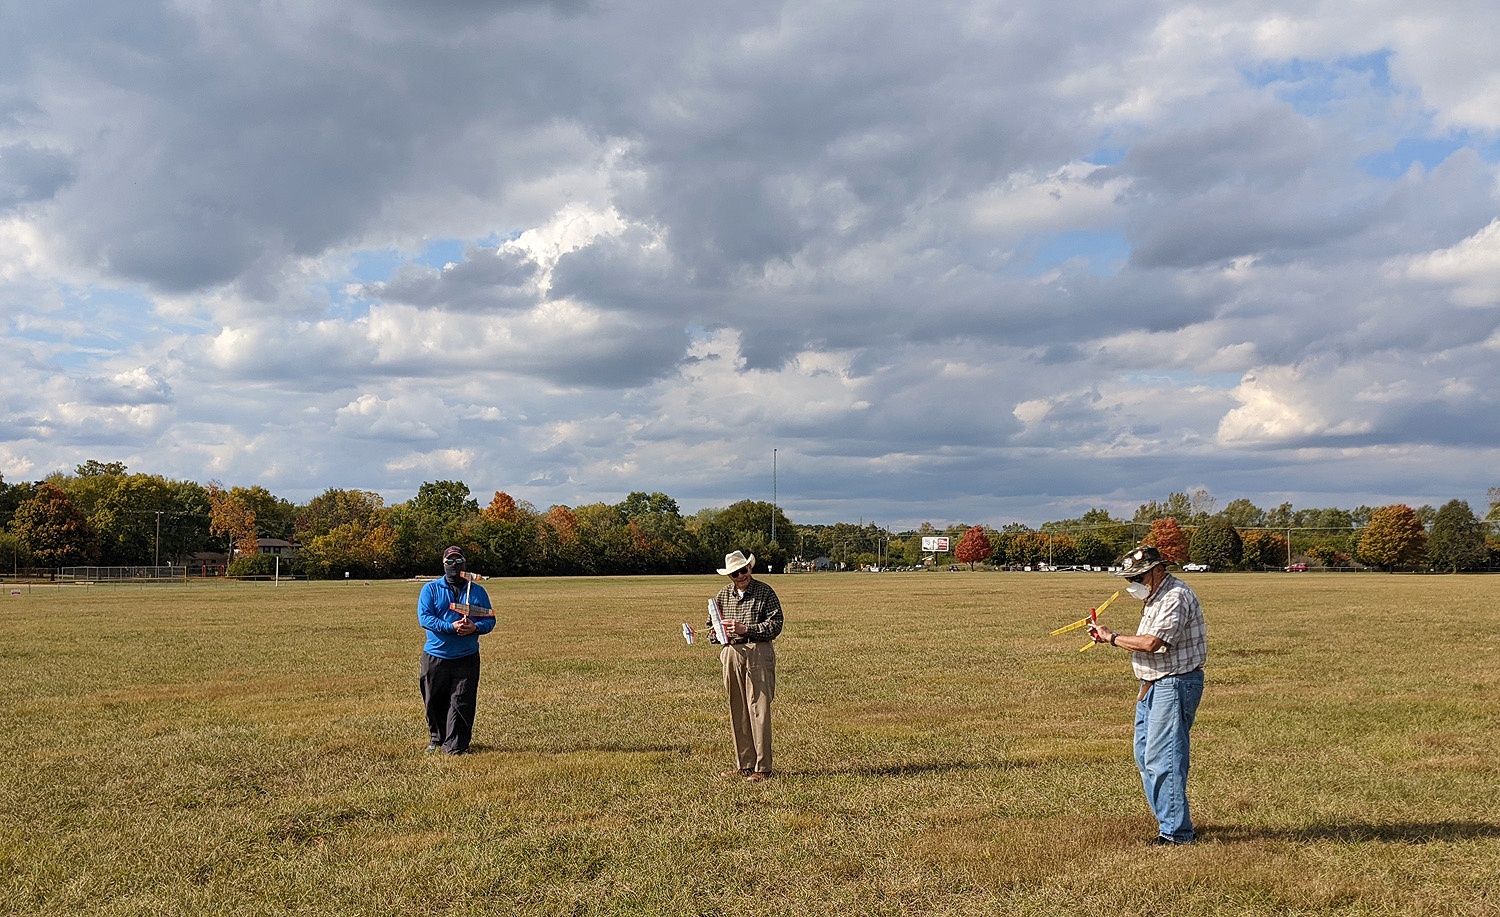
I haven’t posted in three weeks. I feel sluggish, tired all the time, and unmotivated. It is most likely due to lack of sleep, but a certain amount of the ennui or lethargy is due to the time of year and this year, in particular. Winter is hard for me when it comes to building and flying. I can build, obviously, but I cannot really test as I have no testing area. Here is a photo of outside today.
The weather is rarely good enough to test outside – it is either wet and snowy, like the picture, or warm and windy, or cold and windy. Rarely do we get a day where we have soft breezes and a ground that is neither sopping wet or rock hard. I can only test indoors and that is once a month – at contest time. And this year? well, it is bringing its own challenges. We did get the November meet in, but spiking COVID cases are a constant worry and the state has limited gatherings. It may be relaxed by the December contest, but maybe not.
So where am I to get motivation? In addition, my shelves are getting full of models. I am running out of places to store them. Anyway, I will push on, but right now the push is less than a crawl, and more of a stall.
I didn’t write a personal report on the November contest, mostly because I didn’t want to come off as bragging – I took 4 of 5 events and was mere seconds away from the 5th and left that one on the table, due to the model needing a repair. But there were things that I was particularly pleased with.
My Phantom Flash (#11) continues to be perfectly set up, at least for me. I made up some motors BEFORE the contest (that’s a shocker, if you know me) and put one of these new motors in the PF. I guess I can’t read my own notes because the new motor was short – with the model running out of turns well above the ground. On one flight, it ran out about 20+ feet up in the air at about 2:30 and landed at over 2:40. That is about my highest flight time – imagine what it would have been with another couple hundred turns from a longer motor. Next time…
The other great flight was in an event that wasn’t even contested. I took my newly finished Hobo2 Embryo out for some test flights. Bob Bienenstein flies his Hobo design on a LONG loop of 1/16″ and a 6″x6″ prop. I’ve tried to emulate this, but just cannot get the duration that Bob gets out of a loop of 1/16″, probably because I can’t build as lightly as Bob. I built a 6″x6″ wide-blade prop and put in a 3/32″ motor. After a couple of initial test flights, I wound it up. I had 2800 turns and let it go. It leapt right off the board with a very strong climb-out straight away, as it came to a gentle stall, it put in a little right turn and climbed straight out again. After the second power stall and right turn, it continued on with no more power stalls and a nice right turn. Everything went well in the flight, it got good height and had a smooth transition from power to cruise, and it landed at 2:15. Success. I think there is more potential – I can probably go with a slightly thinner motor for a longer duration, but it was a most satisfying flight, even if no one else had an Embryo to fly.
Speaking of contests, in case you are not aware, July 2021 will be especially busy for some of us. Currently scheduled: in the middle of July will be the yearly FAC contest in Geneseo, NY – the next week will be the AMA/NFFS Indoor Nationals in Pontiac, MI (my home field!) – and the week after that will be the AMA/NFFS Outdoor Nationals in Muncie, IN (home away from home). I anticipate there will be many people that will attend one of these three major contests, there will be a smaller number that will attend two of these contests, and… right now, I know of two people that are planning on attending all three of these contests! Mike Welshans and I plan on being at all three of these! What a month – we will be dog tired come August. Let me know if you are planning on one, two, or three of these!
Every year around this time, I create a Potential Project List that I keep taped to the wall right next to my desk. It is a reminder of what I want to design/build/fly/kit for the next year. It is a living document – meaning I add to the list as I get inspiration throughout the year. Often there are carry-overs from the previous year that didn’t get built, but I still have interest in. Right now on the 2020 sheet (initially created last year this time) there are 32 models, with 11 completed, and three nearly completed (built and not finished or cut parts waiting to be built). In the next few days or weeks, I’ll look at the 2020 list and determine what should be carried over to 2021 and create a new list.
So what’s coming up? Traditionally, I don’t usually share too much of what is in the pipeline. Maybe I should share some of this information. I’ll divide this into several groups, based on the current stage of progress on the project (comments welcome).
Ready to Cover
Peanut Fike E “Dream” – I built this last year for Indoor, but Indoor got shut down. Then EasyBuilt came out with a Peanut kit. My project stalled. I will cover it and fly it for Indoor, but I don’t know if I will kit it.
Ready to Build
Al Backstrom’s Dimer Mauboussin Hemiptere – as seen in the NFFS Digest – prototype being built by Oliver Sand
Jonathan Nuñez’ Peanut Yak-3 – also seen in the NFFS Digest – sitting on my board waiting for motivation
Gil Sherman’s Convertible – 2 Bit Old Timer – prototype being built by Archie Adamisin
Old Successful Builds, but not Ready for Production
Jumbo Stallion – drawing needs finished – depends on public interest
Peanut Stuka – drawing needs cleaned up, instructions written, and most importantly, I need to figure out how to design a canopy buck that I can 3D print
Drawings in Process – Top of the List
Mike Welshans’ 24″ Rearwin Speedster
Gene Smith’s Champion 21″ Cessna Cardinal
Comet’s Fokker D.vii Dimer
Any Interest in These that are also In Progress?
Peanut Occipinti’s Tailwind (Wittman Tailwind with retracts)
Ace Whitman Sky Rider for OT Fuselage
Korda C Stick Tractor for OT Stick
Ralph Kuenz’ 24″ F-82 Twin Mustang
Gollywock-based Embryo
About 100 Other Subjects, Some of Which Have Drawings Started
That’s about it for now. Orders need packed, Kits need cut, Things need 3D printed, and Models need built. Stay safe, everyone, even if that means staying separate on Thursday. I hope to see you at the flying field in the future.
I have never really wanted to build a Spitfire. I did build a Guillows one back before I knew the first thing about Free Flight, but haven’t felt any need to since – up until now. To me, their proportions are just not right, then there are those long pointy wings.
Back in early 2016, I made a decision to venture west to the March contest in Colorado Springs. It was a lot of fun – I still owe Don DeLoach another beer for putting me up for a couple nights. In preparation for that event, I built a Fairey Barracuda for Indoor WWII NoCal Combat. Rules require 6.2 grams minimum weight and 7″ maximum prop diameter. These rules are great equalizers as there is no need to build super-light NoCals – pretty much anyone that flies Indoor can build to 6.2 grams or 7 grams without too much problems if they just do a little smart wood selection.
This event was really the start of my learning and improving my Indoor flying. I was able to get it trimmed out and (with a stroke of luck) won the Combat event. Here is a trim flight from that event.
What was the luck? Well, busy CD Don DeLoach never put in a test flight on his model. He pulled out his model for the first round, wound it up, launched, and watched as it foundered like a fractured duck. It was certainly the favorite, but it went down early. The cause? A cracked wing. And the model he pulled out of the box? It was a large, clipped wing Spitfire.
This was the start of my learning to trim (I also learned the importance of checking and testing your model before and official flight). My Barracuda peaked out at 2:47 over the years and is still a very strong threat in the local Cloudbusters Indoor WWII NoCal Combat – it has won eight out of 11 Combats in Pontiac since that trip to Colorado. But, it is never good to rest on your laurels. People are starting to bring in really competitive models – and the Indoor Nats will be held on my home turf this July. I’ve got to raise my own bar.
I’ve built an Indoor Racer that has hit 3 minutes and should fly more (if I were to risk re-trimming with a new prop) – “I have the technology” to build a better WWII NoCal. I have been looking and always return to that Spitfire mk.XVI – its got a clipped wing and converting to NoCal takes it right up to 60 square inches – that is Huge (the Barracuda is under 44 squares). And the hook-to-peg distance is longer by a couple inches.
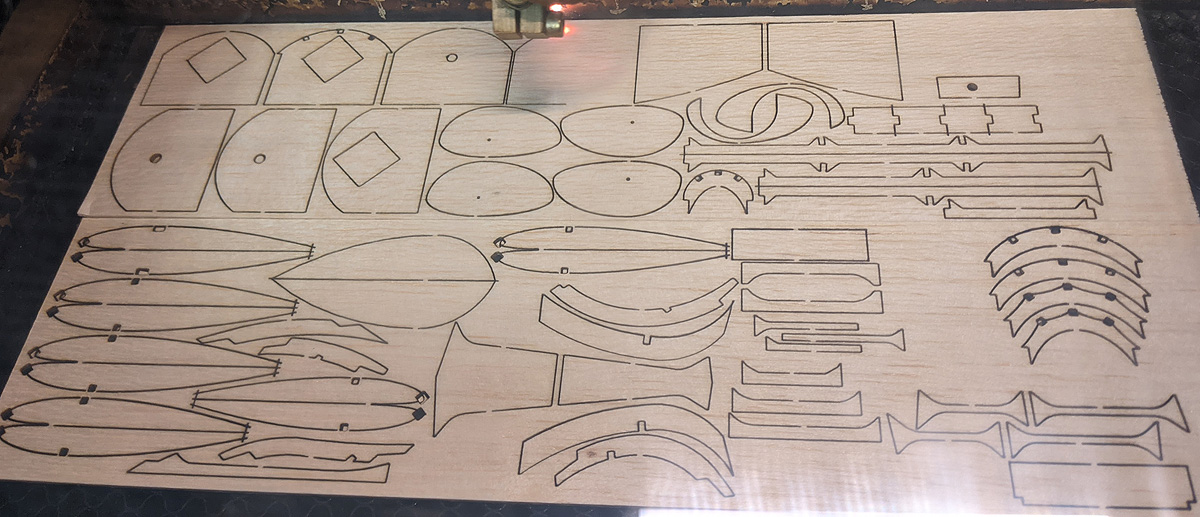
I set about drawing it up and it went quickly. My plan has almost all parts laser cut – only the longerons and strip wood to laminate the tails will have to be supplied by the modeler. The model build very quickly – you could build the frame in a couple hours, if you laminate the tails the night before. I built this slowly with lots of downtime while I did other things, and I had the frame done in 24 hours (including laminating time) and the model covered, ready to test in another 24 hours. Here are the build photos.
5 pound wood on the laser cutter
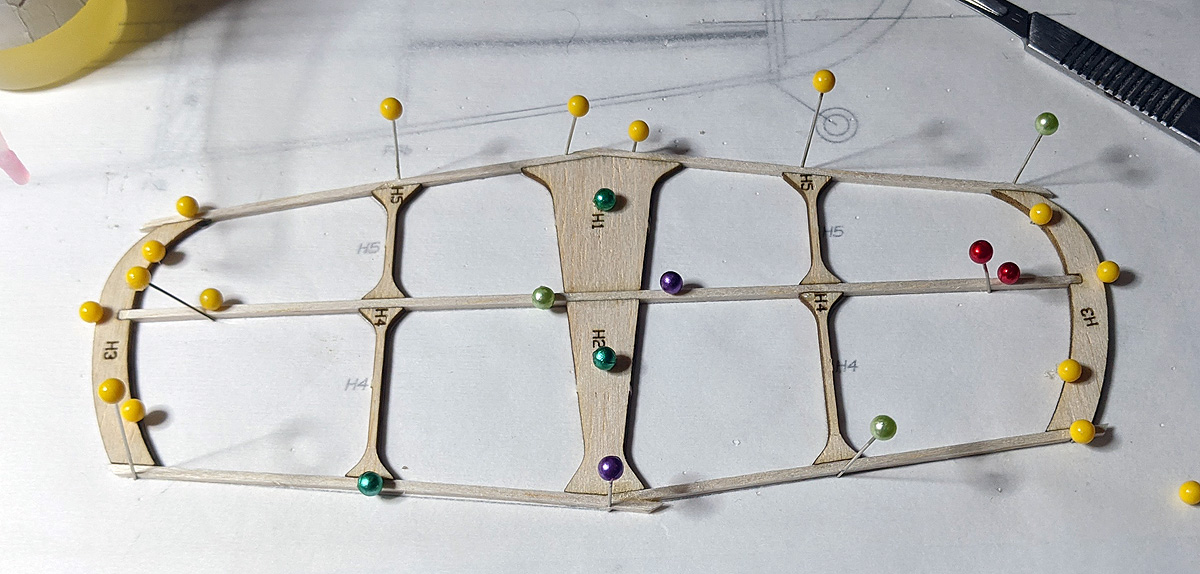
ready to build
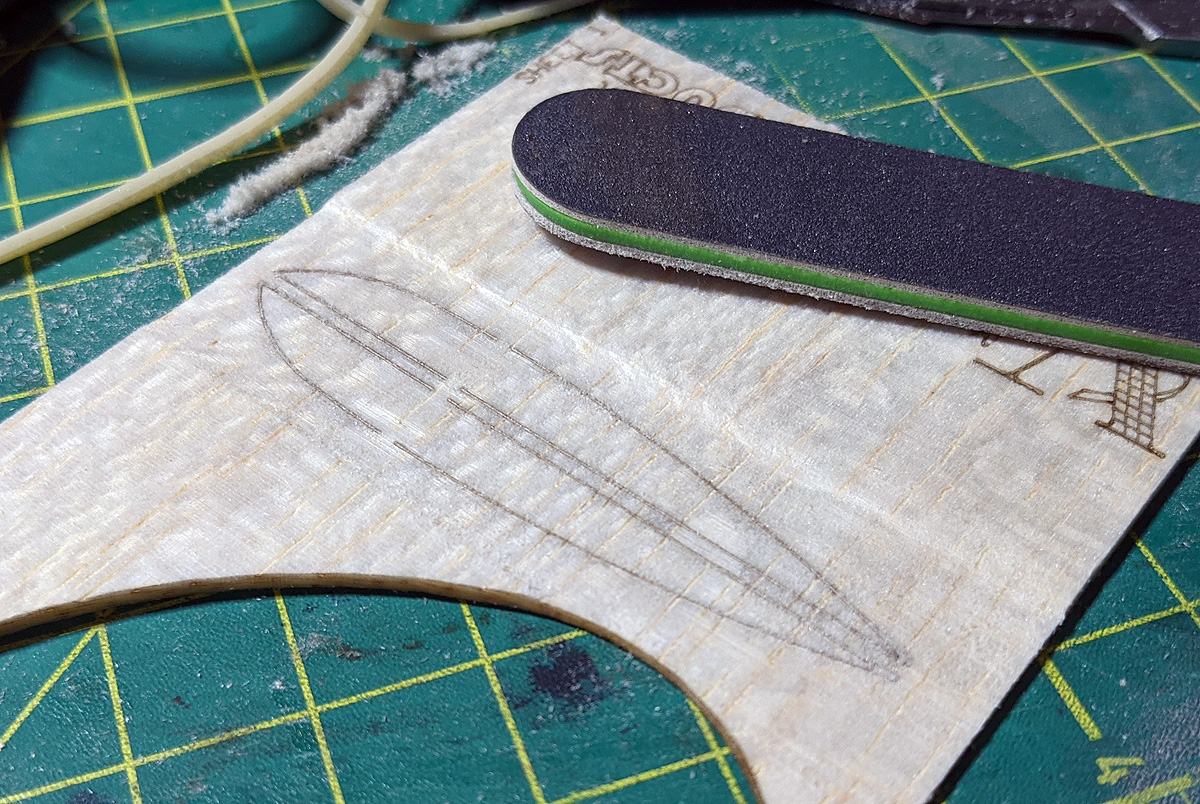
the tail surfaces laminated over supplied templates
body and tail built up
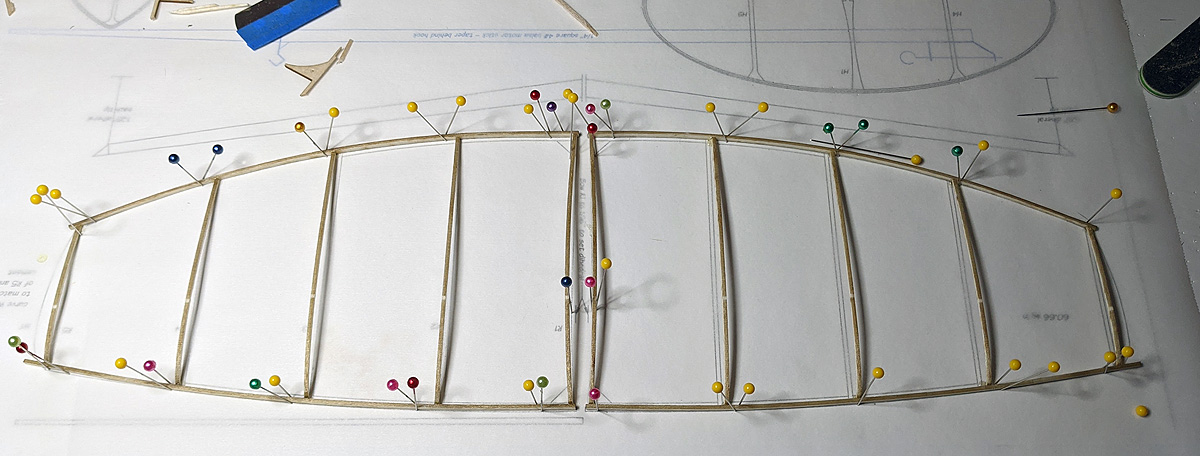
wings built up – using supplied tapered LE and TE and 6% Simplex ribs.
I sanded the sheet tips before detaching them – reducing the 1/16″ sheet to about 1/32″ thick so it could bend to match the tip airfoil.
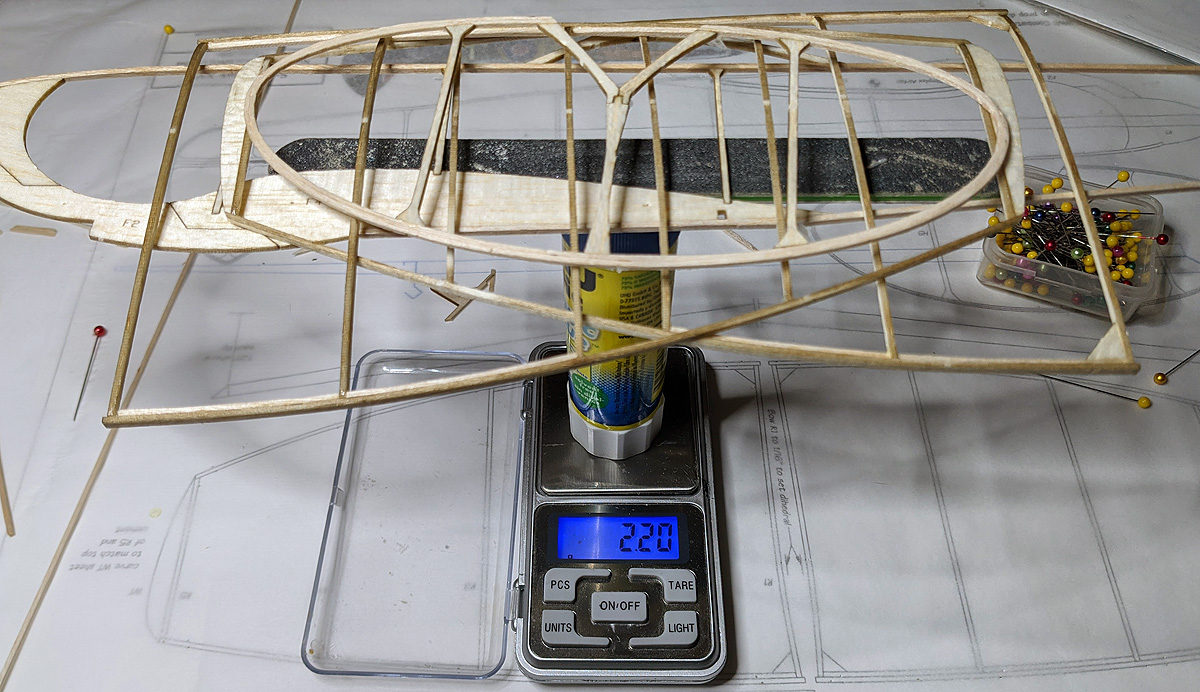
completed structure at 2.2 grams
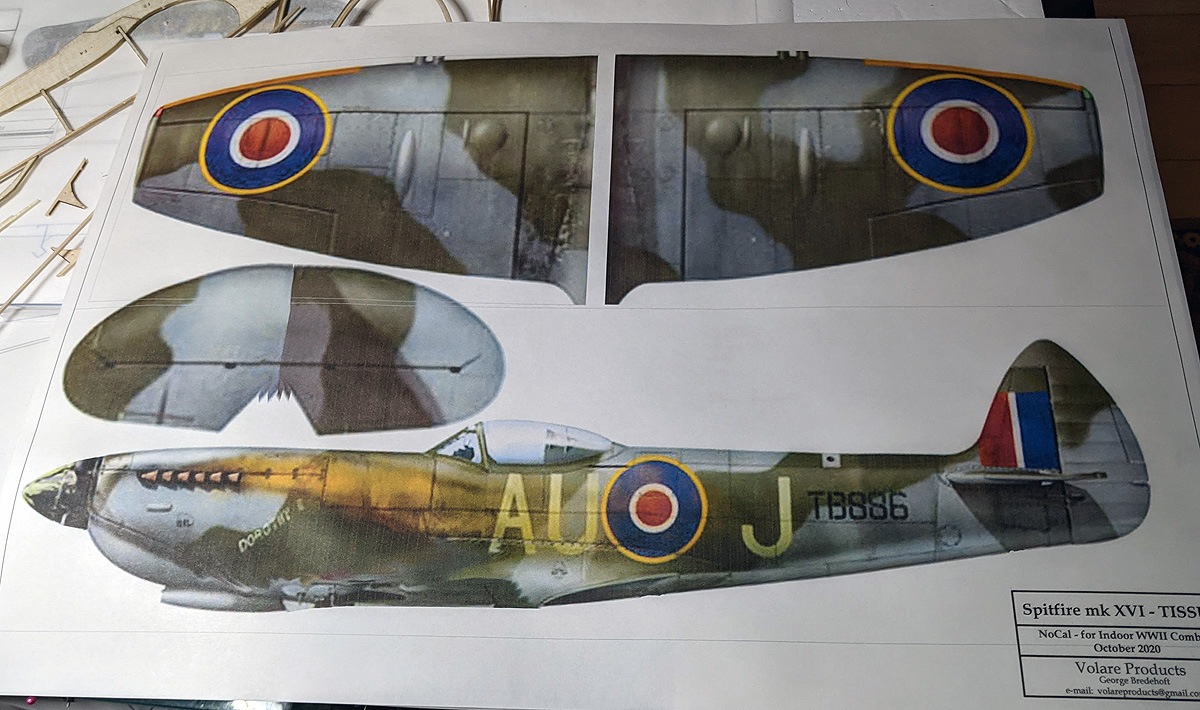
printed tissue on carrier sheet – fresh out of the printer
1/4″ square solid motor stick, with nosebearing and tail hook – 1.5g
covered model right at 5g. tissue and adhesive weighed 1.5g
finished model ready for testing
final weight – 6.7g – just over the minimum 6.2g
Now we wait. We will fly next Thursday. I am a little anxious because this is a low-wing. The Barracuda is a nice and stable shoulder-wing. I will definitely have to watch that torque roll. I imagine it will take a few flying sessions before I get all the bugs worked out. As I told my son, Jack, today – I probably jinxed a good thing (the Barracuda) and the new plane – and neither will fly! We will see!
About a year ago, I received an inquiry from a potential customer. This customer wanted SIX of my EKW C-3603 Short Kits. That was unusual enough, but to add to the experience, the customer was in Switzerland (the EKW is a Swiss plane).
This morning, I woke up and checked my email. There was a new message from the customer, Chris Ott. He reported that two of the six kits had been completed.
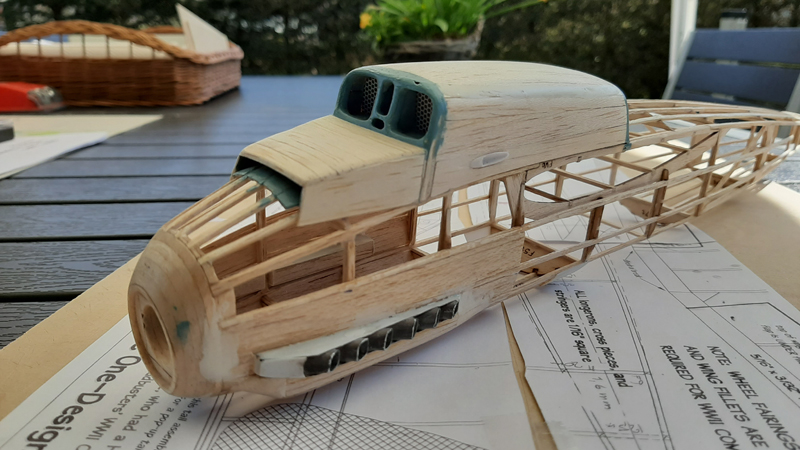
It is always nice to get feedback and notes from customers, but, I think you’ll agree, this was especially gratifying. These models are finished well beyond our typical flying-for-fun models and built more like display models. It is nice to see and hear that my little kits were satisfactory for these modelers. Thank you, Chris, for sharing your beautiful models!
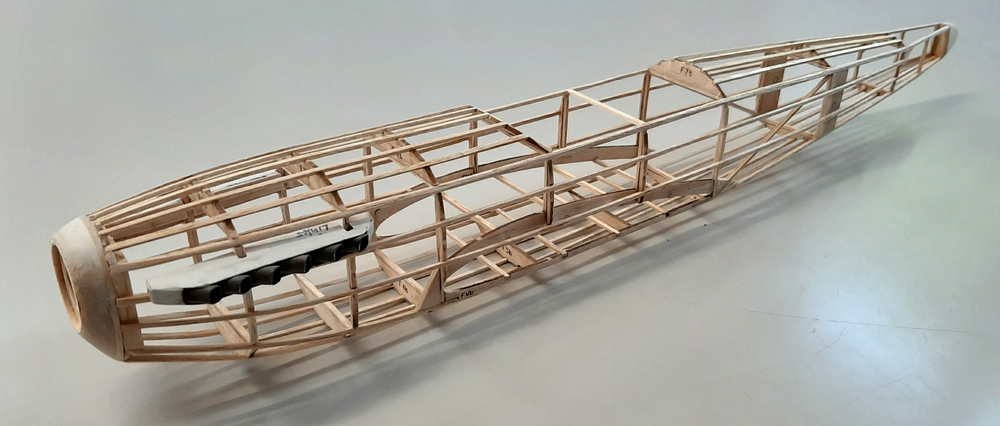
Here is his message – and photos.
It was a pleasure to build this model, using your short kit. The drawings and lasered parts were very precise, so the assembling was easy, even without assembly instructions. Nevertheless we modified some parts to give that model a more scale appearance :
The rear end of the canopy has been rounded.
The valve covers were modified.
The boxy radiator got round shapes.
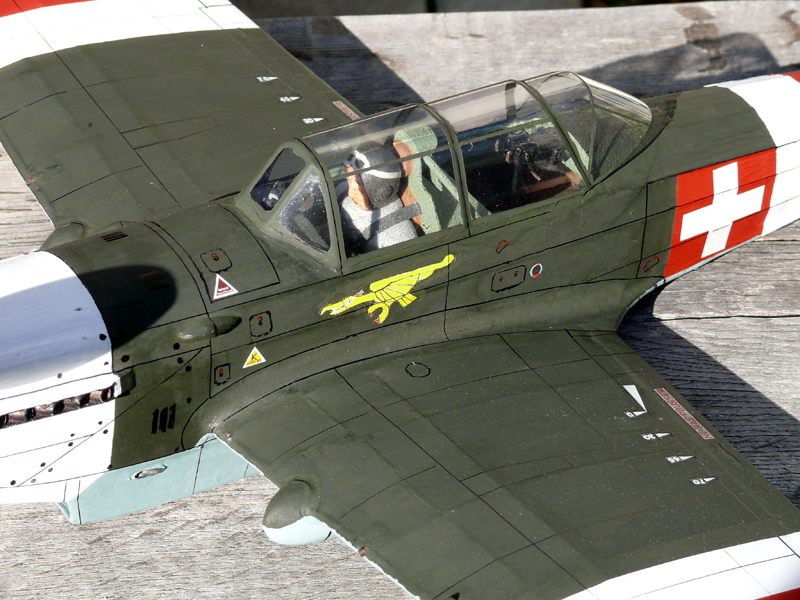
We gave the cockpit a pilot and instrument panel.
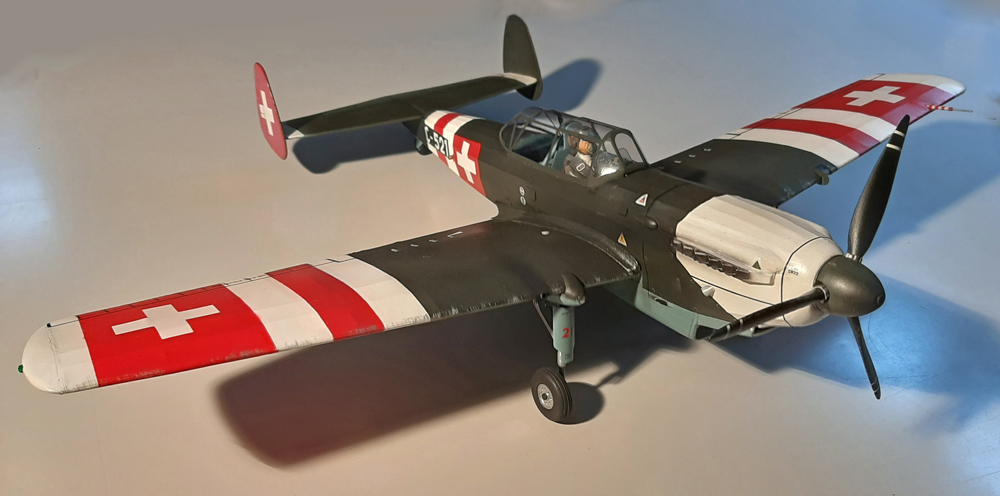
We reduced the dihedral to 7.5° only. (instead 9.5° as indicated in the drawing).
We painted the model with neutrality stripes (like the prototype 1944).
For exhibition purposes we added a removable landing gear and scale propeller.
In the attachment you will find some pictures made during the construction of the first two, now finished models. They wear the buzz numbers C-516 and C-521. The others will follow soon, in other paint schemes.
The b/w picture shows C-625 ready for take off on the runway. This scene could have taken place in the 1940s (photo montage created with Photoshop).
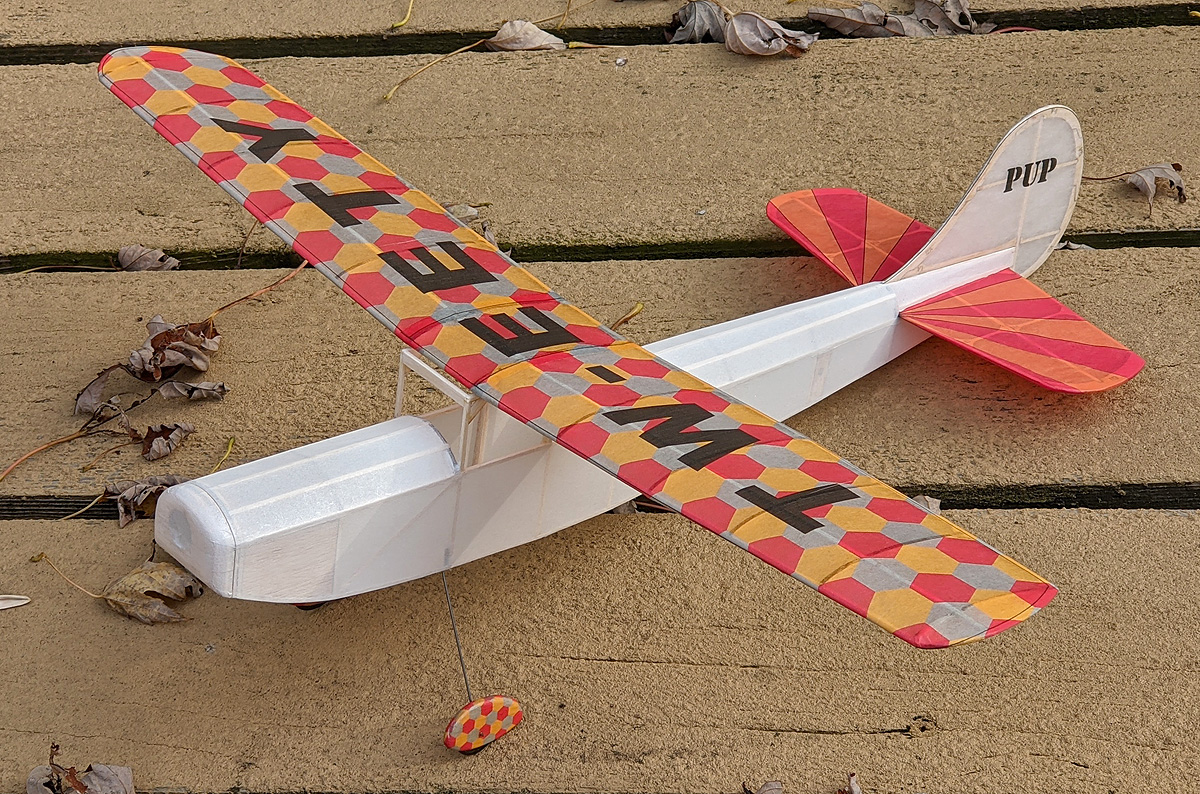
Before I took my 12-year-break, I flew with all the old-school Cloudbusters from the 80s and 90s. One of those was Don Campell and this is his 1997 design, the Tweety Pup. Ever since I drew up Don’s Tomahawk Embryo, I have wanted to do this model, too. It is a sharp-looking, stand 20 feet away, almost-semi-scale model designed as a play on the Cessna o-1 Bird Dog. The wing and vertical are very similar to the O-1, and the fuselage is similar, but lengthened significantly. And, since I just did the Bird Dog as a Dimer, it was only natural that I tackled the Tweety Pup (plus, I just lost my everyday Embryo).
For this build, I decided to go back to basics, building like a “normal” or even new modeler. No striving for lightness, building with “regular” wood, heavy plastic and wire, and a off-the-shelf plastic prop. In addition, I am testing a new tissue, a possible replacement for Esaki, that comes from Japan. This tissue has a nice feel to it, has a definite shiny side, the back side is a little rougher than Esaki (you won’t get front and back confused). It is only marginally heavier than Esaki. People are working to get this in production (if people like me give it a thumbs-up) and we’ll see in a few months if this can be done. I’ll talk about the tissue more later on.
This build was kicked in the pants when I lost my DeHavilland Discard at the Cloudbusters contest a couple weeks ago. We have one more outdoor contest this fall and I decided to have something to fly. I quickly traced Don’s plan and laid out parts so I could start building.
This is built entirely out of 1/16″ balsa. I designed this for quick building – almost all of the tail feathers’ parts are pre-cut, and all of the upper and lower fuselage cross pieces are pre-cut. This removes the tedium of measuring, cutting, fitting – just build the sides and pop out the crosspieces and glue them in.
The wing goes together in the traditional manner. I do include trailing edges with built-in gussets for the ribs.
Back to the Tissue
Again, I am testing this tissue. So I decided to use several treatments on the tissue, in application and finish.
For the tail feathers, I used bare tissue for the fin (except a small print) and the horizontal is covered in fully printed tissue. I cover these dry and flat. when they were finished, I sprayed them with clear Krylon (or whatever the spray-can clear is that I have on hand). They are not shrunk with anything; I do this to resist warping (covering variation #1).
The wing was covered with bare tissue on the bottom and full-printed on top. Again, these were covered dry, gently tautened during the gluing process, and then sprayed with water to shrink. This tightens the tissue, but less-so than covering with damp tissue.
The fuselage was covered differently – I covered it with damp tissue. Since I didn’t know how this tissue would react, the flat sides on the fuselage allowed for a reasonable test. I was pleasantly surprised. The tissue dried nicely and pulled taut – I am very happy with the results. Even on the arched turtle decks, the results are great. Sometimes tissue pulls really tightly and causes stringer to dip under the stress. This tissue shrunk just the right amount (cue Goldilocks and Baby Bear).
The noseblock and wheelpants were wood covered with slightly stretched tissue. I do this by putting glue stick on the solid wood and rubbing damp tissue over the curves. This worked well, as expected, although I did have one stretch separation – which is typical of this type of covering (at least for me).
I sprayed the finished wing with clear, and the fuselage with white Design Master White. It is flat white and so I sprayed some of the gloss clear over it. While I didn’t over coat any of these with the spray, I didn’t hold back (for lightness). It all looks good and the tissue handled it all well.
I finished up the build with some heavier plastic than I normally use for the windscreens and side windows. Of course, along with heavier plastics, came minor frustrations of trying to glue plastic to balsa. I got through it without too much damage to my psyche. The plane was finished with full 1/32″ wire on the landing gear (usually, I use 0.025″) and a off-the-shelf plastic prop. The model came out at 22+ grams, not too heavy for an Outdoor Embryo – that’s satisfying.
I test flew the model in my back yard yesterday, and am happy with the potential. Of course, I need a larger field (hopefully, that will come Sunday). Here’s what happens regularly in my back yard. Note: planes don’t get up there without FLYING.
UPDATE: After a few trim flights, I got the model sorted out. It climbs out well on a 7″ prop with a loop of 3/16″ and Maxed on its third official flight, winning the Embryo event!
Saturday, I went to an FAC Contest. The McCook Field* Squadron, #5 in the FAC lore, is a low-key group of flyers that has been around since the beginning, thanks primarily to Frank Scott. He’s been running on-again-off-again contests in an on-again-off-again manner for probably 40 years or more. They announced they would be having a contest on October 3rd at the comically-named “Jackass Flats” location. (Jackass Flats turns out to be a local PeeWee football and soccer facility. It’s not a big field, but big enough for a small contest.)
* – the real McCook Field was the government’s first aeronautic research facility – and it was in Dayton, Ohio. Read about it HERE.
Something told me I needed to go. Google told me it was a 3.5 hour trip and since the contest was scheduled from noon-4pm and only had three FAC events, I felt I could manage this. I wouldn’t have to leave super early and I could get back before 8pm. In addition, I like the McCook group. We fly at their McCook Contest at Muncie every June and I used to go to their Dayton Sector Skirmishes back in the day when they were held ON Wright-Patterson Air Force Base in the shadow of the Air Force Museum. As an Ohio Boy, ex-Air Force employee, and an aviation fan, Dayton is special and holds much aviation history that I don’t need to go into here. But I wanted to go and go I did.
I got there about 1 hour early – before anyone else. I parked where I thought would be a good spot to be discovered by incoming contestants that would eventually decide from where we would fly. It turns out we just stayed right there. I got out some Jet Cats to test while I waited. I got a couple figured out and broke one on the hard driveway. When you’ve got more than one JetCat, you have to test them before a contest – each one flies differently and you need to re-discover the quirks of each one. I flew my F-4, F-86, and Star-Jet. I broke the Star-Jet – too bad, I wanted to show Frank, as he had built one, too. I decided to fly the F-86 and my Heinkel in the contest.
The turnout was surprising (to me). About 8 or so contestants showed up, and there were a higher-than-average number of family there, too. Per Frank’s contest announcement, most of us were wearing masks, especially when nearing each other. Actually, this was a four-state meet! While the host club is from Ohio, I traveled from Michigan and Archie Adamisin came up from Kentucky and Archie’s dad came down from the Detroit area, too. And Bill Garrison came from Indiana! In all, there were somewhere between 15 and 20 people at the field.
Before I got to my planes, I timed a flight for Archie. It proved to be cautionary. While the temperature was not really “warm” and the wind was nothing more than a breeze, the air was buoyant. Archie got out his own-design Scout Embryo that he flew last season indoor at Pontiac. He didn’t change anything, even the rubber, and after a short test flight, he called for a time. The little model ROG’s just fine and went up. On about the second circle, it hooked a light thermal and we then watched it go up, up, and away. At 7 minutes, I lost sight of it, still going up.
After that, I decided to get down to flying business. In addition to the JetCats mentioned above, I would enter my old Ta-Go and my new Bird Dog in Dime Scale. And finally, my DeHavilland Discard (a Frank Scott design) and maybe my new Durham Stretch Limo in Embryo. Given only 3 events and 4 hours, this was a good selection, maybe too many flights, since I did not bring my chase bike – meaning each flight would need to be retrieved Old School – on foot. Long flights mean long hikes.
I logged three flights on the Ta-Go (all in the 40 second range) and went on to my new Bird Dog. I didn’t change the short loop of 1/8″ rubber that I used as a test motor. And I didn’t trim out the nose-down glide. I didn’t want any super-long flights and I didn’t want the 11 gram plane to hook any thermals – it was too new to fly way. The first flight was almost a minute and the next two were less, around 40 seconds. All were long hikes. I finished out Dime and then went on to Embryo.
I saw lots of Embryos flying. Mike Smith was trimming his Discard, Bill Garrison had a Bad Axe and a Born Loser, Frank had some other self-design, Jim Bair had a cute one with oval flying surfaces and a round formered body (recently featured in the McCook newsletter), Arch Adamisin (Archie’s dad) had one, too. On one of my hikes for the Bird Dog, I brought back Jim’s model so I got a good look at it.
Mike Smith and his Discard
That may have been the last “good look” anyone got on that plane. His next flight also hooked a thermal and flew away. Here’s a picture of Jim and his wife watching the model for the last time (while the model is likely in the photo, no one knows where).
Wow, Embryos are flying away and I still have yet to fly. I don’t want to lose any models – but I want to give Frank a good show with my Discard. He pointed out that this contest likely has the highest concentration of Discards ever: including mine, his original and Mike’s new model. This contest would be a nominal challenge for my Discard – this would be it’s retract-gear ROG debut (it had been hand-launched at previous Cloudbuster contests). I was confident, since it goes near-vertical on a torqued-up hand launch. And so the next part was a learning process: hold the model on the table, hold the gear down, hold the prop, and release. The weight of the model will hold the gear open, so that wasn’t really a worry, but table launches can be tricky. The Discard performed flawlessly, jumping up and the gear making a characteristic “snap” as the plane zoomed up. I put in a string of 90+ second flights, managing to avoid thermals and staying on the field. I decided the field was too small to wring out my Stretch Limo.
The JetCats were last. Here come long hikes for sure. That’s just the nature of decently-flying Jet Cats. The F-86 has always delivered less than expected. It gave me probably some of it’s best flights in the overcast of the afternoon: 16, 15, and 16 seconds for the best three. The Heinkel performed as expected with a best three of 35, 32, and 27 seconds. I was done just after 3pm and had logged over 11,000 steps (according to my watch) in those 3 hours. I could relax, chat, time, take pictures, and gradually pack up before the end of the contest.
Archie flew his Cloud Tramp off and on throughout the day. This was his first outdoor contest. He had been flying with 3 loops of 3/32″ and it was zooming around. I told him that 2 loops would be fine. He did change the motor – and promptly put it in a thermal. That was plane #2 that he lost on the day.
As the contest wound down, Frank called for a Sky Bunny mass launch. I forgot and left mine at home. Well that let me take a picture and film the mass launch. They are here. Note that Archie’s Sky Bunny is the one I track in the video. That was #3 fly-away for Archie. He may not want to fly outdoors again!
NOTE: there is much more story following the video.
L-R: Archie Adamisin, Jim Bair, Frank Scott
The Rest of the Story
a Participation gift from Mike Smith – a bottle of his homemade Cherry Bomb hot sauce.
So, I walked away with the win in all three events. Unfortunately, no one else logged a flight in Dime Scale (I logged six flights, with the Bird Dog topping the Ta-Go). Two flyers besides me logged single flights in Jet Cat – any of my single flights with the F-86 would have won.
I told Frank that I’ve always supported the Dayton crew – I was wearing my McCook t-shirt at the contest. I feel close to them as I won my first kanone at one of their contests. I thought about that on the drive home. That was a long time ago. When I got home, I dug around and found photos of that long-gone day. Maybe this is what pulled me to attend: My records tell me that day was on the same weekend – the first weekend in October, 1990 – exactly 30 years ago. Here are some photos of younger people:
As they say, time flies when you’re having fun. That 29-year-old had no trouble chasing after models (of course, they didn’t fly as well!) I sit here this morning with my coffee trying to twist-out all of the aches that those 11,000 steps put into me. I guess I’m no kid any more. But I still feel like a kid when I fly my planes. Every flight is exciting and holds a certain magic. Flying these models and getting together with these friends-of a-feather is why I do all of this. Thank you to all of these friends, near and far, that add to my life in this way.
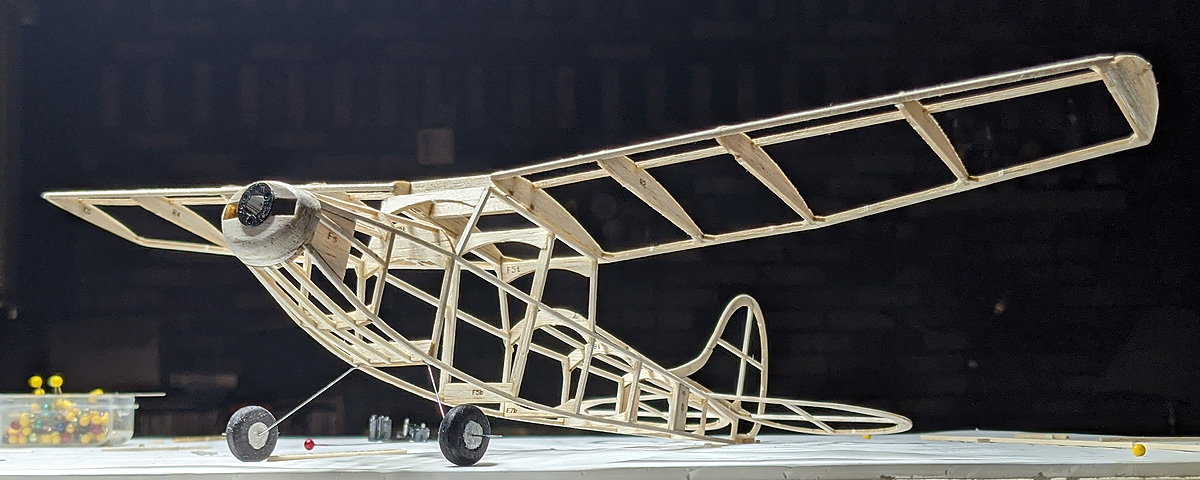
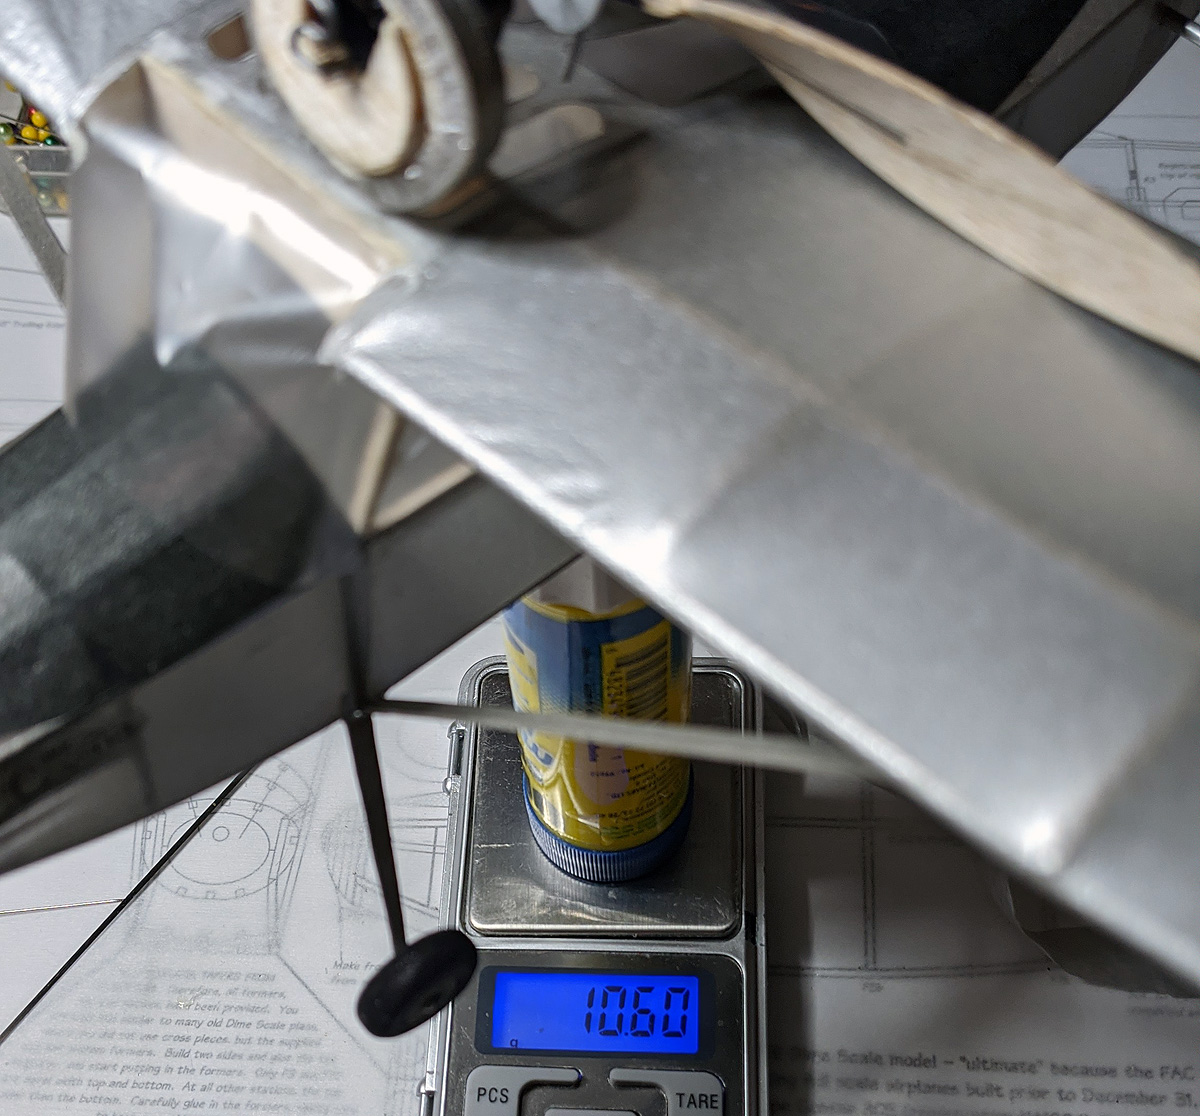
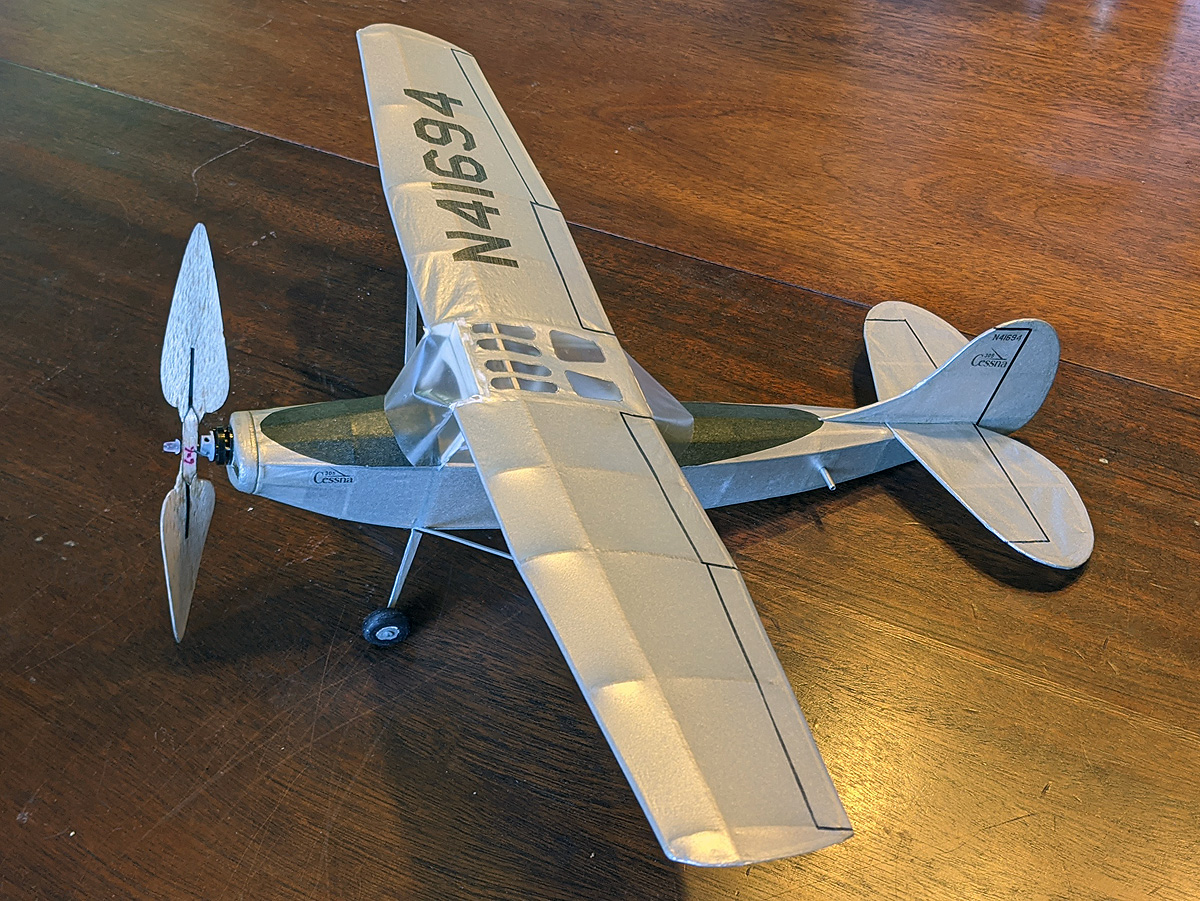
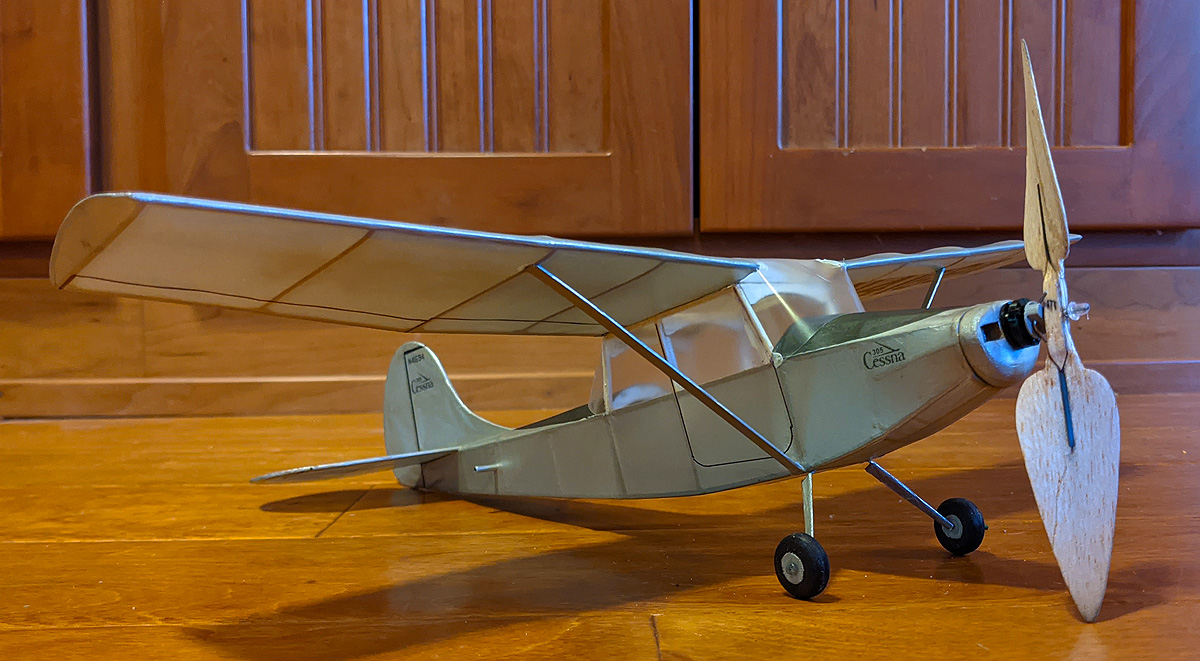
FIVE DAY BUILD! I call this the “ULTIMATE” Dime Scale model. Why is it the “ultimate”; it is not large in wing area, motor length or any other measurement? Well, the full scale Cessna 305 was flown on December 14th, 1949 – and our FAC Dime Scale rules have a cut-off date requiring the the full scale planes must have been built prior to December 31st, 1949. This may be the last eligible aircraft – hence the “Ultimate” (haha).
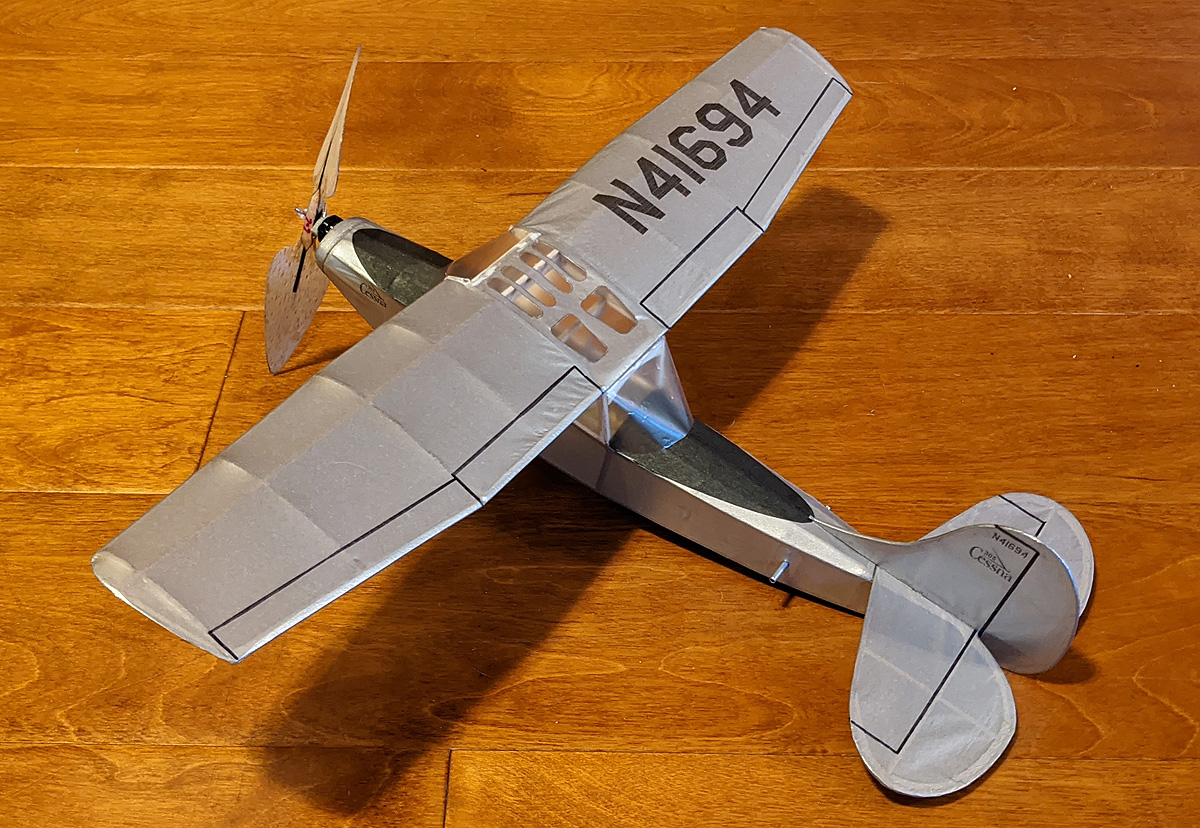
This design builds quick and light. For Dime Scale, I flattened the sides and bottom – very simple. All top and bottom cross pieces are provided to create the correct trapezoidal cabin shape. Even the color scheme of the 305 prototype is simple: Silver with black anti-glare panels and markings.
The plans and parts will be published int he next Cloudbusters newsletter, legalizing the new plan for FAC Dime.
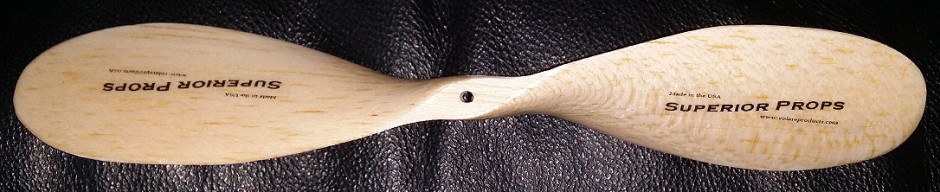
Here are build photos and a crudely trimmed test flight. NOTE: the prop shown in the photos is NOT LEGAL for FAC Dime Scale is it is multi-piece wood construction. The video shows the model flying with a Peck 6″ prop (legal).
I was reduced to trying to clean up my workshop the other day. I decided to consolidate my “tissue for sale” cabinet. I have only a very little left and I was saving what I have for myself. I have small amounts from estates and thought I would put all of the tissue in one place.
The first place to start? Get rid of the box I used to take to contests and events where I brought a small amount of all the colors. Well, it wasn’t empty. In fact, it was full – about 1000 sheets of a variety of colors. Now this is more than I need for myself and I will offer it for sale, starting with large lots: 10 sheet lots of Checker and Silver, 50 sheet lots of some colors. I have more than 50 of some colors, but I do not know exactly how many. (Have you ever tried to count sheets of tissue? It’s not easy or fun).
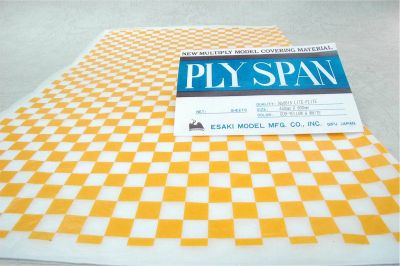
Here is what I have – THIS IS GENUINE ESAKI TISSUE:
40 sheets of Blue/White Checker – 10-sheet lots, $50 each ($5 a sheet)
50 sheets of Yellow/White Checker – 10-sheet lots, $50 each ($5 a sheet)
50* sheets of Silver – 10-sheet lots, $50 each ($5 a sheet)
Yellow – 50 sheet lot* – $100 ($2 a sheet)
Orange – 50 sheet lot* – $100 ($2 a sheet)
Dark Blue – 50 sheet lot* – $100 ($2 a sheet)
Black – 50 sheet lot* – $100 ($2 a sheet)
Lots with an asterisk * – I probably have more than one lot, but this will be evident as I start counting out the lots sold. If you order and I don’t have enough, I will refund your order.
Note: I will NOT be selling individual sheets until such a time as no one wants these bulk lots. When I do revert to single sheets, the price will be higher.
The other day, I was shipping a package to a Canadian customer. Stamps.com warned me that Canadian customers are often charged a customs fee AND a $10 processing fee. They offered to bypass that with a flat rate pre-charge of $6.95. I know that not every Canadian shipment gets charged a customs fee, but those that do might easily exceed $7. So, I have implemented a $7 surcharge for my Canadian customers. This is supposed to ship directly to your door without any customs intervention. You can read about it here: Stamps.com – Canadian Duties & Taxes
2: Purchasing and Accounts
I have had NUMEROUS questions from customers in shock regarding a $25 shipping fee. $25 is my current flat rate for International Shipping. So, why are my US customers seeing a $25 shipping fee? Well, it is because – without logging in or creating a shipping address – the system does not know where you are and defaults to “everywhere else” – which is $25.
In order to save us all some time, I have now disabled “checkout as guest”. This means you have to have an account (and log in) or create a new account (and log in). The system will then know where you are and calculate your shipping charge based on your state (or country).
3: Rubber Prices
Added fees are now integrated into price, some are reduced.
4: Short Kit Prices
Due to the increase in balsa prices, (previously discussed) I have increased my Short Kit prices. These new prices are still pretty low and are based on the number of balsa sheets in each kit. Keep in mind that I try to select appropriate balsa density weights for the specific kits – and I do not use wood over 12#. For example, some of the Peanut kits are cut from 6-7# wood – that’s pretty light. JetCat kits increased and I will try my best to select lighter weight wood for the wings, especially.
NoCals – No Price increase (all are $11)
Dimers – all increased by $1 (all are now $12)
Peanuts – nearly all have increased by by $1 or $2
Scale – all of the lesser kits increased by $1 or $2
Embryos – nearly half increased by $1
Old Timers – nearly all have increased by a couple of dollars
JetCats – all increased by $2


 Well, it’s time to finish my lunch and get back to making those parts!