Adventures in Laser-Land

I took delivery of my new laser cutter on the 11th.  It was scheduled for delivery on the 10th, but the truck driver did not want to back his 53′ semi-trailer into my driveway and tear up the yard.  That was kind of him, and as I said, I didn’t mind because when I take delivery, that’s when my work starts.  So they came back the next morning with a smaller box truck and dropped the crate off in my garage.

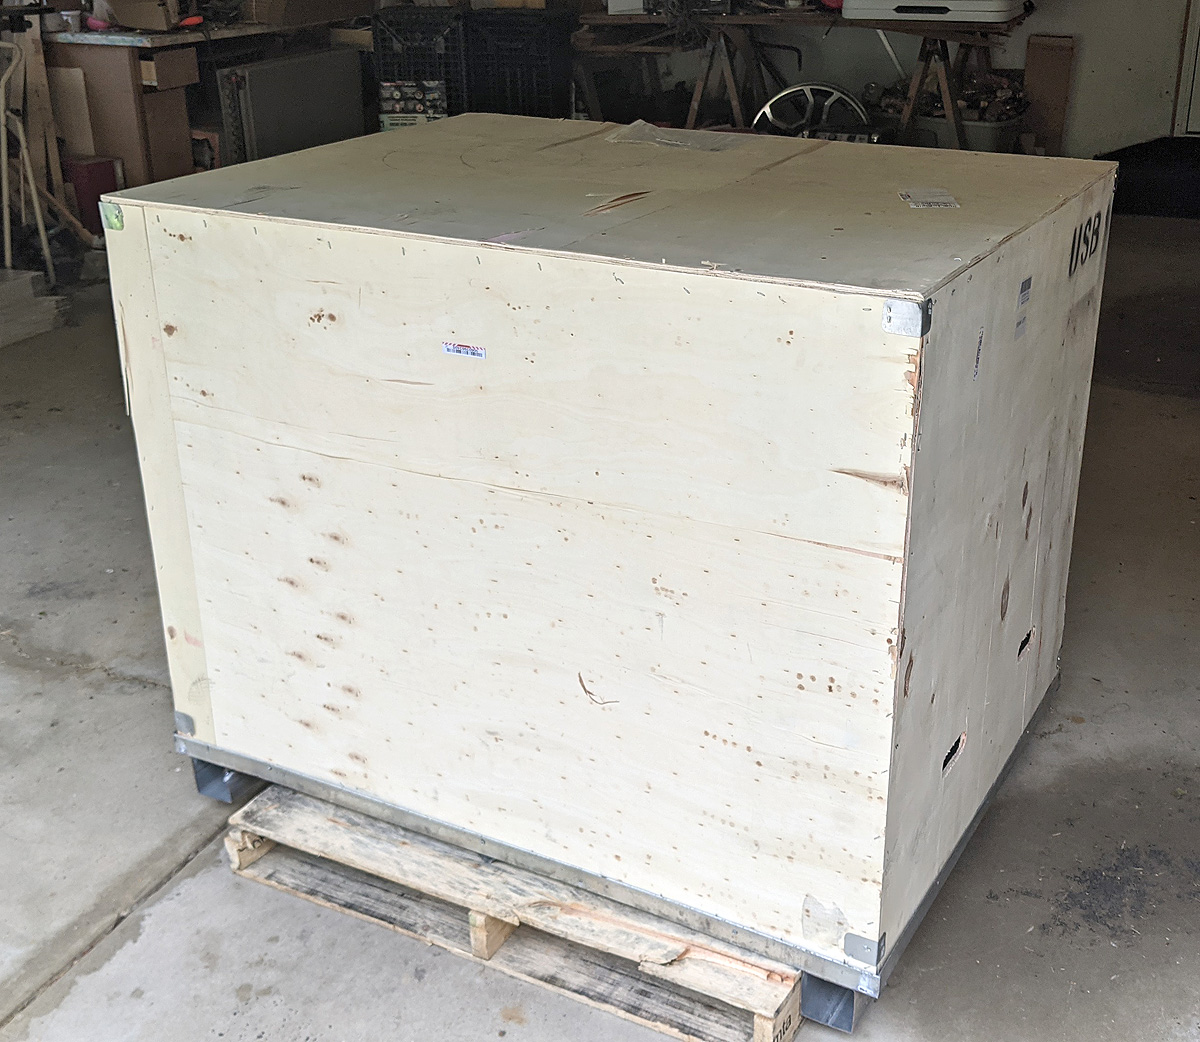
the crate as it was dropped off

I got the top of the crate off with little effort. Miss Patricia did help me with that.

my drill motor shown on the cutting bed for size reference

So there it sat.  I had to wait until late that evening for my sons to come over.  They were working in the coffee shop – and then golfing (!) – so, old dad had to wait to get his new toy moved into the house.  As it was indicated that it weighs something over 300 lbs, I had the idea to roll it on plywood around the back yard to the door into the room where it will sit.  I broke down the crate and used the three larger sides for that purpose.  About 1/4 of the way through the journey, Jack suggested we simply carry it.  That was the right thing as it went much easier than swapping all those sheets of wood.  I did have to remove the doors from the entry way, since they interfered.   With them off, we simply rolled it through the doorway with about 1/4″ to spare.  Now comes the complicated stuff – getting it to work.

The cutter, in its current location with everything hooked up.

I installed the software that came with the cutter onto the laptop that I used for the old cutter and eventually brought up the water cooler (for the laser tube) and the industrial filter system.  I say “eventually” because I didn’t need either of those to get started – I needed to get to that “it’s alive” point and that didn’t require cutting – which heats the tube and creates smoke – so just making sure that I could control the head and load a drawing was the first part.

After it became operational, and I got the water hooked up, it was time to do some test cuts.  As with all things technical, there is a learning curve.  I knew I had to convert all my old files to a new format.  The old laser required XPS format and this would read DXF.  DXF is good, because that is somewhat of a universal CAD file format.  TurboCAD uses its own proprietary format (of course), but easily writes to DXF.  Somewhere along the lines of testing, I got the machine confused and it thinks things are mirrored, and try as I might, I could not get it resolved in the free RDWorks controller software that came with the machine.  Googling told me that LightBurn was a better controlling software, but it costs $80.  I downloaded the trial and found that I could actually set up and control the machine now (so I sent them $80).  It did take me all day to get to a comfort point and that was rather frustrating – just ask the Mrs.

Side track for a moment.  While my old cutter was dying, i had plenty of time to mess with it.  As mentioned before, it would simply stop cutting in the middle of a file, often burning a nasty hole in the balsa.  You can’t really start over on a cut, so tossing all those partial cuts was wasteful.  I discovered that if I stood there and monitored the cut, I could unplug and replug the USB cable and it might resume right were it stopped.  I tried different USB cables but no luck.  These are the silly printer USB cables with the strange square end that plugs into the machine.  During my week of working on the dying machine, I discovered that whatever the problem was, it was throwing errors that stopped the USB driver from functioning.  I could unplug from one USB port and move to another and have success – until that one threw an error.  So…Is it the machine board initiating an error that fed back into the computer – or was it the computer and its USB ports/drivers failing?  I don’t know.  Its an old recycled laptop, that I dedicated to the cutter.  I moved the laptop up to the new cutter and loaded the trial software and got to setting up the cutter.  However, I decided that I cannot trust the old laptop, so I bought a new $500 laptop for the new laser cutter.  End side track.

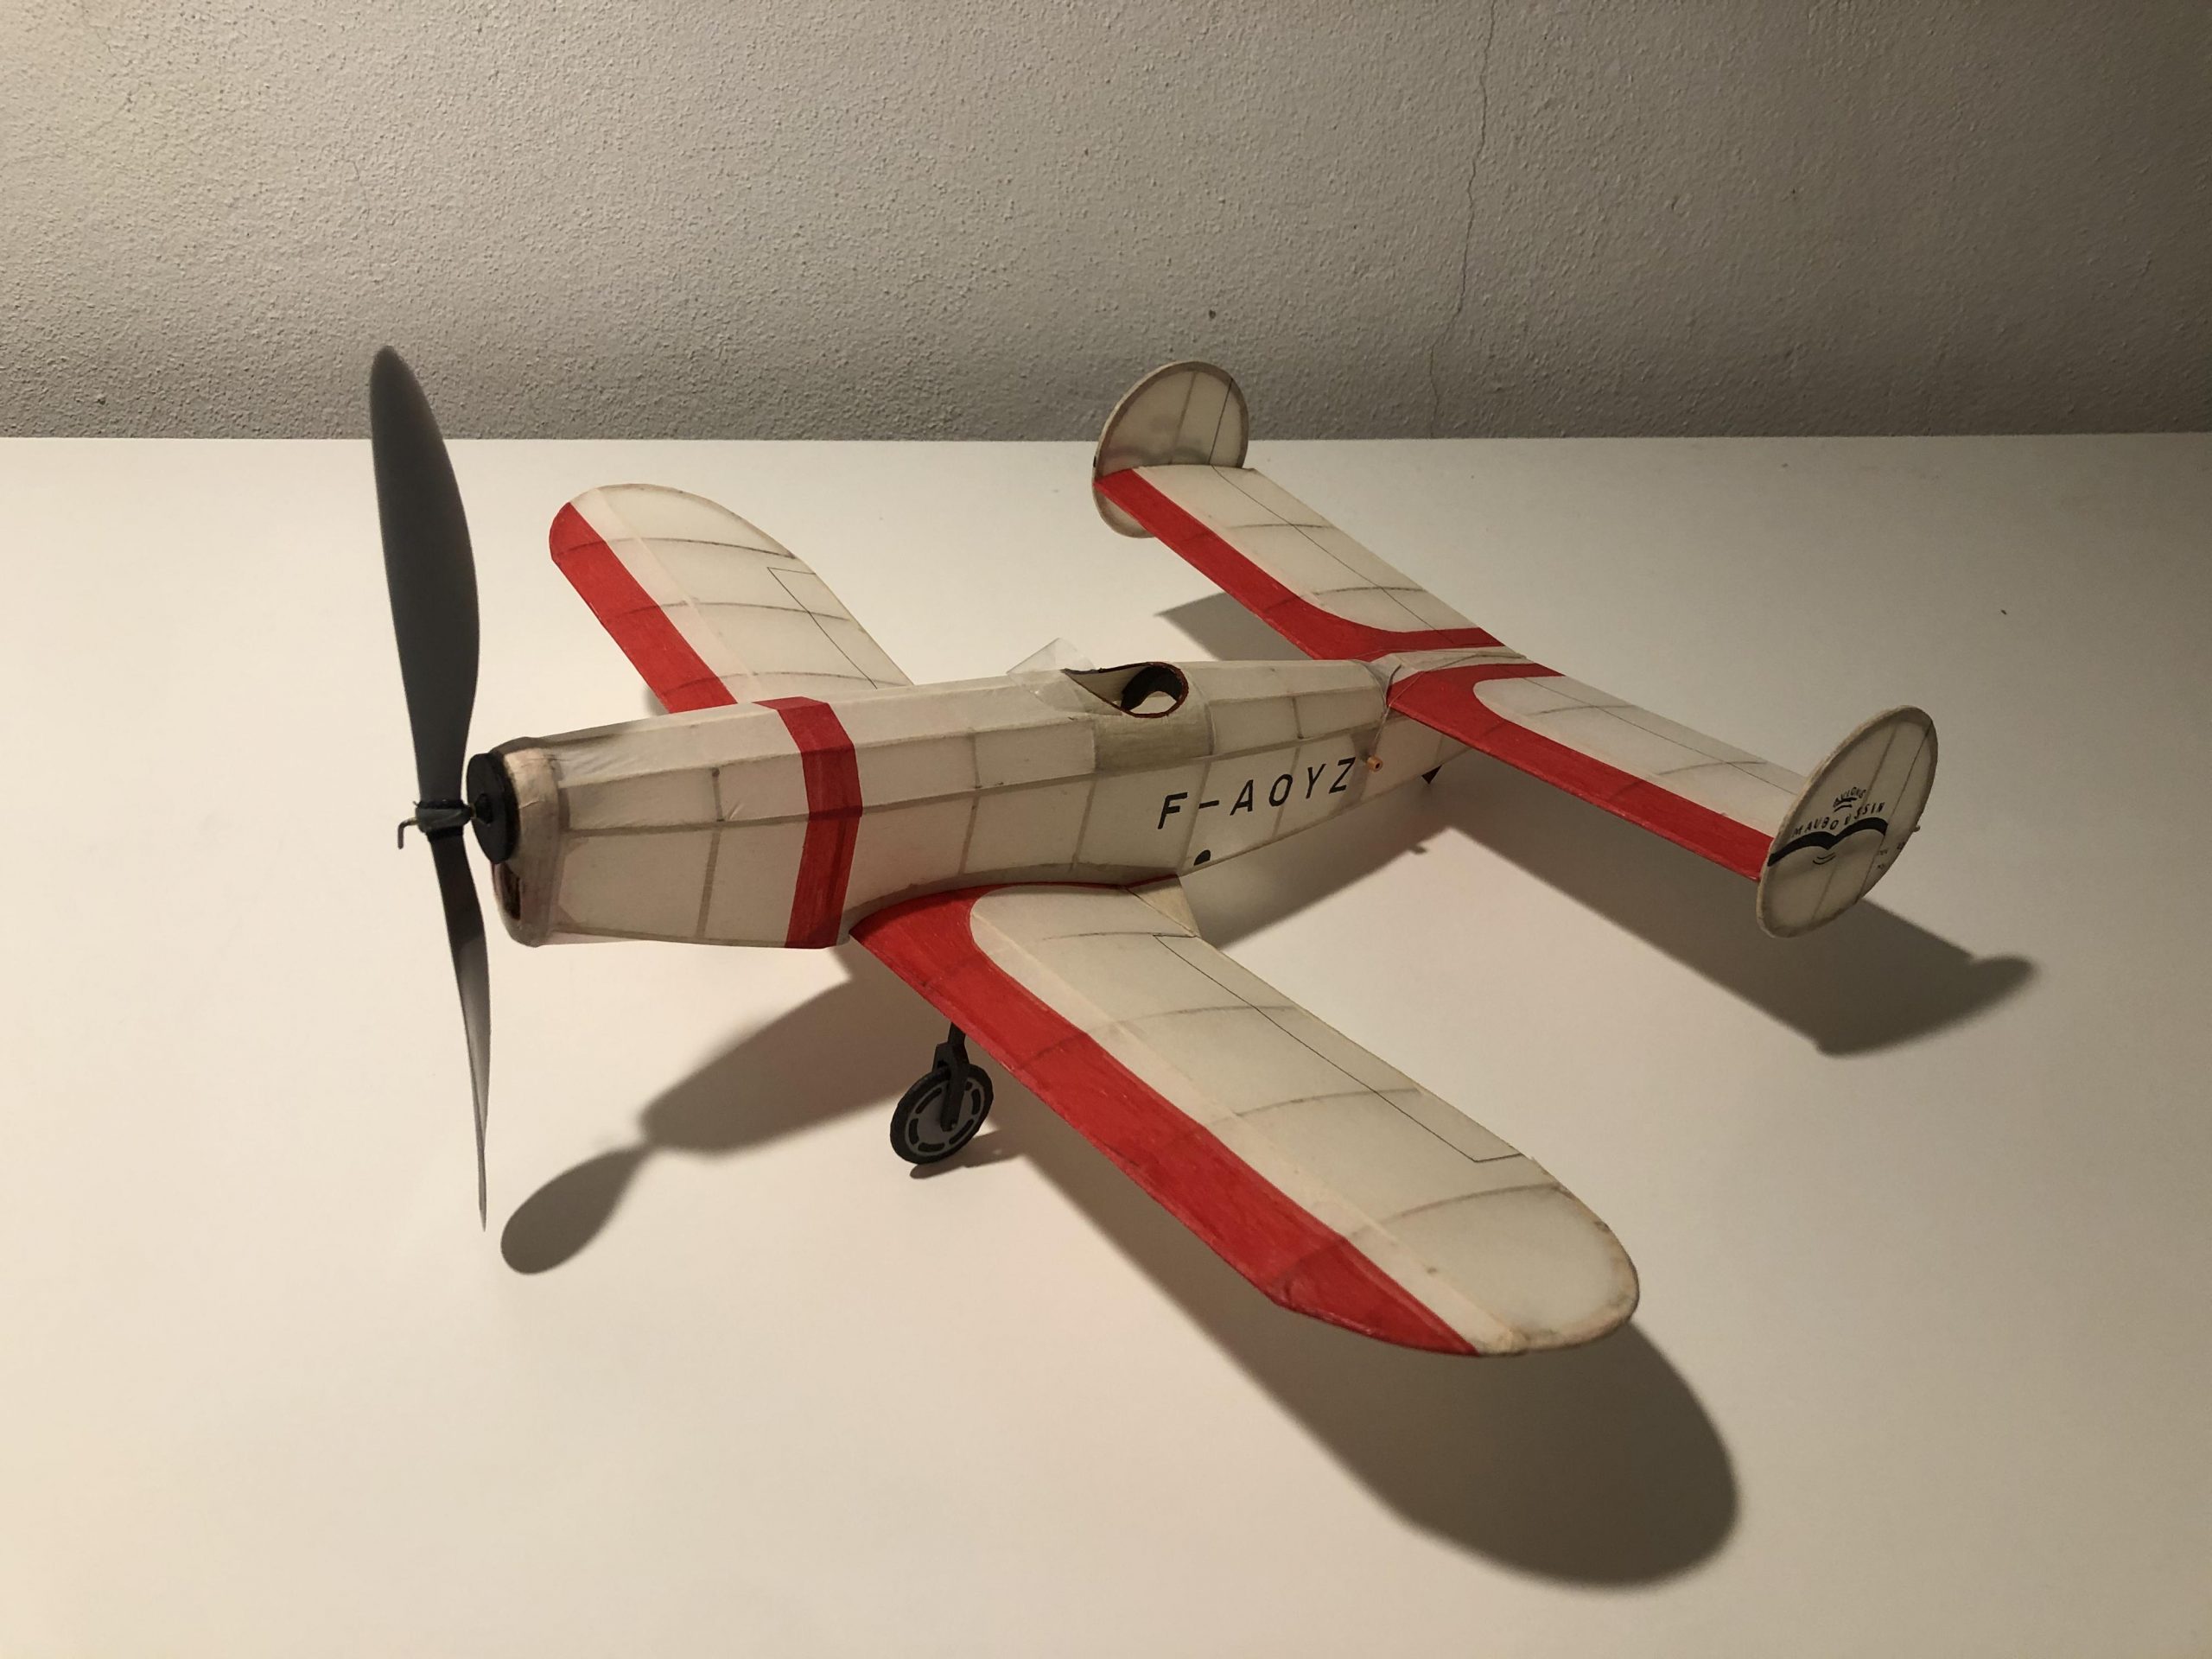
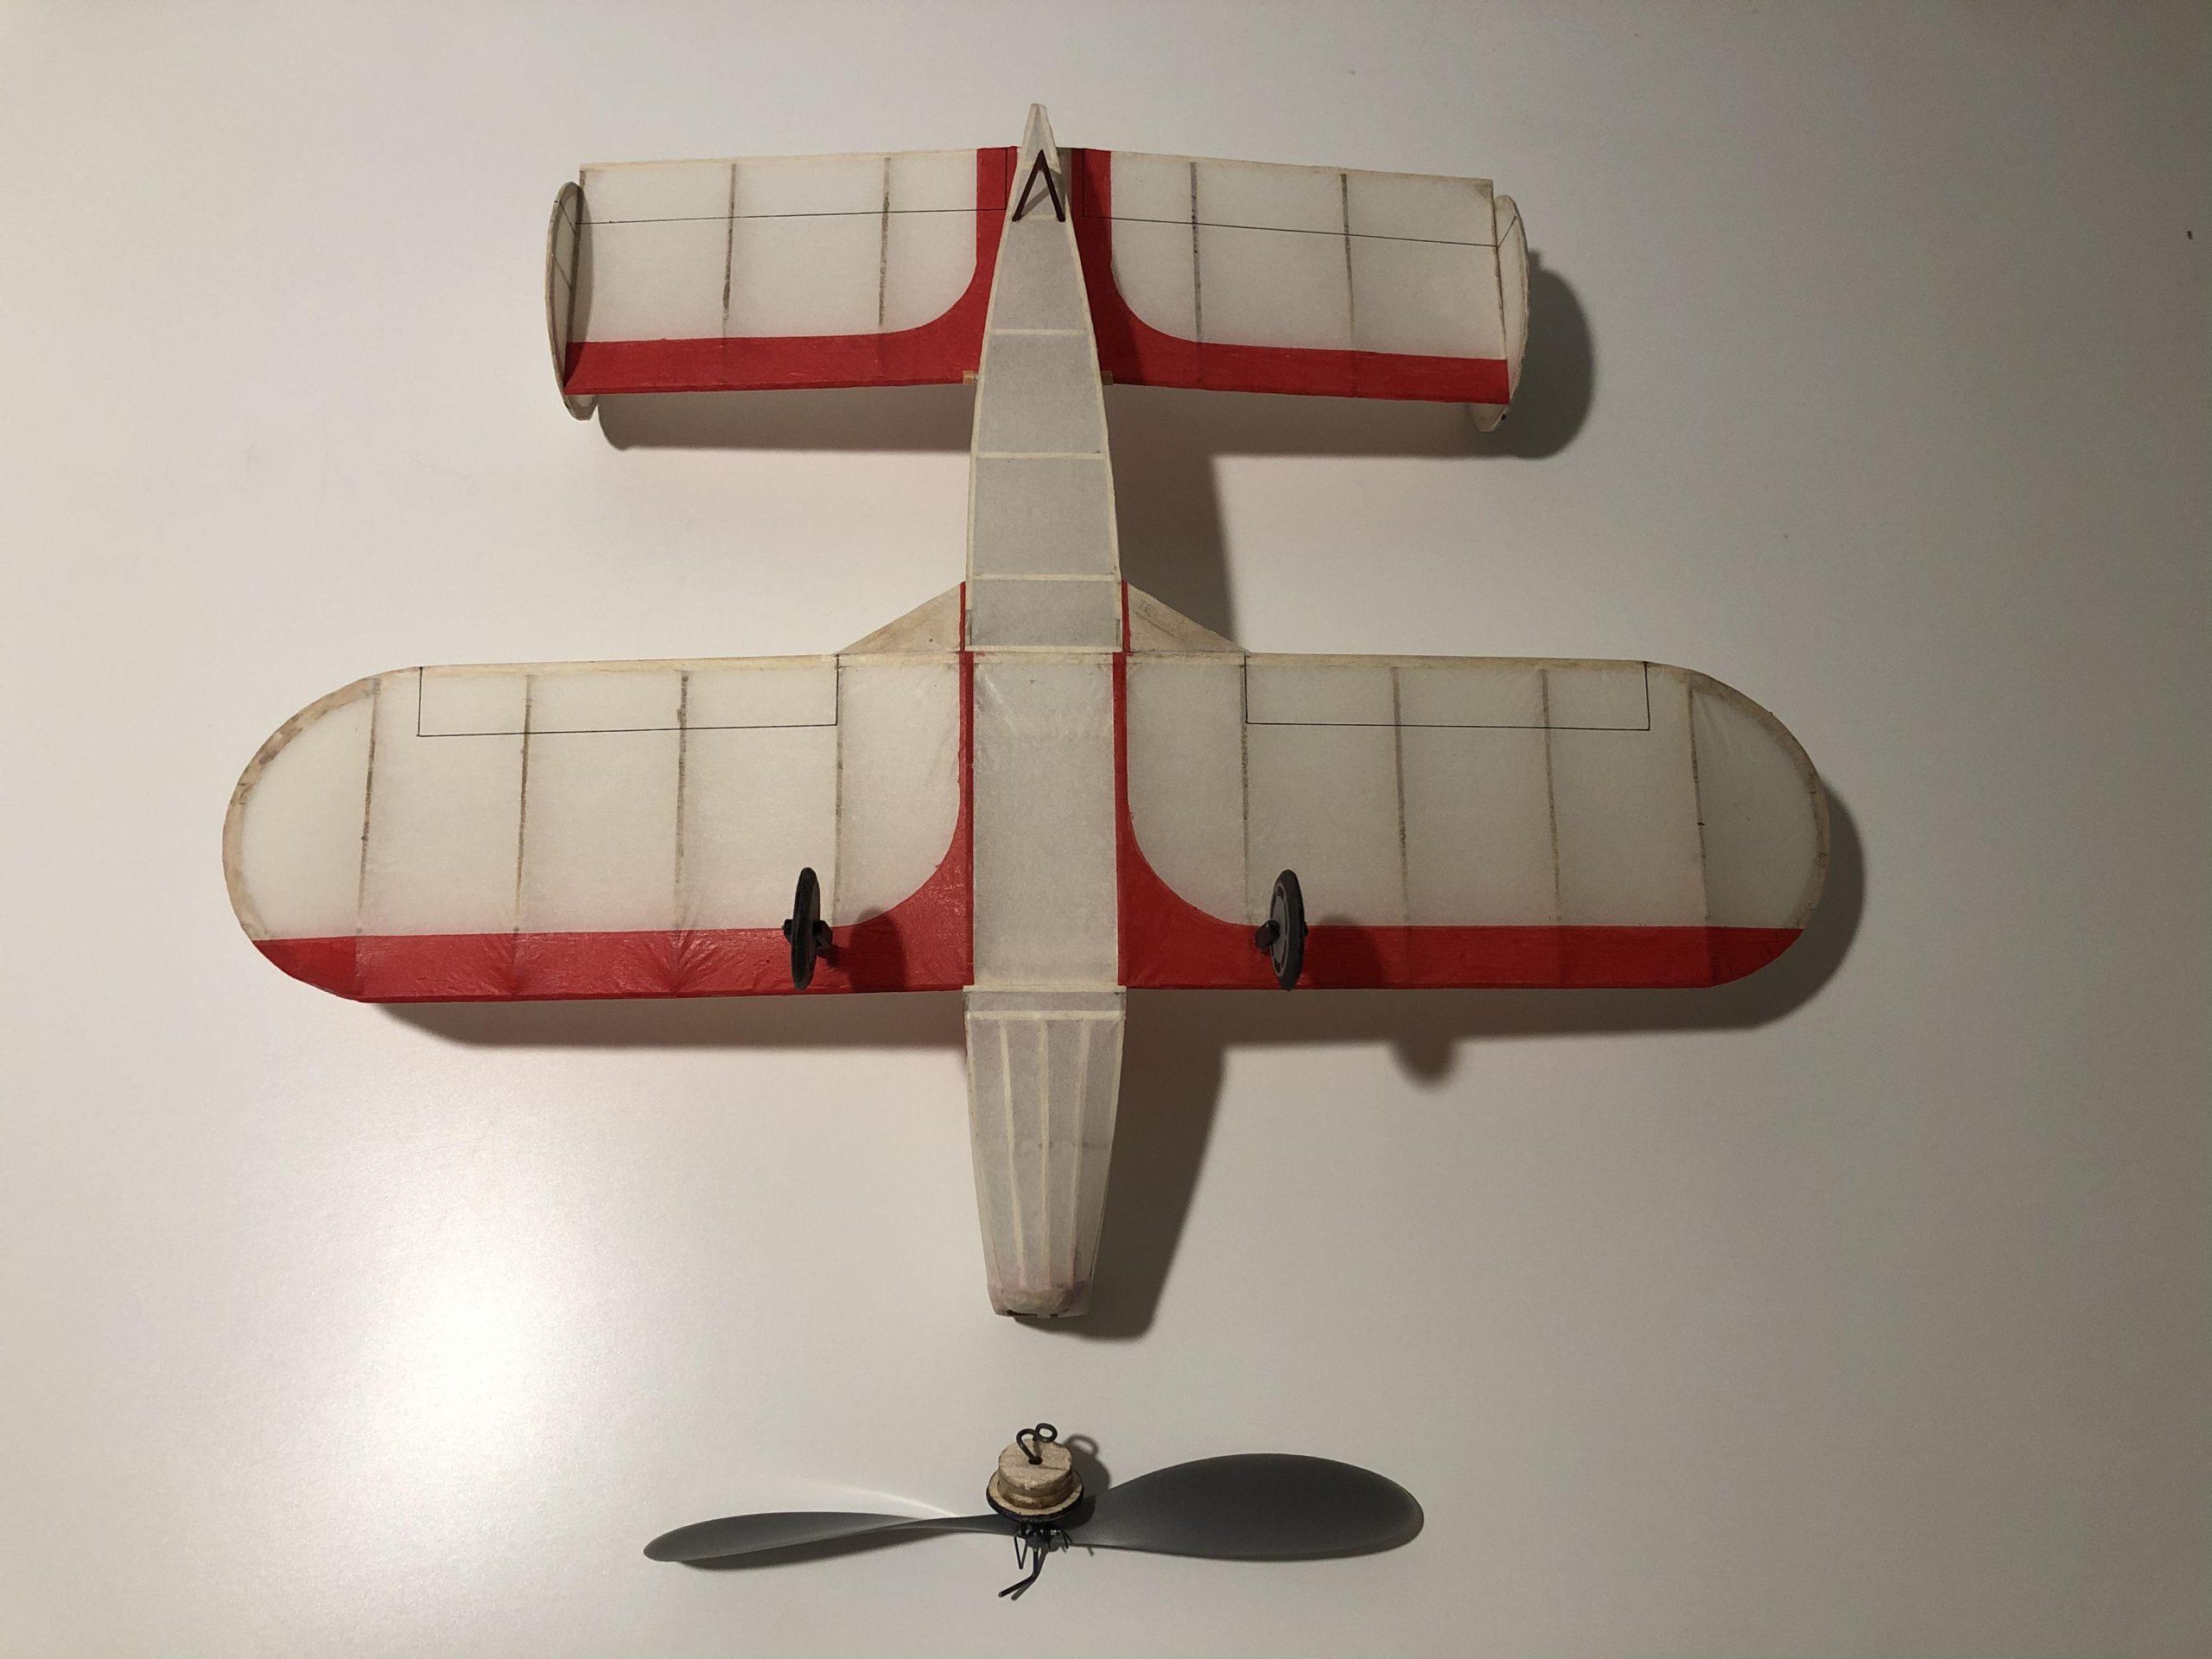
I was able to create some files and test the actual cutting.  It appears that the new cutter is about 5x faster than the old cutter!  Add to that the bed has just over 4x more area.  I should be able to cut at least 4x more wood in the same time as the old cutter.  The old cutter has a cut bed about 14″ left-to-right and 9″ front-to-back about the same size as a sheet of legal paper.  Consider that any of my larger kits require several sheets of balsa, and you can see that to cut one kit would a) take some time and b) take swapping out wood for a second or even third set of wood.

I tested some Chambermaid Dimer kits.  These require three sheets of balsa – 2x of 1/16″ thick and 1x of 1/8″ thick.  I was able to load both thicknesses and cut two kits all at once in less time than I could cut one kit.  Success!  However, as I mentioned on facebook, I was out of any balsa heavier than 6-pound.  I had some on order and coincidentally, it arrived on Sunday.  So yesterday was spent refining and tweaking.  I ran into two issues:  1) I ran into some software-induced problems and 2) balsa suppliers only supply “nominal” sizes.

The software.  I have a backlog on P-30 kits.  And with the arrival of the new wood, I could get busy cutting for them.  I laid out a bed-full of balsa to cut 3 kits at once.  That is four sheets per kit for the Square Eagle and I could fit three kit’s worth on the bed at once.  To get technical, the cuts are sorted by layers – I use blue for the main cuts, red for the lettering, and green for optional features (like gizmo geezer nose button cut-outs).

It only took 25 minutes to cut three kits!  however, I noticed a problem – the lettering was shifting to the left.  That wouldn’t be too serious, except I also etch certain parts locations on other parts – you know: “glue part A to part B HERE”.  I noticed that between the first kit and the third kit this location had shifted almost 1/16″ of an inch.  And then the third layer of cutting the nose button holes was also off.

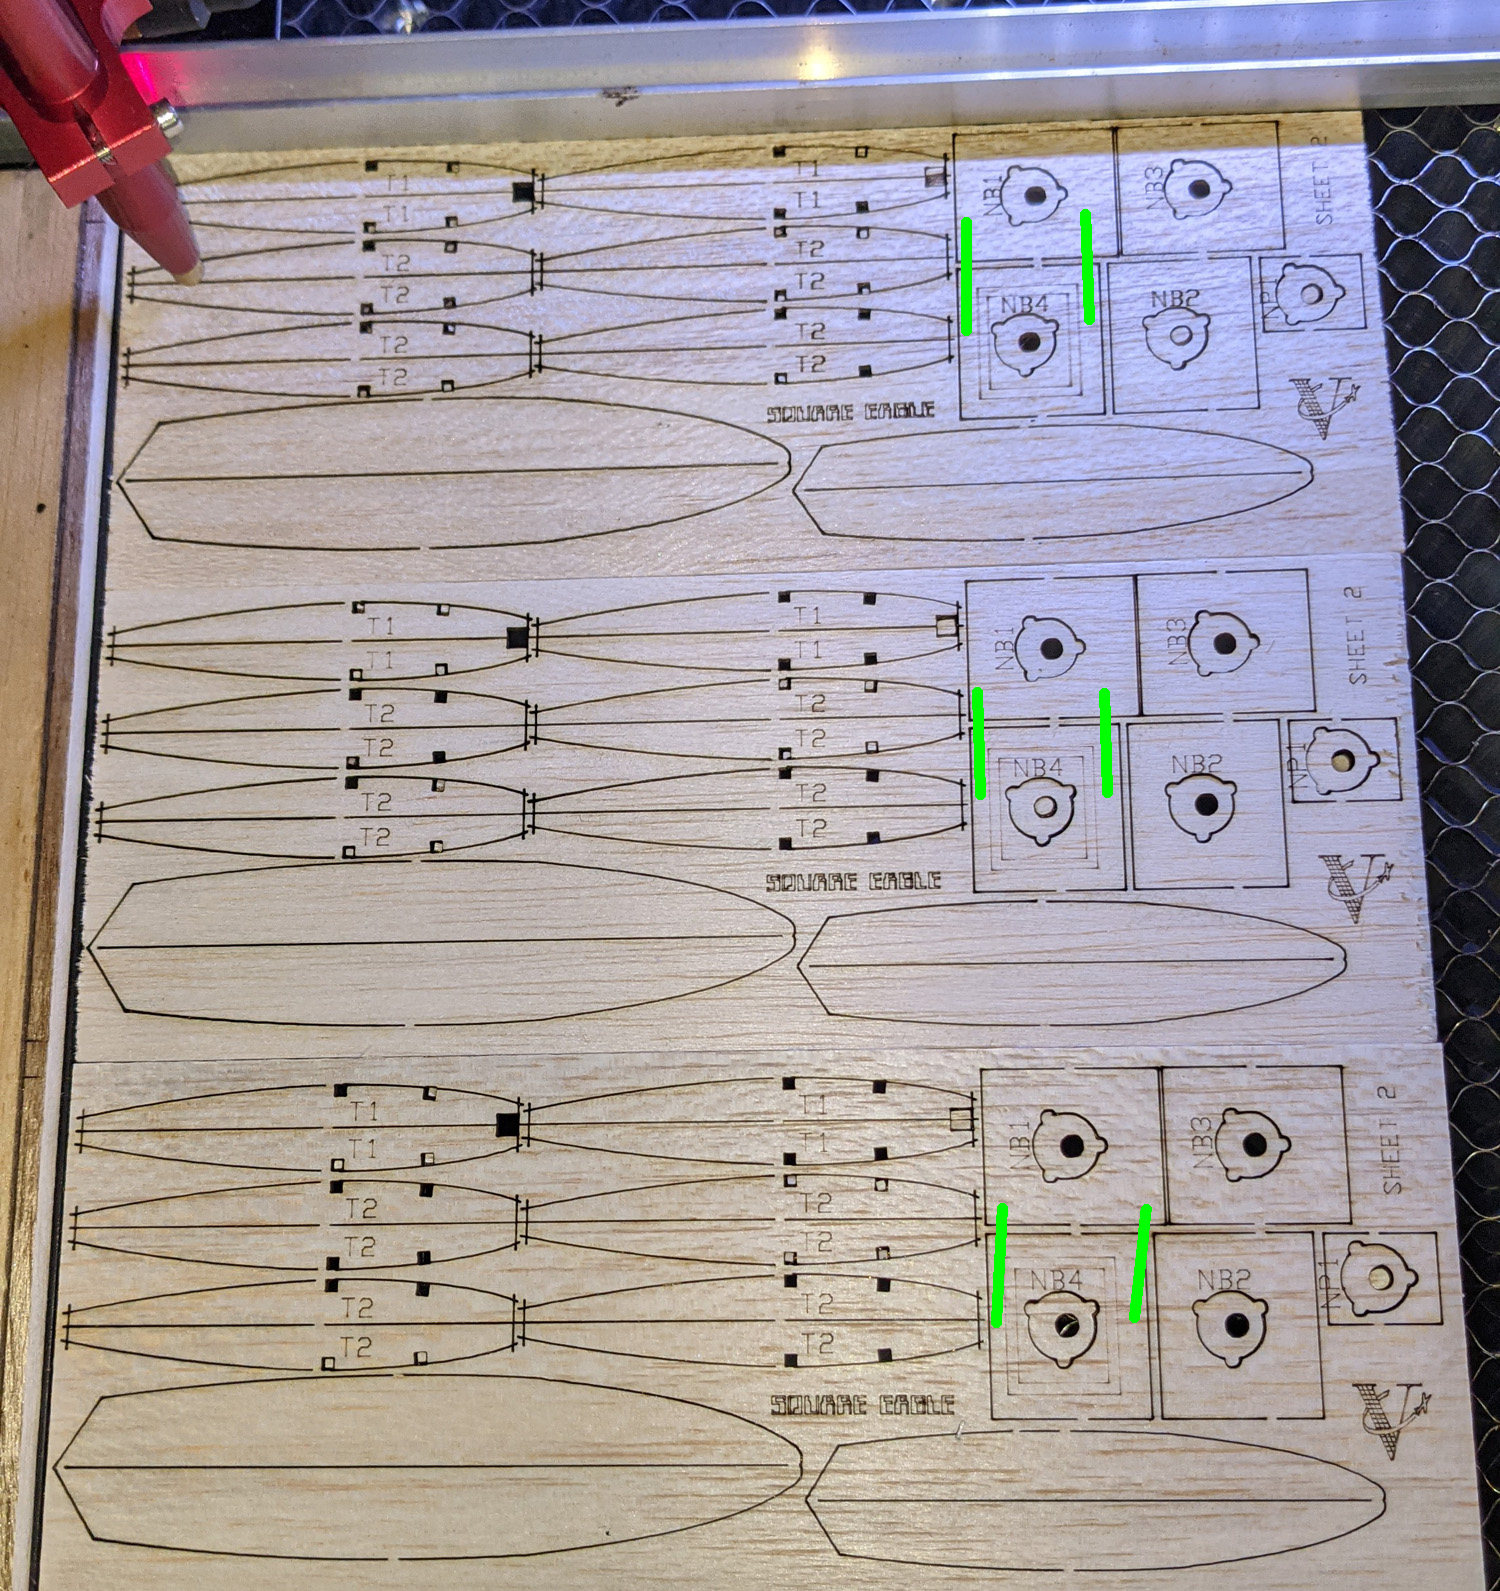
I did more googling and found that apparently the command to control the stepper motors can induce a drift like this.  Here is a snippet: “‘PWM rising edge valid’. This controls which side of the motor pulse the motor drivers are expected to respond to, and if it’s wrong, it will cause very slow drift of jobs over time…” and “… cause slip, especially if the job contains lots of small moves.” – like all those small moves in writing out all that text.  So I got that fixed.

The next problem was one that I encountered before.  I will call it “error stacking”.  I order 3″ wide balsa.  I have found that suppliers have a wide tolerance for producing 3″ wide stock.  I have received batches that are under 3″ by at least 1/32″ and some batches over by as much as 1/16″.

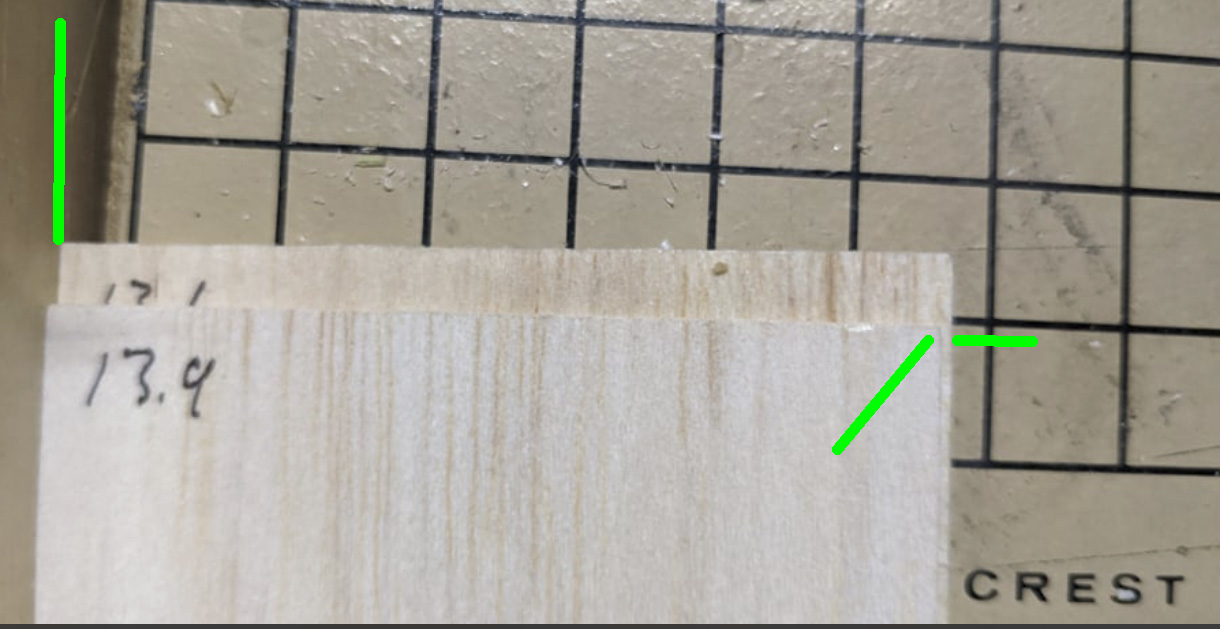
the left green mark shows the sheets pushed up against a wall and the right side shows the two different widths of 3″ wood from suppliers.

On my old small bed, I could account for that and most of my files are padded with about 3/32″ of space between the ideal 3″ width and the parts cut.  That 3/32″ padding on each side would allow for errors to stack up and not really affect the cuts – most cut pieces would stay on the piece, regardless of the size.  I did often strip 1/132″ off of some sheets.  But with the new cutter, I have the capacity to stack up a lot more than two or three sheets and with that, I am stacking errors from all those poorly-dimensioned  stock woods.  My solution to that was to make a cut file to process each sheet – it cuts off any excess over 3″ and makes those sheet 3″ wide.  While I haven’t tested it, in theory, this should solve that problem.  It will take about 3 seconds per sheet, not including the load time, but with all the time save with the faster cutter, I can spare that time and still be faster.

So all that testing took all day yesterday.  I was finally able to pump out some good balsa, but I also have a waste basket full of scrapped sheets of balsa.  Now it’s back to work!


Posted in Products | 1 Comment

Better Flying Through Record Keeping

I’ve written an article and put it in the How To area.  I hope you might find it useful.

How-To: Better Flying Through Record Keeping

–george

Posted in Uncategorized | 1 Comment

Back from the Nats – Ups and Downs

IMPORTANT NEWS BELOW THE NATS REPORTS

Wow – it’s been a week since I returned from two weeks of Nats flying; first the AMA Indoor Nats in Pontiac, MI and then the AMA Outdoor Nats  in Muncie, IN.  Apparently, I’m no spring chicken as I was exhausted upon my return – ha!  To be fair, I returned home every night from Pontiac as I elected to take the daily 135 mile drive – that was about 1,000 miles that week!  Muncie was a 3 hour drive one way and I spent those days on the field with Pat Murray in his RV.

Forgive me if this report is shorter than you might expect; my memory has never been the best and I tend to “live in the moment” and events fade as time passes.  The Indoor Nats had 40-50 contestants, maybe more if you include all the Science Olympiad students that were there for a day or two.  Most of those flyers were for the AMA events and only a few showed up for the FAC events.  This was a little disappointing for me as this was a great opportunity to fly in a wonderful facility.

I had been prepping for these Indoor Nats all winter since they were held on my “home field”.  We Cloudbusters have been flying indoors at this site for maybe five years and while I still suffer from collisions with the girders, I felt I had a bit of an advantage.  All of my indoor models were trimmed over time to fly within the confines of the facility and only other Cloudbusters would share that small advantage and I felt I needed any leg up as I still consider myself an Outdoor flyer flying Indoors.  It turned out that I was the only Cloudbuster that showed up to fly.  That minuscule advantage was all mine.

My flying buddy, Winn Moore, showed up every day.  He didn’t register to fly and ended up helping me throughout the contest.  His help was immeasurable and we increased my flying times for several models.  But we still had to contend with George Nunez (FL) and his some Jonathan (CA).  I met George when I went to the Indoor Nats at Rantoul a few years ago.  George shows up with a car-load of exquisite models.  And Jonathan designed the Yak-3 Peanut that I’ve been campaigning and kitting.  All of their models fly very well.

Wrapping up the Indoor portion of this missive, I did pretty good.  Some events evaded me, but overall I came out on top, as you can see in this photo.

I had a couple days (Saturday and Sunday) to stay at home and do non-airplane things – in between hastily packing orders and the truck and trailer with models and sales goods.  I got a few orders out the door and in the car for contest pick-up.  I even got a couple of kits cut, but had some minor issues.

I drove down to Muncie Monday morning so that I would have all day to test and trim various models.  The weather was great!  Sunny with only the slightest breeze and temperatures in the mid-80s.  It stayed that way through Wednesday and Thursday promised rain and wind.  The rain happened BEFORE and AFTER the contest, but not during and the wind on Thursday wasn’t terrible.  The temps felt like high-80s, maybe 90s and without any wind, the sweat just poured off of me.  The three of us in Pat’s RV went through nearly 3 cases (32 bottles per case) of bottled water over the four days.  At least we were hydrated.

I got my new Holy Ike OT Stick trimmed out on Monday.  It climbs like a rocket and glides well.  It looked really promising for OT Stick on Tuesday.  I put up an easy max on the first flight, but had a brain fart on the second.  I clearly remember winding to a specific torque, which was well below max torque.  I launched and watched a mediocre flight that ended six seconds short of a max.  Well, that ended my hopes of winning OT Stick.  I think three, maybe four, other flyers maxed out and had a fly-off.  I should have been in that group and this model is capable of so much.  Oh well, now I know.  I’ll do better at the FAC Outdoor Champs/SAM Champs.

Holy Ike – 1941 Class C Stick

Brain Fart #2 occurred on Wednesday.  The weather was perfect.  virtually no wind and light thermals everywhere.  On a whim, I had brought my INDOOR Stout 2-AT for the OUTDOOR contest.  It is a good flyer and I thought it might do OK in Golden Age.  Backstory: when I am preparing for events (I guess “seriously” preparing for events), I do a test flight, or several, until the model is where I need it to be for the event.  For my OT Stick and Fuse, I always take at least one test flight to verify the model is where is needs to be and is behaving properly.  Well, I guess i wasn’t “serious” about Golden Age.  I pulled the Stout out of the box and wound it up – with its INDOOR motor and everything.  Pat asked if I was testing and I said “no, let’s go with this”.  85 seconds later I was picking up the model after a low altitude flight.  85 seconds is not 120 seconds and I dropped that first flight.  I wasn’t upset as I had no expectations for the model.  But I wondered why it didn’t climb in the excellent air.  I realized that for INDOOR, I was limiting climb with downthrust so the model didn’t get into the girders.  I took about half a turn out of the Gizmo Geezer nose button and wound up the 1/8″ INDOOR motor again.  I did it again for an identical third flight.  Both of these flights were over 3 minutes, with tons of soaring and landing not-to-far away.  Had I tested before going official, maybe I could have maxed out.  Here is a video of one of them.

My stars aligned for Old Time Fuselage and made my week.  I was flying my new-for-this-year Hep Cat.  I had tested this in April at Muncie on a windy Saturday and was amazed at how stable the model was.  I didn’t try to ROG it (a requirement for FAC OT Fuse) then but it later proved stable in ROG at the McCook contest in June.  Again, the weather was beautiful on Wednesday.  But I saw so many OT Fuse contestants drop a flight.  And these were all the big names.  I had put of three easy maxes and was sitting pretty for most of the day.  Around 4pm, Ed Hardin turned in a triple-max – that meant a fly-off.

My new Hep Cat sitting on the February snow

CD Mike Welshans had decided that fly-offs would be settled by a 4th unlimited duration flight and Ed went back and put up his 4th flight right away – a 4:42 flight that went pretty far down field.  Clouds then rolled in.  All of our nice sun went away for long periods of time.  Pat Murray helped me a lot – telling me “no, let’s wait” when I was getting itchy to go.  We could see breaks in the clouds coming and we waited for more sun – and more air.

One of these larger breaks we coming and I decided that it was time to go.  I told Pat to get ready to time and I wound up.  I would it up pretty tight, stressing the motor, probably close to max safe torque.  I set the electronic timer to 5 minutes and went to the table.  I stood there for a time, resetting the timer for a fresh 5 minutes.  The sun was popping out, the streamers were starting to flutter…then I felt the light breeze shift about 90 degrees or more.  I told Pat this was it, made sure he was ready, reset the timer one last time, turned into the breeze, and launched.

Whatever thermal there was wasn’t the strongest (I had launched into one on the second flight that nearly knocked my model out of the air as I released it), but man, that model climbed up.  It was getting really small and I asked Pat “we aren’t even at 50 seconds yet, right?”  He replied the time was just over 40 seconds.  My motor run is about 55 seconds under normal torque and this was mega torque.  The Hep Cat finally settled into a gentle and flat glide, making big turns over the field.  I was just a few hundred yards from the launch site when it finally came down.  The DT hadn’t popped yet – the flight was under 5 minutes.  I rode my bike over, bent down to pick it up and it popped.  This was going to be close.  I got back and Pat told me it was a 4:49 – I won by 7 seconds!

Don DeLoach photo of flight #2 or #3

The rest of the contest was immaterial.  I didn’t expect to win anything else – and I didn’t.  But I had a great time doing what I did, and learned a few lessons that will be helpful in the future.

P.S.  Wally Farrell took Outdoor Nats High-Point Champ!


MORE DOWNS WHEN I GOT HOME

So, getting back home after big contest means lots of catch-up work filling orders that come in while I am gone.  Of course, people don’t stop ordering just because I’m not there and, of course, they order my short kits.  My kits are probably the part of my business that I like doing the most.  I like finding designs, drawing them out, building them, flying them and then making those designs available for others.

I mentioned earlier that I had “minor issues” with my laser cutter in between contests.  The cutter would start cutting and would just STOP CUTTING after about 10 or 15 minutes.  This may be during one cut, or it may be in the 2nd or 3rd cut of the day.  I mostly cut one kit at a time, due to  the limitations of my 14″x9″ cutting bed.  Not only would it stop, but the laser would still be firing – so it would burn large holes in the balsa, ruining the piece.  The computer was reporting it was losing connection with the cutter.

I found that if I stood by the machine and watched it during the cut, I could quickly unplug the USB cable and plug it back in and the cutting would resume.  I might have to do that two or three times during a single cut.  This was entirely unpredictable – it was failing at various points in the cut and not repeating at a specific spot.  Besides being very annoying, it is wasteful.  The balsa might be ruined, but it also required that I stand by watching for 10 or 15 minutes during a cut – time that I usually spend packing or making other things.

I contacted the manufacturer.  I had issues with the controller board in the past: the board got hot enough that the heat sink on the chip slid off the vertically-oriented board.  They had sent me a replacement board back in 2016 (had it really be that long ago?)  Now they told me that the 2013 purchase was too old and they no longer support that model in any way.  They said I might try to install a 3rd-party controller board, but could not recommend one, nor offer support on how to do that.

I started doing research online.  While replacement is possible, it doesn’t seem to be a simple swap.  Still considering a swap, I purchased a new USB cable, just in case that was the issue.  This cable is a USB printer cable and the end that plugs into the board is a little loose.  I got the cable and used it.  I was able to cut about three kits before the board crapped out again.  This time was slightly different – it finished the cut, returned the cutter head to the “home” position, and shut down.  I can get no reaction out of the cutter at all now.

You know what that means?  Most of my back-orders cannot be filled – I generally cut kits as needed.  I did make some extras in preparation for the Nats but as they have not been purchased, they are not the items people want the most.  I am faced with many orders that I cannot fill because I cannot cut balsa.

While considering how to proceed with this ancient piece of tech that has served me so well, I have gone ahead and ordered a replacement.  This one has a 28″x20″ bed and is much, much larger.  I doubt I can fit it through the door to the basement, even if we could carry it down the stairs.  According to the published dimensions, it should fit through the back door of the house and the Lady of the House volunteered that I could use that back room for the new cutter – even before it was necessary to buy one.

Delivery should be within two week.  In the mean time, I will get the room prepped.  Then I’ll have to hook up the new machine and figure out how to operate it.  Then I’ll have to reformat all my cut files, as I am sure the format I had to use with the old machine will not be readable by the new machine.  Hopefully, it will cut a lot faster, and eventually I should be able to rework the files to fully take advantage of this much larger bed.

To shorten up a long story, it might be a month before I can get back to cutting short kits.  Ugh.

Stand by…


Posted in Builds, Customers, Events, Products | 1 Comment

Shifting Gears for the Nats

Today is the Sunday before the Indoor Nats start and a week before the Outdoor Nats – and I better start preparing.  Not only do I need to gather my models and documentation, but I need to mentally prepare as my mind is elsewhere right now.

As some may know or remember (I did mention this before, didn’t I?), I have a 1963 Studebaker Lark.  I have had it for 10 years or so and have done very little on it for most of that time.  I jumped back into Free Flight with both feet and the car has sat in the barn all that  time, with only occasional attention – until this year.

In April, I took the car down to my dad’s in Ohio and we began a process of swapping engines from one of his Studebakers.  Once a month, I went down there for 4-day sessions.  I had expected three sessions, but three turned into four.  Neither he nor I are as young as we once were and the work required was possibly a bit more than anticipated.  Regardless, a couple weeks ago, we buttoned up my Lark and actually drove it down the road (and back).  Now it wasn’t perfect, but it was running.

This week, I trailered it back home and it is back in the barn.  It has been on my mind pretty much non-stop since then.  I still have a lot of tweaks and adjustments to do, but it is fun to be back working on cars.  I reminded myself that he and I had done similar projects several times – back in the early ’80s.  Early 80s???  Could it really be 40 years ago?  That amazed me – time has a way of slipping by, doesn’t it?  And, of course, I know he doesn’t have another 40 years in front of him, so it was good to spend that time with him.  I think he thought so, too.

Right now, I could go on and on about the car.  BUT!!!!  It’s Nats Time!  Time to get my mind right and back on track with Free Flight.  Because of the weather (June and July appear to be the new “rainy season” here in Michigan), I haven’t been flying since early June in Muncie.  I’ve been drawing and packing orders, but not building or flying.  Now the “biggest” contests of the year are just days away.  I have made a list for the Indoor Nats of what planes to fly in what events and on what days – that’s a start.

Of course, I used all Indoor season (ending in May) to tweak my fleet, knowing that the Nats would be in the very same facilities that we use monthly.  Of course, I took some of those models OUTSIDE at Muncie in June – and adjusted them.  I knew the implications then, but went ahead.  Now I will be forced to take the ones that I adjusted for Outdoors and re-trim for Indoors and hope I can get some of that Indoor magic back into them.

It looks like I am planning on flying 14 events.  And I have 12 or so models called out for that duty.  While I had decent success “locally” I anticipate that the competition will be a little bit steeper and the Nats brings in people from all around the country.  As for the Outdoor Nats next week – I better start making a list for that contest, too!  I am way behind and way out of practice.

I better get my head in the game…if I could just get that supercharged 4-speed hardtop pushed into a back corner of that same head, maybe I’d be able to prepare a little bit better.

See you there!

Posted in Events | Leave a comment

NEW PRODUCTS – Cloud Tramp Short Kit and 30oz Tumbler

After a great deal of consideration, I am bringing back the Cloud Tramp, but only a Short Kit.  You will get all the laser-cut pieces and plans/instructions in this very basic short kit ($11).  You can add a plastic prop (+$1) or a Superior Props Cloud Tramp prop blank (+$8) as options.  Get it now and fly in the August World-Wide Cloud Tramp Mass Launch!

Jump to the SHORT KIT

Details on the Mass Launch HERE

I’ve decided to do a LIMITED QUANTITY of 30-ounce Insulated Tumblers in the “Volare Orange” and with the Team Volare logo.  These will keep your favorite beverage hot or cold for a long time.  Get one now (before they go out of stock) and be one of the “cool” kids!

Dive right in to the Cup HERE

Posted in Products | Leave a comment

Flying Outdoors Again! the McCook at Muncie Contest

FINALLY, we get to go back outdoors for “big” contests, after missing all of last year.  Every June, the McCook Squadron (Dayton, Ohio) hosts a two-day FAC contest at the AMA Flying site in Muncie, Indiana.  It really has the flavor of a local contest, but it is showing signs of growing bigger.  There are only a couple of Dayton people still attending (old age is getting to all of us), but Pat Murray (Roscoe Turner Squadron) and the Cloudbusters have agreed to do all of the contest day legwork, while the Dayton crew manages the prizes and awards.  We have always enjoyed the opportunity early in the year to get back out on the big sites – and we (usually) can use this contest as a tune-up for Geneseo (not happening again this year).

So, after a year of COVID Cancellations, it was great to get back outside and meet up again will all of our flying buddies.  We even had distant flyers attend:  Wally Farrell from Virginia and Dave and Ann Niedzielski (EasyBuilt Models) from Alabama.  What happens after a year off?  It turns out that some of us are a bit rusty.  We “forget” how to fly and we tire easily.  That might be from the aging process or lack of regular activity over the year.

I drove down on Friday morning and discovered that Pat Murray and Clete Schenkel had already been testing since the day before!  The weather prediction was a mixed bag:  the temperature and general conditions looked to be great, but all three days proved to be windy.  I am sure that the wind curtailed participation in many events.  Still we did manage to fly 19 official FAC events, three McCook specialty events, and two AMA events.  All of the FAAC events had at least three flyers, so we awarded plenty of kanones (especially to Wally!).  Two of the McCook events (Sky Bunny Memorial, Cloud Tramp) had many participants, and the McCook Watson Challenge and AMA P-30 only had one flyer.  Frank Scott (Dayton) created the Sky Bunny Memorial and had a perpetual trophy made and gave out Sky Bunny mugs to all Sky Bunny flyers.  He created a target-time event which Wally Farrell won and took home the perpetual trophy.  Of course, Frank and the rest of the Dayton Crew created Award Certificates and the coveted “McCookies” for the winners.

My mug (already used!), a handful of “McCookies”, and a First Place certificate


My adventures started out well enough.  I test flew a few new planes on Friday, including my Three-Night P-30, my HepCat Old Time Fuselage, and my brand new Holy Ike Old Time Stick.  I tried a couple of other models, but really was just there for fun and relaxation and easing back into contest flying.  I stated earlier that I had brought 27 models for 22 events.  That proved to be too optimistic – at least I was prepared!  Well, maybe “prepared” isn’t the right word.  I dislike making motors so much that I neglected to make new motors for my models.  Some models were able to fly on OLD motors (for a could flights, at least) but most required me to make motors on the field – ugh!

the Holy Ike when it was finished – BEFORE testing

My first issue came with my Holy Ike.  I gave it some low and medium power test flights and all looked great with right-hand flying and gliding.  I checked the trim, noted that the wing was about half a bay off of location and fixed that and I powered it up to about 60-70% and walked out to the (windy) flightline.  As I was getting prepped to launch, my thumb broke one of the lower longerons.  I felt it would be ok and I would repair it after the test flight.  I launched and immediately knew something was amiss:  previous flights had a steady and stable climb-out to the right – this went straight out and climbed up.  Of course it stalled, dropped its nose and went straight into the ground, smashing the fuselage back to the wing.  Post-flight analysis:  I had noted the wing was not located correctly.  I had marks on the wing indicating where it should sit on the fuselage, referencing each side.  Earlier, I had aligned the LEFT marks with the CENTER of the fuselage, thus the wing was mounted to the right.  I imagine the extra weight on the right had imparted a right bank, especially under the lower powered tests.  Shifting the wing back AND higher torque made eliminated that right turn resulting in destruction.  In addition, the broken longeron had weakened the structure enough that it could take no impact.  Also, I had built the fuselage out of light wood – too light for a large powerful plane.  This crushing blow was destined to happen when I framed up the model.

the Holy Ike fuselage AFTER testing

The sun and wind started to take a physical toll, too.  By the end of Friday, I was very tired.  As we got started on Saturday, I worked on my B-52.  I built this several years ago, and while it is somewhat stable in flight, it is very sensitive to disturbances.  I also thought I had it under-propped so I put on a larger wooden prop.  That seem to make it fly a little better.  In the end, after several test flights, I recorded a 30 second flight, and then a 55 second flight and as I applied a bit more power, the old characteristics came back and it made about 1/4 circuit and the power pulled it up into a bit more angle of attack than it likes and it stalled out and nosed in.  There was little damage other than a bent prop shaft.  I have it so it comes apart in pieces on landing, so damage is limited.  This stalling is probably due to the washed-IN wing tips.  I’ve tried to counteract that with tabs, but I think it is beyond hope.  And last week, I had reinforced the chin so it would be crushed again on a bad landing.  55 was my top score and, with the 20 bonus points, it was good for second – behind Wally Farrell’s fantastic Me.609 twin.  I probably won’t fly this anymore as I don’t think I can coax it to fly better than it is.

my battle-worn 30″ span B-52 awaiting another flight.

I also got to work on flying my new HepCat Old Time Fuselage.  I have only flown this in windy conditions, testing in April at Muncie with Archie Adamisin and then at this contest.  Testing on Saturday showed a significant nose-down in the glide.  I had previously added tail-weight, but felt this was more of a decalage issue, so I adjusted in another 1/32″ in the tail.  It now has about 1/16″ more than the plan shows, but it seems to like it.  I dialed in a slight amount of down to compensate and proceeded to wind up for officials after one more test flight.  In the windy conditions, I was able to log a triple-max (three 120-second flights) – the only one in OT Fuse – and was happy to earn the kanone with a great flying model.

my HepCat OT Fuselage

Saturday ended with a sunburn.  I am not a total idiot and I do prepare for the sun.  For years, I have used a bottle of Coppertone SPF8 lotion that really does prevent sunburn, even at that low SPF and my easily-burned paleness.  But, I ran out!  I also had a can of spray SPF 50, so I used that – only to end up burnt by the end of the day – grrr.

Sunday was more of the same wind – well, maybe.  Saturday seemed to have lift with violent kickouts – you’d get a little lift, but if you got to the edge, you’d get shoved down rather powerfully – very strange air.  Sunday morning was still windy but the thermals were more typical good lift and no violent back sides.  It was sunny until mid-day, then came overcast.  Wally Farrell was fortunate to fly his Canberra JetCat while the air was still providing lift and logged TWO 60+second flights – amazing.

I managed to win Peanut with my Yak-3 and my kit-prototype Cloud Tramp (built in 2013) won its FIFTH Cloud Tramp Mass Launch.  I figured it was doomed this year as the wings and tail are rather warped, but I guess they are warped in all the right directions.  I dropped my second flight with my Wanderer (108 sec) and therefore missed a potential 3-way flyoff in OT Stick (Pat Murray won with a Korda C Stick).  I came in 2nd in the National Air Races with my Comper Swift.

It was great to be back out flying, but I was unprepared.  I didn’t leave anything at home this time (excepting more sunscreen), but I should have made motors and actually checked all my models.  I didn’t fly Embryo or 2-Bit, I just didn’t have time.  But Muncie is my favorite field and time flying there is better than time spent in most other places.


Posted in Events | 1 Comment

NEW PRODUCTS – Dimer and T-shirt

I out-smarted myself.  I posted that the Mauboussin Hemiptere was ready to buy – and so it was.  But a customer pointed out he couldn’t find it on the site.  That’s because it wasn’t there!

NOW IT IS!  Find the short kit HERE.

Read Oliver’s Build article HERE.

Oh, and find 20+ Documentation pics HERE.

And I have brought back the Classic TEAM VOLARE T-shirt.  With my discovery of my local print shop, I can now offer these filled on demand.  Find them HERE.

Posted in Products | Leave a comment

The Passing of…a Stone

(note – there is “some” modeling content below, but mostly this is a reflection)

Well, that’s over.  About 2pm local time yesterday, this popped out.

predicted to be 2mm, this looks a bit larger, maybe 3mm!

It is a distinctly different shape that #1, which is interesting in a scientific sort of way.  #1 looked like a flake of crystaline stone, like quartz.  #2 looks like a grape-cluster-like mineral deposit.  I now have a “collection”.

Oh, for those of you that haven’t had a kidney stone and are worried that you might get one, I will tell you this as a veteran of two:  the pain is unimaginable – it will lay you down.  BUT – once the stone gets to your bladder, it is easy and virtually painless.  Don’t worry about that last “little” length of travel coming out of the bladder, it’s literally nothing.  It is nothing more than “uh, I gotta pee again…ploop…oh, there it is”.

Now I have to rid my body of these narcotics.  I was given NORCO (Hydrocodone) for pain and FLOMAX for easing urinary tract restrictions.  I went as light as I could on both of them.  The NORCO was great for masking the continual baseline pain while that stone was moving around – baseline having been estimated anywhere from 3 to 5 out of 10 – but it didn’t do much for the peaks and surges that went up to about 8.  As the FLOMAX was indicated to be taken “after a meal”, I only took a couple of those over the several days because I had absolutely no urge to eat anything.  I won’t go into any greater detail on this, but people that have had kidney stones know exactly how bad all this feels.

The point is – these narcotics are not kid’s stuff.  Both of them knock you out.  The make you feel hazy and heavy and catching up on missed sleep is the best thing to come out of them.  And their effects are long lasting.  The NORCO was indicated for every 6 hours, but even after you stop, it’s at least a day before you stop feeling the drag associated with the drug.  I absolutely do not understand the attraction to these – you can be conscious while taking them, but the feeling is not exciting.

Fifteen years ago, when I had stone #1 – and as a result, had my gall bladder (and stones) removed and after my knee surgery – I was given bottles of oxycodone and vicodin.  That was before they realized what a social danger they were.  Again, I didn’t understand why people wanted them – they did nothing good for me.  This time I was given very limited pill counts and warned not to share them and told there are places to turn in excess for disposal.  I will be disposing of what I have left.

Anyway, I still have pangs of kidney pain – very short “zings” and a general low-grade ache.  I assume that is just recovery from the damage done as that mulberry traveled through my body.  It has been 24 hours since my last FLOMAX and I still feel a bit woozy from that.  I gotta get this crap outta my body.

Tonight, it will be a full week since all this started.  That week was 100% downtime from all forms of modeling – personal and business.  I did pack up the easy-to-pack T-shirt orders yesterday and will get to some more this morning before the Post Office shows up for pick-up.  But, essentially, all orders have been delayed.  The only thing I did do was print out order sheets.  It’s time to fire the laser and 3D printer back up and get back into production.

There was to have been a delay anyway – I was scheduled to go back to Ohio to my dad’s this week (Wed-Sat) to work on our Studebakers.  Our plan was to have his re-assembled this week.  Obviously, that didn’t happen.  I’ll need to reschedule that, but now there is a time-crunch.  In addition to scheduled contests in May, I now have a couple of doctor appointments mixed in.  Finding four days to be away is more complicated.  It will happen, though – I need to pick up a trophy we did (and he built) that will be presented at the June 5th & 6th McCook Contest in Muncie.

My OT Stick model needs finished.  I need to paint the wing tips, finish the tail and DT, and finish up the prop assembly.  I am very excited to get this thing finished.  It is a beautiful model and I have high expectations for it.  It has been taunting me throughout this week – It has been sitting on my building board, on my desk – which is in the same room as the couch and tv where I have been spending most of my time.  It has been sitting there in silence sending mental messages into my addled brain – “George…finish me…let’s go flying!”

Anyway, I am on the road to recovery (why am I hearing Todd Rundgren’s “Road to Utopia”?).  And I will be at the Cloudbusters’ Indoor Fling on the 16th a week from this Sunday.  I was worried about that.  Then the Sunday after that is the Cloudbusters’ Monthly Outdoor contest at Alkay Field.  Two weeks after that is the first big-field contest for me/us – the McCook contest at Muncie.  I’m ready (mentally).  I should be ready physically.  I hope to see you there.

As the old joke goes “the coffee break is over; back on your heads!”

Posted in Uncategorized | 3 Comments

Where have you been, George Bredehoft?

~or~

WHY IS MY STUFF LATE THIS TIME????

Today is Day Five.

At 1am Saturday morning, I was awakened with severe pain in my right kidney.  Having been through this 15 years ago, I knew it was a kidney stone.  I will save you from reading all the trials and tribulations involved and sum it up this way:

I have been out of commission, doing nothing but visiting the doctor, the Emergency Room, and subsequently being drugged up and on the couch (or in bed) until this morning.  I think I answered one email and two Facebook messages – no other reading emails, scrolling through Facebook, drawing plans – or packing orders.  Absolutely nothing since Friday.

The good news is – I have received all t-shirts ordered to date and will (hopefully) start packing and shipping them today.

The bad news is – I do not believe I have passed the stone (I haven’t seen it) and am just holding my breath waiting for the attacks to start again.  I am not feeling back to normal, although my head is clear(er) since I have not taken narcotics in about 20 hours.  I need to be done with this.

Anyway, now you know and thanks for your continuing patience.  It seems I am always asking for that.

Posted in Uncategorized | 1 Comment

New Dimer Short Kit – Mauboussin Hemiptere

The Mauboussin Hemiptere is one of those models that has a history of being one of the “popular” Dimers.  As a tandem wing, it has a large amount of wing area for a dimer – maybe that’s why it is popular.  Don DeLoach recently built one and suggested that I kit Al Backstrom’s version, saying his flies very well.  I re-drew the plan and it was published in the Sept/Oct 2020 issue of the Free Flight Digest.  I sent out a couple of prototype kits and here’s a write-up (and photos) by Oliver Sand.  Here’s what he had to say about the build and such:

Prototype Build Notes: Volaré Pseudo-Dimer Mauboussin Hemiptere
Designed Al Backstrom, produced George Bredehoft, built Oliver Sand

Bones: Frame was built with laser-cut parts and medium-weight 1/16” balsa throughout.  I coated the nose plug with medium CA and sanded to prevent wear, and used 1/32” balsa for the cockpit.

Covering and Markings: Because I got to the covering stage during a cold NYC winter, spraypaint wasn’t really an option. So, I did a lot of experimenting with different kinds of ink and paint markers. The Faber-Castell ink ended up being the easiest to use and run-proof, and lettering is all done with a black MUJI pen (also waterproof). All tissue was pre-shrunk Esaki-style from an old SIG kit, chalked on the dull side with white Pan Pastel and covered shiny side out with a purple Staples glue stick; wings and fuse were shrunk again with water after covering, and I kept the rudders flat between sheets of wax paper and under a book for several days to prevent warps.

Landing Gear: A small modification I made to the plan was attaching the LG to the wing with 1/16” OD clear monofilament line for some flex on landing (thanks Tom Hallman for idea). This monofilament goes into a small ?” balsa block flush with the wing rib bottom, and is attached with CA on both ends. Not shown in photos but later bound with thread to LG strut. Axles are small lengths of 1/32” music wire.

Tail Skid: was built with extremely hard 1/16” square balsa, covered in brown Sharpie and double-glued with Duco.  Rear wing: is secured to back of fuselage to be adjustable and removable with hook on back of fuse, dental band, and threads hooking over motor peg.

Magnets and Prop Shaft: Wing is held onto fuse with 2 pairs of small neodymium magnets as shown. I used a 7” Peck propeller for the front, drilled out to spin free over a 1/16” brass tube, with a Z-clutch and 0.047 reverse S-hook shaft. Hopefully will stay bend-free a bit longer than a 1/32” shaft would.

Finished and assembled: all surfaces sprayed with 2 light coats of Krylon, and windshield is .002 acetate curled over a pencil and attached with Sobo fabric glue. Final empty weight is 14 grams and CG is 60% back on front wing as of April 2021. Very promising maiden flights with a 30” loop of 3/16” rubber, incidence as on plan, and just about a degree of down and right thrust, and more trimming is still needed.

Posted in Builds, Products | 1 Comment