A Quick One – a Smaller F-4 JetCat

I decided to toss together a new F4 Jet Cat, but this one is 70% the size of the current kit version.  That makes it just over 8″ wing span and 12″ in length.  I printed out some tissue and stuck it down with spray adhesive.  I took it outside this afternoon and, with a couple of little tweaks, I got some rather stable, but short flights.  I just don’t have the room here at home to give it much power (the trees are hungry!)    I’ll take it to our last outdoor contests (I broke my good Ohka) – maybe I can get up to 20 seconds.

The wings are 1/16″ sheet and the rest is 1/32″ sheet, except for a thin 3D-printed reinforcement for the nose (and a sliver of carbon fiber for the fuselage).

Posted in Builds | 1 Comment

What’s Goin’ On

Well, I’d say it’s time for a deep relaxing breathe, but there’s no time 😉  FINALLY, I am back home, and back to work (full time) – from a number of contests and a 3-week trip to the UK.

Coming out of the last two contests last weekend, I was somewhat grateful the summer flying season was coming to an end – it’s been a poor year for my flying.  And as the streak of issues continued through that weekend, I pretty much resigned myself and just sat back and took it easy.  There were lots of events to fly and I flew some of them, but with a couple of exceptions, if the model needed a new motor, I left it in the box.  I was ok with the fact that Sunday’s wind was supposed to be high and I took off for home after the awards on Saturday.  It was time for a mental reset.

There is good news and that is that I have been working on 3 or 4 new designs that will be kitted.  That was a surprise to me because I really thought I was burnt out, but the ideas have just been coming to me.  I don’t know how many will get finished, built, or kitted, but where I didn’t have a 2020 list last week, I now have eight models on that list.  (on the 2019 list were 20 builds with seven completed.)


Speaking of my kits, there is a serious announcement:  My BAT Monoplane and Martin MO-1 – both designed for Dime Scale – have been found to be designed without regard for the FAC Dime Rules, specifically the flat-bottomed airfoil requirement.  THESE TWO ARE NO LONGER LEGAL TO FLY IN DIME SCALE WITHOUT MODIFICATION OF THE AIRFOIL.

There are two fixes for this:  If you have built them already, you can now fly them in Simplified Scale without modification as the mew FAC Rules no longer have a minimum wingspan for Simplified Scale.  Secondly, I will be reworking the kits to have flat-bottomed airfoils, but this will take some time.


This summer, I used my 3D-printed bobbins.  They performed just as I expected, with one exception.  The LARGE bobbins proved too weak in my Wanderer (12 strands of 1/18″ and one bobbin was deformed under the pressure.  Based on that, I have redesigned the Large bobbin to have thicker walls on the sides and in the center.  In fact the new design is about triple the thickness in the center, as the two halves now slip together (to be cemented with CA).  Here’s a pic:


I mentioned working “full-time”  – I’ve been working on my large backlog and here is a photo showing the progress.  This is the third postal pickup I have done this week and it has 16 or so packages.  I’ve shipped probably over 30 this week and will be shipping more tomorrow.  If you are waiting on stuff, don’t worry, you will get it.  There is a light at the end of the tunnel.

Posted in Customers, Events, Products | Leave a comment

Balsa Basics – in the Shop

Before I left on vacation, I ordered some 1/16″ balsa sheets for laser cutting as I was nearly out.  As planned they arrived when I was away.  Today, I had to open the box and weigh the sheets.  I weigh them so that I can better control my laser cutting – I mean, provide you with the best product I can.

Since the beginning of the year, I have been buying from National Balsa because Sig had a fire in their balsa cutting room and they are not yet back in full operation.  Sig always had pretty good balsa, so I was happy – and besides, I get no discount from National, so it costs me nearly twice as much as Sig.

This particular batch may be the lightest overall batch I have ever received.  I ordered 100 sheets of 1/16″x3″x36″ and 20 sheets of the same size but from their “Aero Light Bargain Grade” – just to collect light wood (I don’t know why – I have more than I could ever use).  National just lumps this all together without labels or separation, so I have no idea which is which (although the bargain grade usually has discolorations).  Anyway, I was surprised at the results.

Notes:  I weigh each sheet in grams and annotate it.  This weight does NOT account for variations in thickness, width, or length.  For my everyday kits I divide the stock into 12-13 grams, 14-16 grams, and 17-19 grams.  I toss out (save for give-aways) anything over 20 grams.  That means my short kits are cut from wood that is between 6.8 pounds per cubic foot to 11.2 pounds per cubic foot.  I usually try to make weight sensitive planes (NoCals, Peanuts, etc) out of the lighter and larger planes out of the heavier.

Usually, I will get a handful of sheets below 13 grams and maybe up to 20% of sheets over 20 grams.  This batch had a different distribution.

you might see annotations on some of your short kit sheets. This is the weight that I recorded for the full sheet and it is in grams

the sheets separated by weight

a histogram showing the number of sheets received for each gram increment. YES, YOU SEE THAT RIGHT – I received 1 sheet of 3.4# wood, 3 sheets of 4# wood, 1 sheet of 4.5# wood and only about 4 scrap (heavy) pieces. And 12 grams (highest count at 20 sheets) is 6.7# wood.


PROBLEM: sometimes the sheets are warped

BIG PROBLEM: sometimes there is variation in the 3″ nominal width

BIG PROBLEM: this sheet is over 1/32″ under 3″ width

BIG PROBLEM: this sheet is almost 1/16″ over the 3″ width

Why is the width variation a problem?  Often I don’t cut a single sheet at a time.  I arrange my CAD files to a standard 3.0″ width.  If the sheet width varies and I do not account for this, part of the second sheet will be cut on the first sheet – or the bottom of the second sheet will cut of the sheet.

Now, back to cutting kits…oh,here’s a chart you might find useful (only for 1/16″x3″x36″ sheets)

gram to pounds-per-cubic-foot conversion chart – for your enjoyment

Posted in Products | 1 Comment

First Fall Flying – RJK Follies – Muncie, IN

*** BE SURE TO CHECK OUT THE PHOTOS AT THE BOTTOM ***

I’m back from vacation and swamped with orders.  In addition, I now have two weeks to get all the trophies made for the Outdoor Champs and all of the Registrant Short Kits made.  One day, I will be elected as the President of the Procrastinators Club (but not today).

This last weekend was the RJK Follies meet in Muncie.  This is an annual Free Flight contest put on by Rudy Kluiber (Cleveland area) and is focused on “other” Free Flight – but Rudy has added two days of FAC flying to his three-day event.  He provided nice participant plaques and has promised to create a perpetual trophy for FAC High Point Winner.  THIS CONTEST SHOULD BE ON THE TO-DO LIST OF ANYONE CLOSE TO MUNCIE.

This was a wonderfully relaxed contest with only four events per day.  Unfortunately, it was lightly attended, with only four FAC participants (excepting two stragglers that put in FAC times from the other side of the contest).  They were Pat Murray, Winn Moore, Paul Boyanowski, and me.  We had overcast, but calm weather Saturday and Sunday, excepting Saturday afternoon, when it was clear, calm and buoyant.

Personally, I had low-lights and high-lights.  I struggled getting things to fly (and to keep motors in planes).  For example, I flew all day Saturday, but only logged six official flights (low-light) – BUT – four of those six were maxes (high-light) – but – one of those was a 8:18 deep into the beans and was lost (low-light).  However, I got my Jumbo Stallion properly powered and have a model that is practically guaranteed maxes ever time (high-light), but a faulty DT/Tail/Seating caused a stall and crash shortly after launch that will require the entire nosebllock and prop assembly to be rebuilt – in two week – in addition to trophies/kits/orders (low-light).

Lastly, I was shut out of the kanones.  However, let’s look at the facts: Winn had a spectacular day one, winning three out of four events (Embryo, Dime, OT Rubber).  In fact, he was High-Point Winner and picked up a fourth kanone on Sunday (Jet Cat).  Pat Murray won FAC Scale and Jimmie Allen.  And Paul Boyanowski won Simplified Scale.  Nearly all of the events were close;  OT Rubber had a fly-off between Winn (Wanderer) and Pat (Jabberwock).  Pat landed at 4:15 with Winn about 10 seconds behind that – and they were within 100 feet of each other at the end.  I had grand designs on Simplified Scale after my Jumbo experience on Saturday and did log a Max (after a 100 on the first flight), but crashed out on my third.  Winn put in 3 90+ second flights on his Stout 2A-T, Paul put up a Max, 110, and a 103 on his (anything but simple – see below) Cessna 180, and that encouraged Pat to get out his high-flying WWII-Combat Grumman Avenger – practically a guaranteed winner.  He maxed and then went down hill in the overcast afternoon, giving Paul the win.  It seemed every event was close like that – a great contest.

One last thought about the competition.  We had four competitors – with 694 Kanones between us (as of the beginning of August – kanone reports is another thing I am behind on).  That’s some pretty serious flying there – all of us know how to build and fly and win – and there can only be one winner in each event.

I had a comment from someone that they did not see me post any photos after day one.  She (my wife) was right.  So I took some pics Sunday.  Let’s call this “A Study in Perfection” – these are two planes by the Master – Paul Boyanowski.  Usually I will do a single photo, but I am doubling up on these to show the exquisite detail that Paul puts into every model.  The first is his winning Cessna 180 (modeled after Mark Houck’s full scale 180) and the second is his venerable Albatros D.i.

The prop is not bent, That is an artifact of a digital photo – the wind was turning the prop.

Posted in Events | 1 Comment

Muncie in August – Managing Expectations

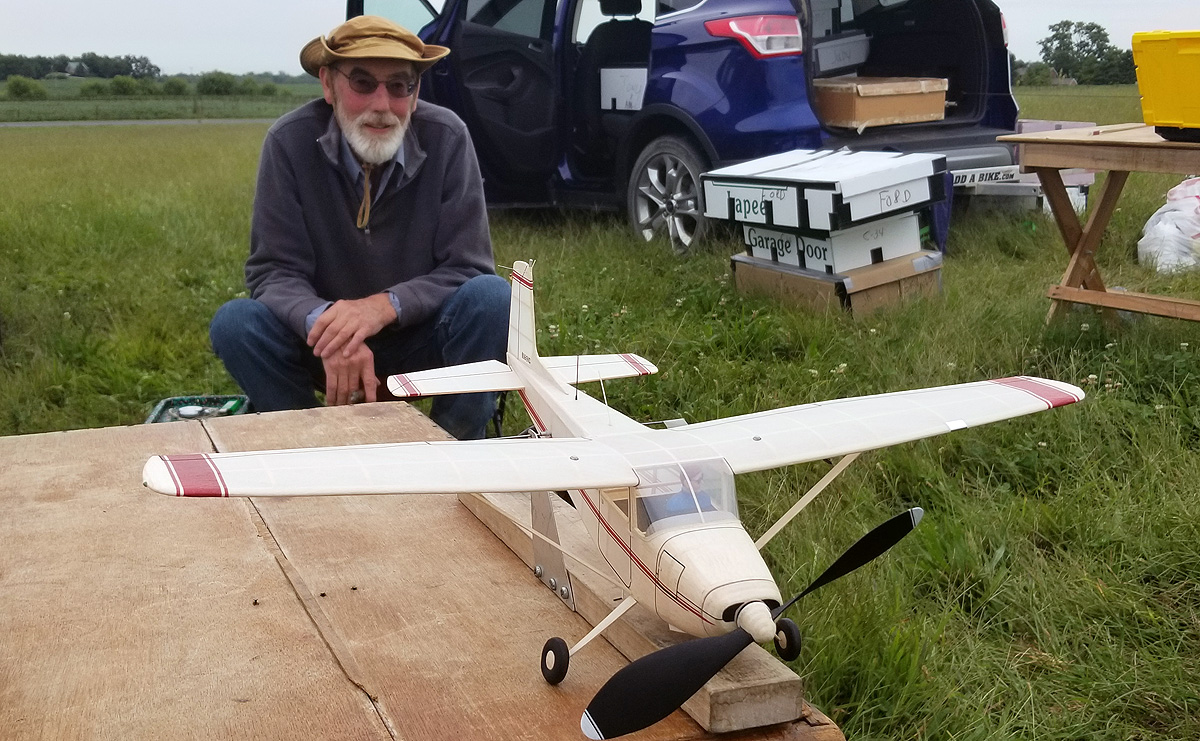
I got back last night from five flying days in Muncie:  three at the AMA Nats and two at the McCook Squadron FAC Contest.  For those FACers that were at the Nats, but left, Saturday and Sunday had near-perfect weather conditions – clear skies and very light breezes.

For the last couple of years, I have been prioritizing Endurance events (Embryo, 2 Bit, 1/2 Wakefield, Jimmie Allen, OT Stick, and OT Cabin).  They have been good to me and I’ve learned a lot.  In fact, someday, I will write an article about how flying Endurance makes you a better Scale flyer.  Also, I’ve rushed through many things, especially preparation.  It’s not good to arrive at a contest, especially a high-level contest, with new and untested planes.

This summer, Hung has given me a dose of humility, but backed it up with some redemption.  I have not had a good season to date in Endurance.  My week in Muncie was disappointing when it came to my Endurance planes, only taking a First in the McCook 1/2 Wakefield event (I also placed first in Jimmie Allen at Geneseo in July).  Other than that, there have been several also-rans, and a few broken models – it’s been painfully frustrating.

But Hung reminded me that I can still fly Scale planes.  Of course, nearly all of my flying “career” has been focused on Scale – I didn’t even do the Endurance events until say five years ago.

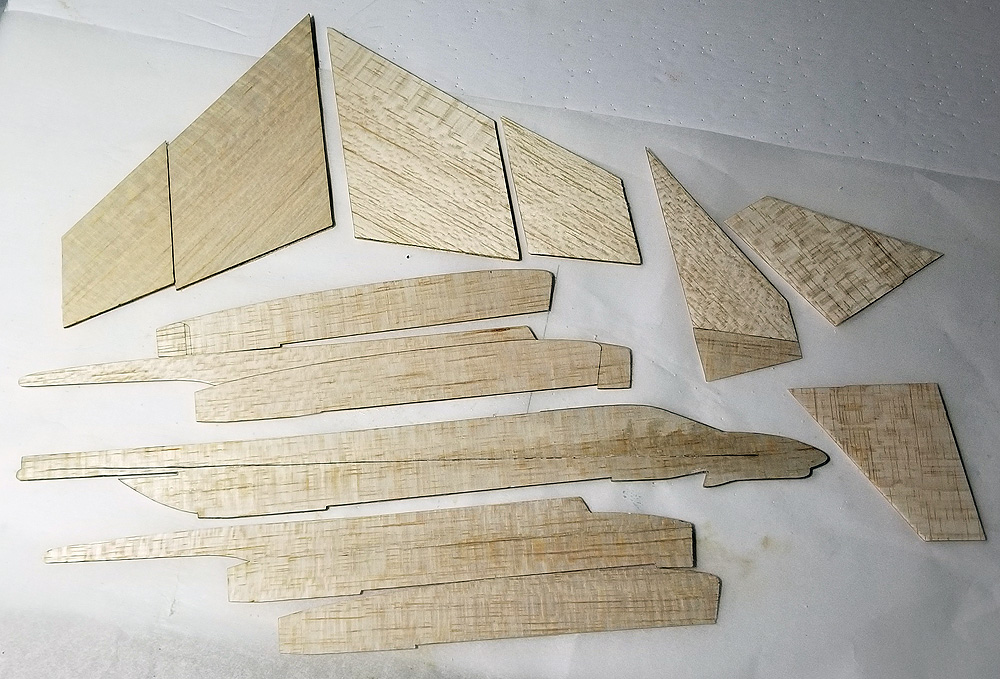
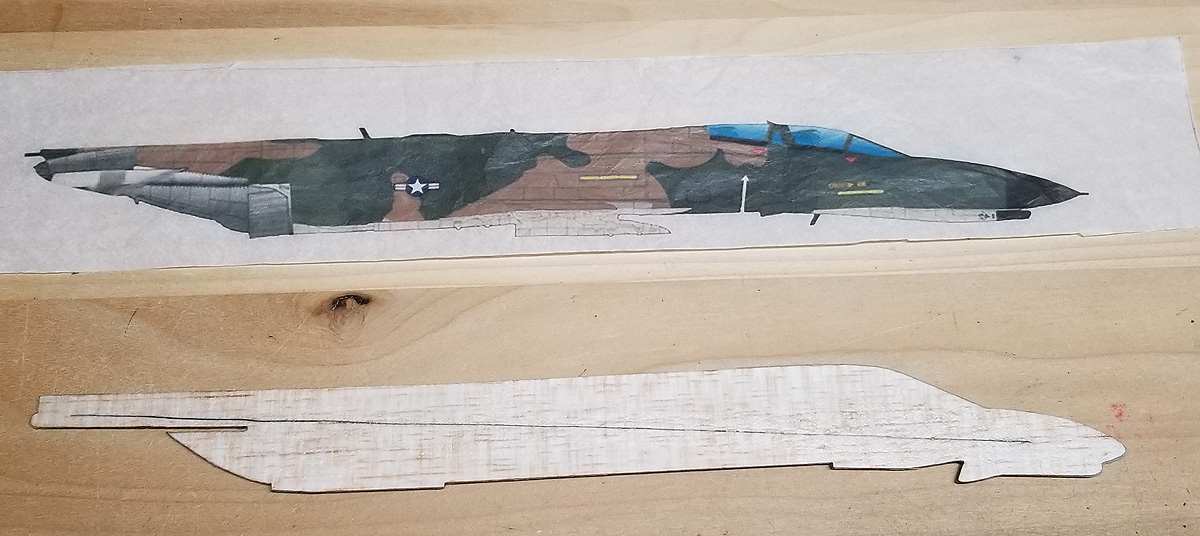
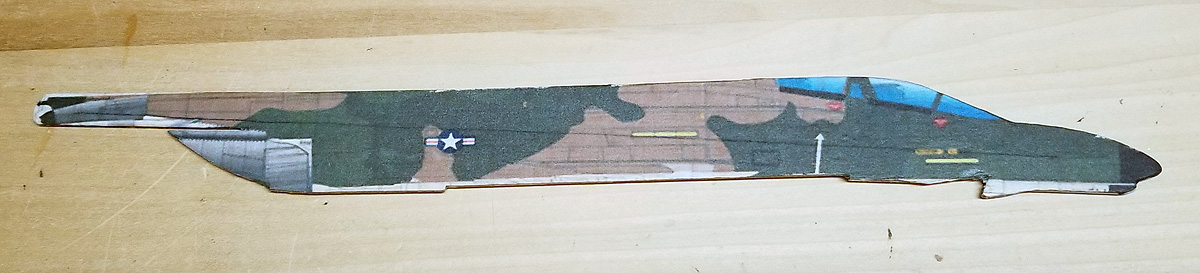
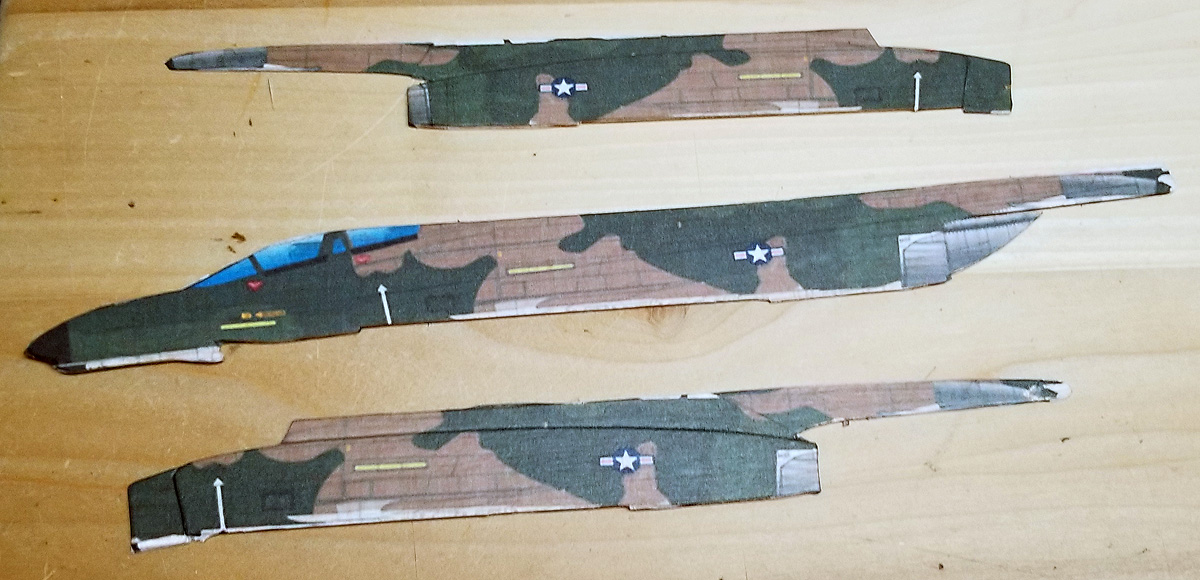
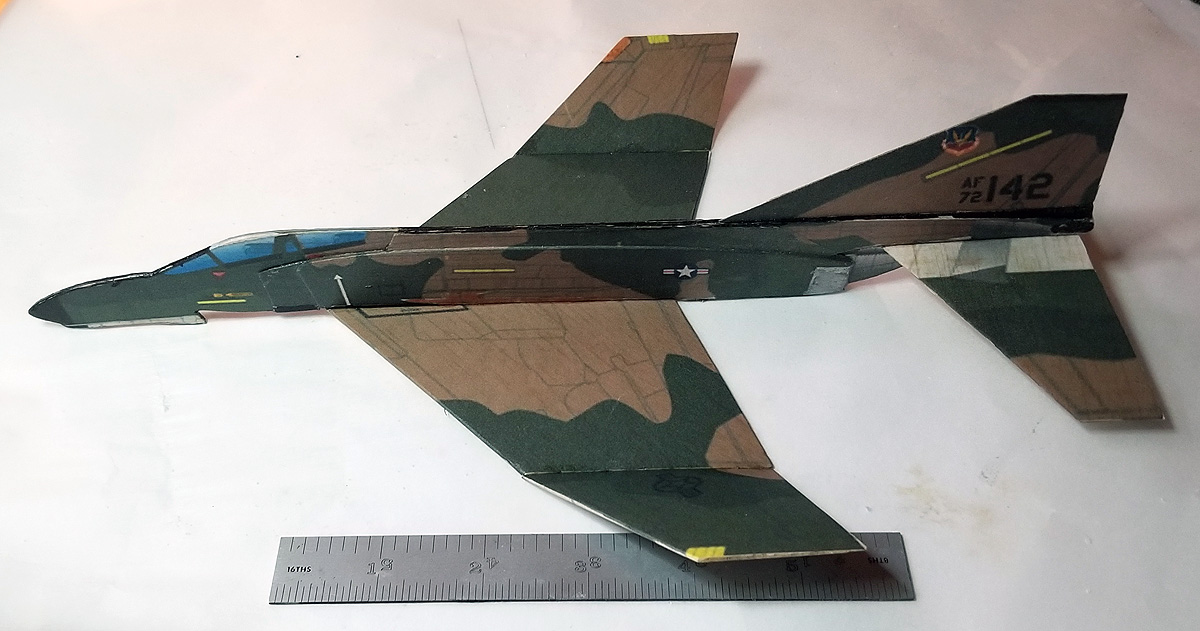
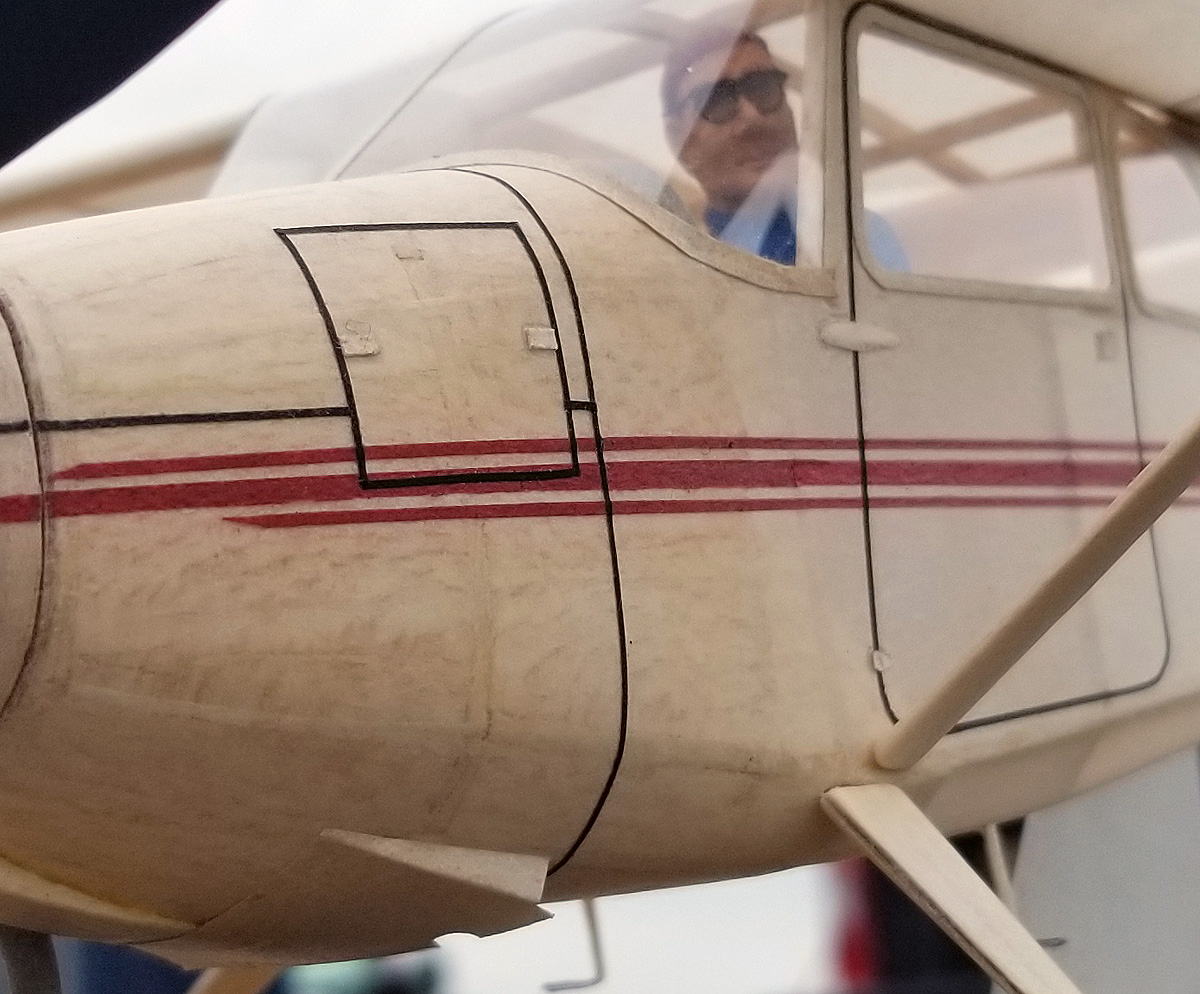
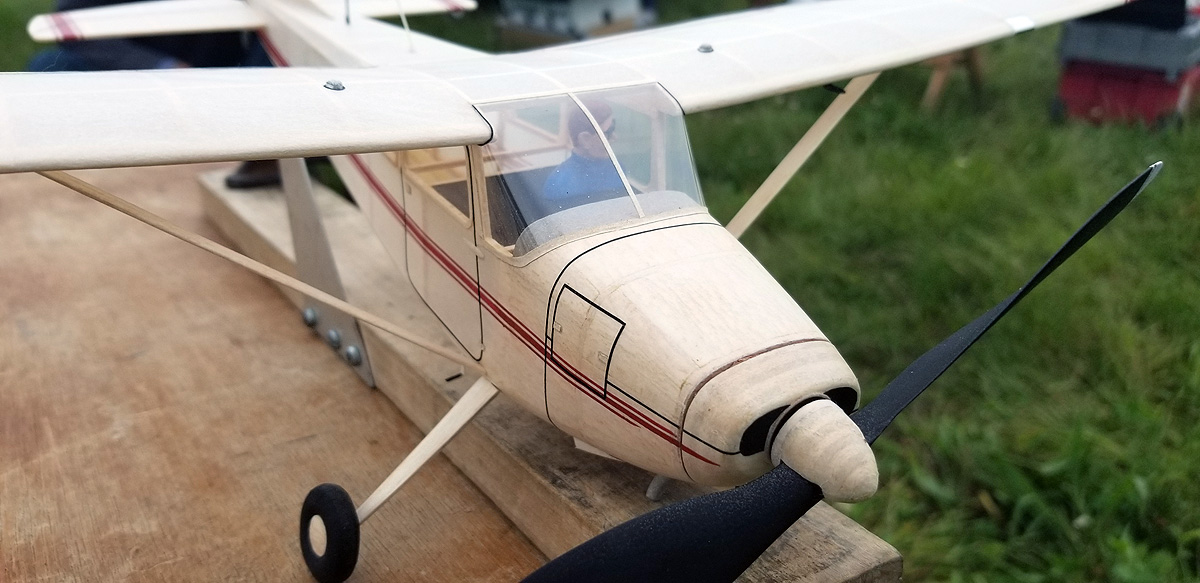
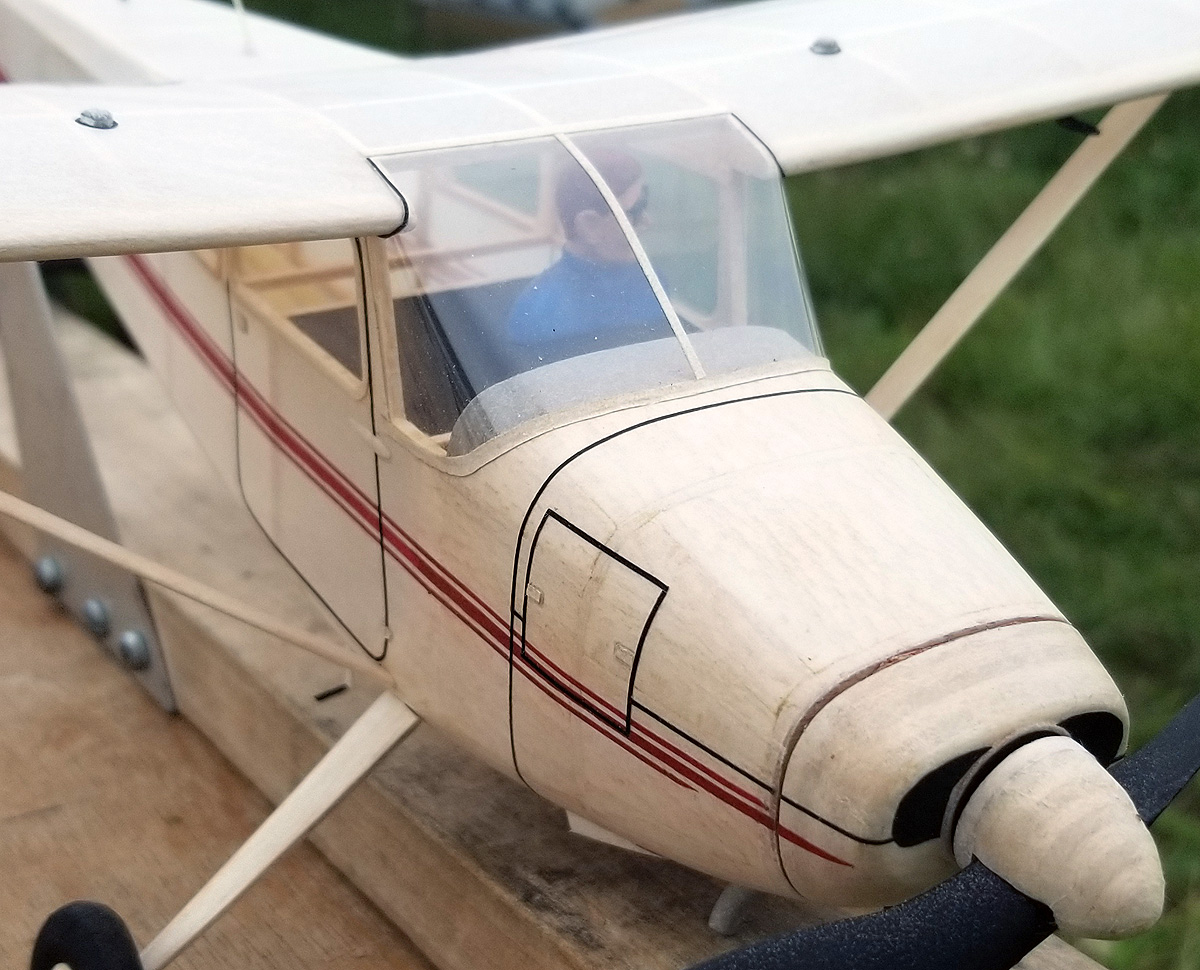
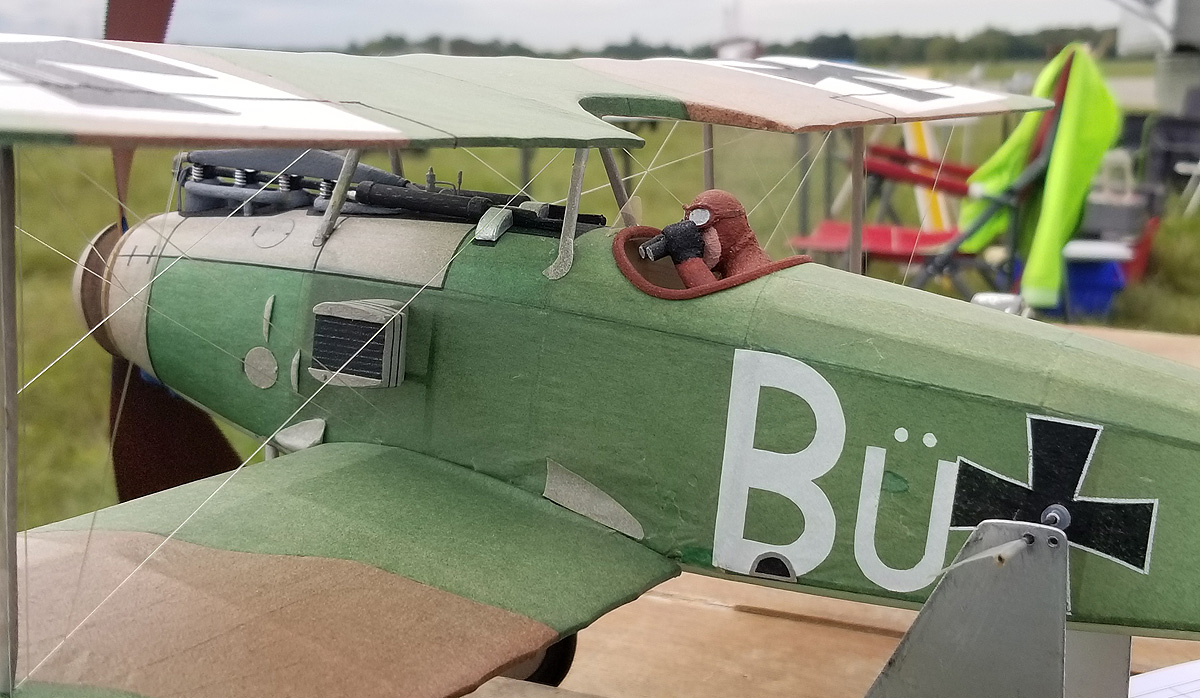
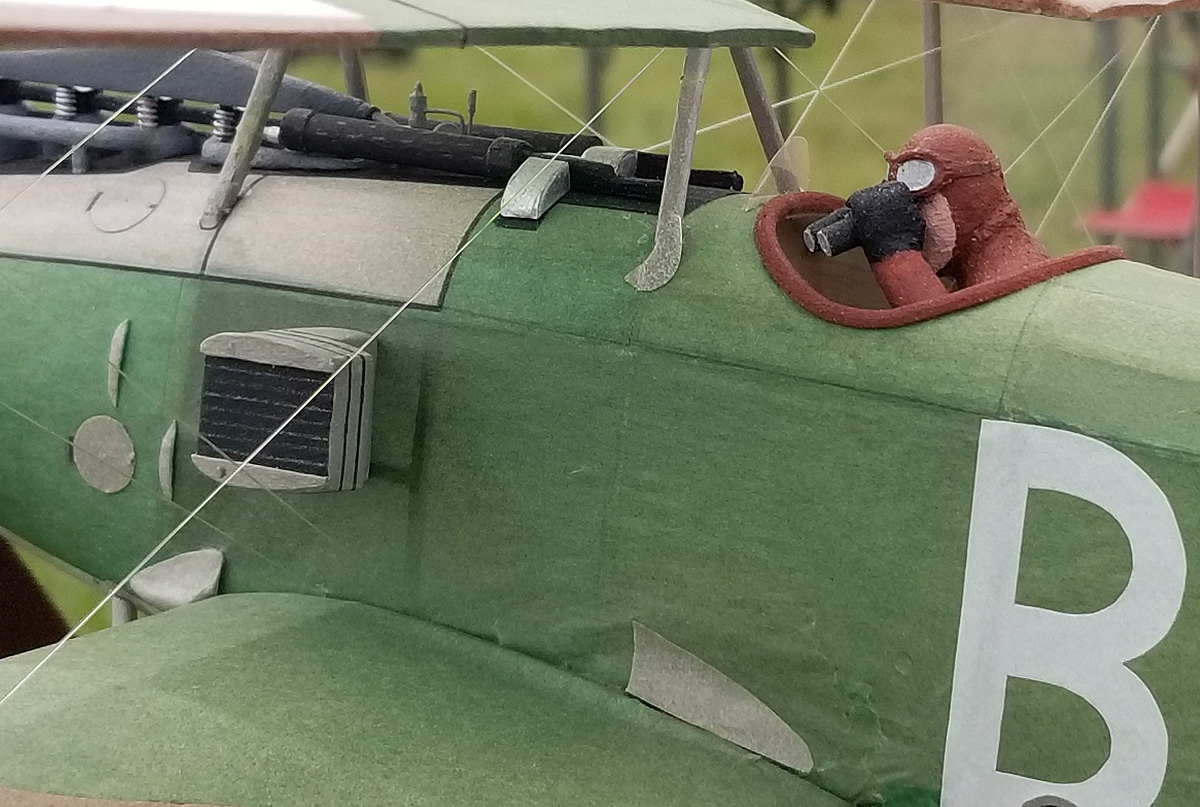
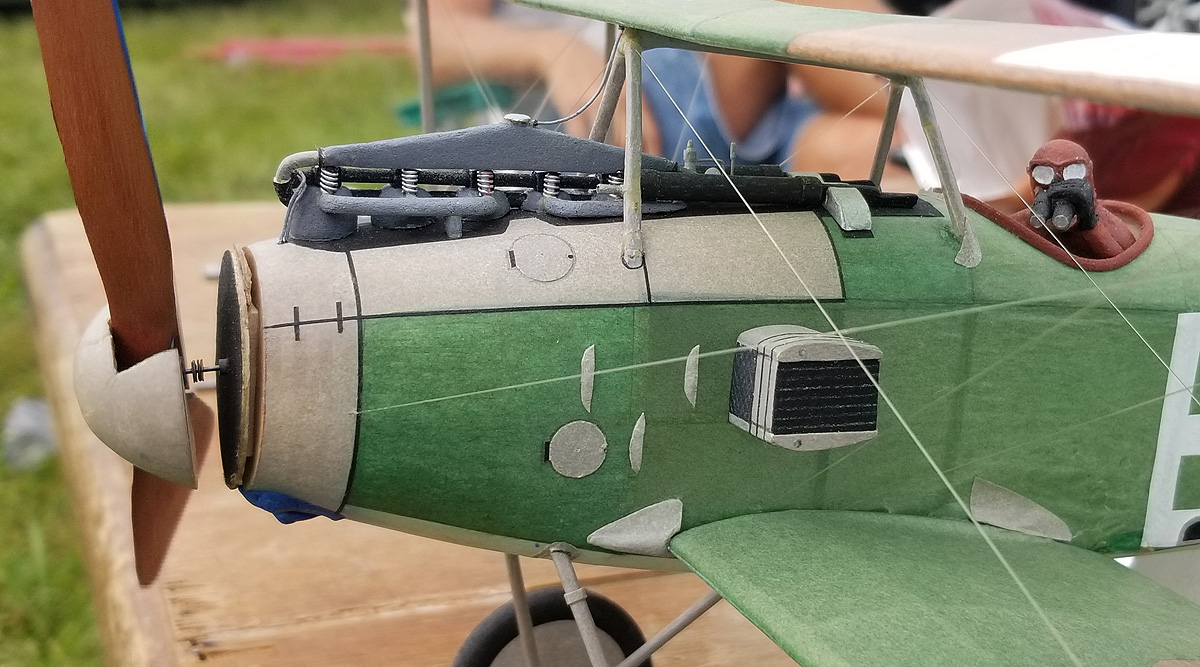
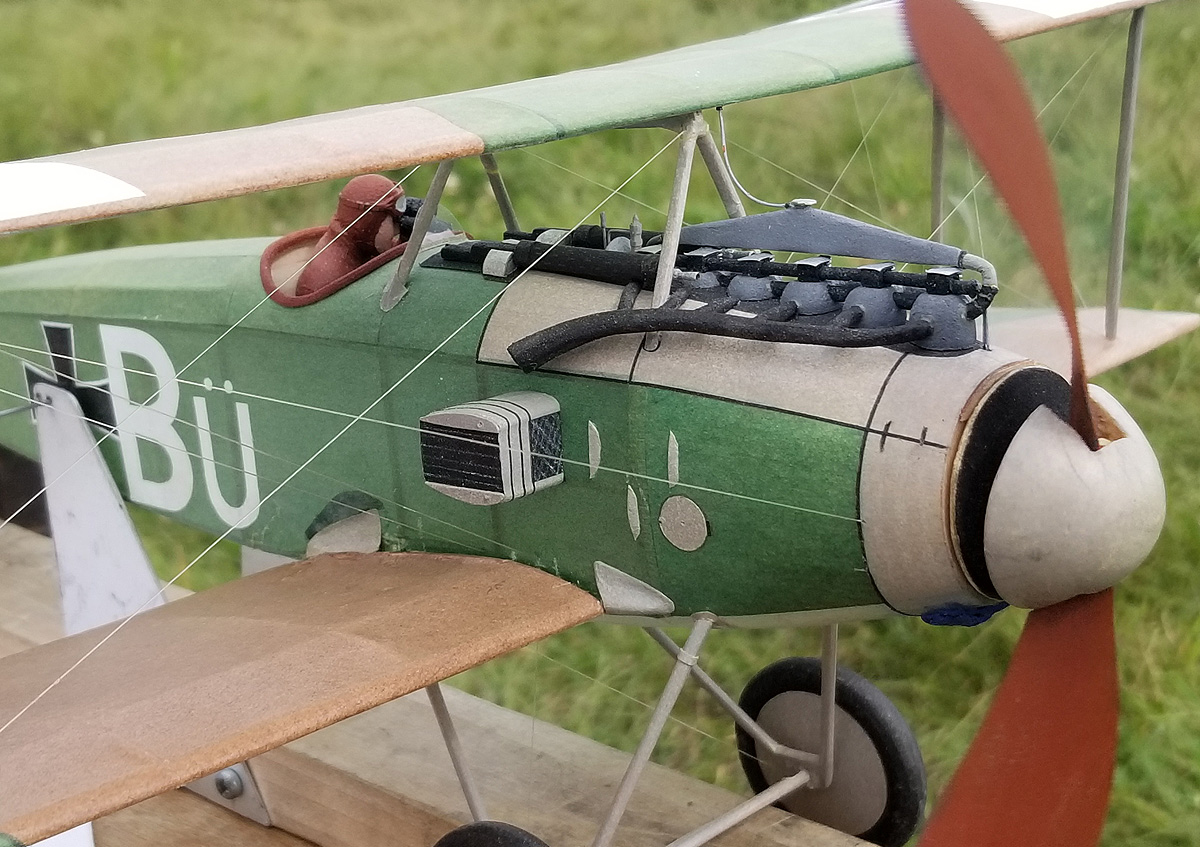
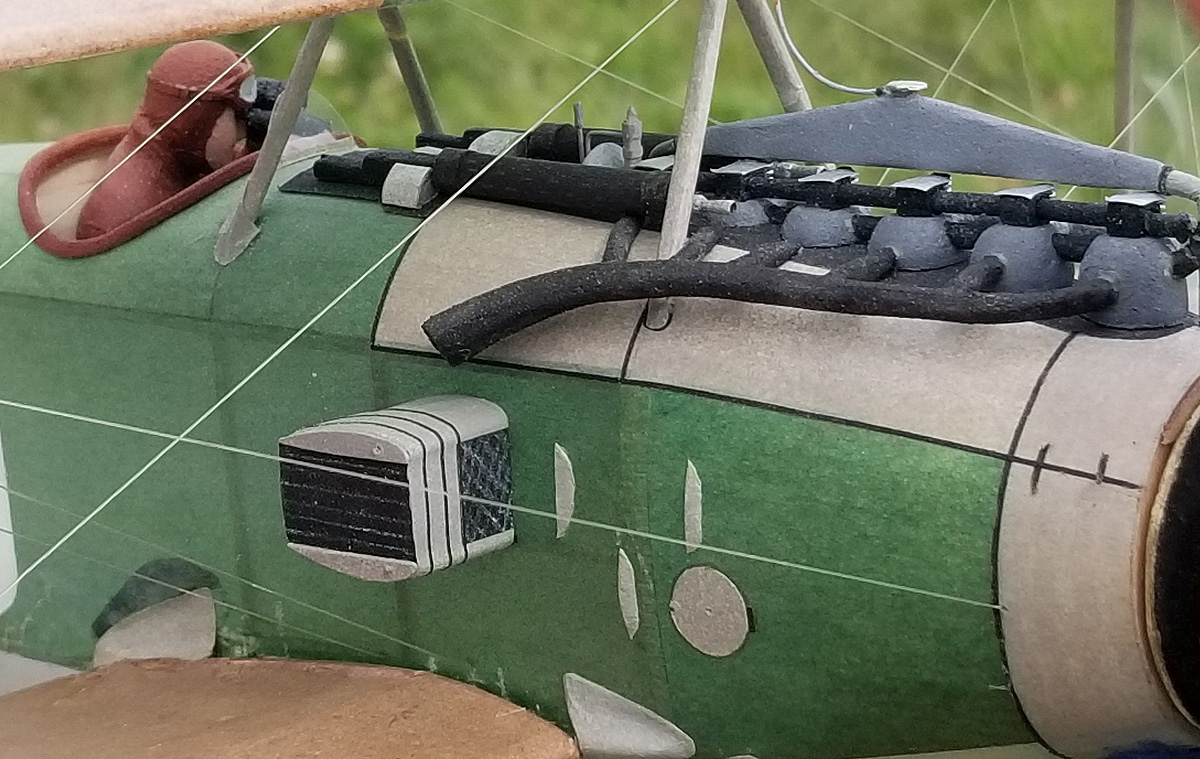
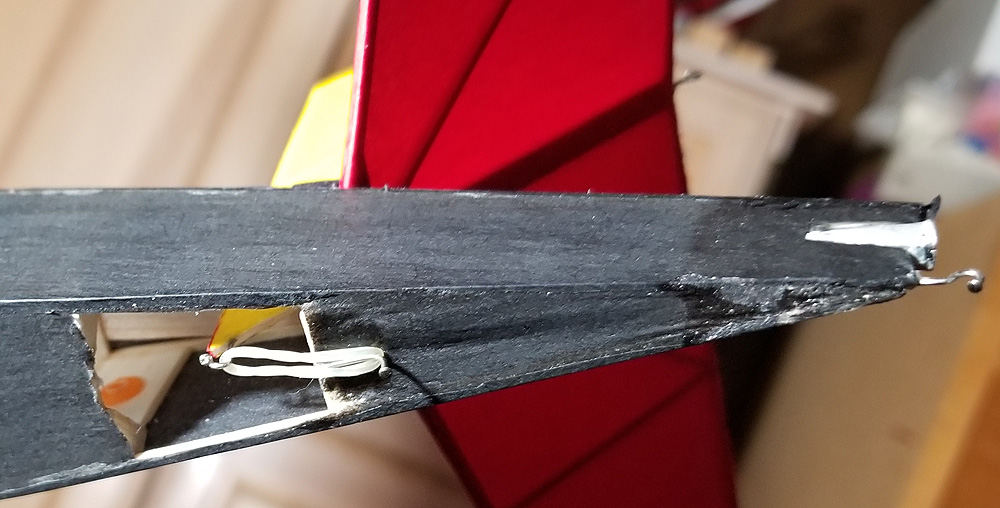
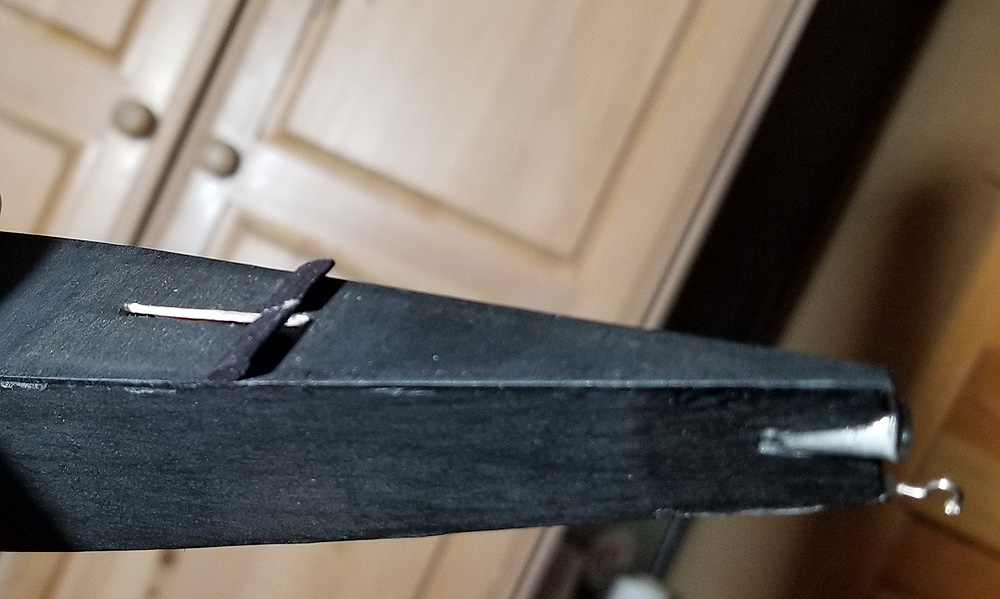
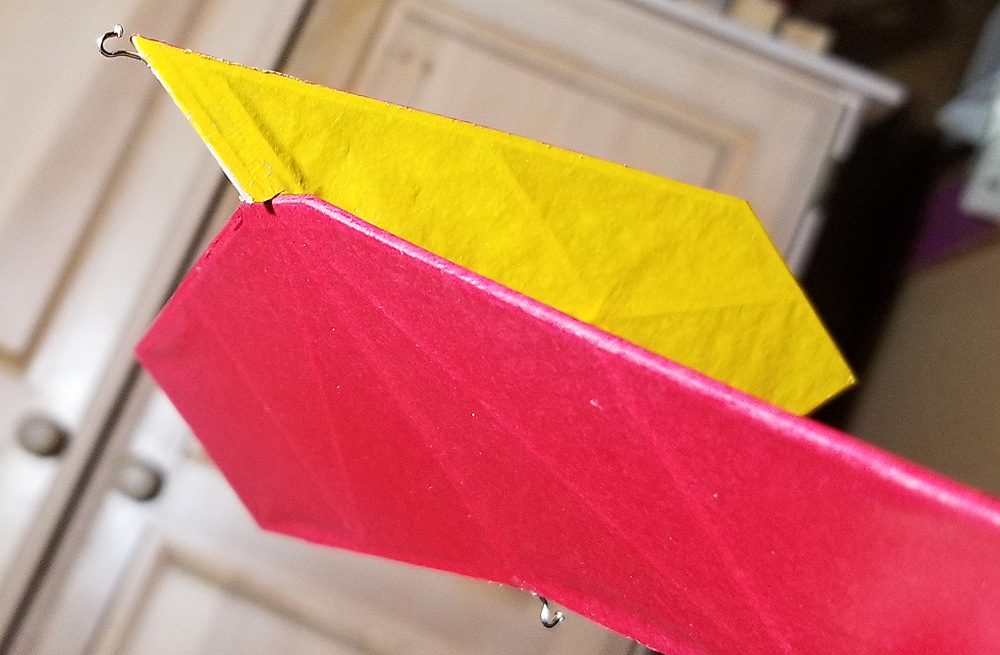
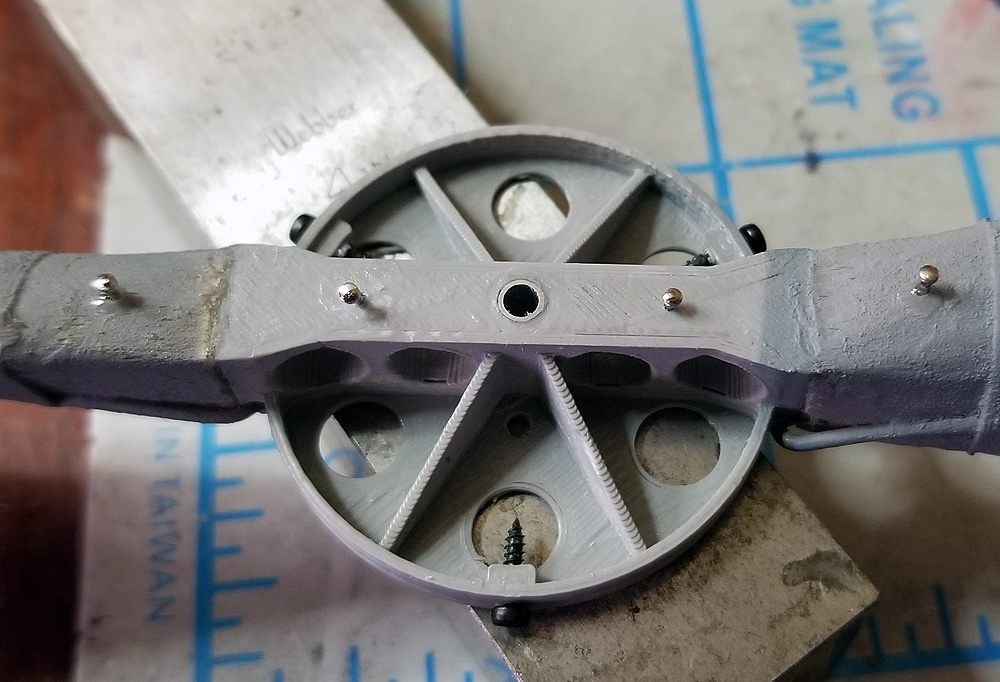
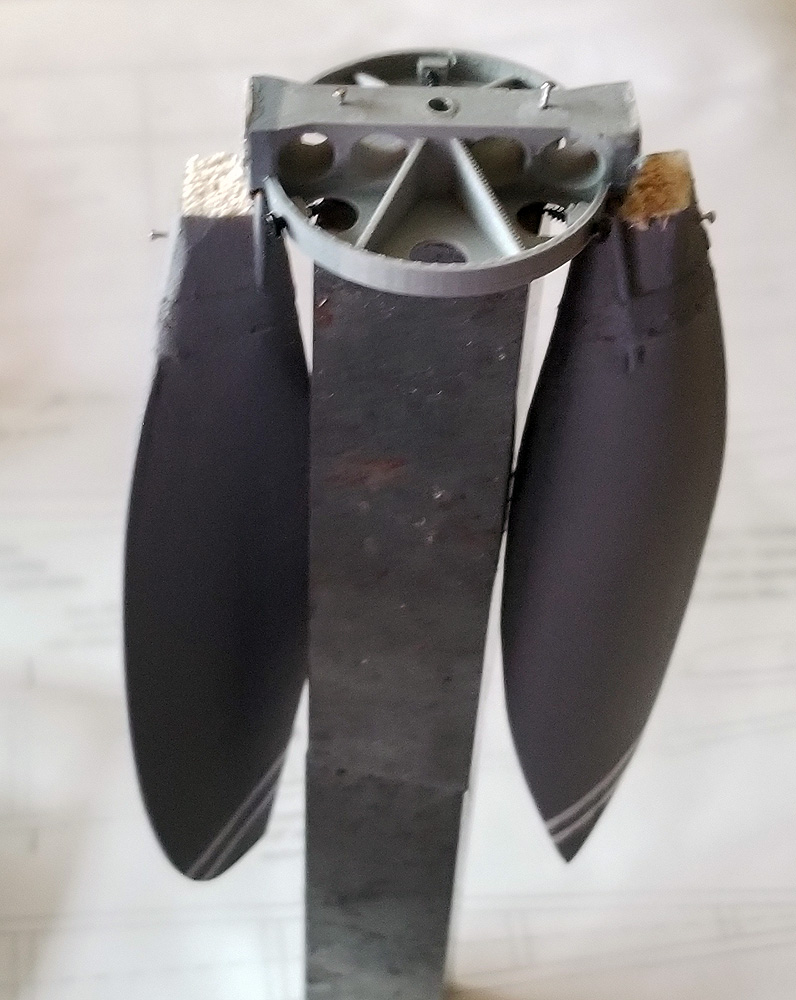
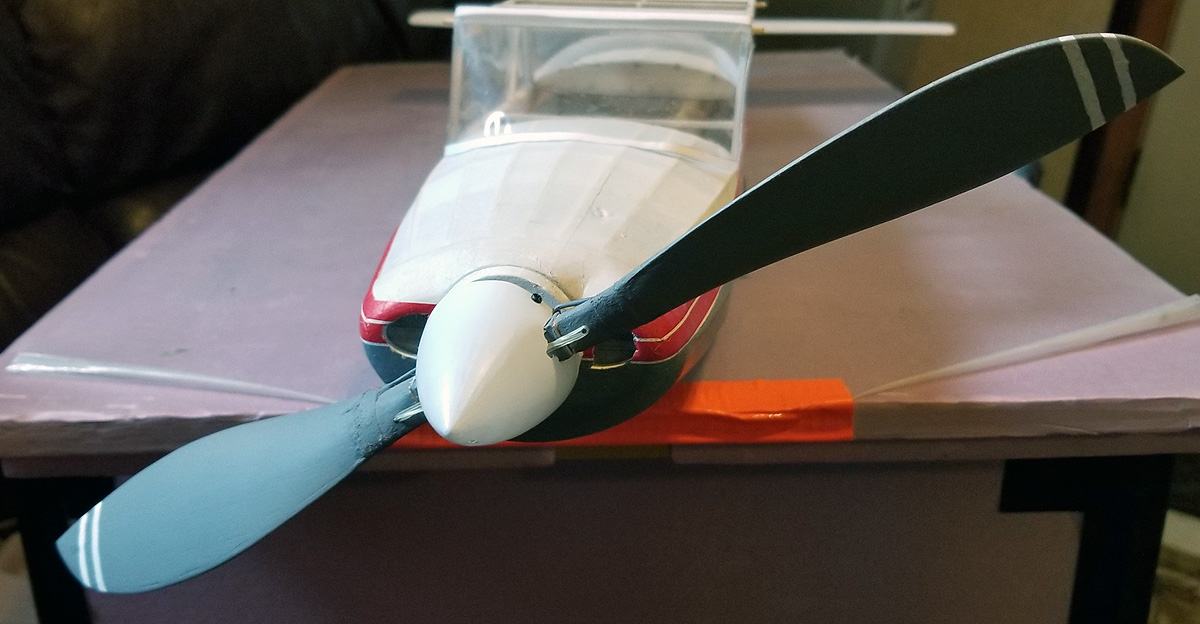
Work on my Caudron has been very rewarding.  FAC Scale was Friday, and I took my repaired Caudron out and started trimming, I was getting good flights, large sweeping turns to the left and a nice gentle glide.  I finally called for a time and wound it to max torque.  The large model pulled away hard, with a great climb in large left circles, with no hint of dropping that inner wing that is the risk with flying low-wingers to the left under high torque.  It just kept circling and climbing and hooked a thermal and went way up.  You couldn’t even tell when the power came off as the transition was just that smooth.  At a couple hundred feet, the band-burner DT went off (set to 2:20) and the model popped out of the thermal.  However, the split h-stab DT was uneven and it induced a very hard right spiral.  I knew it was going to be bad, and it was – both wing saddle sides were blown out again.  But I had a Max in Scale and that was the best that I could do.  It turned out that was enough as I took home the Champion plaque.

my 24″ Caudron C.460 – AMA Nationals Champion in FAC Rubber Scale. You can see the blown out side just above the wing – and that is the GOOD side!

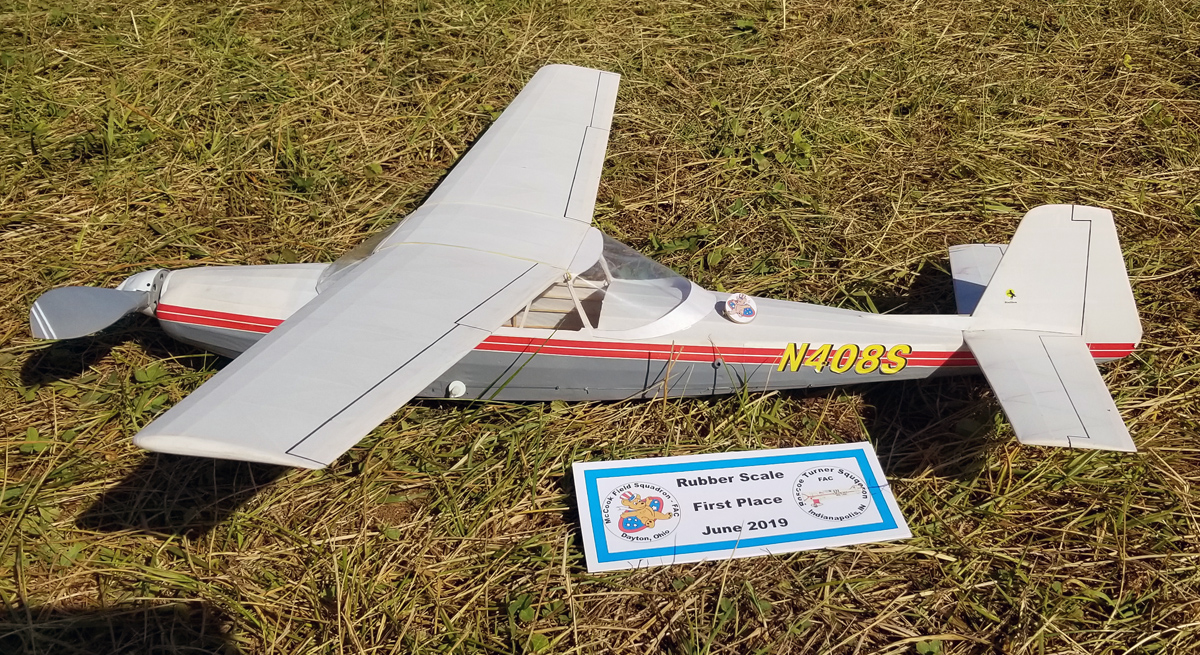
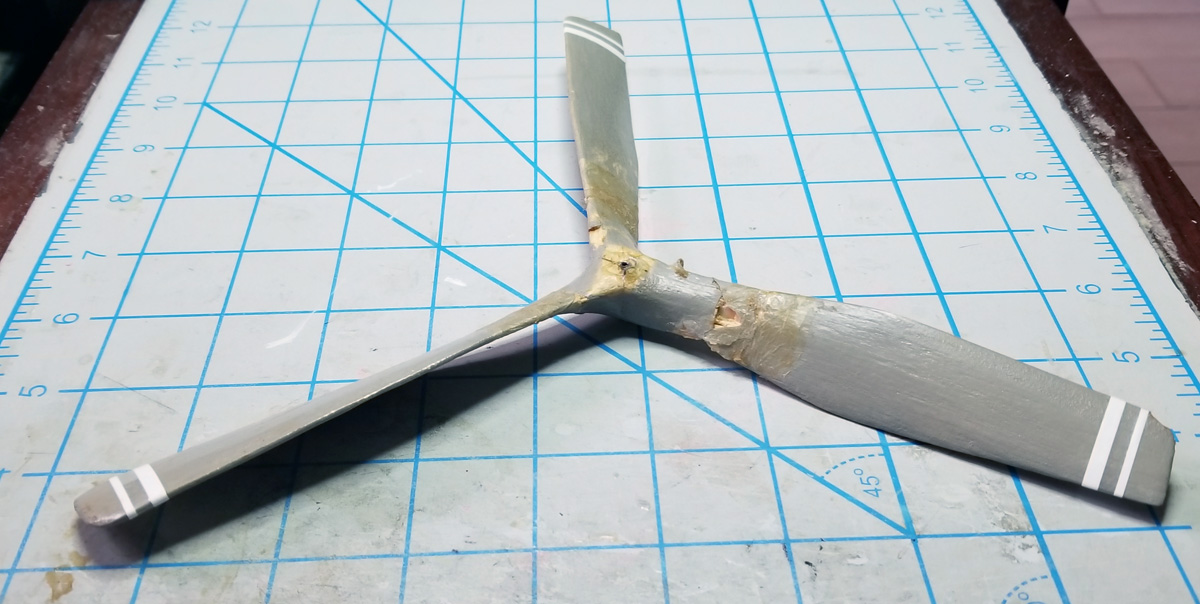
On Saturday, the McCook contest also offered Scale, but the Cuadron was out (and it was out for the Greve Race – killing Mr Smoothies will have to wait).  So I decided to fly my Jumbo Stallion in Scale (there was no Jumbo event).  After several test flights, broken motors and waiting, I finally put up a near-max (118 seconds) and that remained good enough for the Win.

My 36″ Aircraft Designs Stallion taking McCook FAC Scale

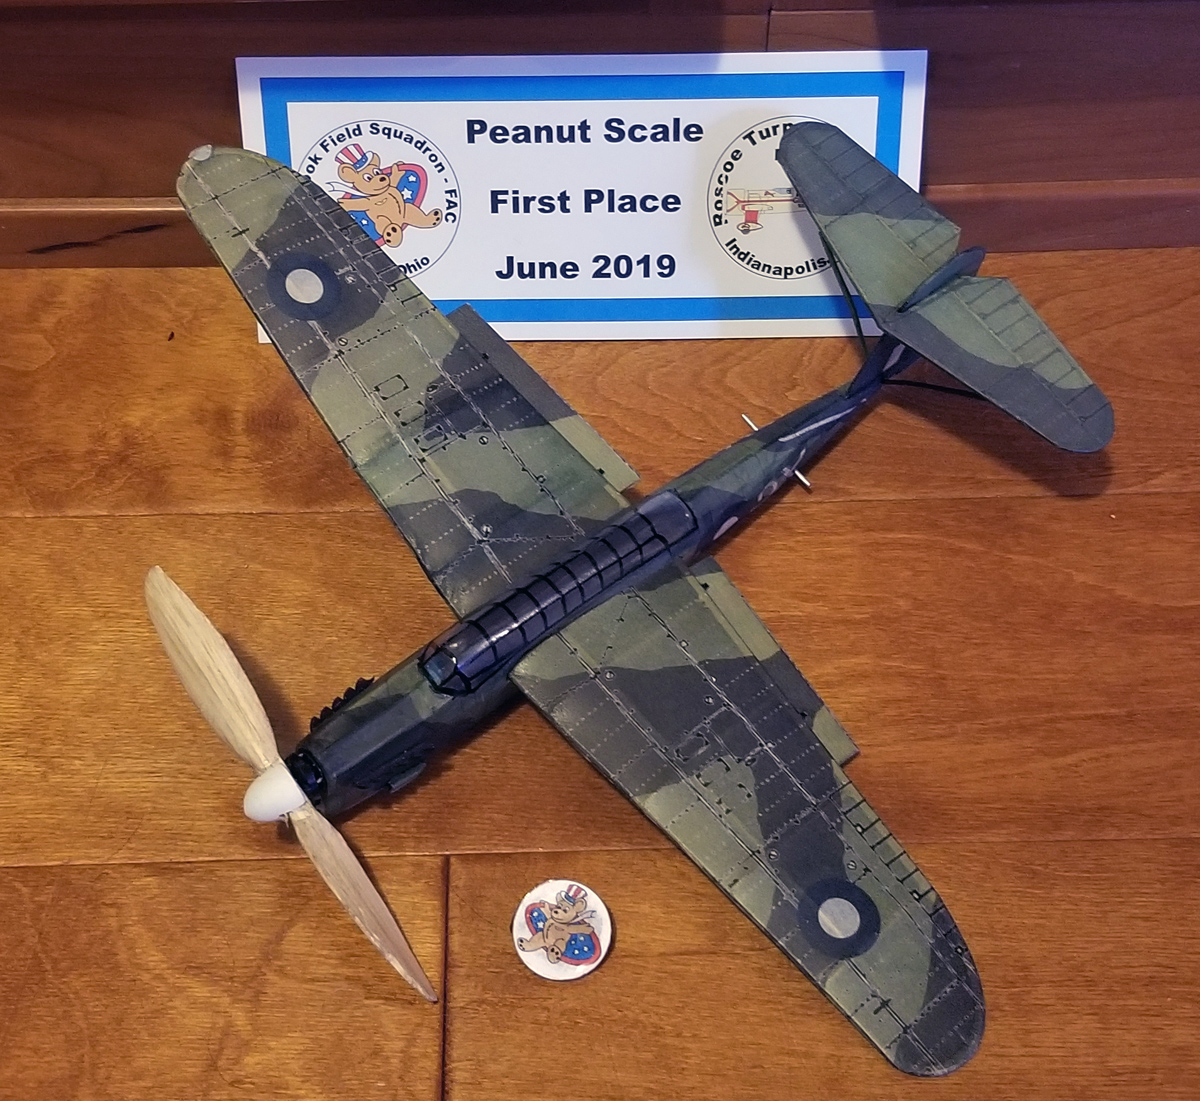
Lastly, late on Sunday, Peanut needed a third entry to award a kanone.  Pat Murray had put up a 110 second flight (something close to 110) very early in the day.  Thermals had seemed to go away by mid-afternoon.  I told him I would enter to fill out the roster.  I almost flew my Bellanca Aries T-250, but I broke a motor.  (Anyone that pits near me knows this is a regular occurrence – and since I fail to adequately prepare, it is also a time-consuming one.)  I decided to switch to my Fairey Barracuda which suffered from not one, but two idiot launches in the WWII Combat events this week (javelin throws resulting in stalls, and exiting the event as first-out).  I (and Pat) knew it “can” fly, but I was struggling this week.

I put up a qualifying flight, but had the urge for just one more (I still had 20 minutes or so in the contest).  THAT rubber broke and I hastily made a new one.   The next flight was stally and less than 20 seconds.  My long motor made the little model tail heavy.  I pinched off some clay for the nose and rewound the motor to max torque.  I added some right turn and called for a time.  The consciously flat launch went spiraling up to the right and just kept going.  I launched into a thermal (I wasn’t event trying for that!) and I took off chasing.  I had broken off the Garami clutch earlier and just bent the shaft over the prop.  That bent shaft locked the prop and saved it from the thermal.  I got back with the model  and was told it was a max!  I knew my scale score was better than Pat’s so that sealed the deal – another win with a Scale plane!

My Peanut Fairey Barracuda taking first in the McCook Peanut Event.

It has been a long time since I had such success in Outdoor Scale events – and it feels good.  And it takes the sting away from the poor performances in Endurance.

My 24″ Comper Swift. It was 9 seconds short of winning Golden Age Combined at the McCook contest.


Posted in Builds, Events, Products | 2 Comments

Mid-Summer is Here – I’ve Been Busy

You haven’t heard much from me and this will probably be my last blog post until September.

Between o4 August and 11 August, I will be attending THREE contests – yes, three contests in a week.  Tomorrow is our local Cloudbusters’ Picnic meet, then Tuesday I leave for the AMA Nats in Muncie, Indiana (FAC events Wed-Fri), and lastly, Saturday and Sunday is the much-rescheduled McCook Squadron FAC meet (staying in Muncie).

Geneseo was fun, as always, but it left me with some chores.  My dependable and always-a-contest-threat King Harry flew away.  My Jimmie Allen Sky Raider suffered some blown-out sticks, my new Wanderer had a wobbly tail and smashed the nose, and my Caudron flew great until I tried to make it fly better and it blew out some side supports. So here’s what I have been doing in these two weeks:


A new King Harry has been built.  The Wanderer’s nose and tail have been rebuilt.  The side was repaired on the Sky Raider, the Caudron has been repaired, and I spent an afternoon trimming out the Kuenz Klingon Embryo.  The Klingon was selected to be the One-Design and will be given out to registrants at this year’s FAC Outdoor Champs in September.  I built this one while Ralph was still alive and we will be honoring him this year.  I thought I better get mine flying as an example of the product.  I’ll give it a workout tomorrow.

Here’s two more images:  the first is the T-Shirt image for the Outdoor Champs.  You can register online right now by going here:  http://cloudbustermac.tripod.com/registration.html  – when you show up at the Champs, you will get a T-shirt AND a Klingon Short Kit.  The second is a reminder that I will be out of town and you might not want to order from my shop, unless you don’t mind delays.


Posted in Uncategorized | 2 Comments

Summer – Contests & Vacation

Finally, some flying.  I am driving tomorrow morning for Geneseo, the annual Flying Aces Club contest.  I will be returning Sunday.  Then I will be home for just over two weeks until I leave for another 5-day flying session at the AMA Free Flight Nats in Muncie.  Immediately after the Nats, the Mrs. says we must go on vacation and I will be off to Jolly Old England and Scotland until the end of the month.

Sooooo… out of the next seven weeks, I am home for a little over two weeks.  I would suggest that you hold any orders for Volare Products until after 01 September.  Orders from 2019 have been slower than normal in processing due to volume, and this will only add to the problem.

Oh, on top of that…yesterday, my laser cutter failed to cut for me.  I think it is a dead tube and I have ordered one.  It should arrive while I am in New York, so Sunday or Monday (or whatever day after that it arrives) I will be swapping in the new tube and frantically cutting kits again.  (I really need a larger capacity laser, but that requires a “remodel” of the basement to make it fit!)

Anyway, wish me luck in flying, safety in travels, and good times on vacation.  See you on the flying field!

Posted in Customers, Events | Leave a comment

New Product – Prop Retainers

For clutches that sit behind the prop, you need some sort of retainer on the very tip of the prop shaft to keep the prop from falling off.  Some people use wire insulation, heat shrink tubing, a crimped metal tube, and whatever they can find.  For a few years, I have been using Dubro 0.047 wheel retainers, but there are two problems with them – they are limited in application (0.047″ wire) and … they are no longer made.

Our good modeling friend, Chris Boehm called me last week as he had discovered a solution.  Chris tried these silicone items on 0.025″ wire and 0.047″ wire and they might work on larger or smaller wire.  Of course, you can also use them as wheel retainers.

I bought a bunch and now will be offering these separately as well as including them with my VPS Clutches and Boehm Clutches.  There will be 4 included with clutches (with no price increase) and you can get a pack of 10 separately for $1.

Posted in Products | 1 Comment

Another Type of DT

Yes, I just wrote about an electronic DT.  But what if you are working on smaller models that cannot support an additional 5 grams?  This is a Fuse-Type DT, but I have located the fuse in the rear of the model.  With this type, you eliminate the need for routing lines and such.  This is not new.  You can usually see these on OT Sticks and other larger models.  What is semi-new is where the tension to pop the tail resides.  It is enclosed within the fuselage for a clean install.

I first saw details of this structure on Al Zimmer’s 1/2-size Gollywock a couple of years ago, but this is the first time I have tried to implement it.  It utilizes four pins (or other bent wires) and two dental bands.  I hope the weather holds for the weekend and I can get this new Embryo tested.  Read the picture captions for more details.

This is the DT setup loaded and ready to go. You can see an anchor point for a dental band at the rear of the fuselage opening. At the extreme rear, there is a pin in the tail assembly and another on the tip of the fuselage. A second dental band keeps the tail locked down until the fuse burns the band.

here is a bottom view. You can see the stretched dental band running up to a slot in the top of the fuselage.

The top view of the tail assembly locked down. At the front, you can see the stop block that positions the tail and the slot with part of the fin in it.

Here the tail is popped up, as if the fuse had burnt through the band.

The bottom view with the tail popped. Now you can see the tip of the fin with another pin hook. This front dental band has pulled the fin down.

Here is the fuselage with the tail assembly removed so you can see the stop blocks and the fin slot.


This is the bottom of the tail assembly. The front of the fin is extended slightly below the surface of the fuselage so that the tail always is within the slot. A pin hook is installed on the tip. The leading edge of the H-stab is straight to engage in the stop blocks and act as a pivot point for the tail assembly.

Posted in Builds | Leave a comment

Another Prop Replacement – Jumbo Stallion

As spring time has rolled around, I am finally working on some of my outdoor models – yes, I am always behind the curve.  This prop is for my Jumbo Scale Aircraft Designs Stallion.  You may remember –  oops, I guess I never posted the assembly pics for the Stallion…

Anyway, I’ll start from the beginning.  Back in the late ’90s, I built my first Jumbo Stallion and I put on a fully carved 3-bladed prop to match the full scale aircraft.  It broke just about every landing, but I still have it – here it is:

When I built this second Jumbo Stallion last year, I wanted another 3-bladed prop and made it a folder.  While it flew the model, I believe it had too little blade area – and – the blades started to pull off the hub.  Here is a photo of that prop:

Over the winter, I decided to go with a 2-blade folder of typical design, more suiting to the power loading that I expect for the model.  BUT – since I got a 3D printer, I decided the hub would be printed and integrate the base for the spinner.  Here are some build pics for this new prop (read the captions for details):

the 3D-printed hub with integrated spinner base. Bushed with a 1/8″ aluminum tube.

The printed hub and the Superior Props 14″ blank. The final prop is 13″ in diameter. The “X” marks the part of the balsa prop to be removed.

The hub and prop blank – now with the center portion removed. ALL of the center of the prop will eventually be removed, but it needs to be there for construction, keeping the blades in proper relative location.

The hub in place with the locating 3/32″ aluminum tubing. The next step is to glue the hub to the balsa – only at the ends of the hub.

Prior to cementing the hub to the balsa, hinge wire had to be installed. Here they are and the basic outline of the prop blades has been marked on the blank.

The completed prop. The hinge wires were bound to the blades, bass leading edges glued to the blades, and the blades finish carved and sanded.  The blades were rubbed with medium CA, sanded and balanced.  At this point, the blades are still cemented to the hub.

New spinners ere vacu-formed. An accurate plug was printed and sanded (3D printing does NOT leave a smooth surface) and red plastic was formed over it to smooth it all out for final production. Two spinners were pulled from 0.030″ white styrene.

The blades have been painted with Design Master Gray and are still cemented to the hub.  Here are the pins embedded in the hub and blades to mount dental bands to hold the prop open. You can also see the three #0 pan-head screws that will hold the spinner to the base. Note that a flange and anchor points had to be printed into the base to accommodate these screws.

The glue joint was cut with a razor saw to complete the folding operation. Full folding alignment is not critical because this folder is always open and only flexes to prevent breakage on landing.

Here is the finished prop mounted on the model fuselage. This prop and hub actually weighed a gram less than the temporary 12″ plastic Chinese prop I used at the end of last season. Testing will happen in two weeks, weather permitting.

Posted in Builds | 4 Comments