A New Event and a New Product

A LONG post with a lot of photos AND a video!

One of the great things about the Flying Aces Club is that CDs are allowed to implement rules in their own way and try new things at the local level.  On the East Coast, you will find 15-contestant Mass Launches being flown in 14 rounds.  And out in Colorado, they are trying out a Mass Launch event for NoCal Thompson and Greve Racers.  And now, Don DeLoach (Colorado) is taking that event to the national level – literally.  As CD of the 2019 AMA Indoor Nats, he is strongly promoting FAC Events and has obtained GHQ permission to run the the NoCal Combined Races at this National meet – for a Kanone, even.

Now, you don’t see a lot of Racer NoCals – Chambermaids mostly – and the Hosler Fury is a favorite in come indoor circles (Don had prohibited the Fury), but you don’t see many other planes.  While contemplating the drive out to Arizona, I wondered how I could participate in this event – given that I don’t have a Racer NoCal, and have never drawn any plans for one.  I do sell a Chambermaid NoCal, but that’s been done to death (from my point of view).  And who really wants to see the sky filled with Chambermaids and Mr Smoothies (although the Smoothie would probably do really well)?

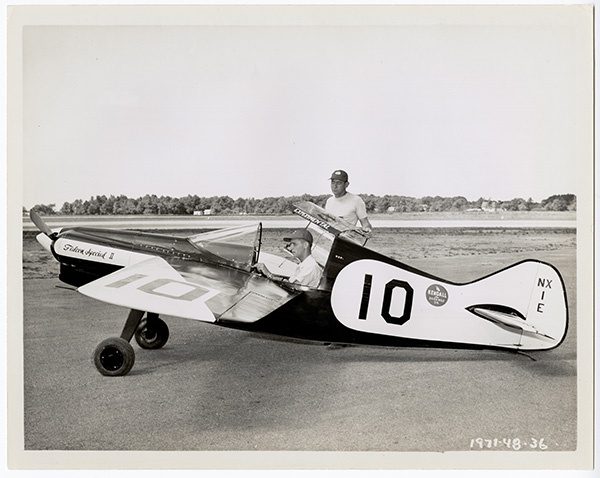
Back when I was a younger man, I drew up the Wedell-Williams Model 45 for Peanut Scale.  It wasn’t very successful.  But I decided this would be a good candidate for this event – it has decent moments AND I already had a drawing to start with (always thinking!)

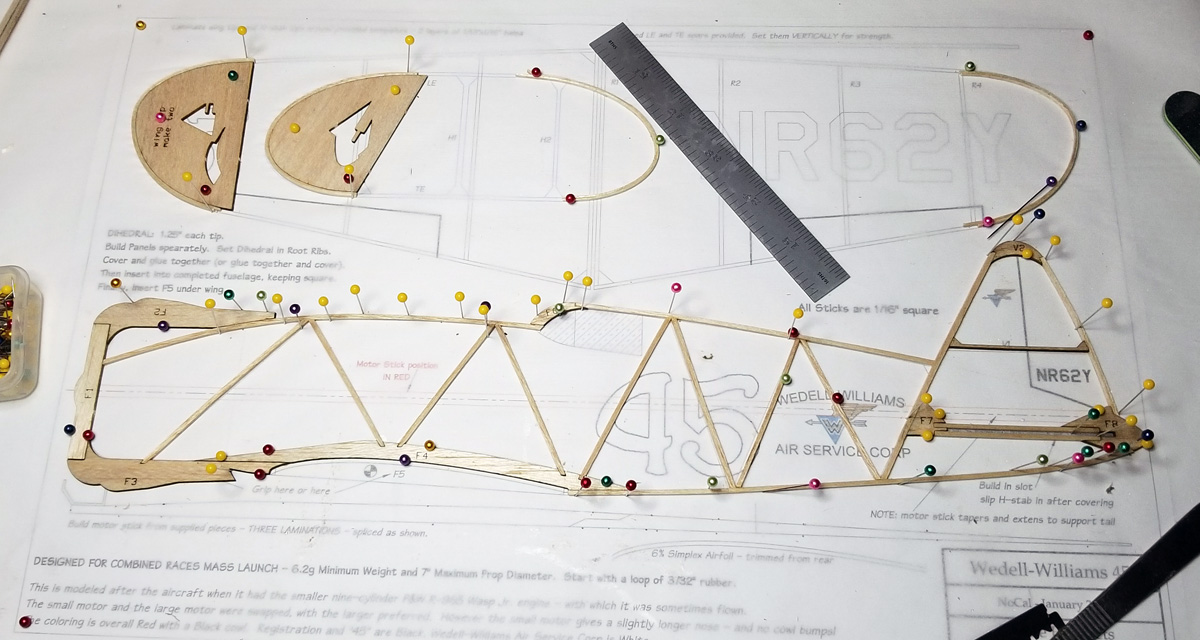
It was a quick draw from Peanut to NoCal and the good part was it fits on a single sheet of 11″x17″ with only the horizontal stab overlapping the wing.  I laid out the parts and cut a prototype set.

The build went together pretty well and it came in pretty light – about 2.5g at that point.  Now, the event requires a minimum weight of 6.2 grams and maximum prop diameter of 7″.  These restrictions are a method of leveling the playing field – no super-light NoCals with monster props.  They all have to be “heavy” and fly with a moderate prop.  I decided to print the colors on some domestic white tissue, because I knew I didn’t need to save weight.

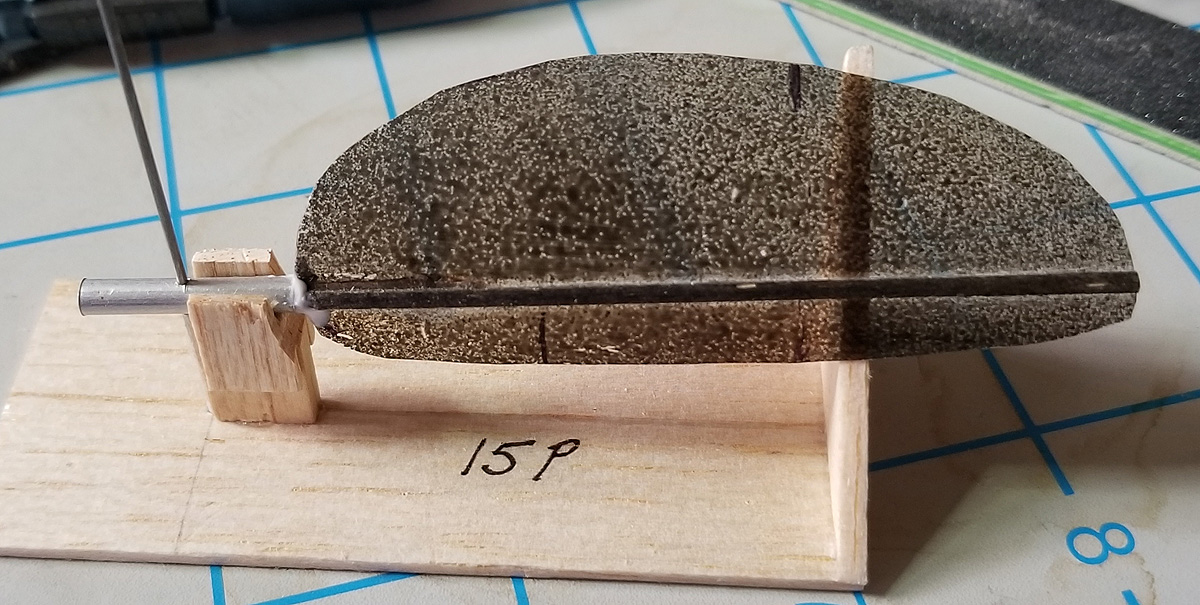
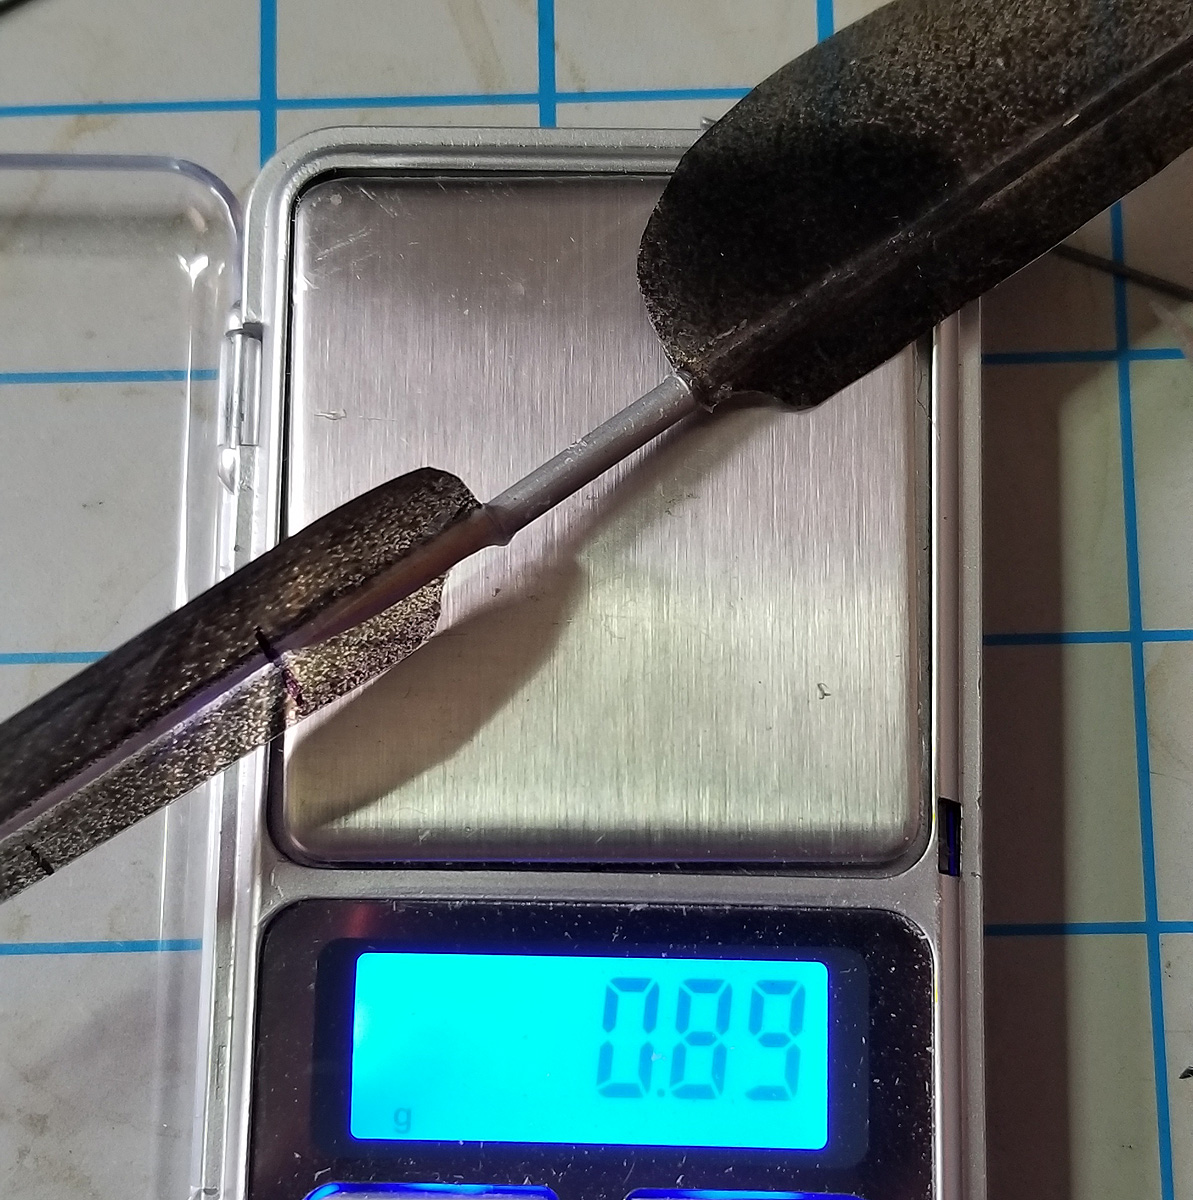
The model finished out at just under 7 grams.  I was going to use a 7″ plastic can prop I made earlier in the year, but this proved to be too delicate this heavy model and the supporting blade spars cracked on test glides, so I went with a plastic commercial 6″ prop, scraped down to about 1.5 grams.

I will include more build photos here – and a test flight video.  But if you want to know more, scroll down and I will address the “errors” and “fixes” that I have encountered – important stuff, should you want to build one yourself.

One more comment before the photos:  Don will be running this plan in the NFFS Digest to promote the Indoor Nats and this Event.  I will soon have the Short Kit ready for purchase ($11) and free Tissue Templates for download (2- legal size sheets).

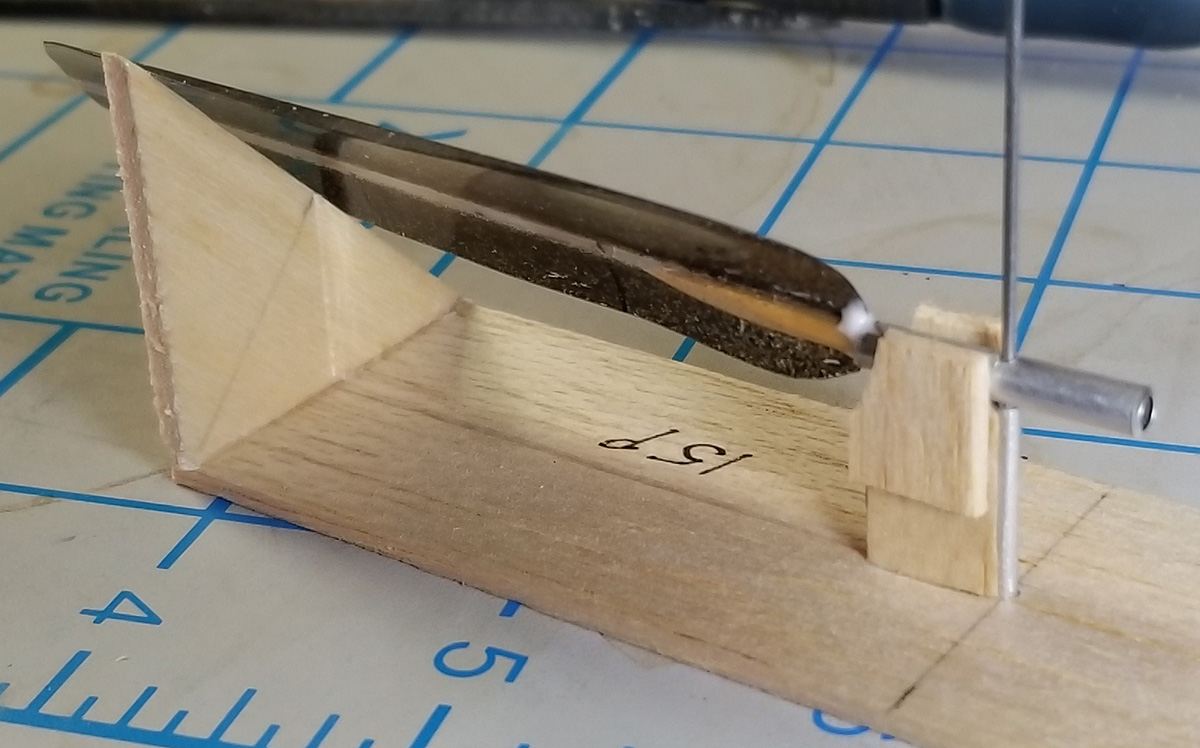
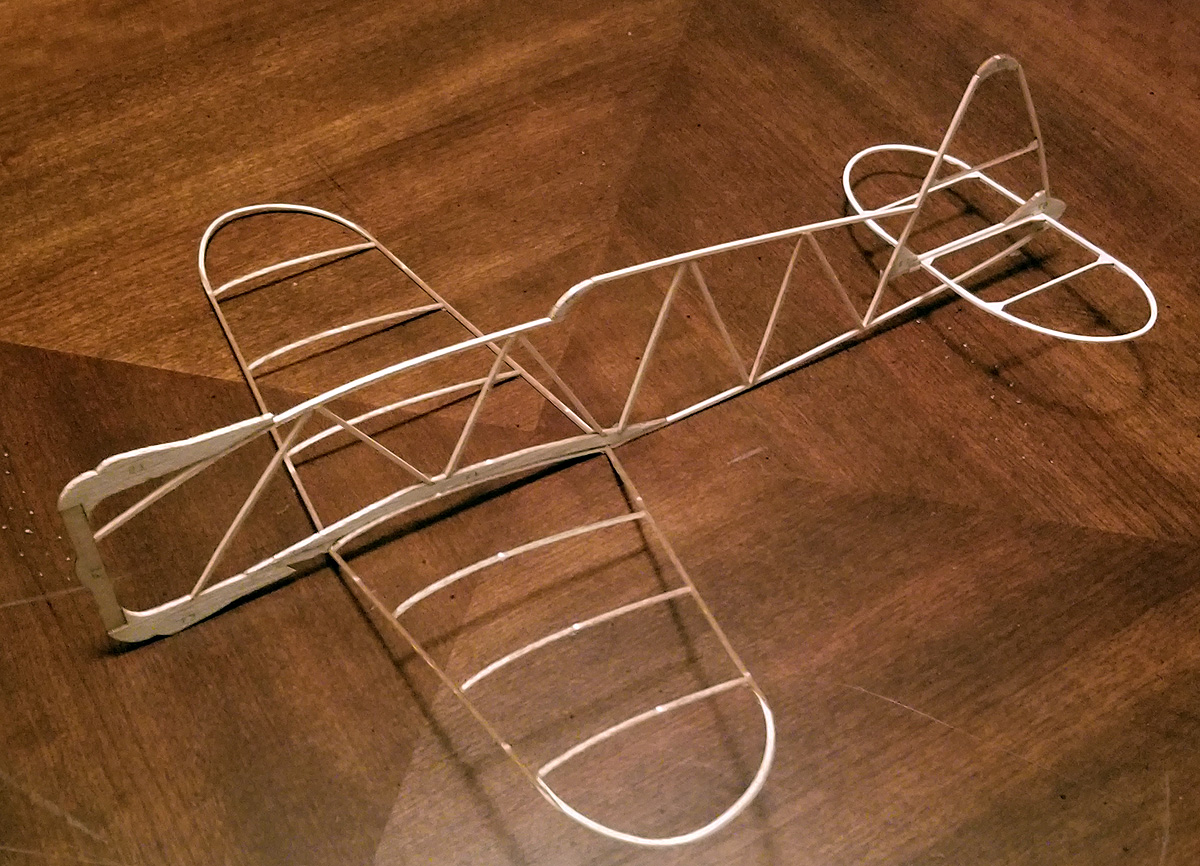
the fuselage structure and the start of the laminated strips. Tip Templates are provided. You can see the right tips completed and the left tips in process. I used 2 strips of 1/32″x1/16″, wetted, and glued with wood glue.

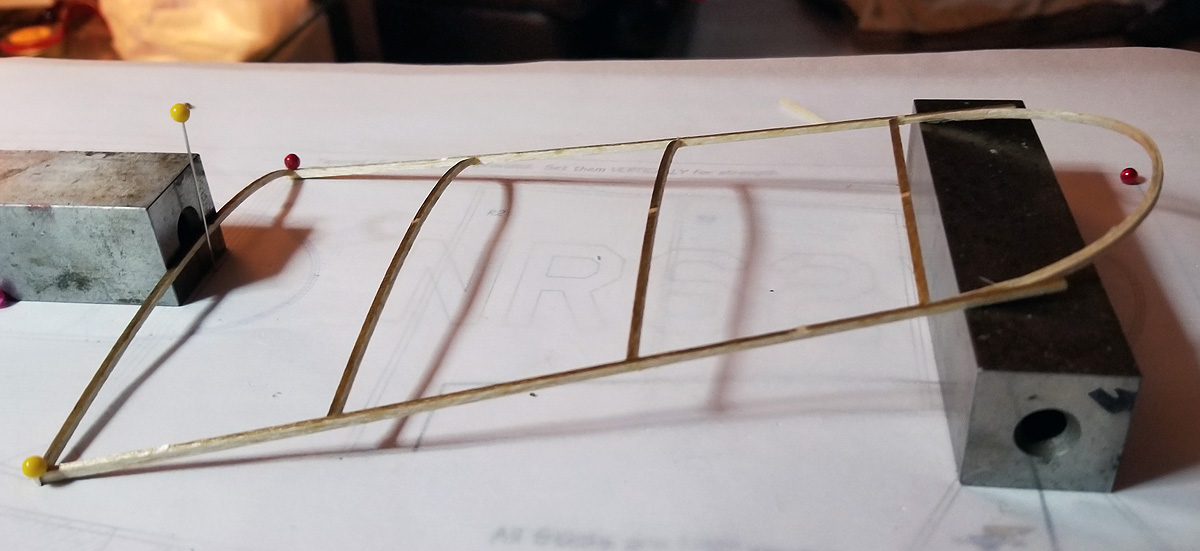
Setting the Root Rib Dihedral. I recommend two root ribs (one each panel) to create a strong anchor for the fuselage.

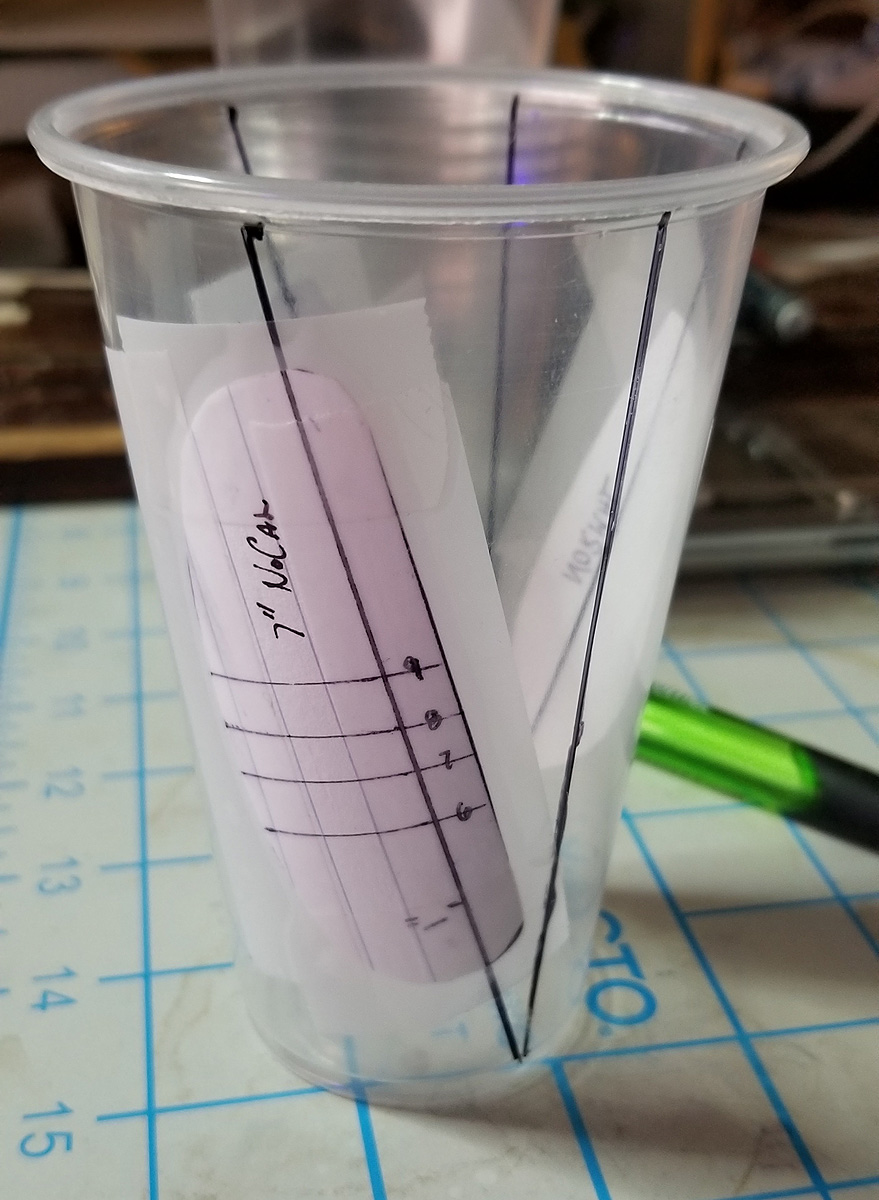
the printed tissue – 2 sheets of legal size – 8.5″x14″ run through an Epson printer for waterproof ink. I used domestic white – more on that below.

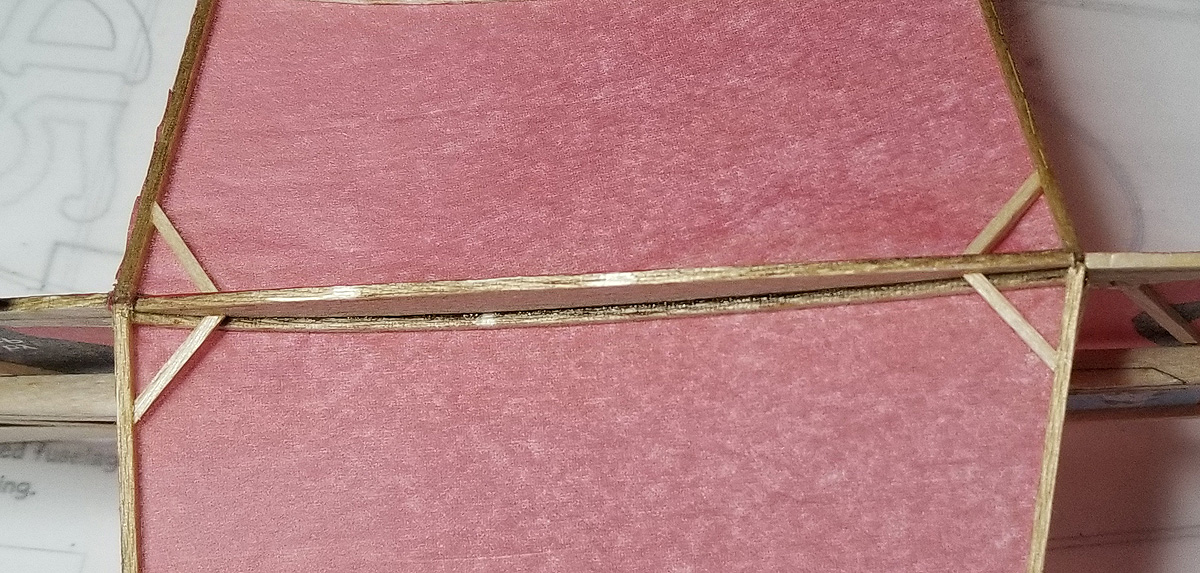
Wing Root braces. Shown as gussets on the plan. You can install gussets (or braces) before covering, after covering, or (like I did) after assembly. But do it – they add a lot of strength to the wing.

these braces also add a lot of strength to the wing-fuselage joint. They run from the motor stick to the LE and TE of the wing at the fuselage joint.

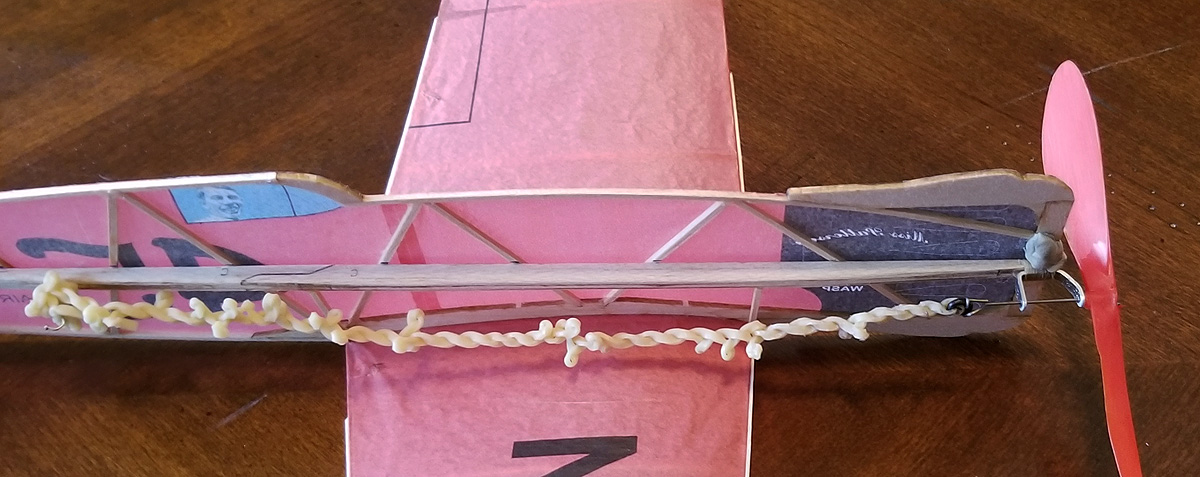
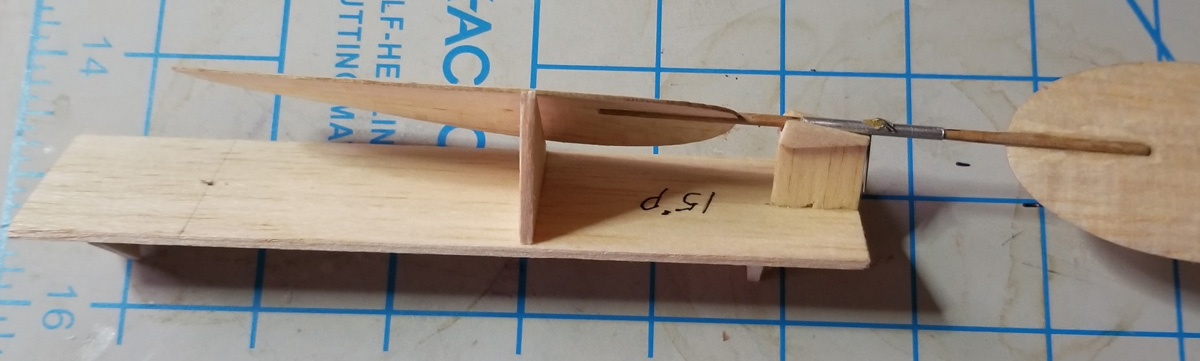
Showing the motor stick, prop and nose bearing. The motor stick is made from parts supplied in the kit and was plenty strong. The bearing is home made from sheet aluminum. And the prop is a scraped 6″ Peck-style prop.  You can also see the balance of the rubber related to the CG.  I would NOT move the rear hook farther back – and you might be able to position it more forward – say 1/2″ – 1″.

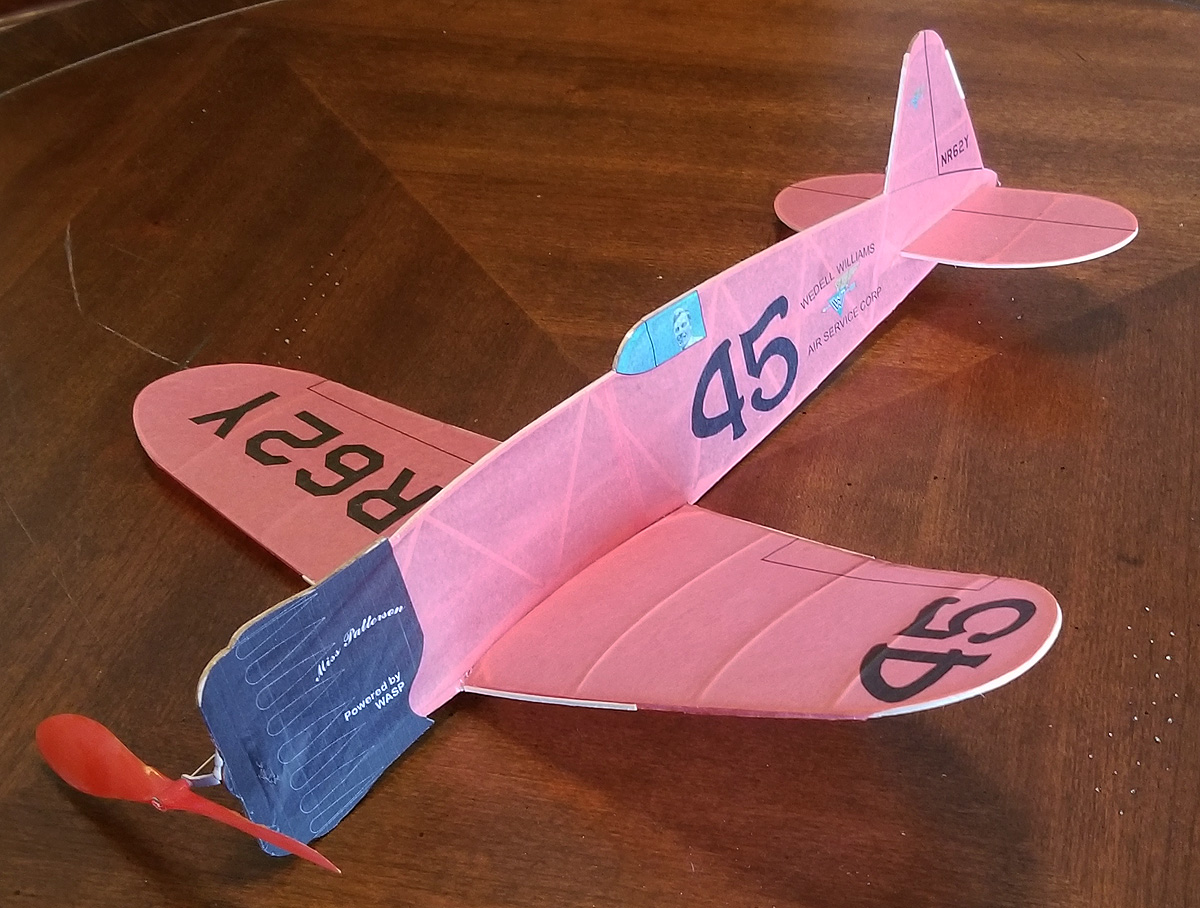
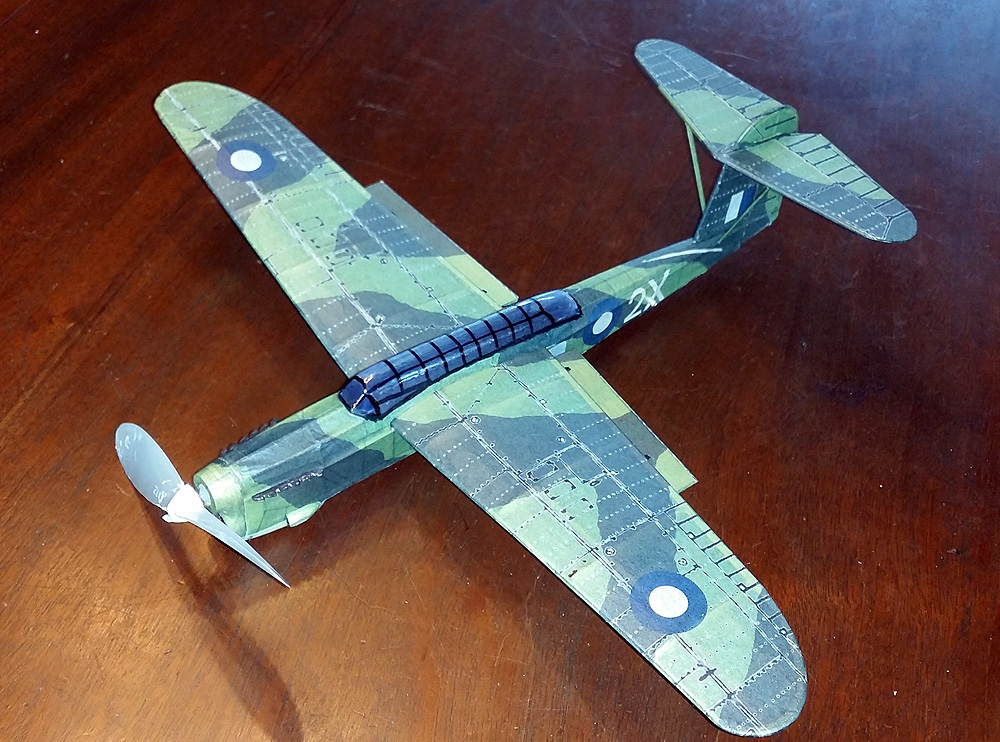
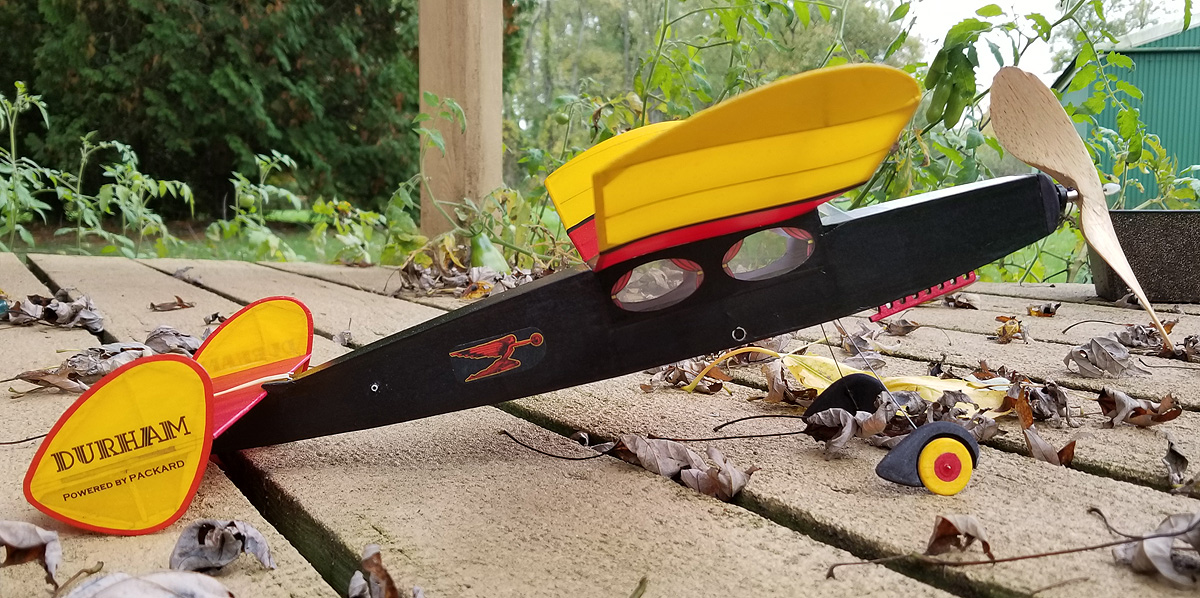
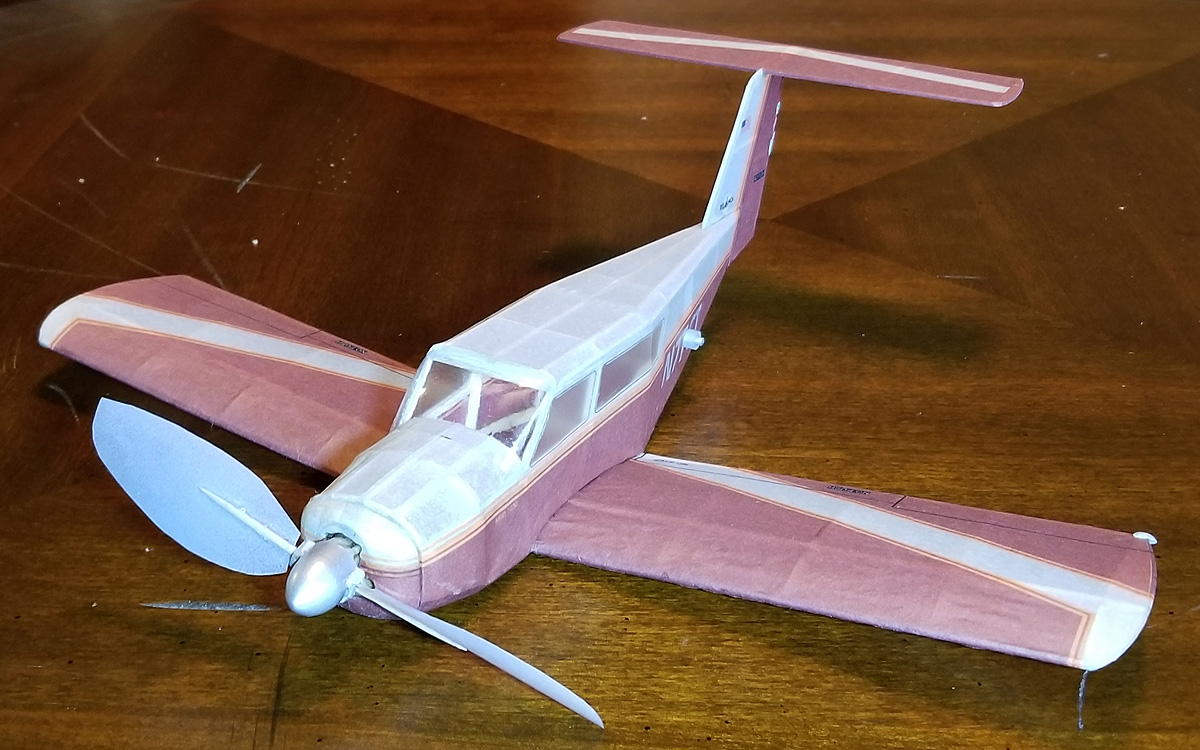
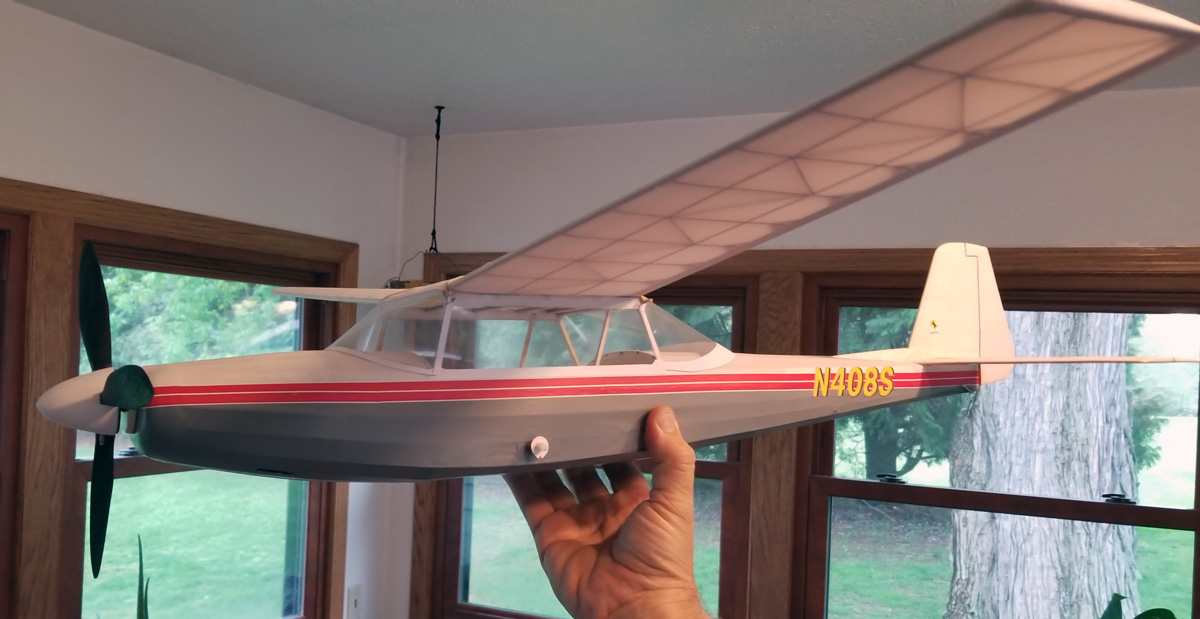
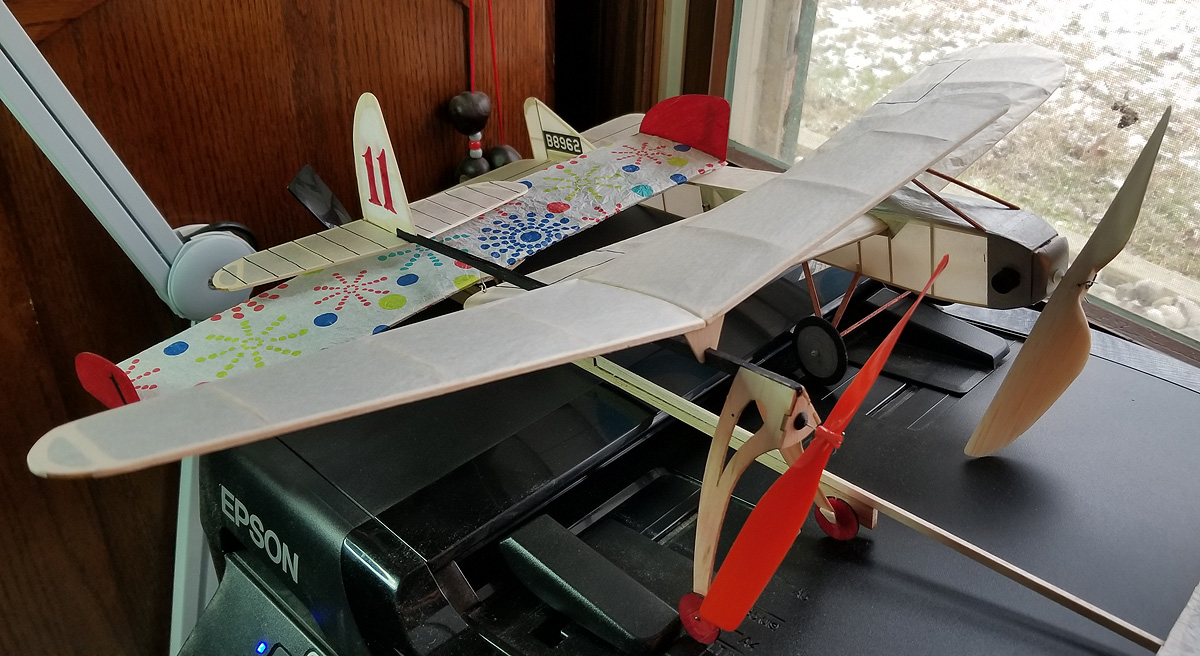
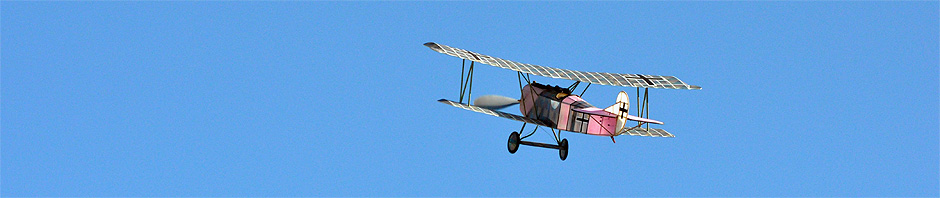
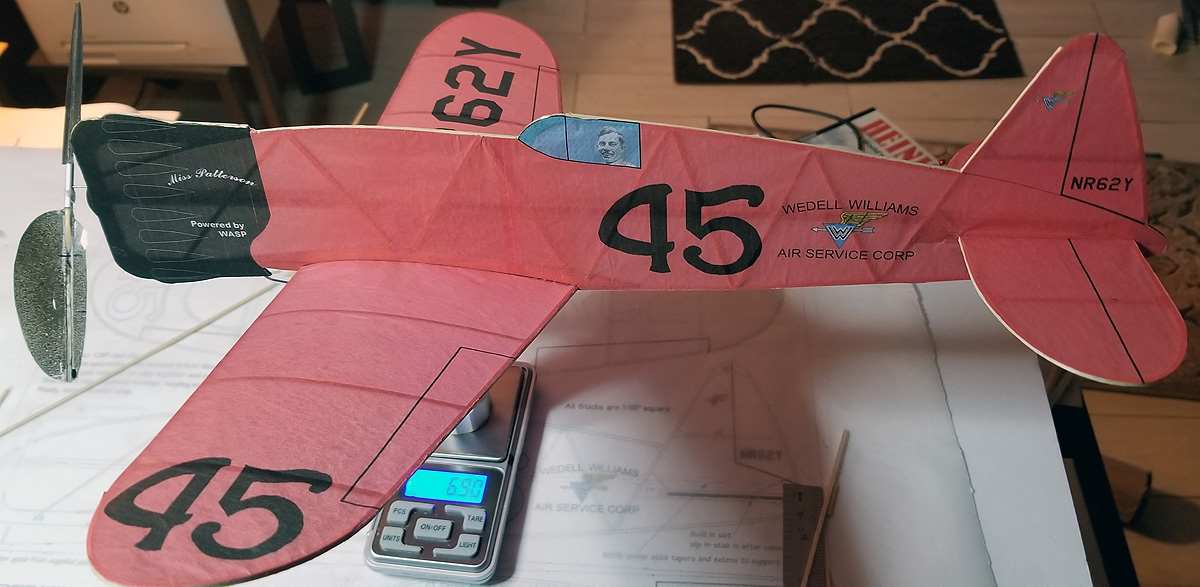
The finished model – after flight testing and trimming – see below for issues and fixes.  And that’s Jimmy Wedell in the pilot’s seat!  And printed cowl bumps, too.

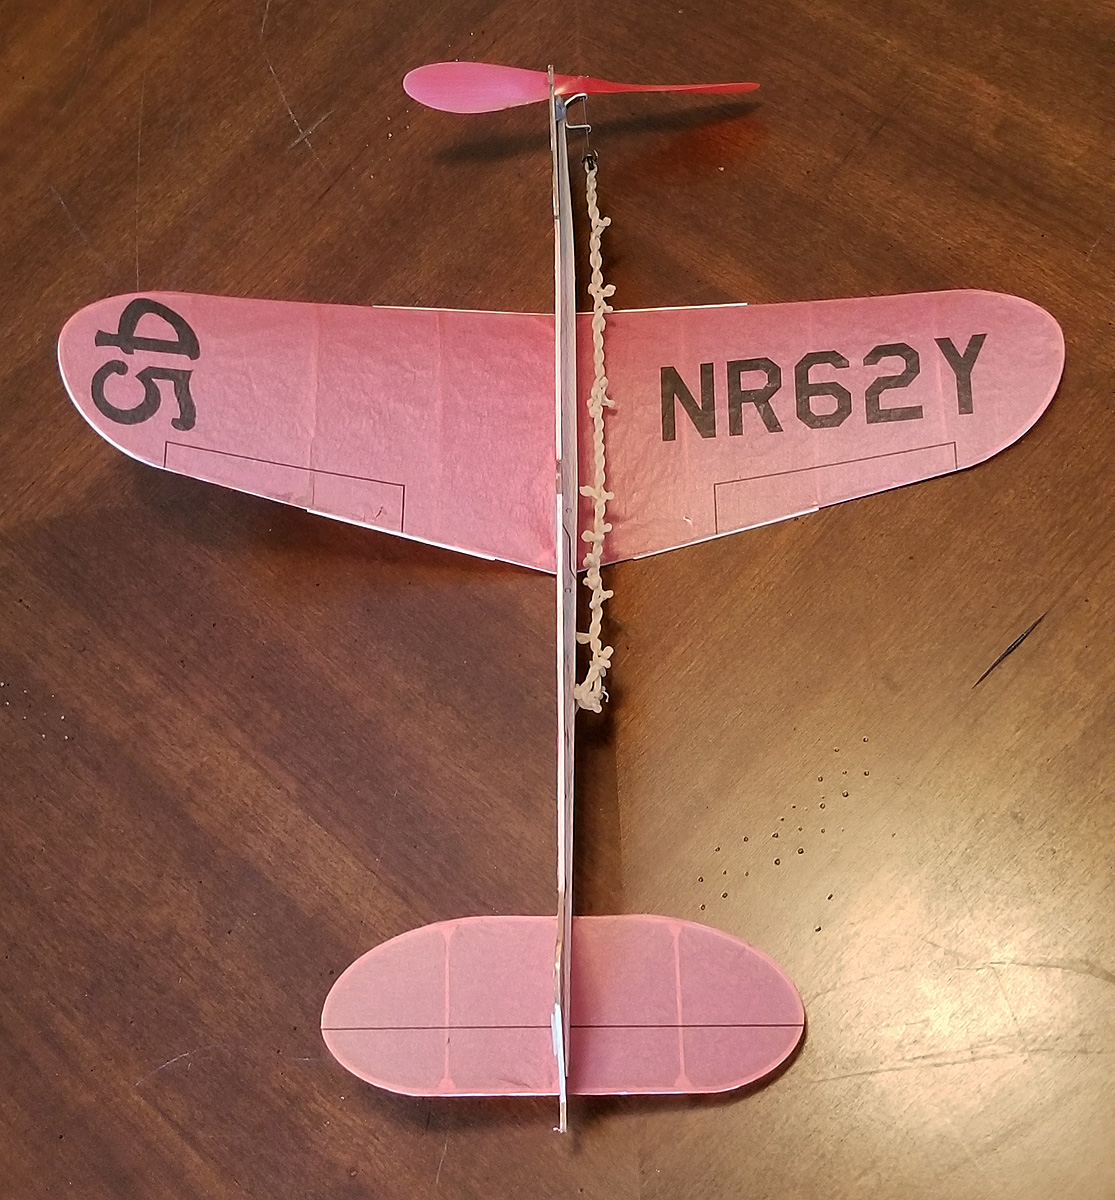
the overhead view showing the good proportions of the model.  the tail is plenty big:  26% of the wing and it produces a 0.78 TVo

PROBLEMS, ERRORS, and FIXES

Soooo…  The video shows the model flying – it flies pretty well, but could do better.  It is hard to tell in the terrible video, but it has just the slightest stall tendency.  I am flying it left because I feel that low-wingers work better to the left.  I do try to fly high-wingers to the right, especially indoors.

I didn’t pay attention to weight in this build.  I knew I could hit the target weight and being well under would only mean having to add ballast.  But I think I did make some mistakes in this design.

  1.  I should have built the fuselage lighter – and the wings heavier.  I used “indoor style” LE and TE spars – cut from balsa and tapered from 3/32″ at the root to 1/16″ at the tip.  This proved problematic during MY testing phase.  Low-wingers are not as easy to trim and they can have induced roll – mine did – and when it finally came to the ground, even slowly, the LE and TE would crack if the wing touched first.  You can see my 1/13″x1/16″ balsa splints on the LE and TE in some of the pics.  That helped, but if I were to build it again, I would probably use bass on the LE at least, maybe on both.  That would make the wing stronger, and less susceptible to warping, too.
  2. I used cheap domestic white tissue.  This wasn’t a real problem – until I got too eager and decided to try some test flights – outside – with light snow flurries.  The tissue was not pre-shrunk or crinkled – it was just put on with a little bit of loose-ness.  Well, there were snowflakes on the wings when I came in the house.  I didn’t blow them off.  They melted and made the tissue wet.  The tissue shrunk slightly – you can see a bit of “potato-chip” in the wings.  I should have crinkled the tissue on the wings and tail – like I usually do for light-weight NoCals.
  3. There are printing errors in my tissue that I have fixed in the tissue templates.
  4. I scraped that prop down to 1.6 grams but, judging on the blob of clay on the nose, I didn’t have to.  Although… using lighter wood and lighter tissue in the fuselage, would have resulted in less weight behind the wing and less nose weight needed.
  5. Note – not a mistake, but a disclosure.  My goal yesterday was to get this flying respectably – which I did.  The prop and rubber combo is not the best for duration.  This is a loops of 3/32″ and a 6″ plastic prop.  A bigger prop and more testing time would likely result in increased duration.

That’s all the major issues.  I have a 7+ gram NoCal that flies on a loop of 3/32″ with less wing area that flies for 2.5 minutes.  This plane has more area, in fact, it has a lot – 53+ Square inches.   So this design might be able to get to that level, but care and attention will need to be observed (remember, low-wingers are less stable).

Two more things:

  1. get yourself out to the 2019 AMA Indoor Nats – it is in a football dome with a 100-foot ceiling!
  2. Build a Racer NoCal!  Any of the Thompson/Greve racers will qualify.  That Mass Launch should be a lot of fun!

See you on the flying field,

–george


Posted in Builds, Products | 2 Comments

Model Performance Report (i.e. “bragging”)

The Cloudbusters’ monthly indoor contest was yesterday and I had a few successes.  This post will talk about two of them.

Last month, I debuted my B.A.T Monoplane neo-Dimer.  I had a high time in December of 102 seconds (1:42).  I felt (and may have even stated) that I thought it could use a touch more power.  I was flying on a loop of 0.110″ rubber, but it wasn’t using all the space and there was obviously another 20 seconds needed to record maxes.

The old motor was 20″ of 0.110, wound to 1650.  I installed a new motor of 0.125″, 20 inches long. after a few test flights, I would it to 1800 and was rewarded with a flight that exceeded Max at 2:11!  This was launched and flew in the very center of the room, using all of the height available and included one light scrape/bump on a wire.  A second official flight seems to be a little porpoise-y (maybe a bunched motor at the peg – maybe I forgot the down thrust shim?).  I was concerned that it wouldn’t max, but my timer, Ron Joyal, stated that it would probably max and we recorded a 2:03.  The two maxes were enough to beat everyone with their three flights.  It is a majestic flyer and I am more than happy with this model!

The second plane is my 18.5″ Stout 2-AT, built specifically for Indoor Golden Age.  I did this kit a few years ago (wow – over 3.5 years ago!) and never built one.  I saw MANY of these have terrific flights at Geneseo and Muncie, when it was the One-Design.  Anyway, when the club decided to fly Golden Age in the indoor meets, I threw one together, finishing it on New Years Day.  I had to wait to really give it any test flights.  It also uses a loop of 0.125″.

This is another very stable flyer.  After tweaking, I was able to post 103/111/108 flights to win Golden Age.  I was happy.  When I messaged my flying buddy, Winn Moore, about the flights, he responded “that’s good, but it looks like you should be able to max with that.  He’s absolutely right – no need to be satisfied with “mediocre” performance.  The glide was not good and I had to keep adding downthrust.  I take that to mean that I am nose heavy.  Next month, I’ll try adding some tail weight, improving the glide, and removing some of that downthrust.  Maybe I can max out with this one, too!


Posted in Builds, Events, Products | Leave a comment

Flying Free Flight on New Years Day 2019

As I like to do, I was able to go out and fly today (New Years Day 2019) around noon.  I had wondered what I would fly, but I finished up my Stout 2-AT this morning and decided to test it since it is rather calm outside today.

So, here it is – a TWOFER – my Stout test flight AND 2019 New Years Day Free Flight in Michigan – all rolled into one!

you can see all my build photos here:  https://volareproducts.com/blog/?page_id=3608

See you on the flying field!


Posted in Builds, Products | 2 Comments

New Year Updates/Increases

Postage

I have run with Flat Rate Priority Mail since I started.  I am not changing the process, but postal rates have increased (for everyone) and while I get a discount through the service I pay for, postage is often a wash on orders I process.  Sometimes it is a significant loss – like approaching $2 over what the flat rate charge has been.  As you know, a business cannot survive selling things for less than what they cost.

I was prepared to increase my shipping prices across the board, but then I did a tiny bit of informal analysis.  The orders that cost more in postage than I charge are for heavy packages.

Did you know that postage prices increase whenever you cross the 16 ounce (1 pound) weight?  If you, the customer, can order 100 items that need a big box AND keep that weight under 1 pound, then I can ship for what I am currently charging.  If your order weight exceeds 1 pound – or 2 pounds – then postage prices jump to well over the flat rate I charge.

Well, the culprit in most cases is Rubber.  Even a 1/2 Pound box of rubber will almost certainly exceed 1 pound – the rubber weighs 8 ounces and the box it is in takes the total closer to 12 ounces – and then I pack it in another box.  Boom – just like that it is over 1 pound.

So, instead of increasing the postal charge for all, I am adding an extra charge for shipping Rubber:

  • 1/4 pound rubber will add $1 per box in the order
  • 1/2 pound rubber will add $2 per box in the order
  • 1 pound rubber will add $4 per box in the order

This should cover the excess postage.  Note, contest delivery will NOT incur the extra charge.

Tissue

Esaki Tissue – I believe it is No Longer Available.  It is a long story, but the short of it is that the old couple that ran the hobby shop in Gifu, Japan have closed shop and retired.  I understand that Esaki did not manufacture the tissue – they procured it and resold it.  However, I do not know the source of the tissue.  It has been about a year since I was able to contact Esaki and my 6,000-sheet order is running low.  I have had to discontinue sales on White, Dark Blue, Yellow.  If you see a color on my site, I still have a supply of it, although Red and Orange are running pretty low.

I will be beginning the tedious process of trying to find a Japanese source for tissue.  I have some very, very thin leads and time will tell if I can procure Japanese Tissue from a new source (at a reasonable rate).

Over a year ago, I contacted a Chinese paper manufacturer and asked for a sample of their 14gsm (gram per square meter) tissue.  Esaki stated their tissue was 12gsm, but 12 is tricky to find.  I received samples in a variety of colors.  This tissue did have a shiny side and a dull side, but did not have the good wet strength that we have expected.  I will continue the search, but this seemed like a reasonable alternative.

I did an experiment with some white tissue from my local department store.  I bought a couple of different brands and I found one that was acceptable to me.  The brand is FLOMO tissue and while it was apparently slightly heavier than Esaki, it worked well and was really cheap.  Some “domestics” will work just fine and some have told me that Hallmark brand is not a bad tissue.  However, for small models, where every 1/2-gram counts, I am not sure we will be able to find a cheap alternative to Esaki (even though Esaki was not the lightest tissue).

More to come on Tissue.

Kits

Sourcing balsa has become a game of chance – a roll of the dice.  My primary source offers a great price, but they have had problems supplying in a timely manner over the past year.  They have decent balsa, for the most part (more on this in a moment).  My secondary source has very timely delivery, but the cost is twice as much per sheet.

In addition, I weigh each sheet that comes to me (this is for 1/16″x3″x36″ sheets).  I then sort the sheets into 5 categories:

  • under 12 grams (under #7 wood) – keep for super light projects – this is about 3% of any order
  • 12g-13g (#7-#8 wood) – I use this for NoCals, Peanuts, Dimers – this has been about 12% of the order
  • 14g-16g (#8-#9.5 wood) – this is for normal Scale and small Old Timers – maybe 35% of an order
  • 17g-19g (#9.5-#11 wood) – this is for larger Scale and larger Old Timers – maybe 35% of an order
  • 20g and over (#12 and over) – I do not use this; I usually give it away in club raffles – maybe 15% of an order.

Lately, my orders have shifted to the heavier side.  I am getting hardly anything under 14g and getting more over 20g.  In addition, I have had to order more from the more reliable, but more expensive source.  I even tried the premium light weight (more costly) wood.  The good news – it was all light.  The bad news – it was all under 8g per sheet.  This is too light for my kits, excepting some NoCals and small Peanuts.

So…long story – I have held my basic Short Kit price at $10 since I started cutting kits 5 years ago.  Any of these $10 kits will now be $11 to cover some of these costs.  My larger kits that are $15, $20, or $25 will not change for now – it is only the $10 kits that are increasing.

Interesting Side Question

As mentioned, I set aside the under #7 wood for special projects.  I cut the Turbo Cessna 195 NoCal kit from this wood.  And I have used it for some of my own light-weight models.

As a customer, would you like to have the option to have your short kit cut from this wood?  There would likely be a $2 upcharge for light wood.  And it would probably only apply to some short kits, not all.  Keep in mind that light wood is fragile – and some of my parts are already kinda flimsy (there is a downside to using light wood).  Also, if there is high demand – and I have to start purchasing a lot of light wood, the upcharge would likely go higher.

Let me know what you think – and Welcome to 2019 – I hope it is a great one for you and yours.

See you on the flying field  –george


Posted in Customers, Products | 1 Comment

End of Year Short Kit Releases

Wrapping up 2018, I have quietly put a couple of short kits online.

First, I have the Jimmie Allen Sky Raider.  I was able to fly this in September at the FAC Outdoor Champs and Ted Dock contests.  It is an amazing flyer.  I personally feel it is better than the Skokie (although I have never built a Skokie) as it is slightly larger.  With its 26″ wingspan, it qualifies for FAC 2-Bit Plus 1 (26″ max span for ROG Old Timers), for FAC Old Time Fuselage (up to 36″ span ROG Old Timers), and for – of course – Jimmie Allen.

Second, I have the B.A.T. Monoplane for Dime Scale.  This plane was putting up 90 second indoor flights its first day out with a high time on that day of 102 seconds.  It has 60 square inches of area and is a real floater.

Lastly, I have four short kits of the short run of the Peanut Barracuda (with vacuformed canopy – and online tissue templates).


Coming in the New Year:

First up will almost certainly be the Durham Air Limousine Embryo.  I am told the plan and story will be in the next FAC News.  Once that hits “the news stands”, I will have the short kit for sale.

I’ll have the Peanut Bellanca T-250 Aries.  This is complete, but I just haven’t been able to dedicate time to it.  Winter is here in the upper midwest and indoor time is tight, with little time to dedicate to testing.

After the fatal final crash of my 19-year-old Falcon Special II Goodyear racer, I decided to build a new one.  I’ve reword my 1999 plan and have parts cut for assembly.  Once I get that built and flying, I’ll be kitting that – and provide tissue templates for the complicated scheme for free download.

A 1″:1′ Lacey M-13 (rebuild of the Lacey M-10) should make its appearance sometime in 2019.  I’ve got the plan about 80%, but at this size, there are so many details – and the wild color scheme to lay out.  It might take awhile.

If there is significant interest, I could get a short kit together for my 36″ span Jumbo Aircraft Designs Stallion.  High wing, no struts, and retract gear make this a simple plane to build and fly – but it won’t get any FAC Bonus Points.

Of course, there are those designs yet to be known – even to me – that will appear in 2019.

Have a Happy New Year.

Posted in Products | 2 Comments

December Flight Report

If you remember, I had three new planes to test fly (and compete with) at the Cloudbusters’ December Indoor Contest (yesterday – 13 Dec 2018).  I build the B.A.T. Monoplane, Phantom Flash (#11), and the Cloud Dancer.

Let’s start with the Cloud Dancer.  This is a full kit developed and produced by Mark Freeland of Retro RC.  His goal was to produce a good-flying, simple-to-build model for this year’s Science Olympiad event.  He has done just that.  This model built quickly (an hour or so?) and flew right off the board.  Mark could easily hit 2 minutes with his (a lot of testing).  Mine put in a 90+ second test flight on like its second flight.  I put in one official of 65 seconds (3rd flight) – this was shortened because it flew right up to the rafters, hit them and lost about 50% of its height before recovering.  I need to trim it better to reduce climb and increase duration.  This model just flat flies (flat – because of the flat wing – haha!)

I recommend this for ANY SciOly team.  Why?  because it is simple and does not require any fancy or exotic materials.  I think many SciOly kit producers lose site of the fact that kids without any knowledge of airplanes build these – they need something simple to build and fly – after all, this is just one of many subjects they are doing in Science Olympiad.  The Cloud Dancer is simple and sturdy and flies extremely well.

Next up is my 11th iteration of the Phantom Flash (the previous 10 all flew away outdoors).  I built this one explicitly for Indoor flying and it weighs in at 4.5g and flies on a loop of 1/16″ rubber.  It still needs tweaking, but will regularly put in flights over 2 minutes.  It easily won Phantom Flash yesterday.

Lastly, the B.A.T. Monoplane for Dime Scale.  Also built for Indoor – it weighs 9.5g and currently flies on 0.110″ rubber.  I needed something that got beyond 70 or 80 seconds, as the competition is flying at this level.  This did that, with a best flight of 103 seconds, and I think there is room for longer flights as I try a different size rubber.  It was landing with turns, so maybe I need to go just a touch fatter.

I was very happy with the performance of these three new models.


Posted in Builds, Events, Products | 1 Comment

Confessions of a Winter Modeler

Hi, my name is George and I might have a problem.  It has all the traits of an addiction.  Maybe combined with a touch of Seasonal Affected Disorder*

I sit here in a confused and anxious state, a few days out of completing my third build in three weeks.  After the Cloudbusters’ November Indoor meet, I built a Dime Scale B.A.T. Monoplane, a Cloud Dancer, and a Phantom Flash.  To me, building starts out as a necessary evil.  I like to design the plans, and I like to fly (more on this in a minute), but building – while not terrible – is not the most enjoyable of these three parts of the process of modeling.

The new Cloud Dancer, Phantom Flash, and B.A.T. Monoplane await the opportunity to fly.

Once upon a time, building the fuselage was the easy part and I had to force myself to do the wings first or I would delay them.  Since I now laser-cut everything, wings go together quickly and the fuselage takes more time.  On top of all of that, covering and finishing now takes more time than the structure-building of the wing, tail, and fuselage combined.  Some planes seem to take forever (yeah, I know – I just said 3 planes in 3 weeks).

Here is where the problems come in.  Once I am started on the model in earnest, I just keep building and covering until it is done.  I just put my building machine in gear and it is like the 4L gear on your 4WD – not super-fast, but lots of torque, and it gets the job done (ok, ok – 4H for you slow-pokes).  But, then…

The model is finished.  But the machine is not dis-engaged yet.  It feels like I am spinning my wheels and getting nowhere, since I have nothing to build.  And this time of the year just amplifies that, since here in Michigan, the weather is not the best for flying small, light models.  And with the ground frozen and leaves off the trees, there is even more hard surfaces to crash into should I actually venture outside.  I cannot fly until the monthly indoor contest rolls around.

So, when the model is done, I should fly it, but I can’t.  I feel like I need to build because that is what I have been doing in the immediate past.  I can neither build nor fly.  There is a definite let-down after I complete a model, especially if I cannot go fly it right away.  After a day or so, the building urge passes.  Then…I have to force myself to start on the next project (remember, it is my least enjoyable part).  Fortunately, in this dry spell between build sessions, I can work on plans.  I do like the drawing.

The three models above were built for Indoor.  I doubt I will be building any more for Indoor this year, unless something happens to my stable of aircraft and I need to replace something.  So the remainder of the winter building season will shift over to builds for next Outdoor season.  As always, I have a lengthy list of intended projects and now I will narrow that down and prioritize them so I can have a new fleet come spring.  There are ten on that list right now, with two additional completed (B.A.T. and the Bellanca T250).  Also, there are some duplicate events on the list – where I have to select which model to build for the event.

One additional issue with this building addiction combined with my “retirement” and focus on my hobby-business – I am getting Too Many Planes.  I am running out of room to store them.  They are everywhere – packed away, on shelves, on desk-tops, practically under foot.  I almost never throw any of my old soldiers (airmen?) away (is this hoarding?) – I just retire them to an ever-growing pile.  See what I mean?  I have problems.

only part of the Old Plane Repository

* – Note:  this was written mostly in jest.  I do not suffer from these issues (well, maybe the addiction to building … and the urge to fly – oh, and the hoarding of models) and I am not poking fun at those who do suffer.

Posted in Builds | 1 Comment

BACK IN STOCK – Gizmo Geezer Prop Assemblies!

I just received these this week.  10 each 7″, 8″, 9.5″, and 10″ with Spinner drives.  Get ’em while they are hot!  (If you miss out on this batch, there will be more – they are BACK IN PRODUCTION!)

Find them here:  GIZMO GEEZER PROP ASSEMBLIES

Posted in Uncategorized | Leave a comment

Hard-to-Find Tools For Sale!

I have been lax in posting these, but they are all online and ready to ship – just in time for the Holidays!

You can find them all here:  Volare Products/Specials/Tools

Posted in Products | Leave a comment

A Can Prop for NoCals

Everyone knows about Plastic Props.  Many people know about carved wood props.  There is another type of prop that you can make that is a) light weight and b) effective.  I call these “Can Props” because they are formed on a can.

I have experimented off and on with these for years – and they still challenge me (probably because I don’t do them enough).  These are often seen on indoor models (Limited Penny Plane), but also some of the top scale modelers make these for their large models (Free Flight, of course).

A couple years ago, I did my Cessna Turbo 195 and asked Don Slusarczyk what to use for a prop and he suggested a 10″ diameter 15″ pitch prop and gave me instructions on how to make it.  It wasn’t too hard to make (wet formed balsa) and it works great.  Later I asked him what kind of similar prop to use for an Embryo and the pattern he recommended (7″ diameter 15″ pitch) worked well again.  Of course, matching the rubber to the prop is essential.

So I started to make this prop for a WWII NoCal where the prop diameter is limited to 7″ by rule.  I finished this prop to be used on my B.A.T. Monoplane Dimer, but was told to check the rules (one piece props only for Dimers!)

Regardless of what I put it on, here is a short segment on how I built it.

This is my first attempt on the prop for the Cessna.  Don provided the design for the fixture to set 15″ pitch.  Note the bracket at the hub to hold the prop spar (1/16″ dowel).  Also, this initial prop used an aluminum hub whereas the second Cessna prop used a one-piece spar.

For this new prop, I laid out the prop design on a plastic cup.  This is 18 degrees off vertical.  This cup is my Template – I take a second cup and slip it over this and trace the pattern on the second cup.  In that way, I do not have to continually lay out the design on a cup.

I use these cups from Walmart.  They are small.  This bag of 80 cups cost about $4.

Here is a single blade set up in a new fixture that was based on the old fixture but was designed for a fatter aluminum tube hub.  The hub was drilled for 1/32″ wire and that wire slips into a vertical tube to positively prevent rotation.  More in the next photo.

This is the back side of the same blade.  I used standard round toothpick as the primary spar.  Rather than cut the blade to fit the spar, I sanded a flat on the spar and glued it to the blade.  This method necessitated a tubing hub as shown.  The blade was very flexible, so I added a 1/32″x1/16″ stiffener to the back side of the blade.  I sanded it thinner.  The toothpick spar is being glued into the aluminum tubing with Canopy Glue.

Gluing to the cup/blade is nearly impossible, but Loctite makes a product that primes the plastic.  There is science behind this, but I won’t attempt to explain it – just know that this works.  The “Activator” is the key – I am pretty sure the glue is just CA.  Without this glue, I couldn’t glue the toothpick or the stiffener to the blade.

The finished prop comes in under 1 gram.  By the way, that is just flat black Design Master sprayed on the blades.  I haven’t yet tried this prop on any plane, but am confident that it will work for indoor models.  I anticipate having to match rubber to the prop and maybe trimming some of the prop away.


Posted in Builds, Products | 1 Comment