A Solution to DT Problems and Concerns?

Imagine a world where you’ve been flying Free Flight for years and years and, while you have had the occasional lost model, your efforts and skills do not require you to be overly concerned with flights over two minutes or fly-aways.  Such was my life until about 4 or 5 years ago.

Then something happened – I started losing models with much more regularity.  My planes were flying better and longer and were catching more thermals.  I decided to try my hand at the Dark Art of Dethermalization.  I’ve tried pop-up tails, pop-up wings, pop-off wings, and even swinging weight DTs.  And while building the DT mechanism requires planning and careful adjustment to ensure there is so little friction that the mechanism works, a bigger challenge (for me) has been “How to Activate the DT”.

In my own personal trek, I am comfortable with burning fuse DTs.  And when I say “comfortable”, I mean they are pretty easy to install, they are light-weight, and they work reliably (say 85% of the time?)  If they don’t work, it is usually because the fuse was not fully lit or that it was damp and would not hold the burn.  One problem for me has been an understanding of how long to make the fuse.  Hence, most of my flying buddies will know that when I set a DT for a 2-minute flight, it might be 3 minutes or more before the DT pops.  But I use them most often.

I have tried and tried (bench-tested) viscous DTs.  I even make and sell one.  But – and take this for what you will, even as a potential customer – I don’t trust them.  I have never felt that 85% comfort that a burning fuse gives me.  Try as I might, I cannot figure out how to set them to run for 2 minutes AND release the line.  They always either go too fast to start (but still have power to release at the end) or they do run for two minutes (but have no remaining power to trip the release at the end.  So, I do not use viscous DTs.

I have tried mechanical clock-work DTs (Tomy Timers), both homemade and commercial products.  They do work and I think they are reliable.  But again, – for me – it is a guess as to how long the countdown to release is.  While the mechanics are governed and the shaft rotates at a set rate, I am often left wondering if I have twisted in 3 revolutions or 4 – or how many.  In addition, they are heavier – 3-5 grams or more.

Now I have decided to try something new (to me) and very repeatable – an electronic timer with a band burner.

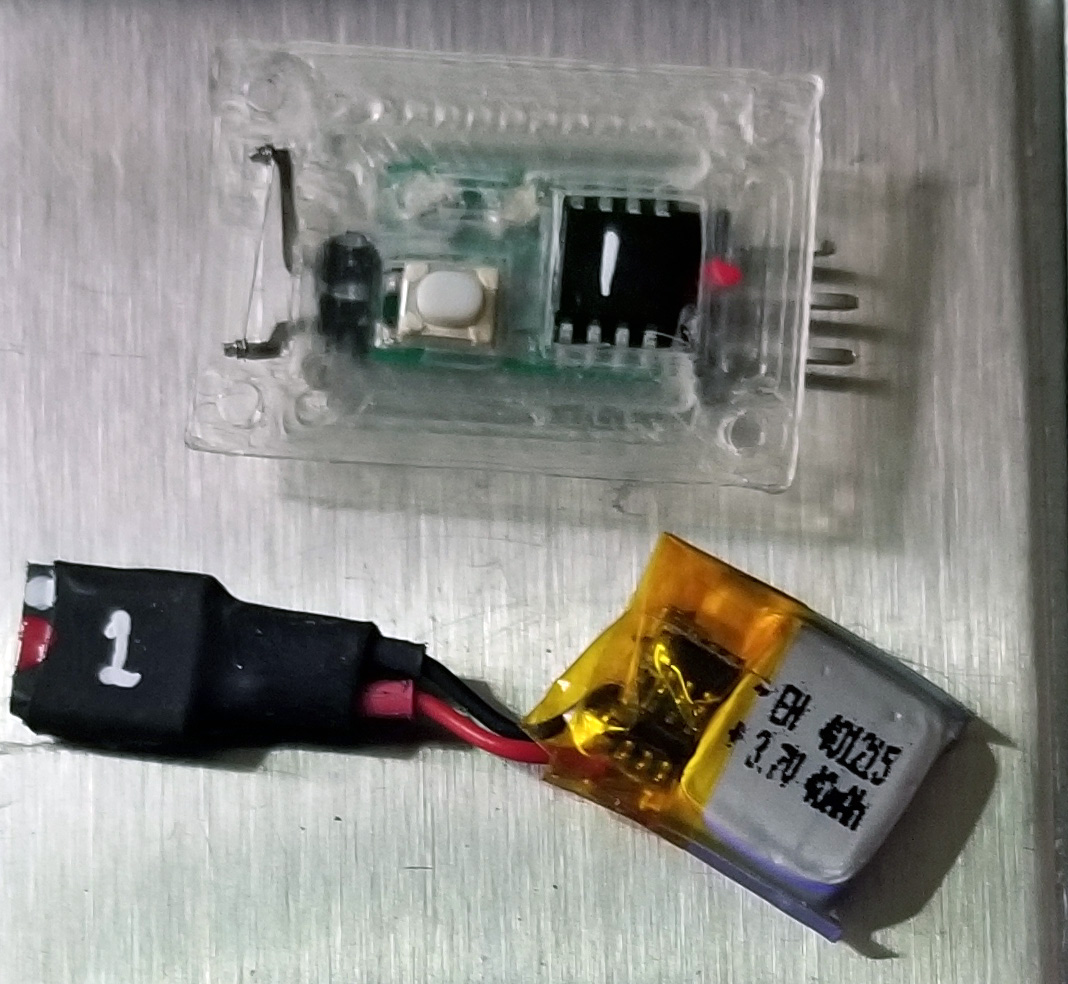
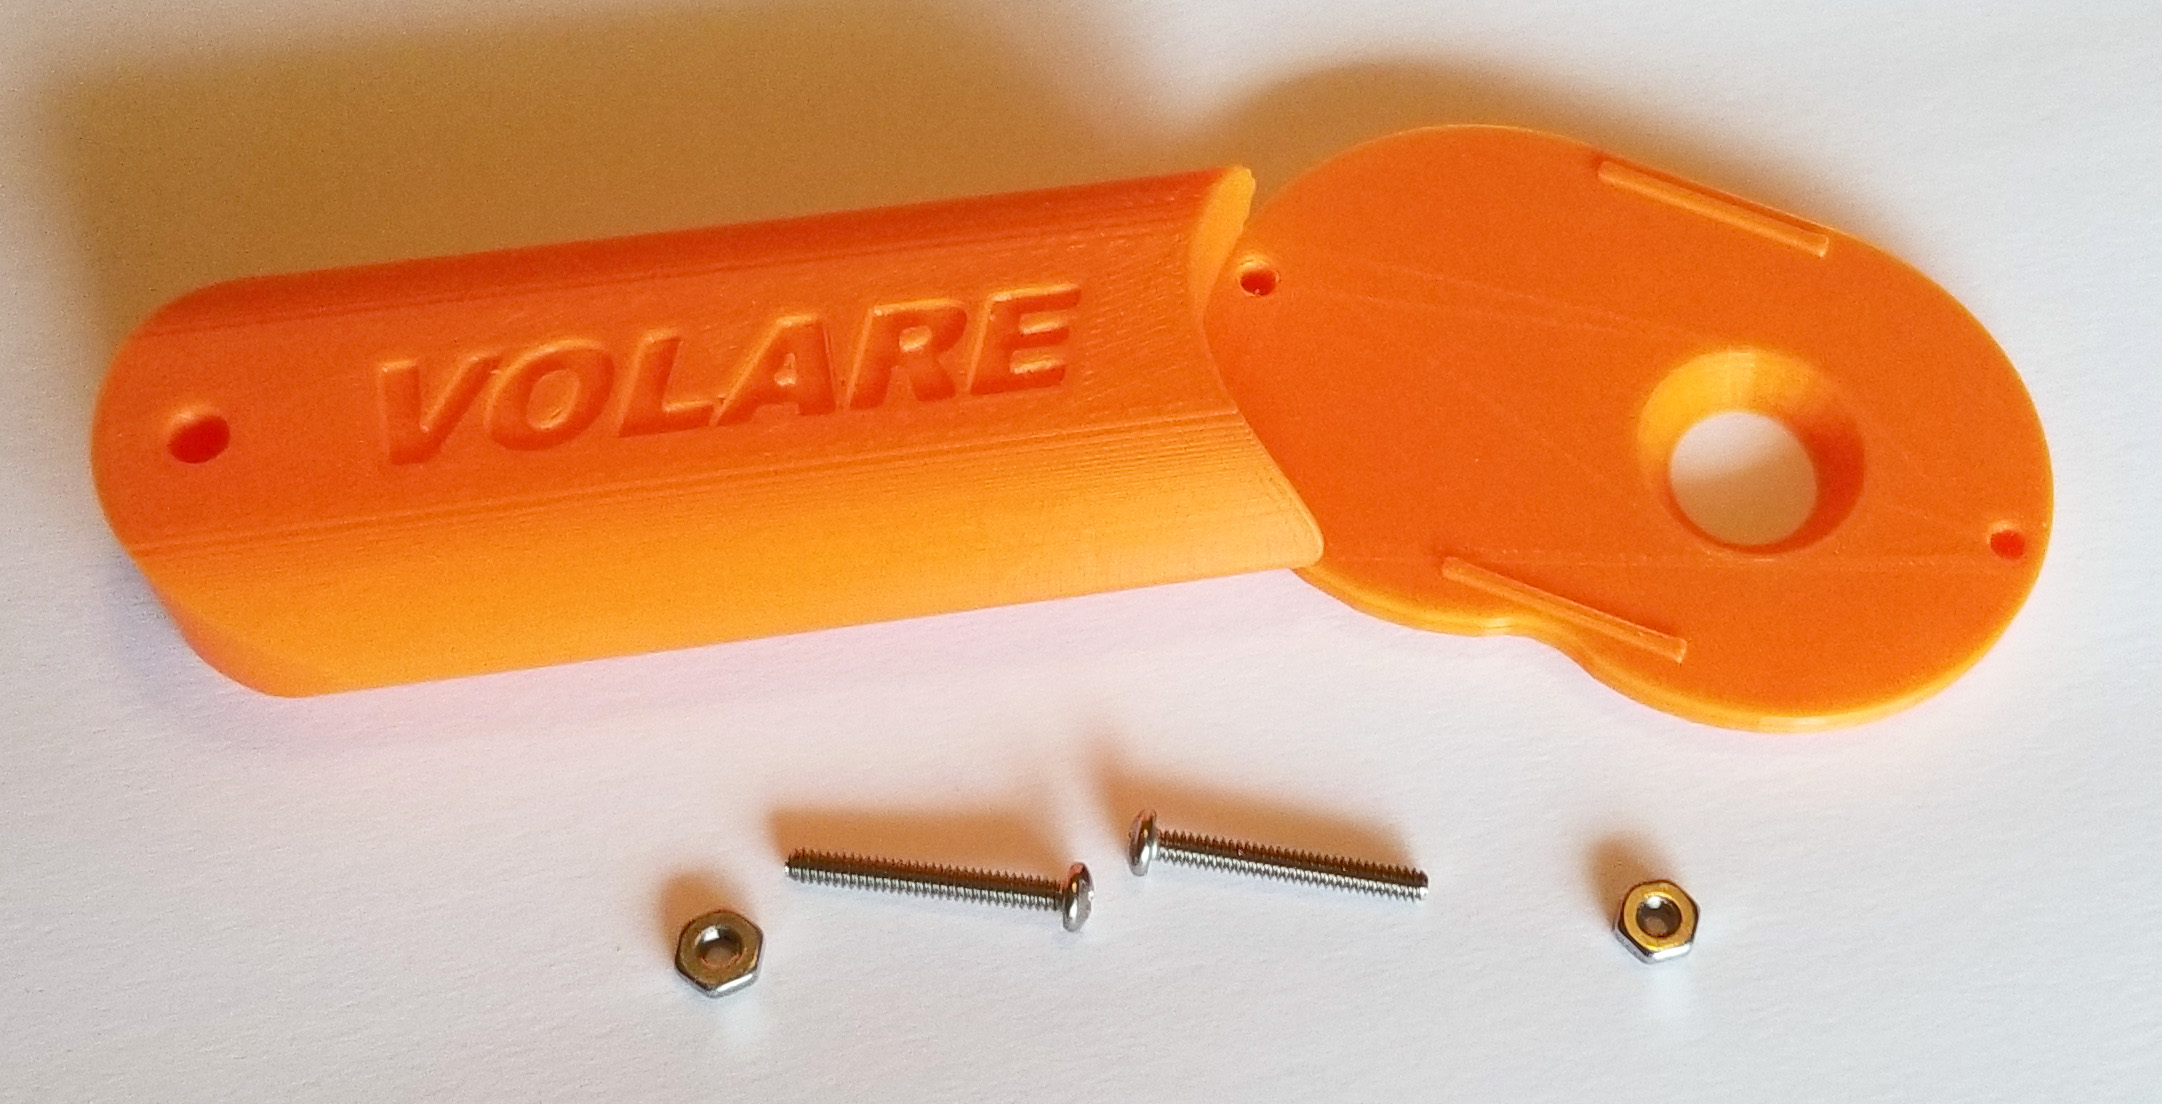
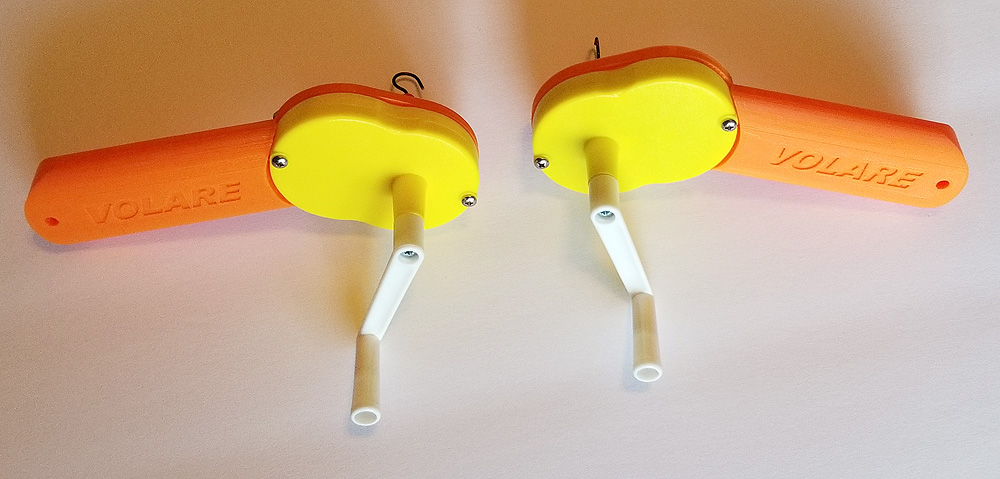
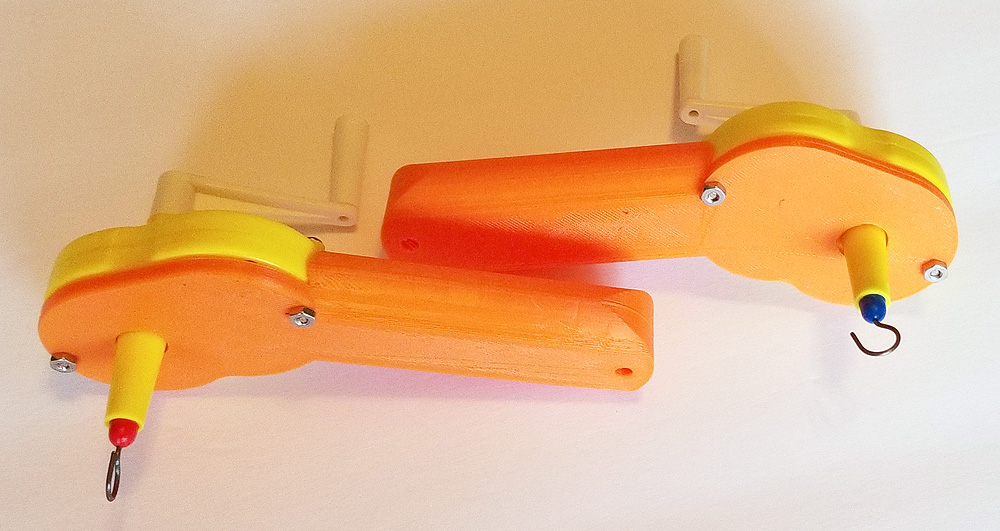
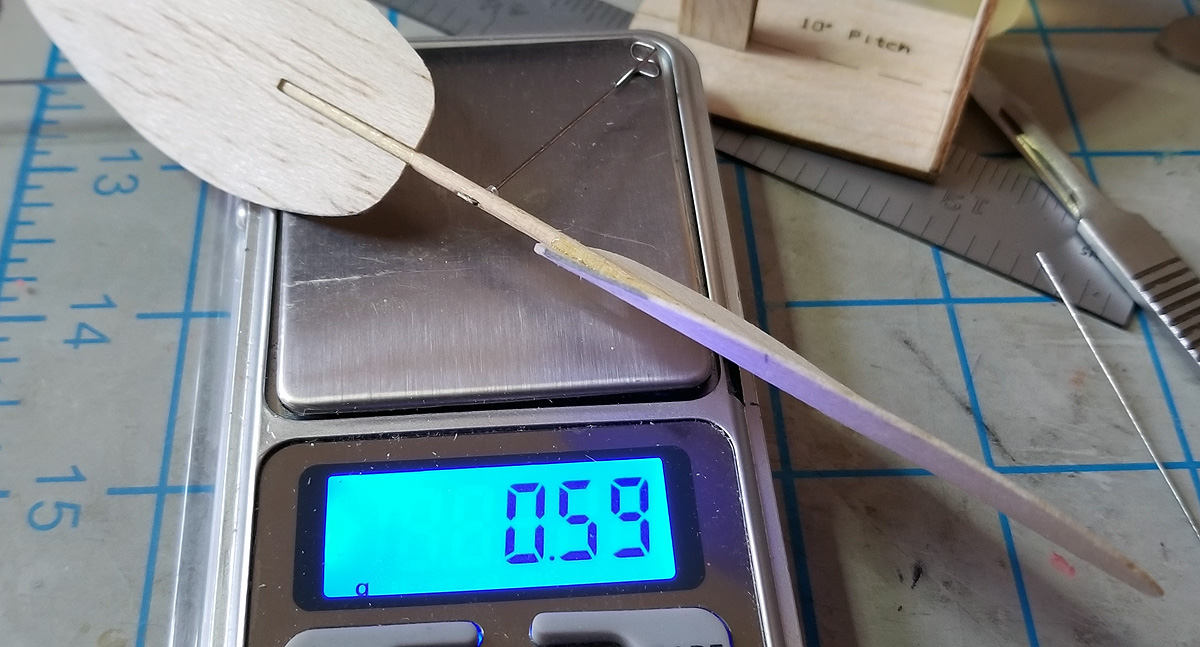
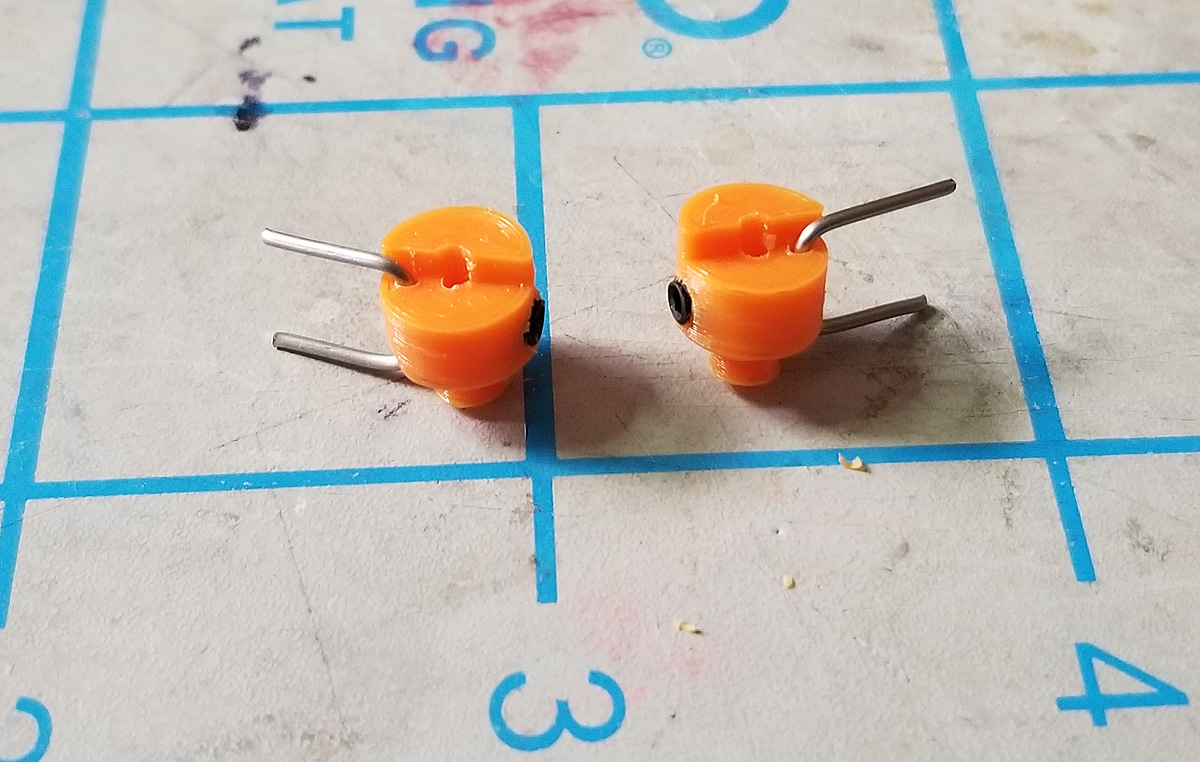
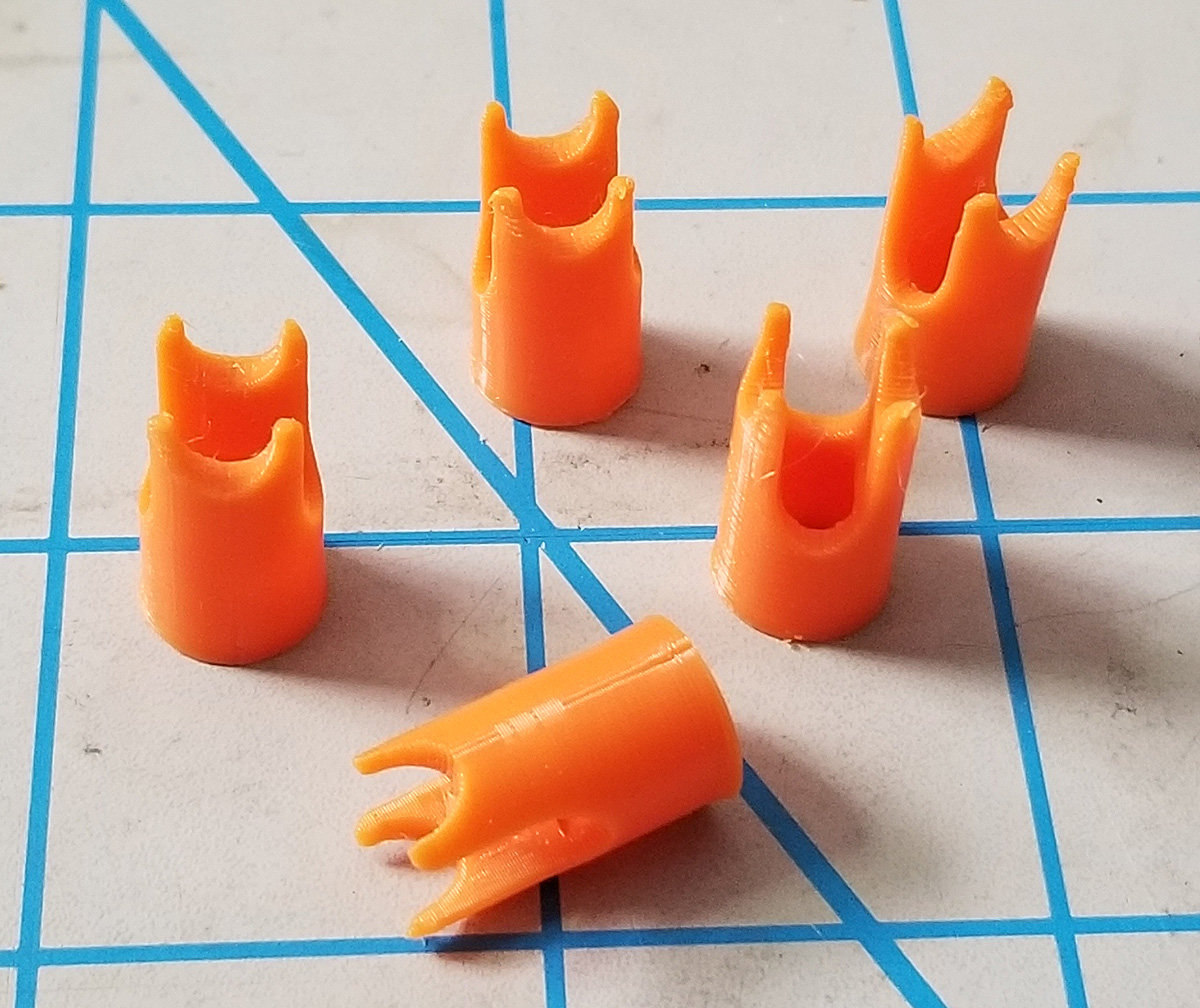
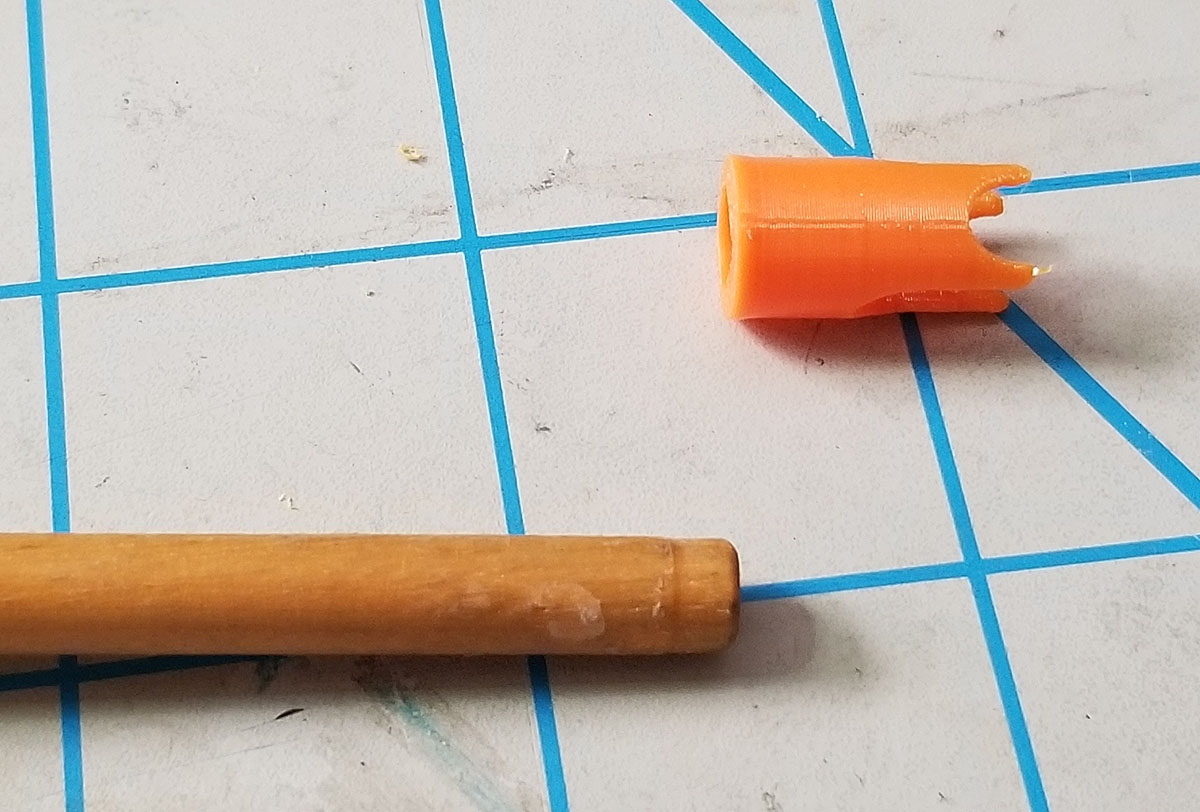
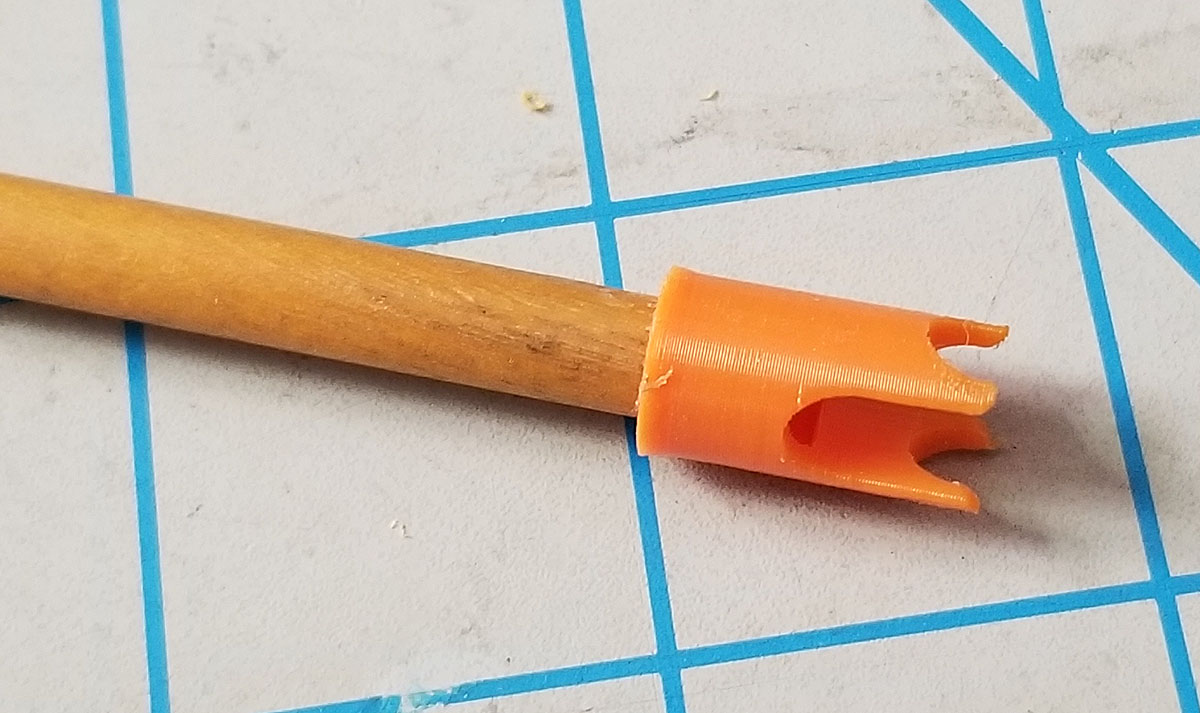
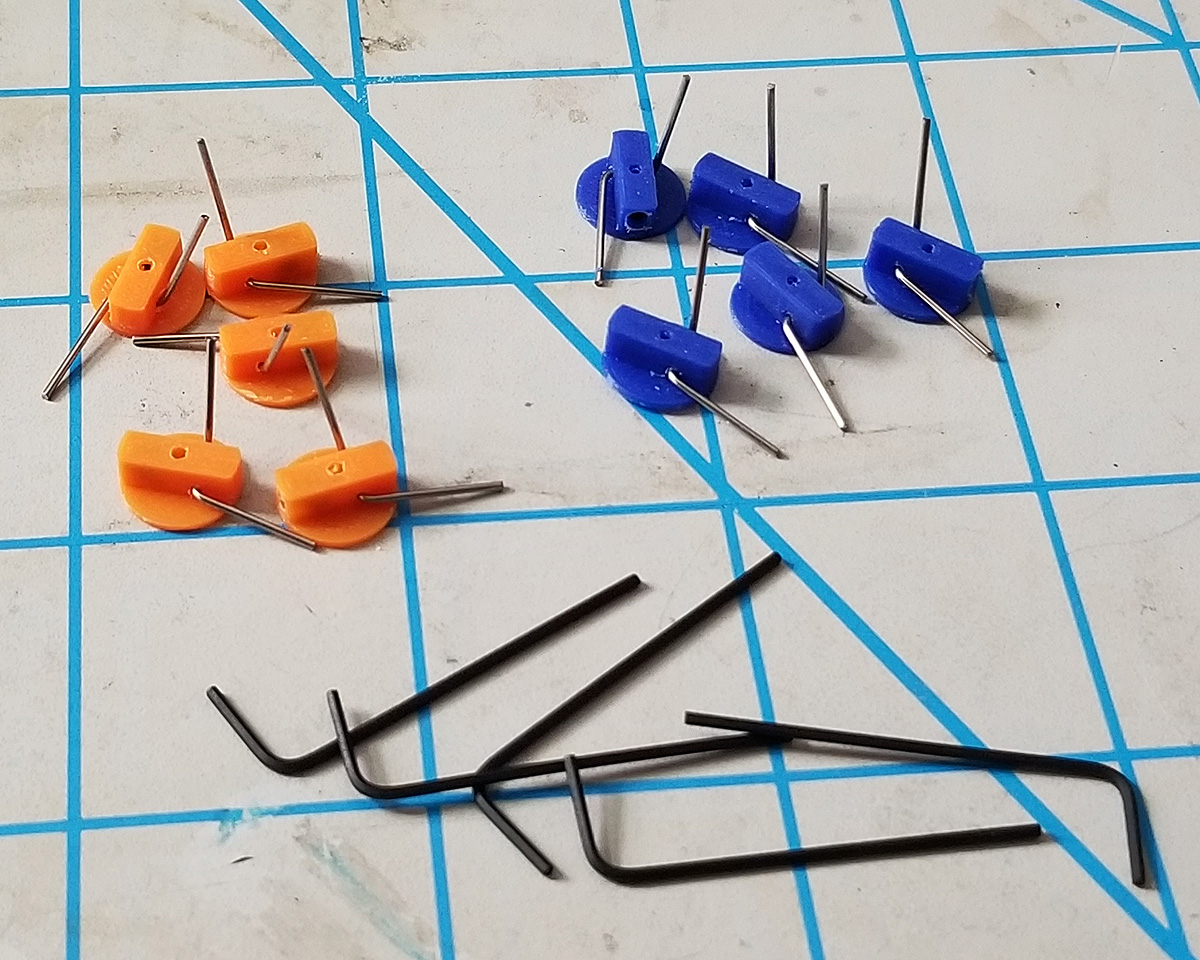
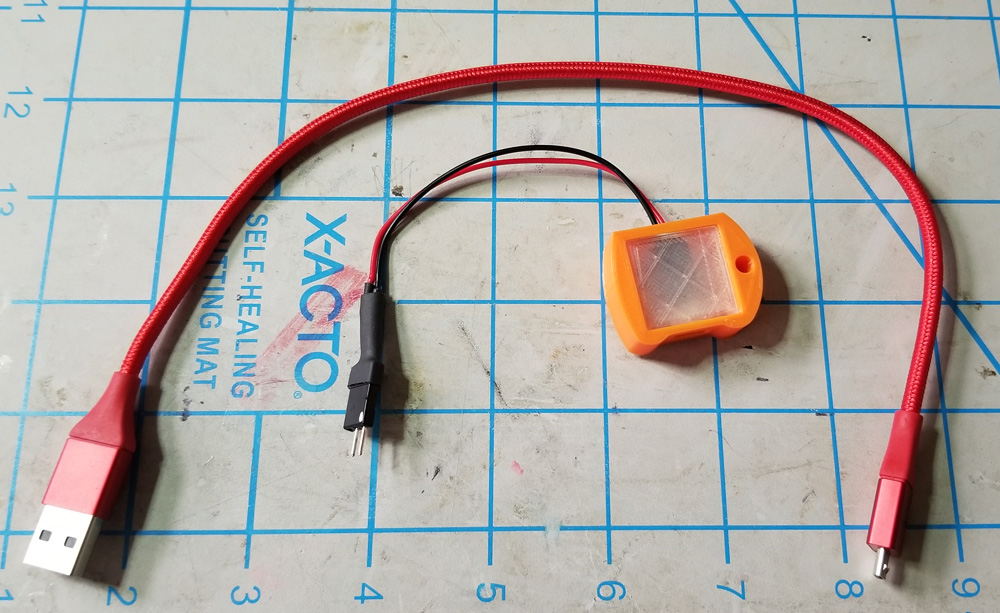
This is a small, single-action electronic DT, developed by Liav Hershkoviz and licensed to Bernard Guest of Hummingbird Model Products.  With the connectors provided (they could be smaller) and the 3D-printed mounting shell, these come in at just under 3 grams all-up weight.  (link at the bottom of the article)


I’ve decided to try these on my endurance models (where I am likely to encounter flights over 2 minutes.  However, before I mounted this in a model, I knew that I needed to come up with a charger for the tiny, single-cell LiPo 40mAh battery.  Bernard helped me find one that would not pump out too much power and ruin my little cells.  I found the AdaFruit 1904 mini-charger (link at the bottom of the article).

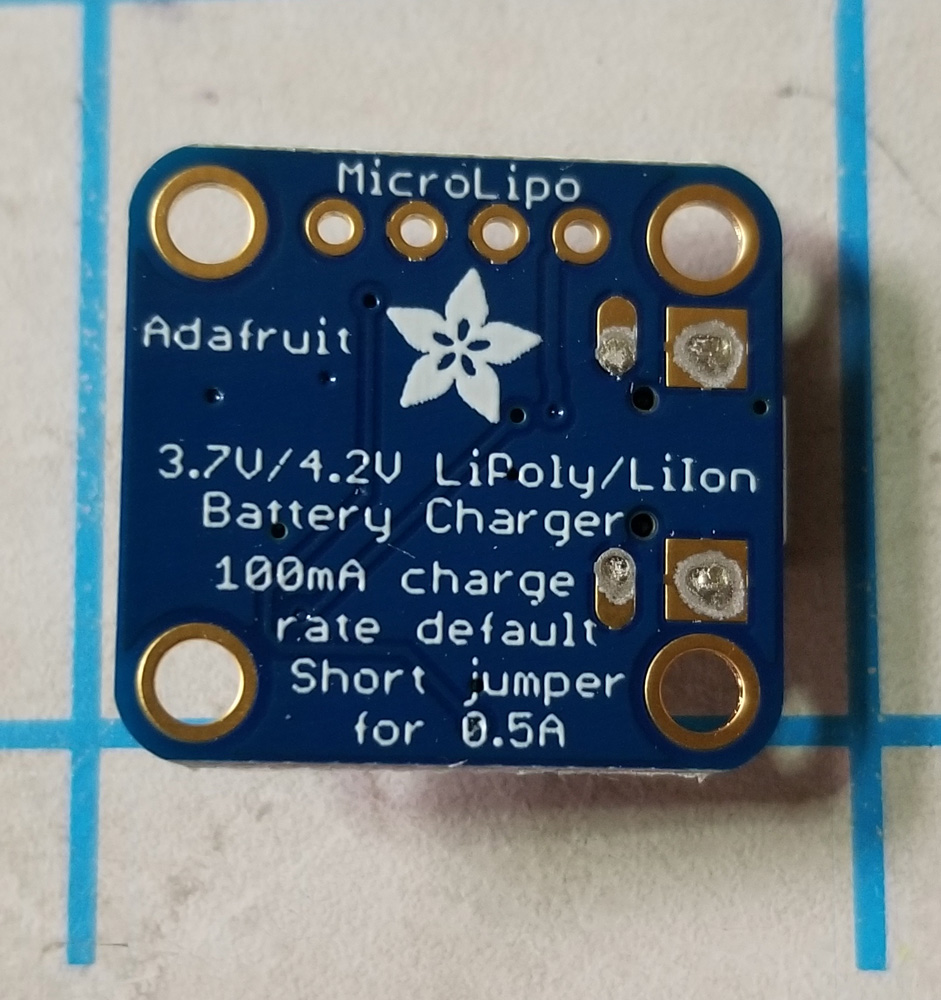
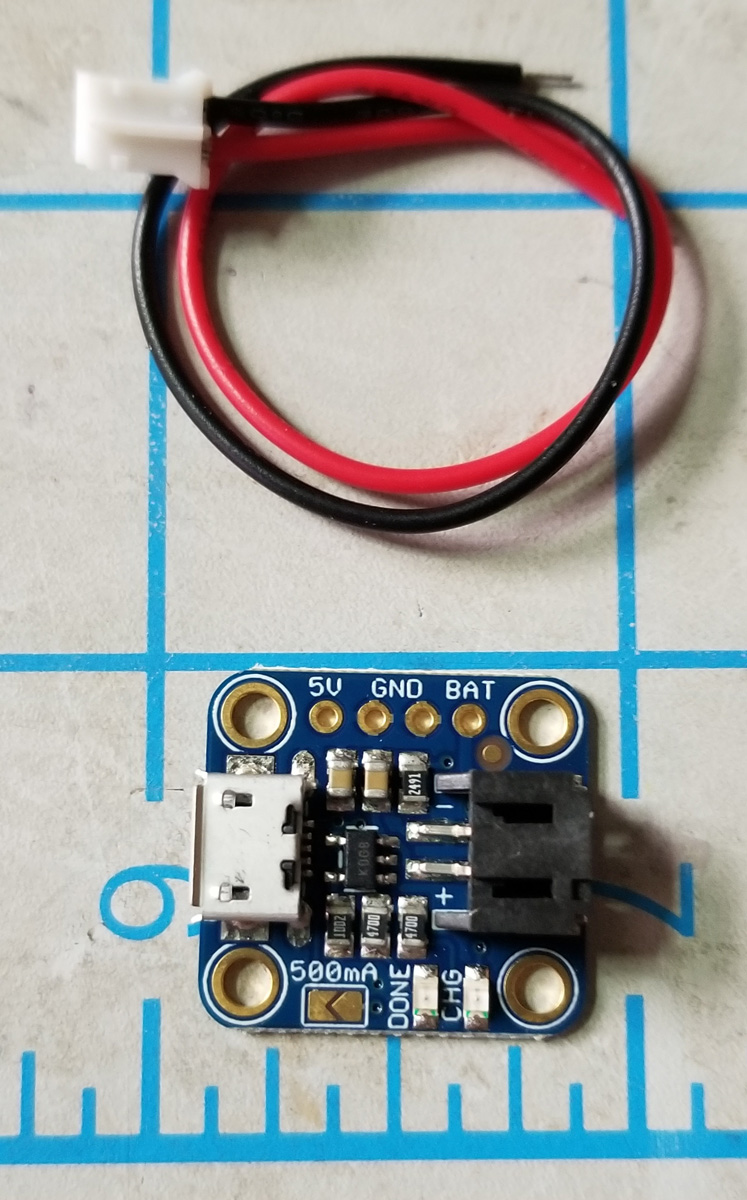
It comes as shown above, the small wire is the output.  You will need to hook up a plug to match the pins on the battery.  The connectors you choose are really up to you, but if you buy the batteries from Bernard, they come with a “standard Futaba servo plug”.

One of the nice things about this charger is that it runs on USB power and the power input is from a USB-Micro plug.  This matches my plans exactly – because I wanted USB power so that I can just use a phone-charger-battery at the flying field, if I need to recharge these tiny batteries.

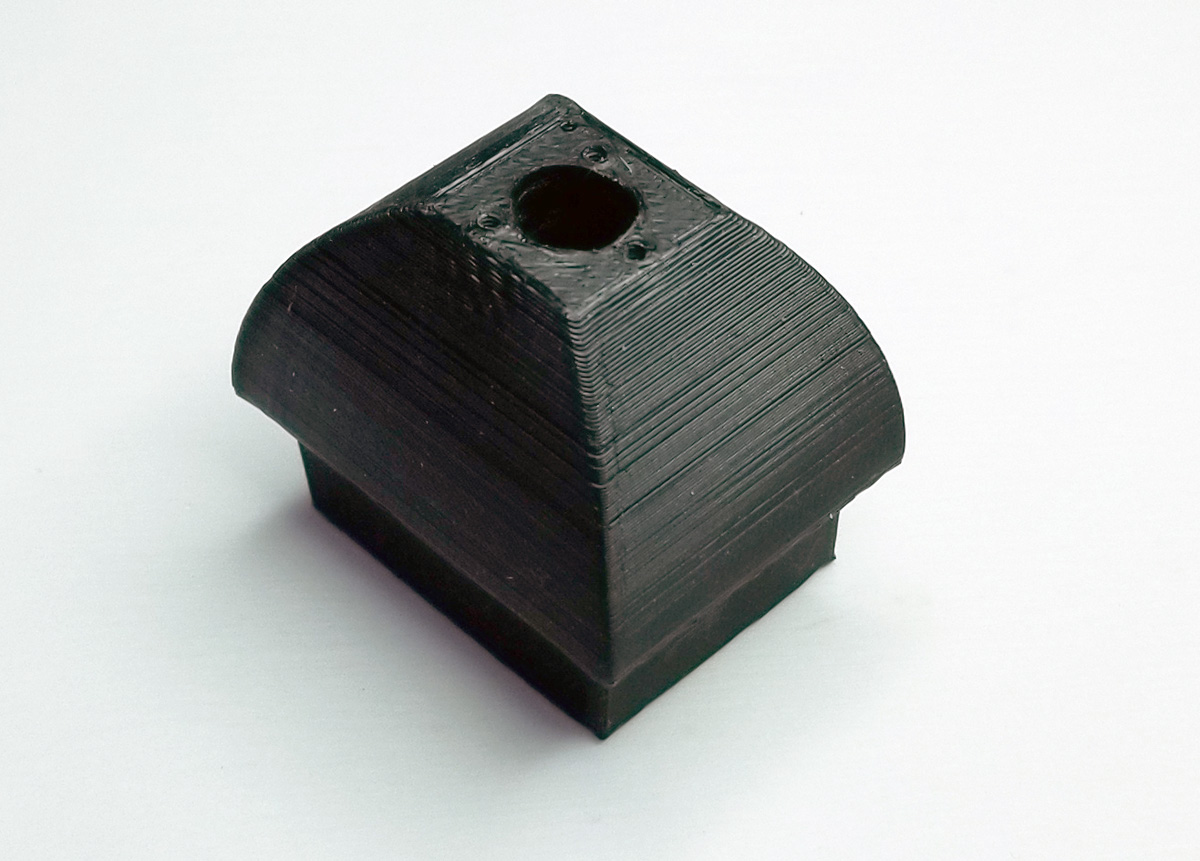
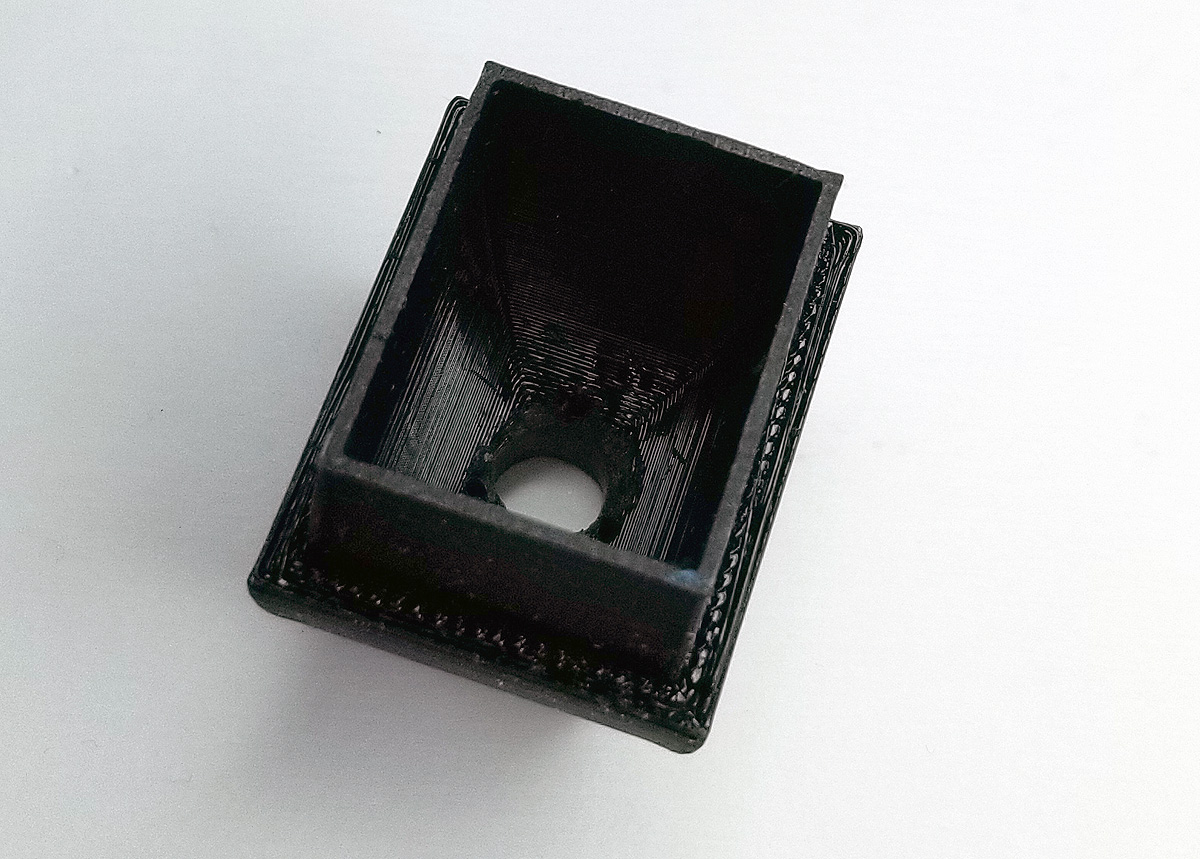
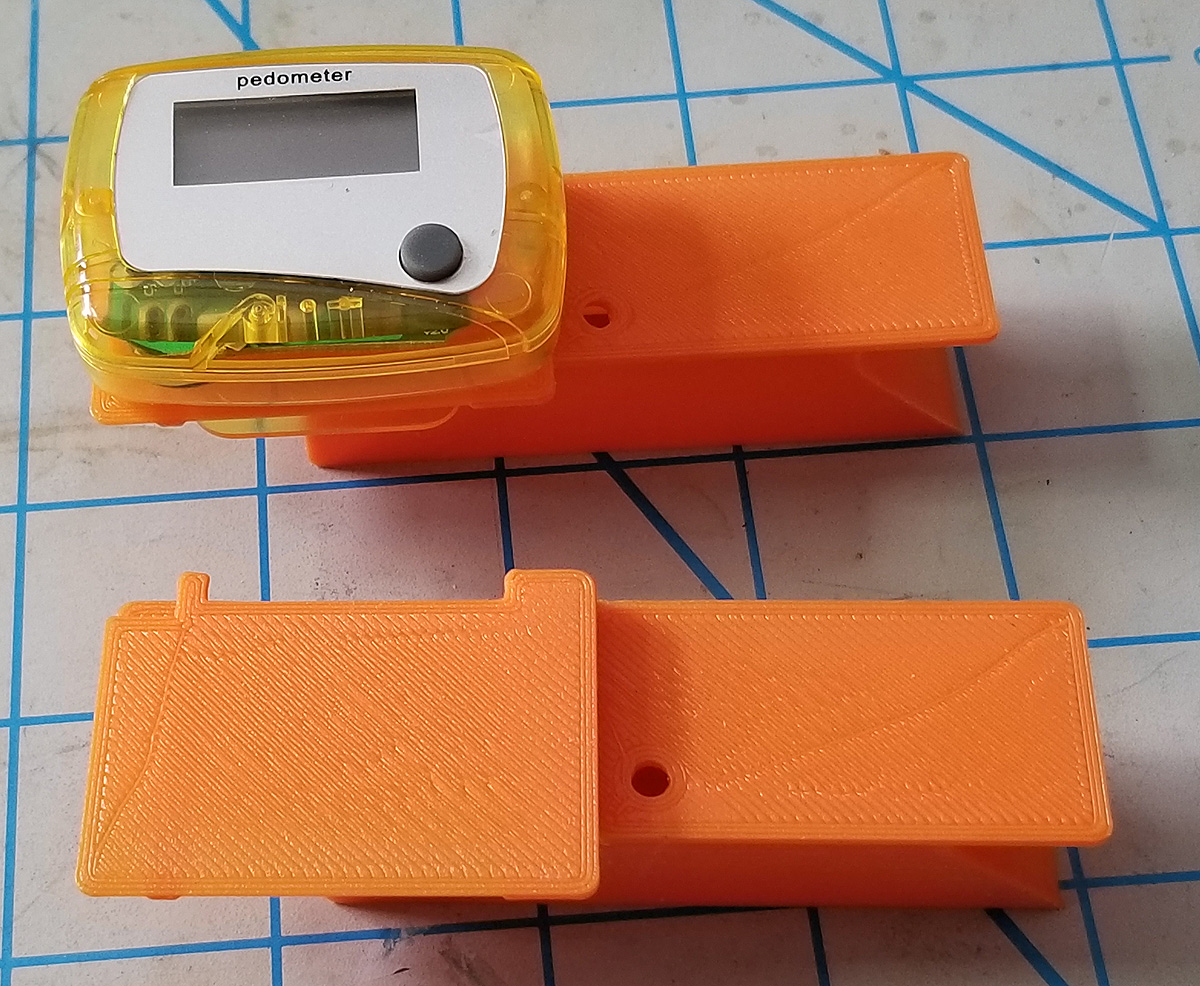
But, this tiny board is open to the elements.  While I don’t plan on using this in the rain, I want something that will protect the board from abuse and short circuits.  I found that someone has designed a 3D-printed case on Thingiverse (link at the bottom of the article).  I downloaded the files and printed out a case.  I bought some “clear” filament, too, so that the charger LEDs can be seen through the case.

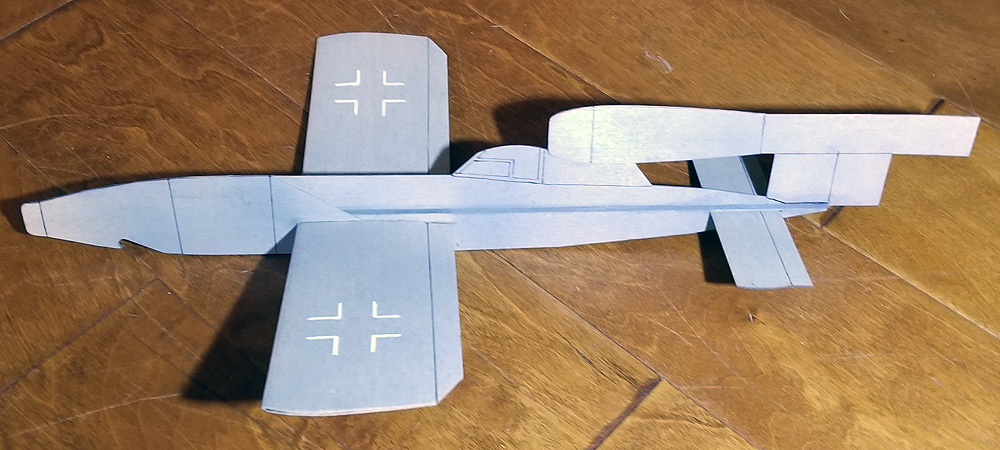
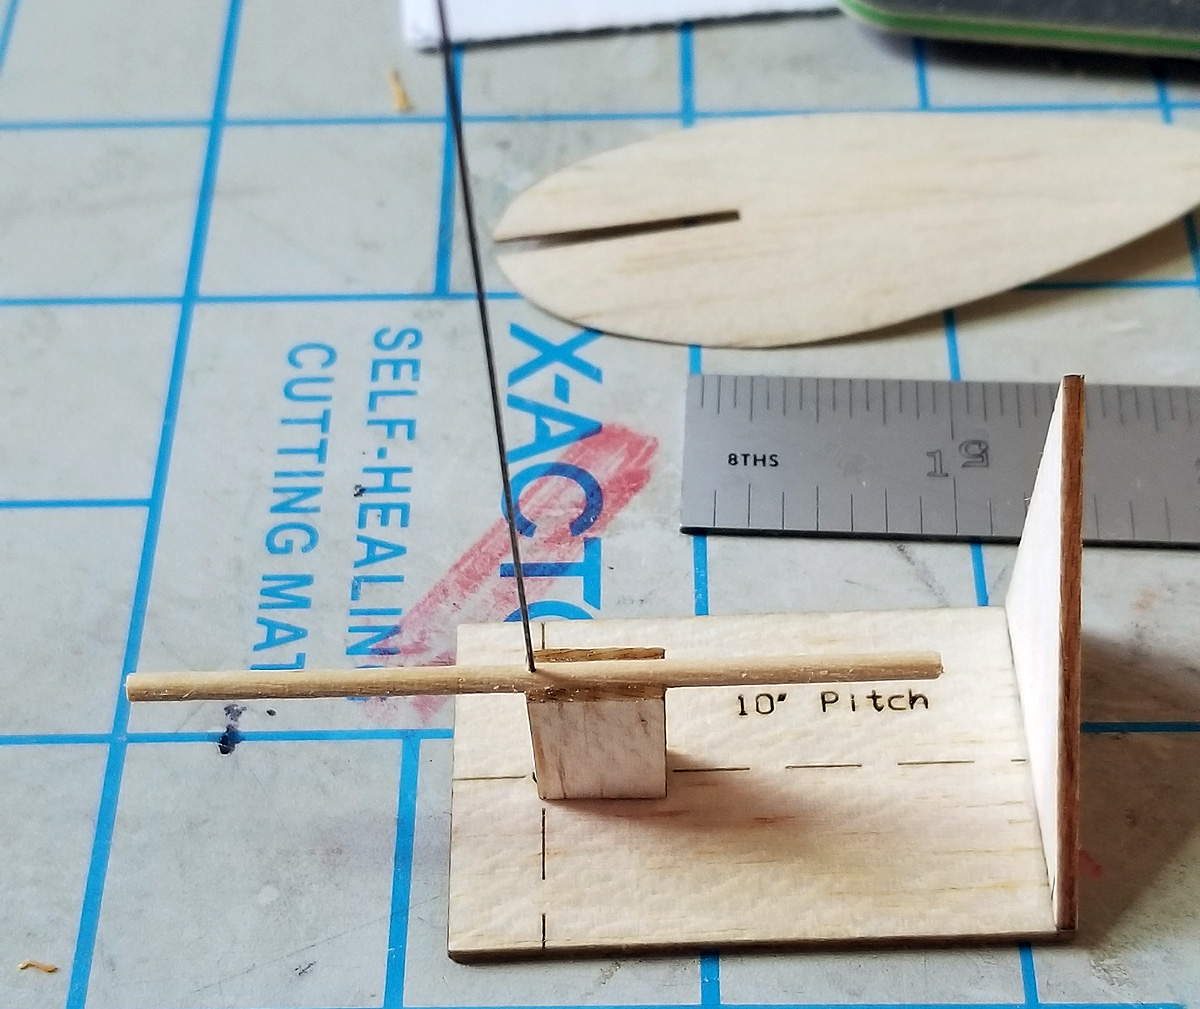
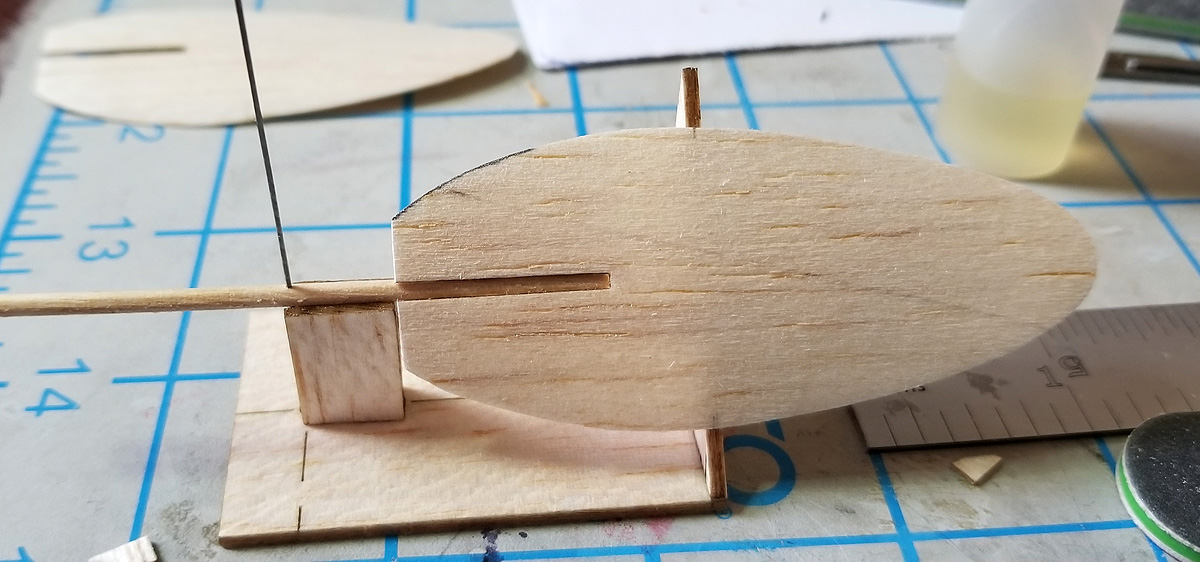
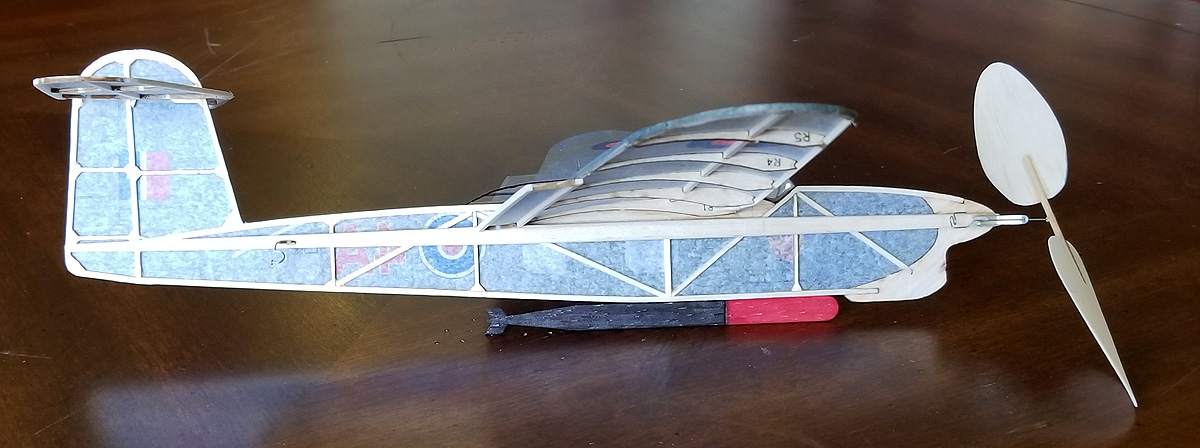
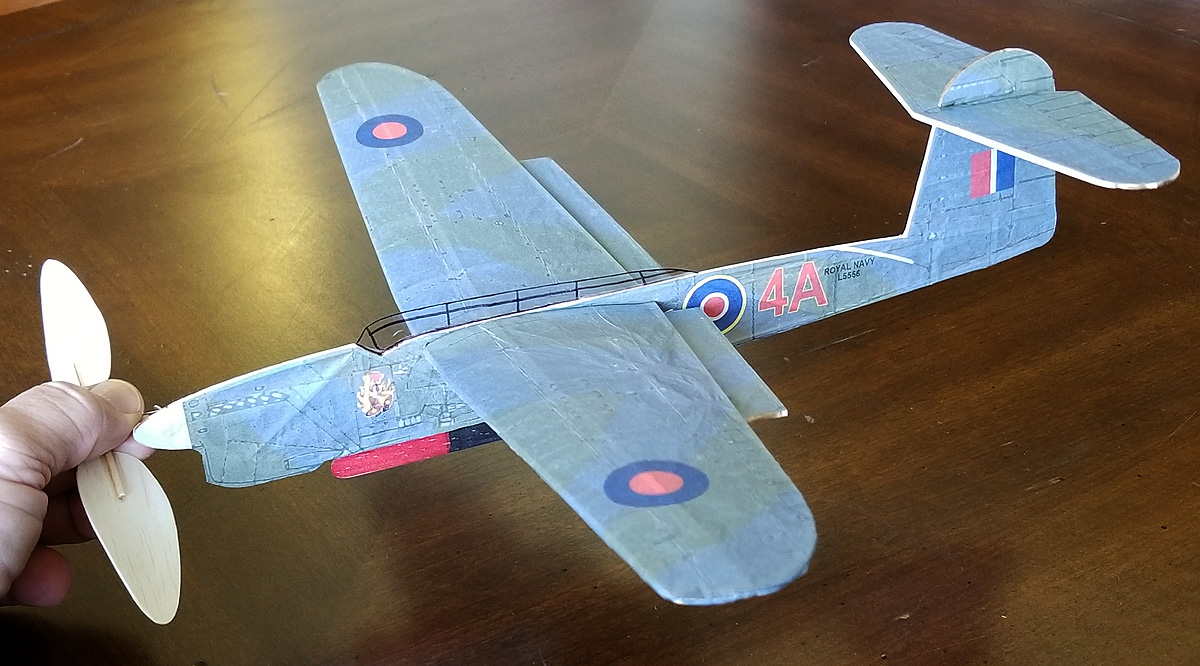
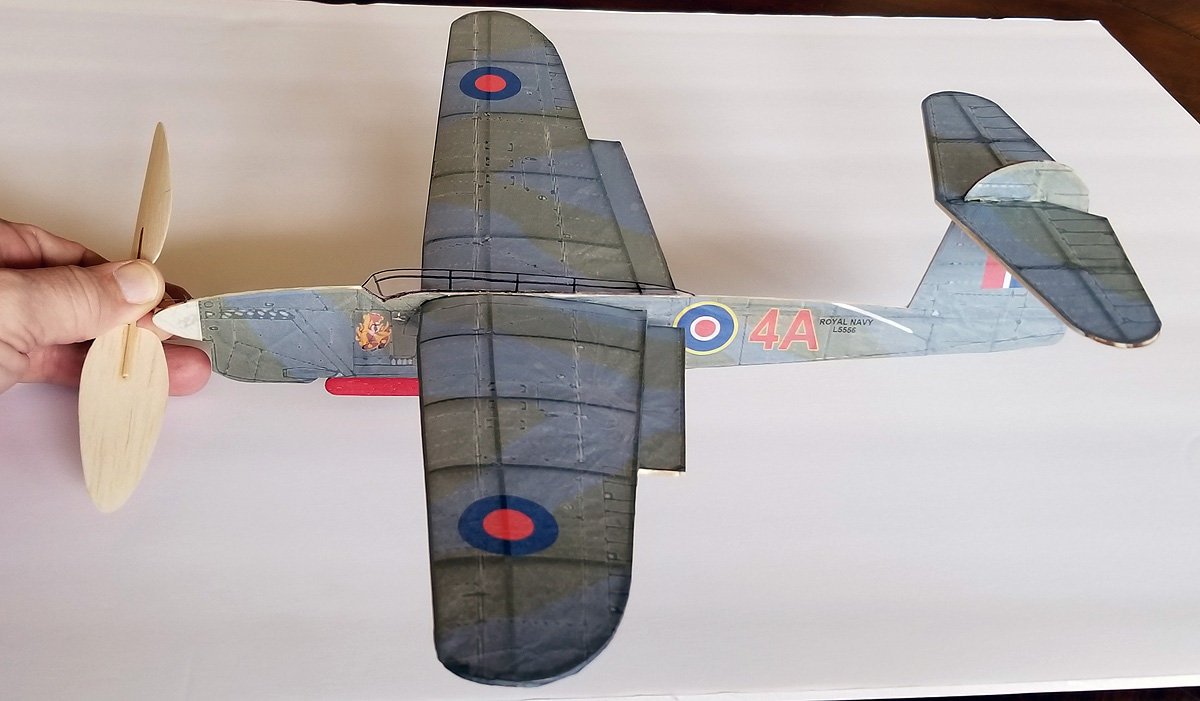
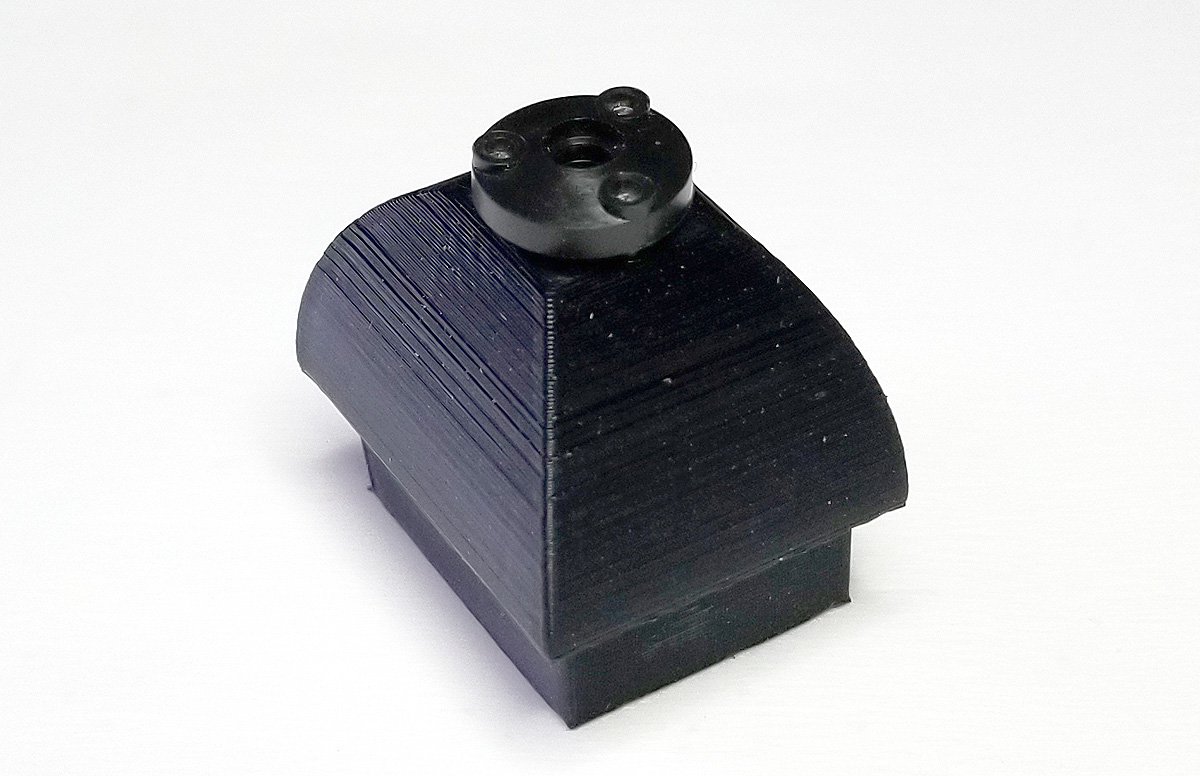
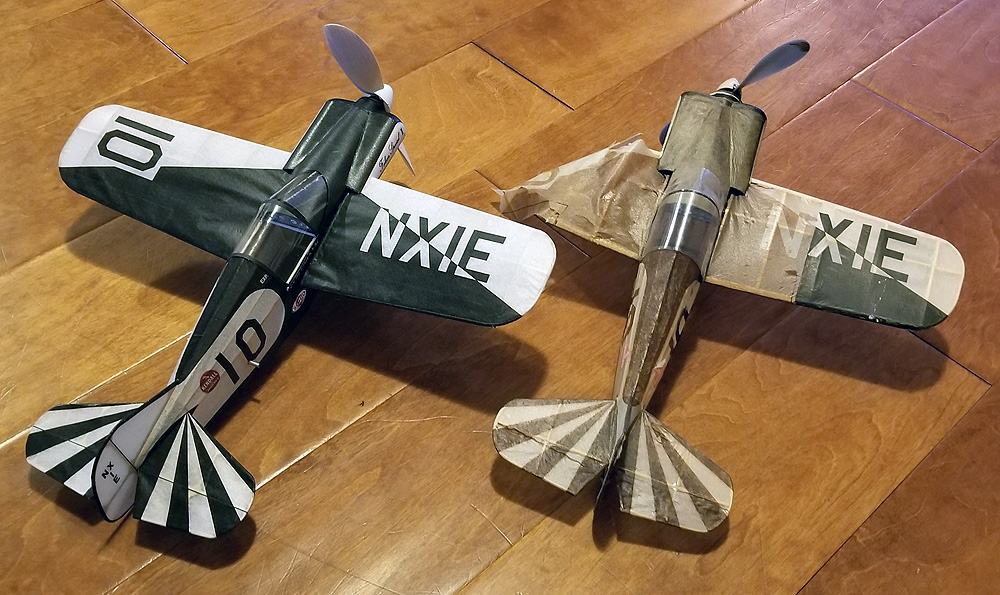
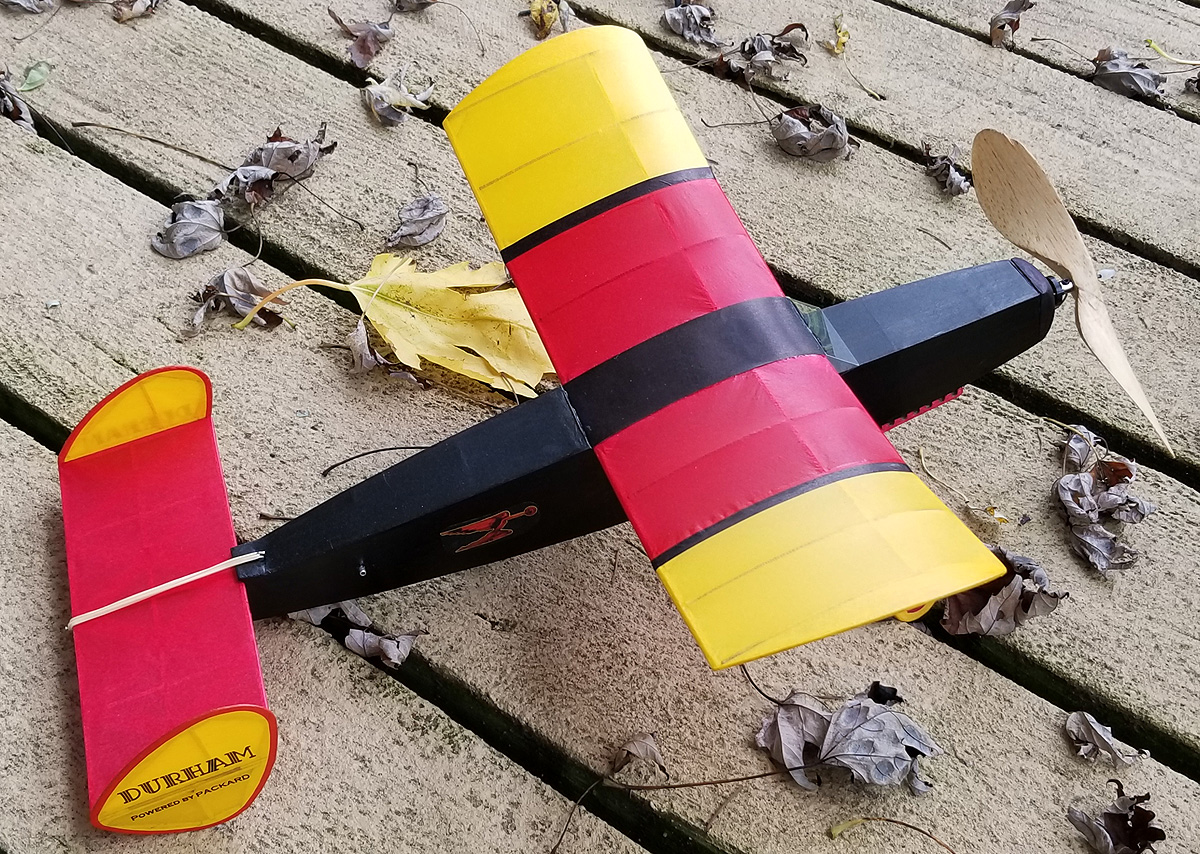
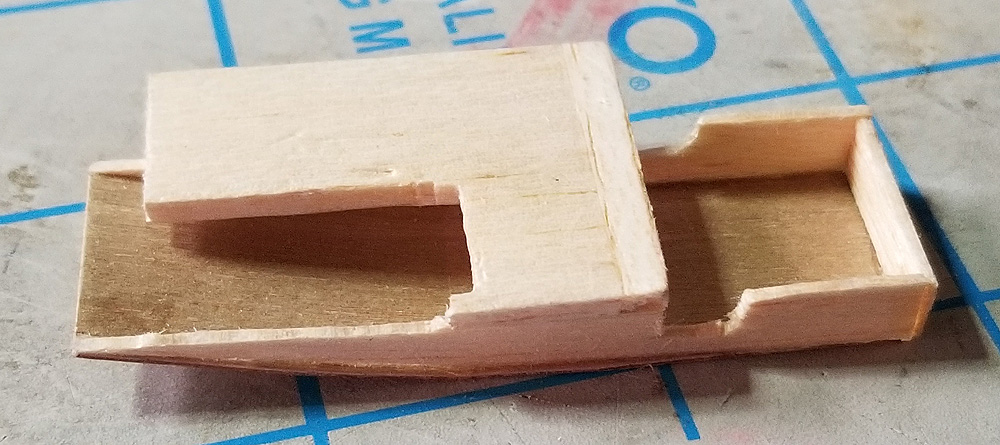
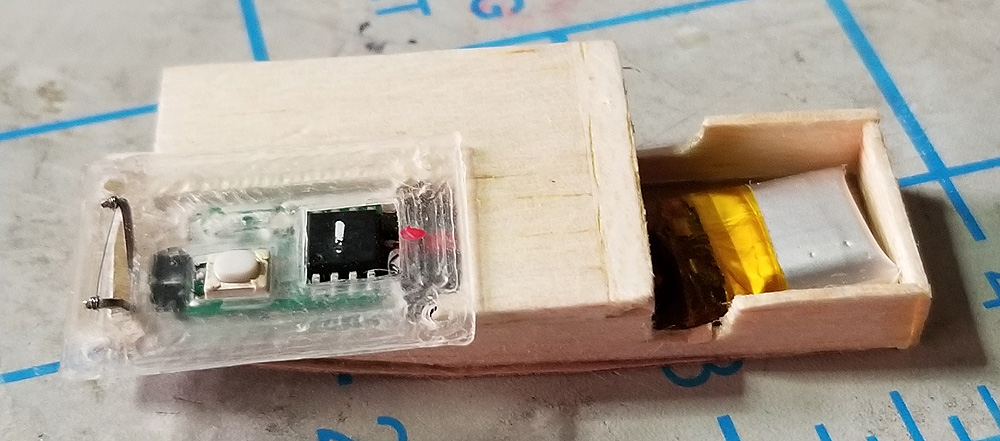
I decided to do my first install as a retro-fit into my Jimmie Allen Sky Raider (I had a home-made clockwork timer in there).  I removed the old timer and installed this one.  I built up a support for the board and then a cover for inside so that the board and battery were protected from the rubber beating on them.

After programming the timer (video link at the bottom of the article), I confirmed the operation.  I even made a video so that you could see how this operates.  Here I have it set for 15 seconds, but will probably go with 2:15 for my flights.  Once the time is programmed in, you just need to turn on the timer and activate it.  It will always kick at that time.  Here is the demo video:

Hummingbird Model Product Band Burner DT: https://hummingbirdmodelproducts.com/timers-for-free-flight/tiny-band-burner-timer

Liav’s Timer Programming Instructions: https://www.youtube.com/watch?v=vlEIlWheRuk&t=1

AdaFruit 1904 Charger:  https://www.adafruit.com/product/1904

Thingiverse AdaFruit Case:  https://www.thingiverse.com/thing:2758551


Posted in Builds | 1 Comment

Never a Dull Moment

It been just jam-packed around here.  Spring has finally come, although we are still trying to shake loose old man Winter (snow last Sunday).  I’ve been feverishly packing orders for all of you (all that have ordered).  I took a trip over the weekend to the Prop Factory and talked to my parents – and brothers.  I am heading south again this weekend.  It just seems I cannot catch up!

Spring is definitely here.  Daffodils have popped out locally.  Wildlife is appearing – turkeys, deer, and Sandhill Cranes have been seen in the back yard, not to mention all sorts of songbirds, chipmunks, and squirrels.  I love watching Mother Nature, especially those big birds.

Today, I took a little time and repaired three indoor planes before out last local indoor contest of the season coming up this Thursday.  I replaced a missing strut and patched a tissue hole on the BAT Monoplane.  I replaced a missing strut on the Stout 2-AT, but more importantly, replaced a section of broken leading edge and patched the tissue on that bay.  And my Turbo Cessna 195 suffered several LE and TE cracks – I hope it still flies.

After that, I took a flying break.  It is warm and calm enough outside that I took out some old Jet Cats.  I had built a super light (for me) T-37 Tweet that never flew up to expectations – well, never flew well at all.  It won’t fly ever again after today as I snapped off the tail – again – on a nose-in landing.

I took that back inside and grabbed another that had been relegated to shelf-sitting – my Fieseler Fi-103.  I built this a year and a half ago as an indoor model.  It has always been tricky, but it managed to win its first contest back in 2017 and I have always believed the design has potential (if not this model).

The fuselage was warped with severe bend right at the leading edge – the result of a few too many hard nose landings.  In case you don’t know, there is a tremendous amount of snapping force to the side on some of these landings.  As I said, the Tweet’s tail snapped off and this one had a big crack in the front.  I squirted some thin CA on it and held it straight and went outside.

right after building in Oct 2017

Jet Cats are a mystery to me.  But I persist.  This one – as all of mine usually do – required a bit of tweaking.  But by removing a touch of clay off the nose and adjusting my launch, I was starting to get some really good flights in my tight back yard.  Unfortunately, the launch would be a nice right-handed climb into a transition to….straight away, with little turn.  All this is on one loop of 1/8″ – half the rubber I would use in a larger space.

I took of about half the clay on the right wing tip, hoping to allow a left turn and walked upwind (up-breeze?) and launched.  The thing did its very pretty arcing power flight and settled into cruise about 50 feet up.  There was a little left turn, but not much.  But it did come around and headed for the row of arbor vitae that lines the back yard on the north side.  I know it was about 50 feet because that is the estimated height of these trees – and it flew over them.  I saw and heard it hit the huge old maple tree between the arbor vitae and the house.

I walked around and found my plane – parked as pretty as you please way up in that maple.  I looked at it for quite awhile as it is up higher than I can do much about.  I even got out my 35′ pole and lifted it as high as I could and was at least 8 feet short.  It is resting on two small branches at the nose and tail and pointing into what little breeze there is.

I am sure it will fall out sooner or later – but will that be before or after the rain comes?

I guess it is time to build a better one.


Posted in Builds | Leave a comment

8thYEAR – Discount Code plus another New Product!

It’s that time of year again! April 1st starts our 8th Year. Take advantage of a 10% Discount on ALL products on the web site by using this code during checkout: 8thYEAR (copy and paste for best results). The discount is good until 15 April 2019.

In addition, here is another New Product!

My latest 3D Printed Product – a handle for the K&P small winders. Comes in Right or Left configuration. Buy a winder at the same time and I will refund $2! Comes with two screws and nuts.

Posted in Customers, Events, Products | 2 Comments

New Products for March

It never ends here in rural Michigan.  I’ve finished up the Falcon Special II Short Kit and have a full range of 3D Printed Stuffer Stick Ends and matching Bobbins. Stuffer Ends are sold as singles; the Bobbins are sold in pairs.  Or buy the Combo (1 Stuffer End and a pair of Bobbins) for a reduced price!

All short kits and 3D Printed items are small batch – made on demand.

The weather seems to have broken and Spring is here (we hope!).  Soon it will be Outdoor Season again!

Posted in Products | Leave a comment

A Busy Day!

Today seemed like work, work, work – with no stopping.  I packed orders and got them out the door, but that is nothing new.  Today, I…

  1. designed and laser-cut and built a formed blade pitch jig
  2. designed and 3D printed clutches for reverse operating props (several iterations)
  3. finished up a replacement WWII NoCal
  4. designed and 3D printed a test nose block for a Wanderer

Here are some details

1.  for my new Fairey Barracuda NoCal, I built a formed prop at 6.5″ diameter and 10″ Pitch.  I drew up parts for a fixture to set the blades at 10″ Pitch

2. A customer wanted clutches for a pair of counter-rotating props.  Our Superior Props Clutches are machined out of aluminum and only work for “normal” rotation.  It would take quite a bit to make one for reverse operation.  I had experimented with 3D printing a clutch and had some relative luck, so I thought I would try to create a pair.  On my fourth design, I feel I have conquered the issue and have a workable pair:

3:  Last Thursday, I lost my great-flying Fairey Barracuda NoCal – it got stuck in the rafters at the flying site and will likely never be retrieved.  So I built another one over the last couple of days.  Notice the color differences between the old model and the new.  I discussed coloring when I talked about rebuilding my Peanut Barracuda.  The old colors were sampled off a 3-view.  The new colors are actual RGB equivalents to Fleet Air Arm colorings.  These values can be found online.  So the NEW colors are “right” – in fact, while covering, I remarked to myself that they reminded me of color photos of Spitfires from WWII.

the last photo of my old Barracuda – taken in February

finished weight of the new one (unbalanced) – rules require a minimum of 6.2 grams.

backside structure – including laser-cut parts and tapered motor stick.

the colors are hard to show

here it is on white

4.  I am mentally preparing to rebuild my Wanderer or build a new one.  One of the problems I had with the old one was the balsa nose block – the Gizmo Geezer thrust button smashed the balsa on several hard landings.  I wondered if I could print one.  Well, I could – I designed and printed one today.  In order to prevent redundancy, I reproduced the “bottom” part of the GG nose button into the nose block.  We’ll see if I can use it.

Posted in Builds, Products | 2 Comments

New Blog Article – Peanut Falcon Special II

I wrote up a LONG article on my new Peanut Falcon Special II, complete with all the Build photos and an old editorial written by Russ Brown from the Cleveland club.  I have the article posted as a “page” rather than a “post” (this is a post) so that it is always available for reference.  Find it on the blog menu bar above under “Galleries/George’s Models/ Peanut – Falcon Special II”.

Or just click this link.  Peanut – Falcon Special II

Please read it; it is not just about my build, but it is a tribute to one of my modeling mentors.  Maybe that is why the old model was so special to me.

Posted in Builds, Products | Leave a comment

Winter Update – New Tech, New Stuff

Winter = Wow.  I have been slammed with orders this winter, more than past winters.  This is good (for business) and not-so-good (for my retired life/building/spare time/etc).  Toss into that mix mandatory family time/issues, a visit to the Prop Factory in Ohio (my parents’ house), and helping our sons open their brick and mortar coffee shop.  To give you a clue, I haven’t worked on any building for over a month, like five or six weeks.  And no airplane plans work for almost that long.  It’s all stalled!

But, I’ve been working.  I finally took the dive into 3D Printing.  I got myself an Ender 3 Pro.  It is not the biggest or most complicated printer, but it was a great price and I could start working on it right away (given some advice from Brian Bartnick – thanks Brian!)  The learning curve is what I expected – steep.  I am pretty proficient at CAD in 2D (see my plans), but 3D is a different world.  Fortunately, my CAD Program (TurboCAD 19 Deluxe) has 3D built in.  However, it is limited.  And self-teaching myself stuff is limiting, for sure, but I am getting there.

Given all that – guess what?  I have some result (New Products) to share with you.  These will be online very soon (hopefully today).

Here is the first thing I designed.  Brian actually printed the first one for me.  This is the end for a small stuffer stick for small models (think Peanut and Dime).  I have been making mine out of ply for years (starting with kits sold by Greg Thomas) but this will work better.  You slip this on to the end of a 1/4″ hardwood dowel of your desired length.  You might need to sand or taper your dowel, but maybe not.  And you can choose whether you want to glue it on or not.  $2 each.


The next product is really an update.  My Rees Counter was made from 1/32″ ply and I struggled with EVERY ONE of these that I have built and sold.  It took me quite awhile to get this built in 3D CAD, but from now on, you will receive a plastic one, should you order.

And lastly, here is another update – to a brand new product:  the Boehm Freewheeler Clutch.  Chris Boehm designed this and my dad has been machining them from aluminum bar stock.  I will be relieving him of this task as I can now make these – and I am offering two sizes:  the original 0.047″ shaft size and now 0.032″ shaft size.  The BEST PART about these?  They are HALF THE WEIGHT of the aluminum version!  These are the lightest add-on clutches available – they are 0.25 grams each – and that includes the metal wire bail and the 2-56 set screw.  But there is a VERY IMPORTANT NOTE:  you MUST grind a notch on your prop shaft for the set screw.  These delicate threads are now cut into plastic and you will certainly strip the threads if you really torque down on the set screw.  $4 includes 1 clutch assembly and 1 Allen wrench.  If it is not clear, these mount on the prop shaft between the nose block and the prop.  They drive the prop from behind and are positively engaging – they will automatically re-engage should the rubber encounter a hiccup (like a momentary bunch of rubber).  Orange is 0.047″ and Blue is 0.032″


Now, looking at the calendar, spring is just around the corner and I have to prepare for two things:  the end-of-indoor-season contests (the Cloudbusters Indoor Fling and – maybe? – the AMA Indoor Nats) and the start of Outdoor season.  I GOTTA get back to BUILDING!  And first up will be a new Falcon Special II to replace my 19 year old Goodyear Racer that suffered a fatal crash in the fall.

Posted in Products | 2 Comments

NEW PRODUCTS – NoCal and LPP Nose Bearings!

Thanks to Joshua Finn, I worked out a deal to have a couple hundred (300 each) of these made – Pigtail Nose Bearings for Limited Penny Plane and NoCals!  Find them on my site under: Pros-Bearings / Nose Bearings, etc.  Only $2 each!

LPP Specs:

  • shaft: 0.020″ (0.5mm)
  • hole: 0.023″ (0.6mm)
  • thickness: 0.028″ (0.7mm)
  • width: 0.080″ (2mm)
  • nominal offset: 3/16″ (5mm)
  • nominal weight: 0.10 grams

NoCal Specs:

  • shaft: 0.031″ (0.8mm)
  • hole: 0.035″ (0.9mm)
  • thickness: 0.035″ (0.9mm)
  • width: 0.118″ (3mm)
  • nominal offset: 1/4″ (6.5mm)
  • nominal weight: 0.18 grams

This is the NoCal with two different 1/32″ prop shafts – both shafts slip into the rear notch as expected.

Posted in Products | Leave a comment

New Embryo – Durham Air Limousine

AS SEEN IN THE FAC NEWS!  A short kit is available for the plan (and story!) in the latest (Jan/Feb 2019) Flying Aces Club News.  Flying buddy, Winn Moore, inspired this modification of the Durham Mystery.  And inspired by Tom Nallen’s story of his original Durham Mystery, I just had to come up with a fictional tale for the Durham Air Limousine.

I finished the prototype in the late fall and didn’t have a chance to wring it out – but it does fly!

Read the stories here:  The FANTASTIC DURHAM EMBRYOS

Find the kit here:  DURHAM AIR LIMOUSINE SHORT KIT

Posted in Builds, Products | Leave a comment

A New How-To Article – Printing on Tissue

I just published a new How-To.  Printed Tissue, Part 1

Find it in the How-To area – or click HERE

Posted in Uncategorized | Leave a comment