
So, I’ve been building an Old Timer, slowly but surely. I’ve been mentally struggling on how to do the wire pylons – how do I make sure they are even and the correct length? And how do I make the installation look nice and not gobbed onto the side (ruining the covering)?
Here is my solution. I run the wires on the inside of the uprights, CA’d securely to the uprights. But still – how do I make sure they are the right height – there are FOUR posts and they have a length differential front to rear (the rear is 1/16″ shorter than the front)?
Bring in the New Tech! I made a jig to set the front posts and rear posts – I 3D-printed it! It has a different height built in for the front and back. It also has notches for the wires, and side fences to properly locate the jig on the fuselage. I did beef up the structure to properly locate the posts. Of course, the fuselage top needed to be covered first to get that clean installation.
Here are the photos. (Model details to be revealed later!)
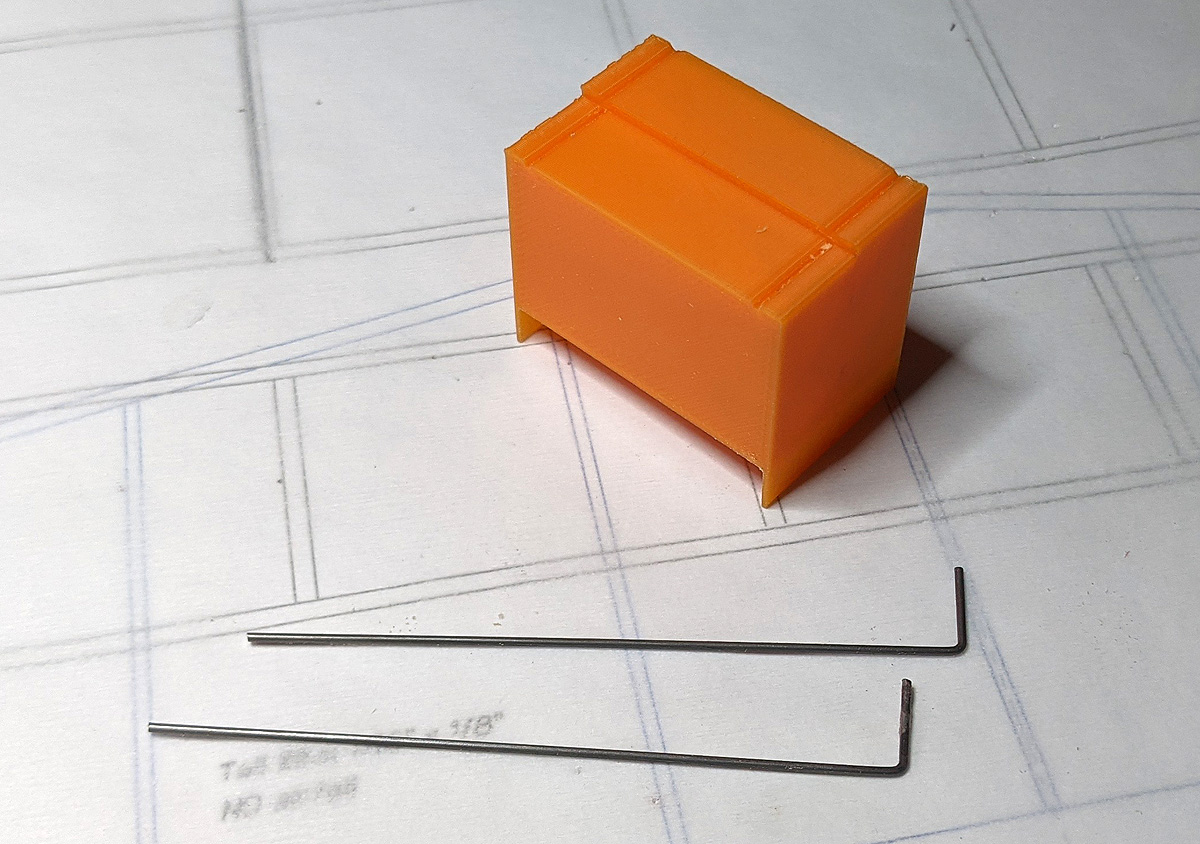
My 3D-printed jig block and two of the four posts. on the bottom are the fences to exactly fit over the fuselage. on the top are two steps – the tall step is for the front posts and the short step is for the rear posts. the grooves on the top are to properly orient the legs of the post.

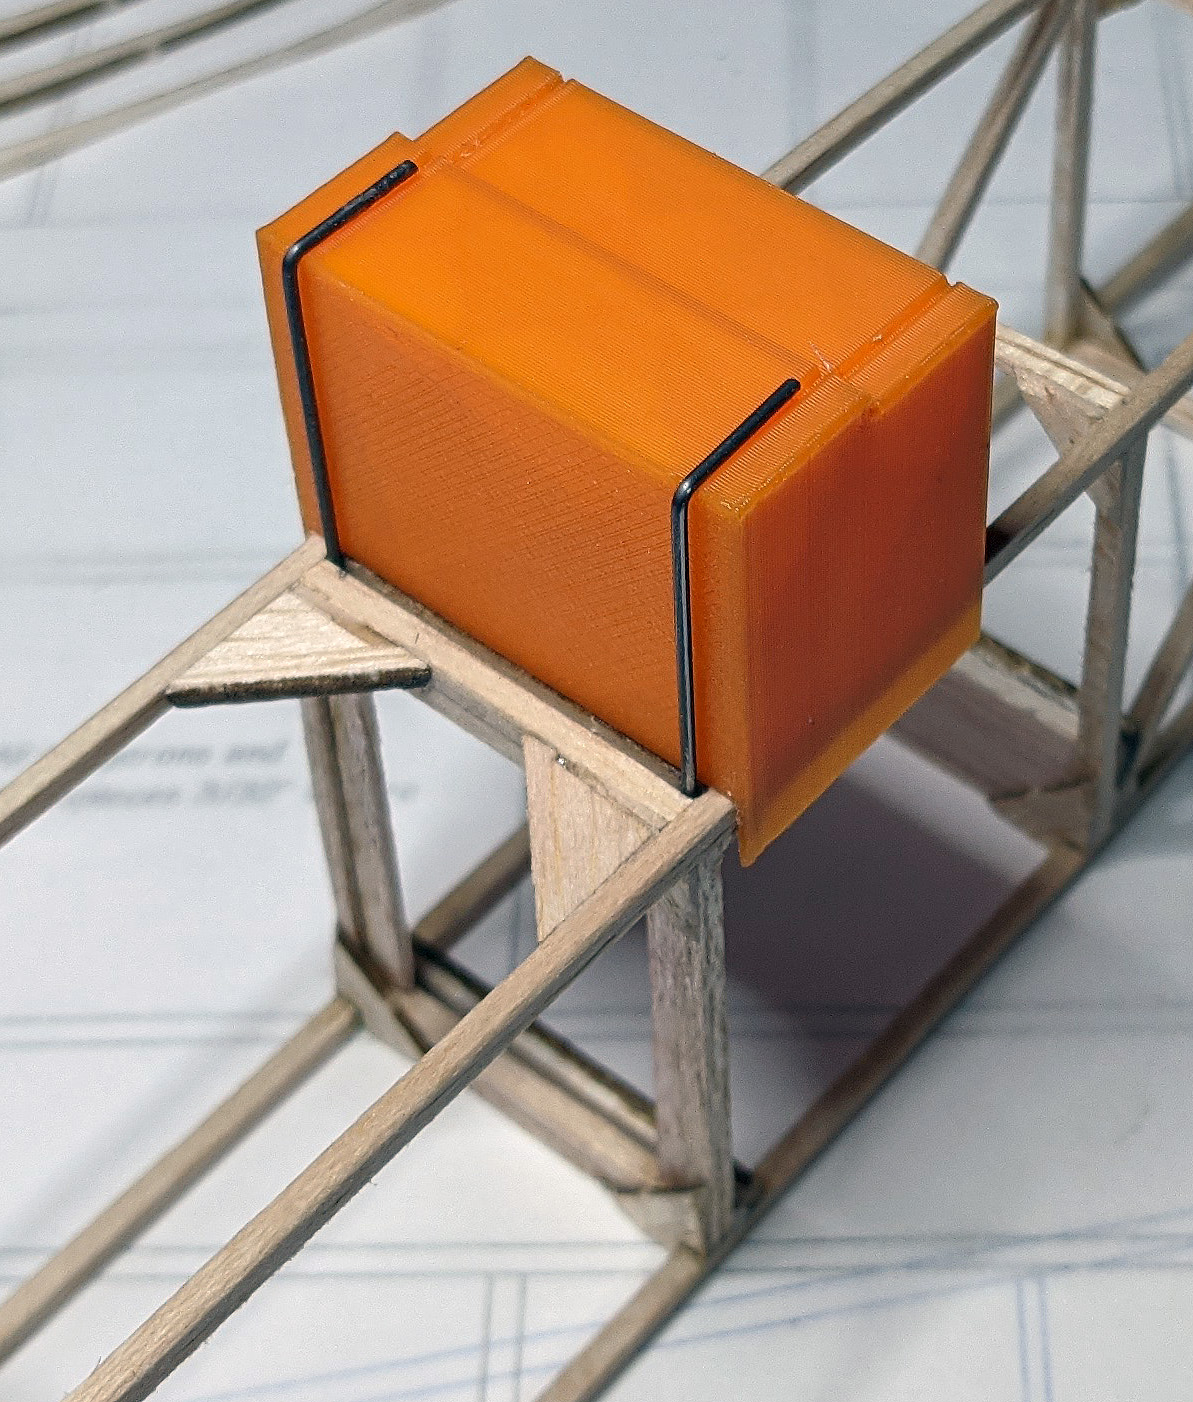
a test fit on the fuselage
a test fit with the posts properly located
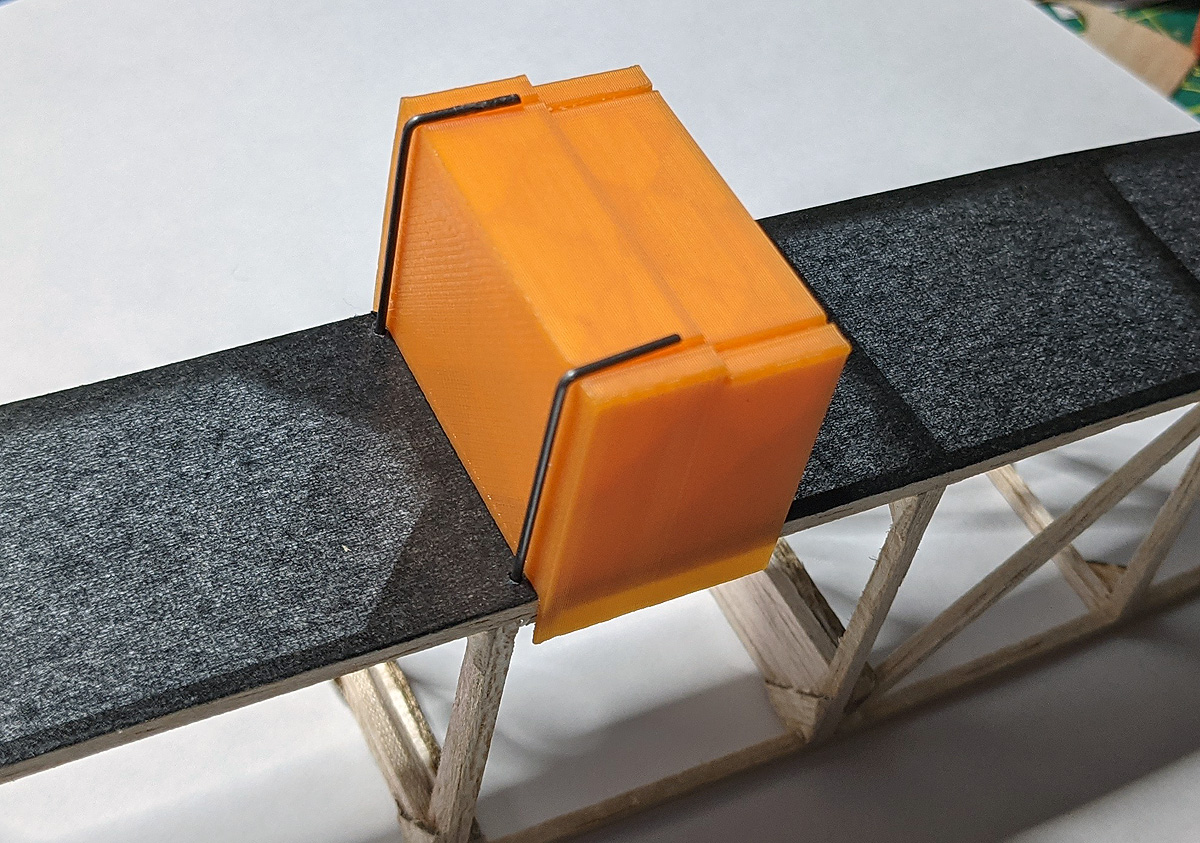
Note the jig is not properly up against the near post, nor is the post properly seated in the groove.
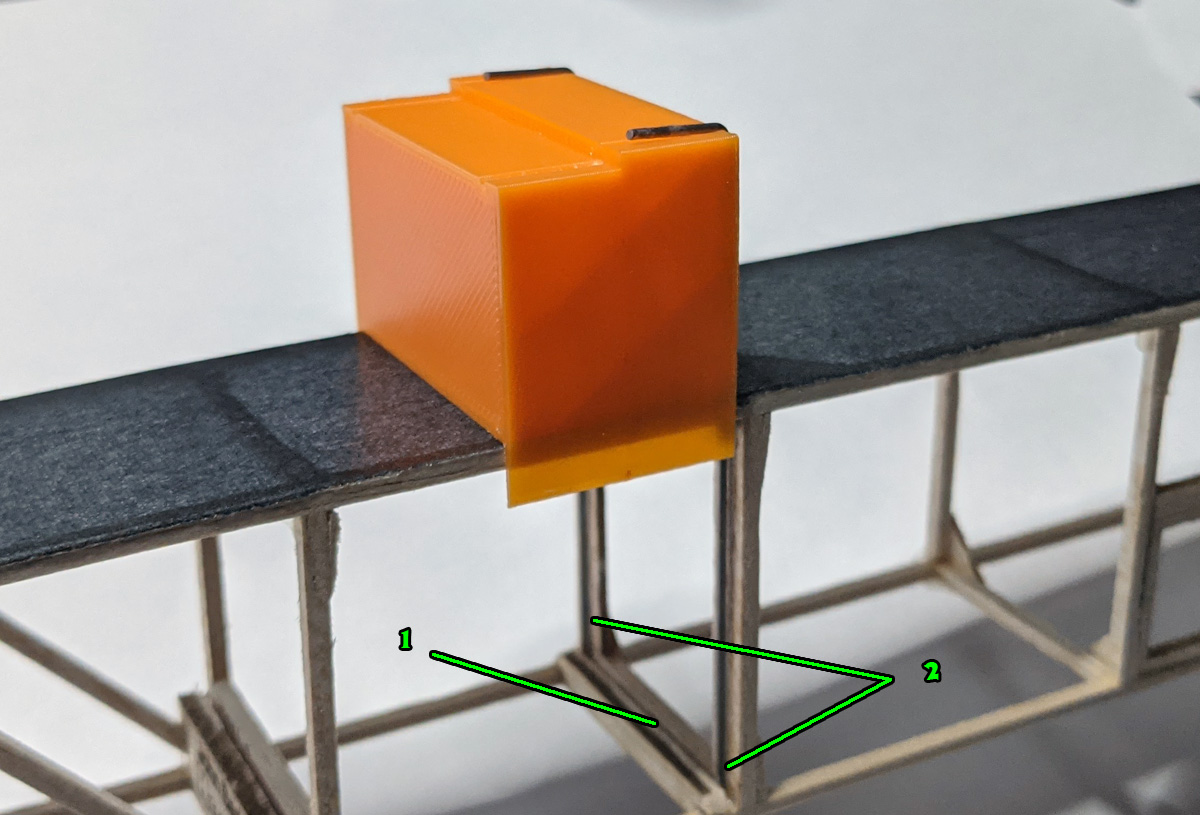
gluing the front posts. 1 = the socket built into the bottom to accept the posts 2 = the posts CA’d to the beefed-up structure.
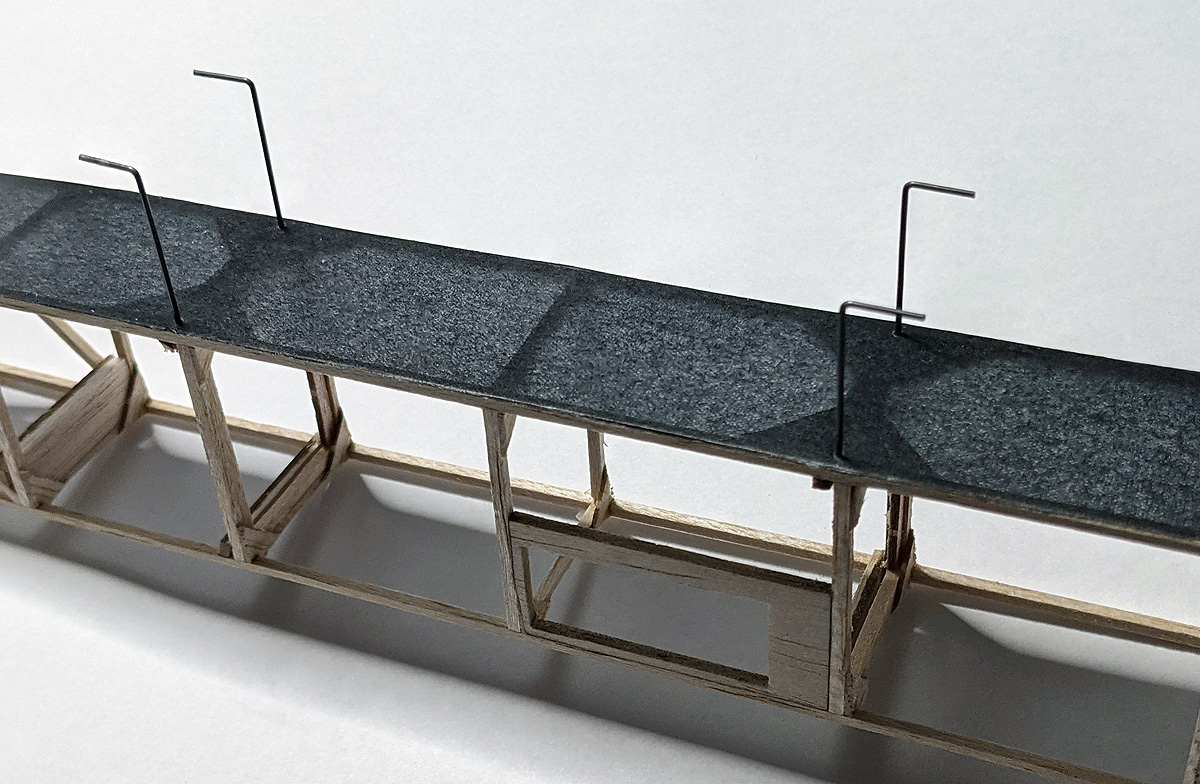
all four posts in place

bamboo skewers cut to length and carefully wrapped and glued onto the posts.