Everyone loves the iconic Vought Corsair F4U, especially if you are old enough to have watched the late 70s series “Baa Baa Blacksheep” (even those that caught it later under syndication as “Black Sheep Squadron”). There is just something about the Bent-Wing Bird that grabs you – until you look into modeling it.
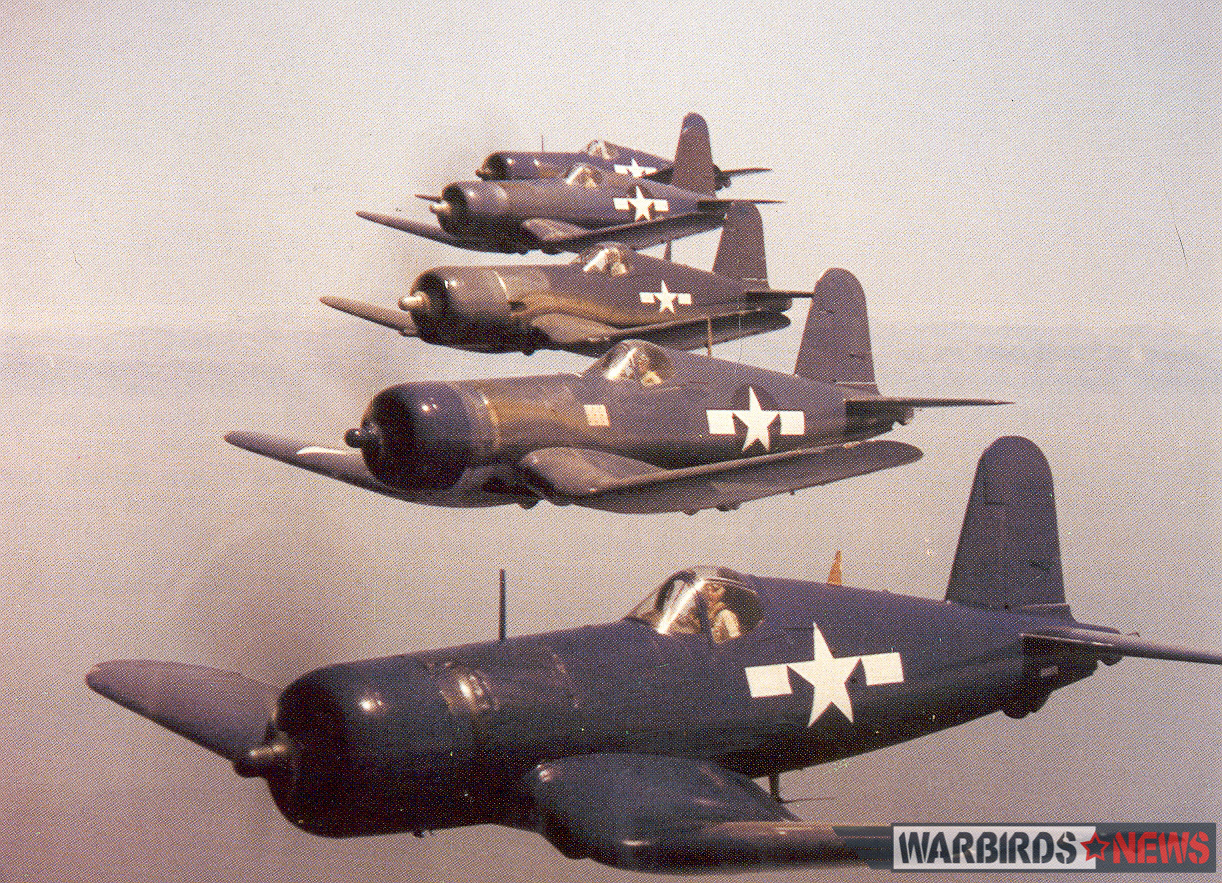
For some of us (ok, maybe it is only me), WWII Navy planes are less than attractive. The round nose and round bodies are hard to model. And they only come in one color – Navy Blue (or variations of blue).
A second issue that I, personally, have is that most of the plans and kits are “keel and half-shell” – boy, I’ve seen some of those builds head south in a hurry. I like the box and former. Build that square box, add formers and stringers and there you go. “Change My Mind!” as the current phrased goes.
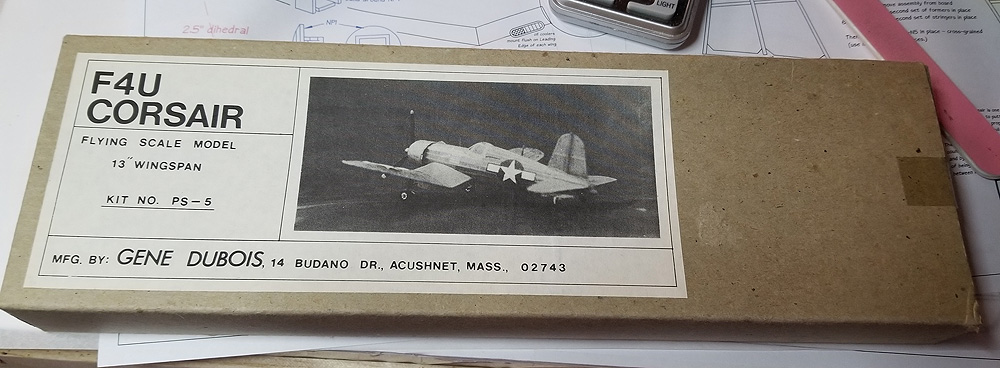
Well, maybe someone did just that (changed my mind). This fall, I happened to come across a Gene DuBois Peanut kit of the Corsair. This was purely luck – I won it in a raffle. I looked it over and thought “this is pretty simple – maybe I could make this work”. In a way, it was simple. But in another, I probably spent more time on designing this kit than any other in recent memory – especially a Peanut.
This seemed like a l-o-n-g build for me. I was only partially motivated, especially when it came to the build (after getting the plan and parts to a workable stage). Date stamps show that I scanned the plan on 24 September (a couple days after getting home from the FAC outdoor Champs and Ted Dock – where I won the kit). I started building around 06 Oct and finished the frame-up on 14 Oct and the tissue covering on the 18th. I put a motor in it yesterday (20 Oct) and did some light test flights. That is nearly a month start-to-finish.
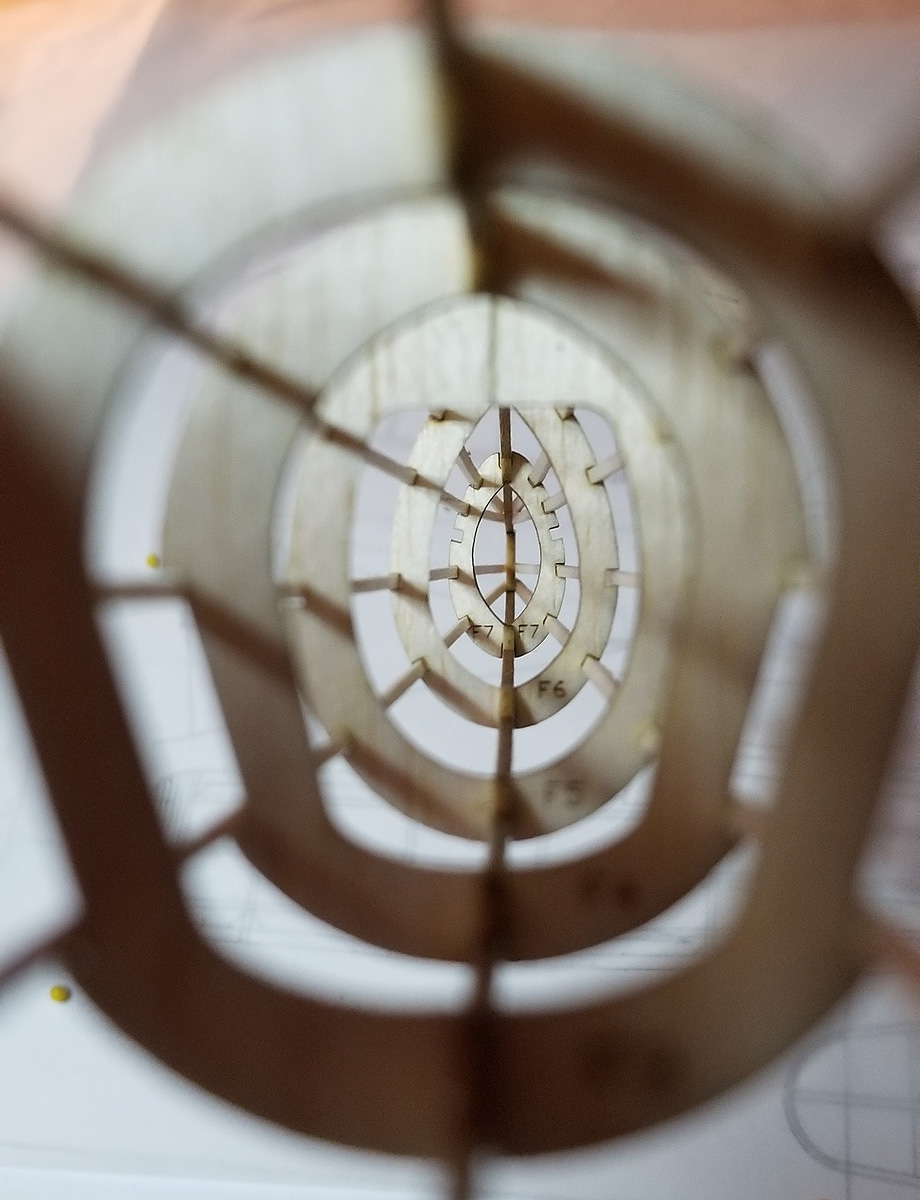
All of this time has paid off so far (I will give it some real testing indoors come November). It took quite awhile to trace, measure, compare, redesign, and test the half-shell formers. This is the first plan I have done using this style of build. I did have to adjust the original DuBois formers as they just didn’t seem to line up in the drawing. It seemed that this part of the designing took forever, but when I got to the test build, everything fit together just right. It was a pleasure to build this keel and half-shell!
pleasingly straight stringers
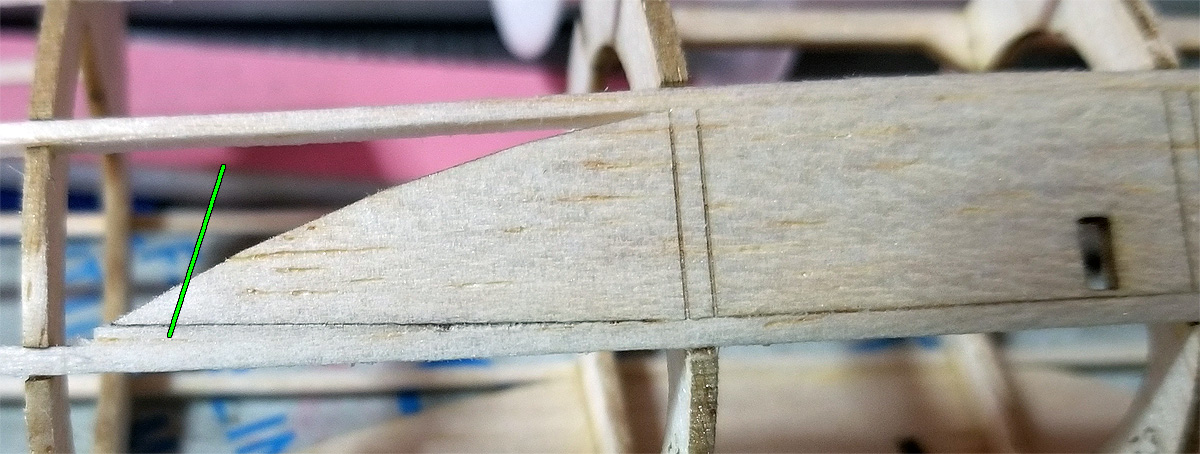
index marks on the wing supports (the green line shows a bit of fill that was corrected on the laser cut part)
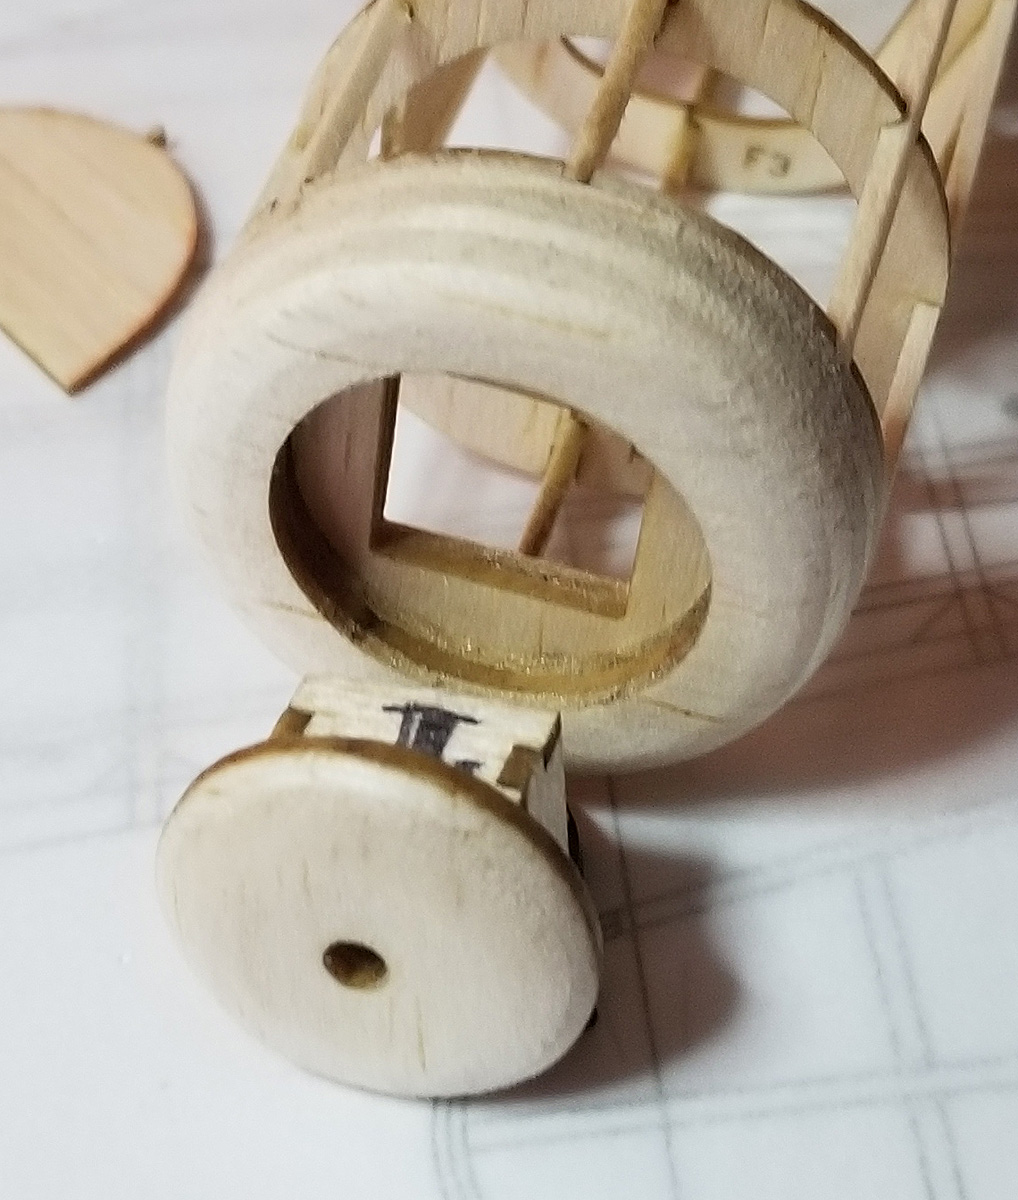
how the nose goes together
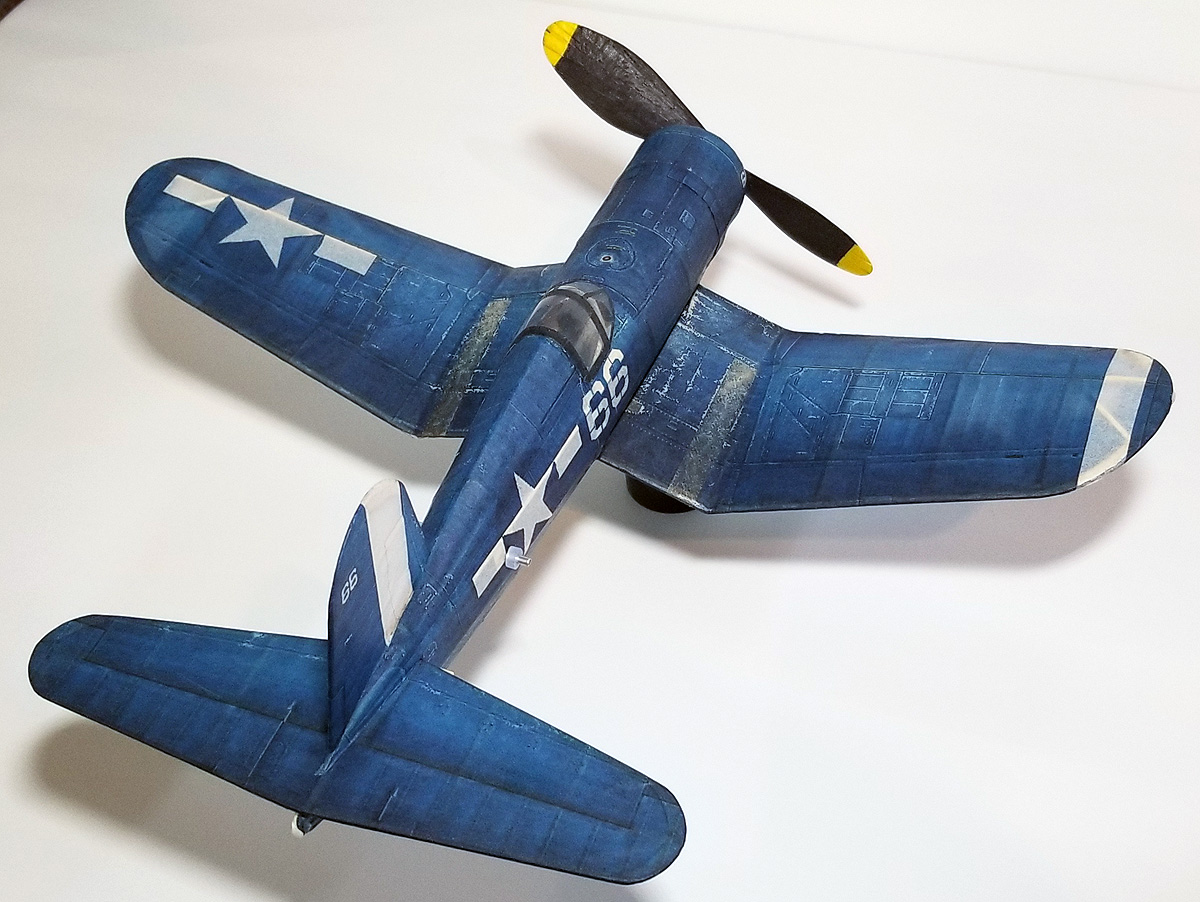
In addition, I had to do a lot of measuring and calculation to get the gull wing angles right. After all, this is the MOST characteristic part of this aircraft. Fortunately, Peanut scale models allow a lot of fudging – a lot of detail is hidden and lost when building at such a small scale. One thing that isn’t done on this model is the graceful curve of that gull-wing. It is presented here as a simple dihedral break, but I don’t feel the representation suffers because of this crudeness. I did work hard to make the build process and installation process simple and it worked well for me. Just build the inner wing panel, then the outer wing panel, set the dihedral of the outer panel while the inner is still pinned to the board and then glue the wing to the fuselage. Easy. I do have to give credit to DuBois here for setting it up, but again, I had to tweak it to get it right.
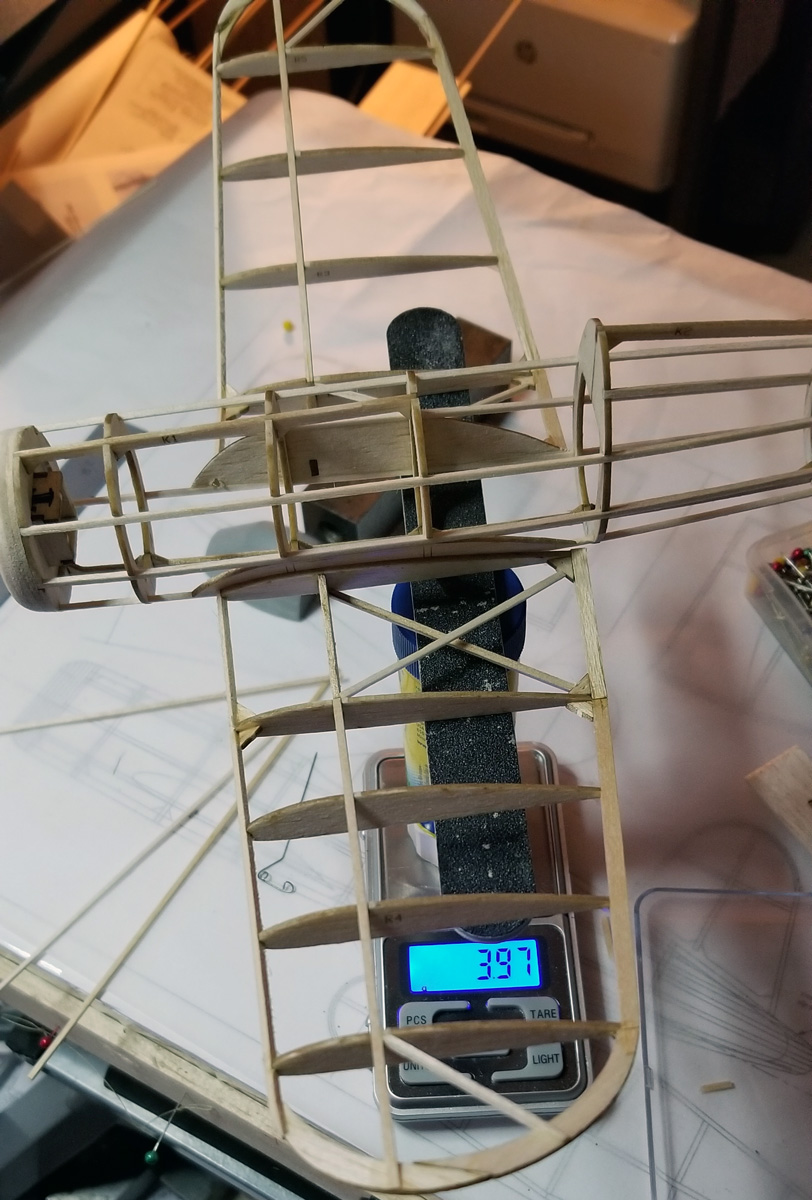
the frame, ready to cover, weighed 4 grams
I made a wood prop – a stacked prop – of 5.5″ diameter and 5″ pitch. I didn’t want to go too big a diameter or too high a pitch. I figured the plane needed to “fly” (at speed) rather than float around at the slower speed that a higher pitch would force. So far, test flights have been good. I made a short motor – one loop of 3/32″ rubber and put in 400-600 turns for testing. The duration wasn’t great for 600 turns (about 15-20 seconds), but the plane moves along well and floated nicely when the power ran out. I doubt I will be able to come anywhere close to 2 minutes indoors with this prop – but it flies!

the jig I make for stacking props. I might have these available in the future for a variety of pitches.
Regarding the color scheme, I searched the ASISBIZ website (https://asisbiz.com/il2.html) for “skins” of the Corsair. This site has a very large section of aircraft skins for some computer games (IL2 and COD) which allow gamers to install the skin in their game and fly with or against aircraft with these custom designs. These skins are highly detailed and work great for printing on tissue – if you modify the files they provide to fit your size and shape of the flying surfaces and fuselage. I found the file to be just about the same proportions as what I (DuBois) laid out with the exception of the fuselage. I had to stretch the fuselage images “vertically” to make them large enough to wrap around the curved fuselage. I will have the tissue print template available for free on my site (the template will be on this page).
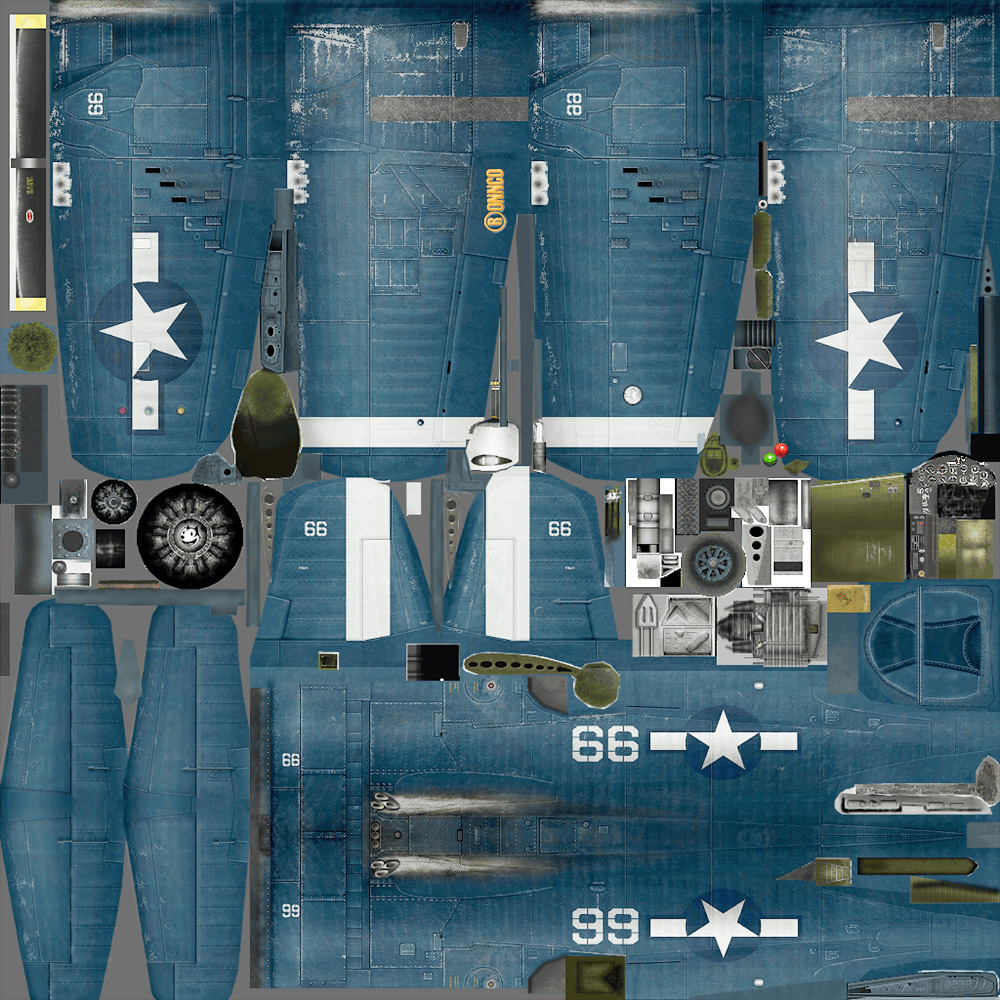
what asisbiz offers
The latest setback is the canopy – or rather, the canopy buck. I 3D-printed it and it came out pretty nice. I sanded it smooth and pulled a canopy and it worked just fine. So yesterday, I pulled two more, sort of a test-run for Production (as mentioned before, I dislike making canopies for others. I feel my personal canopy quality standards are lower than production standards). On the second pull I noticed that the heat was distorting the buck. So I am printing a second buck with thicker wall thickness and denser fill percentage. Hopefully it will hold up to short production runs. If that fails, I guess I could try filling a first pull with plaster of paris – I’ve never tried that before.
If I can get the canopy worked out, I’ll have the short kits (plans and 2 sheets of laser-cut parts, AND canopy) online soon at $15. The tissue template will be online when the kit goes live.
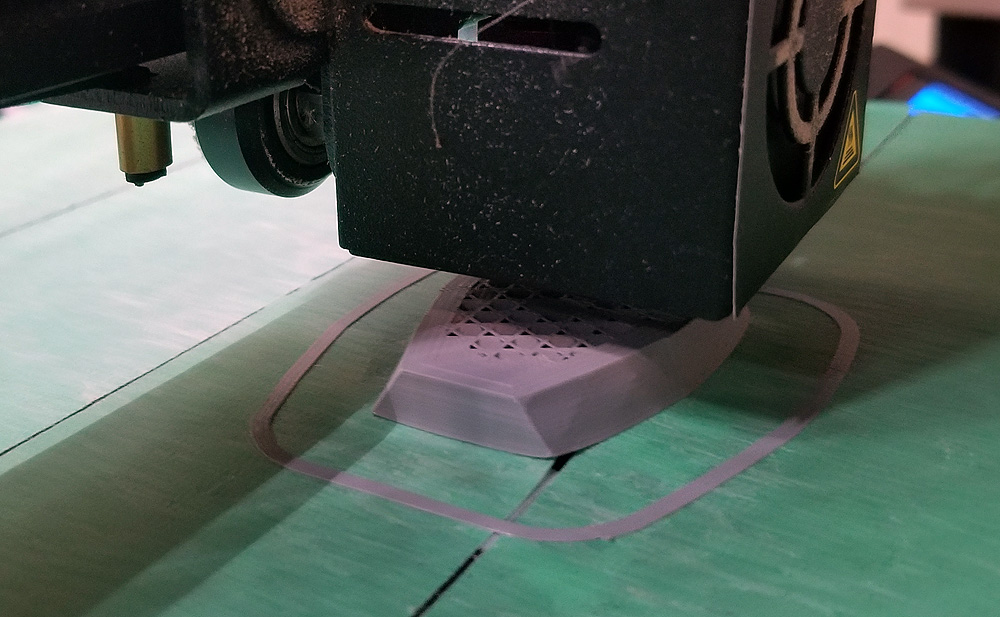
printing the second canopy buck with thicker walls and more internal support

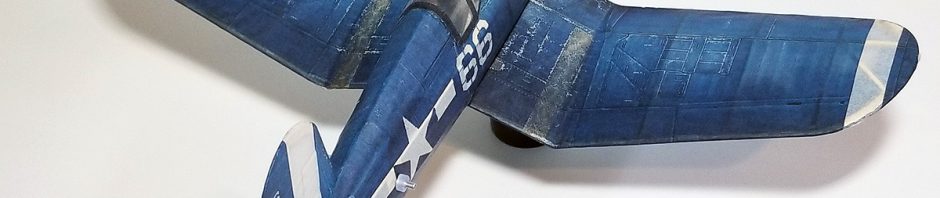
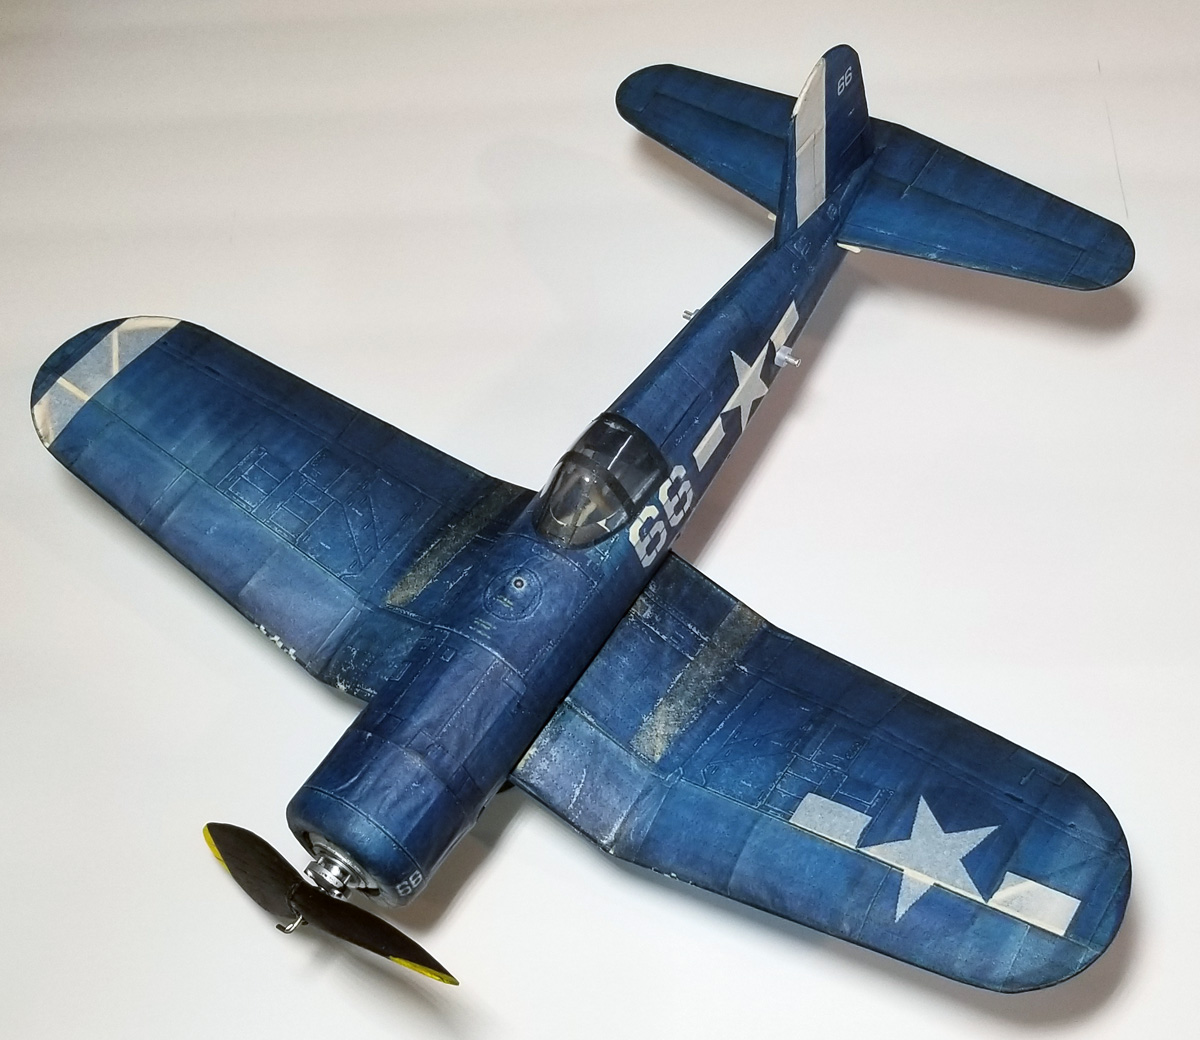
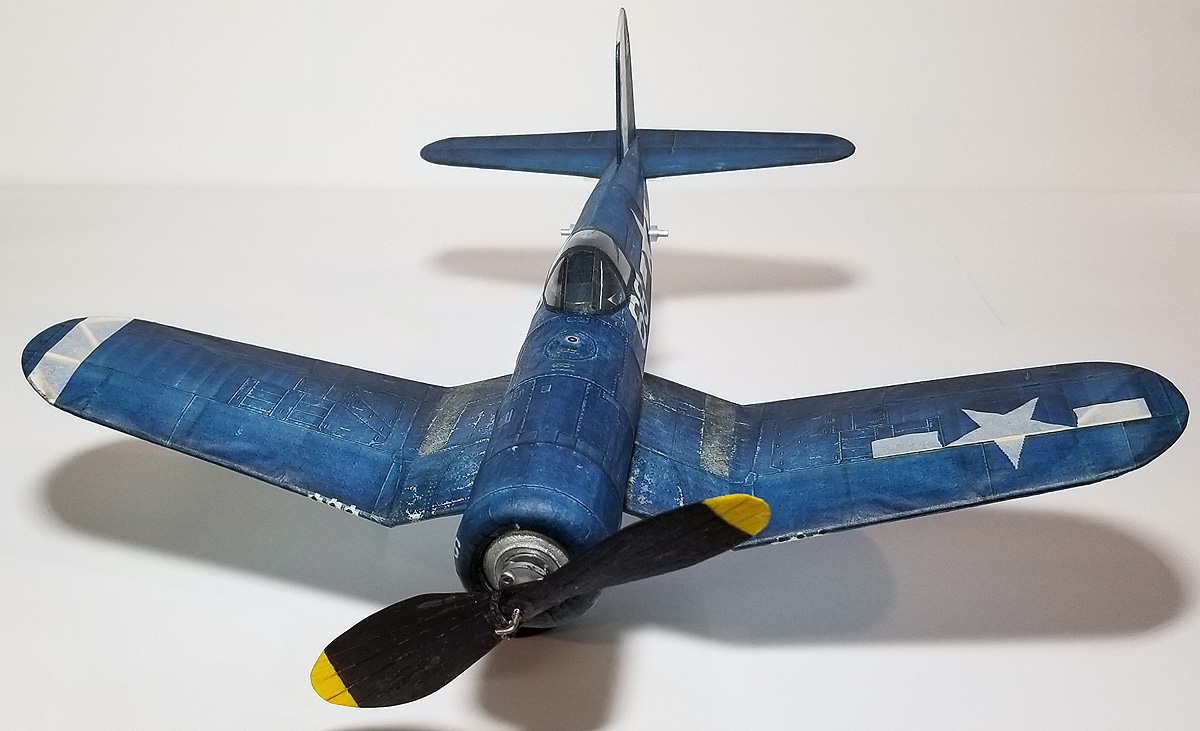
covered and just about finished
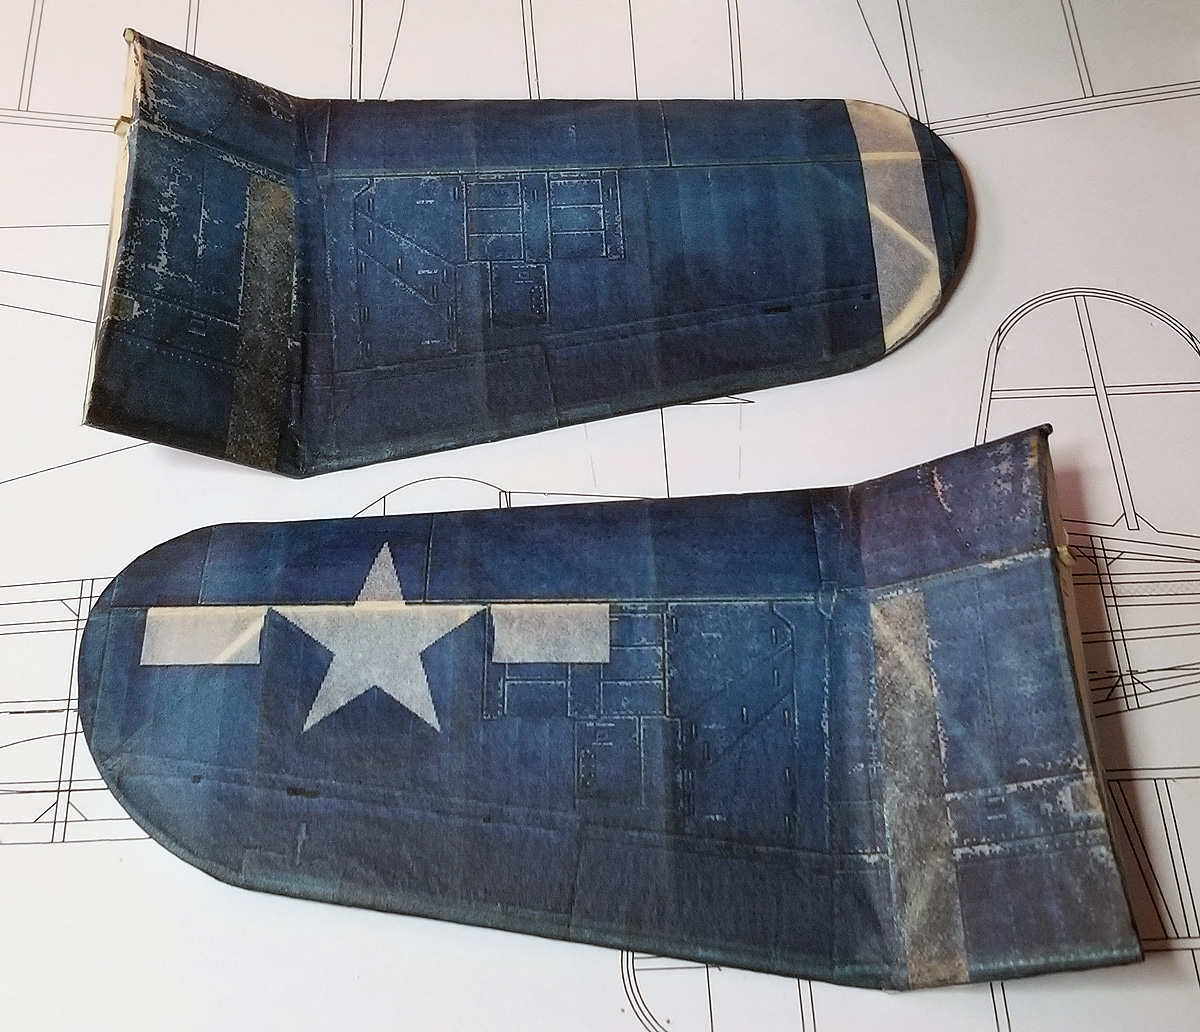
the covered wings
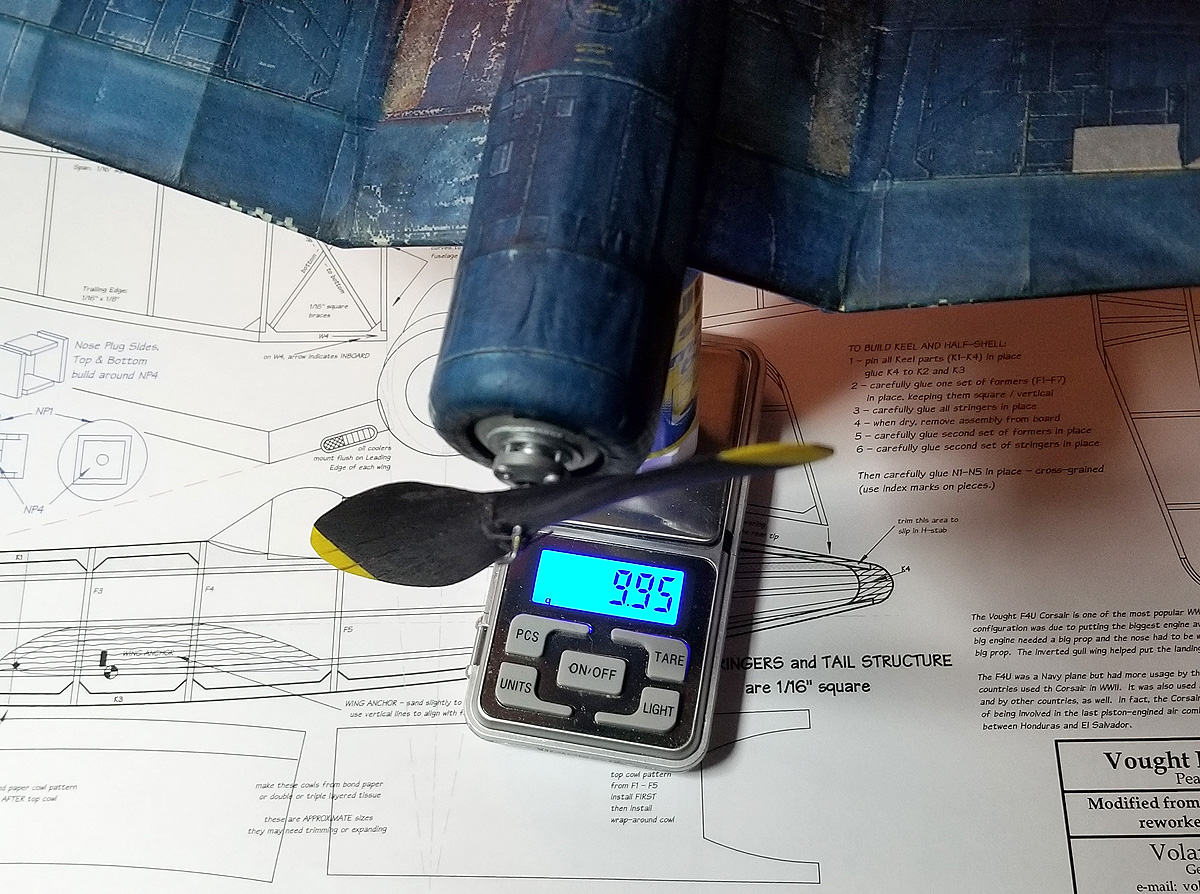
all ready to fly: 10g without rubber
What a great idea for tissue printing! The ingenuity of modelers (come on…we’re artists) never fails to amaze.
I am probably way late for this to matter, but I have made many plaster of Paris molds of kit canopies. Usually works well. I always retain enough of each kit to be able to reproduce it. Copy print wood and plans, make molds for canopy and any plastic parts. But I detest any model for which the wings don’t carry through the fuselage. Glued on wing panels do not wear well and are hard to align properly. Don’t forget to apply some kind of slippery release on the inside of the canopy. Rubbing a piece of candle on it works. PAM is better.