
We had storms roll through Volare Acres this week – Brainstorms! We had rain, too, but coming out of the Indoor Fling last weekend, I was inspired to try several things.
3D PROPS
First thing, though, I’m going to talk about flying buddy, Archie Adamisin. Archie is a third generation modeler as his grandfather and father and uncles were (and are!) modelers in the Detroit area. Archie now lives in Kentucky, but has participated in our monthly Indoor contests as his mom and dad still live in the Detroit metro area,
Archie has raised the bar at our contests and he won the hotly contested WWII NoCal Combat event at the Indoor Fling, besting 8 other competitors in 3 rounds of flying. His winning time with his Dauntless was over 4 minutes on the final round.
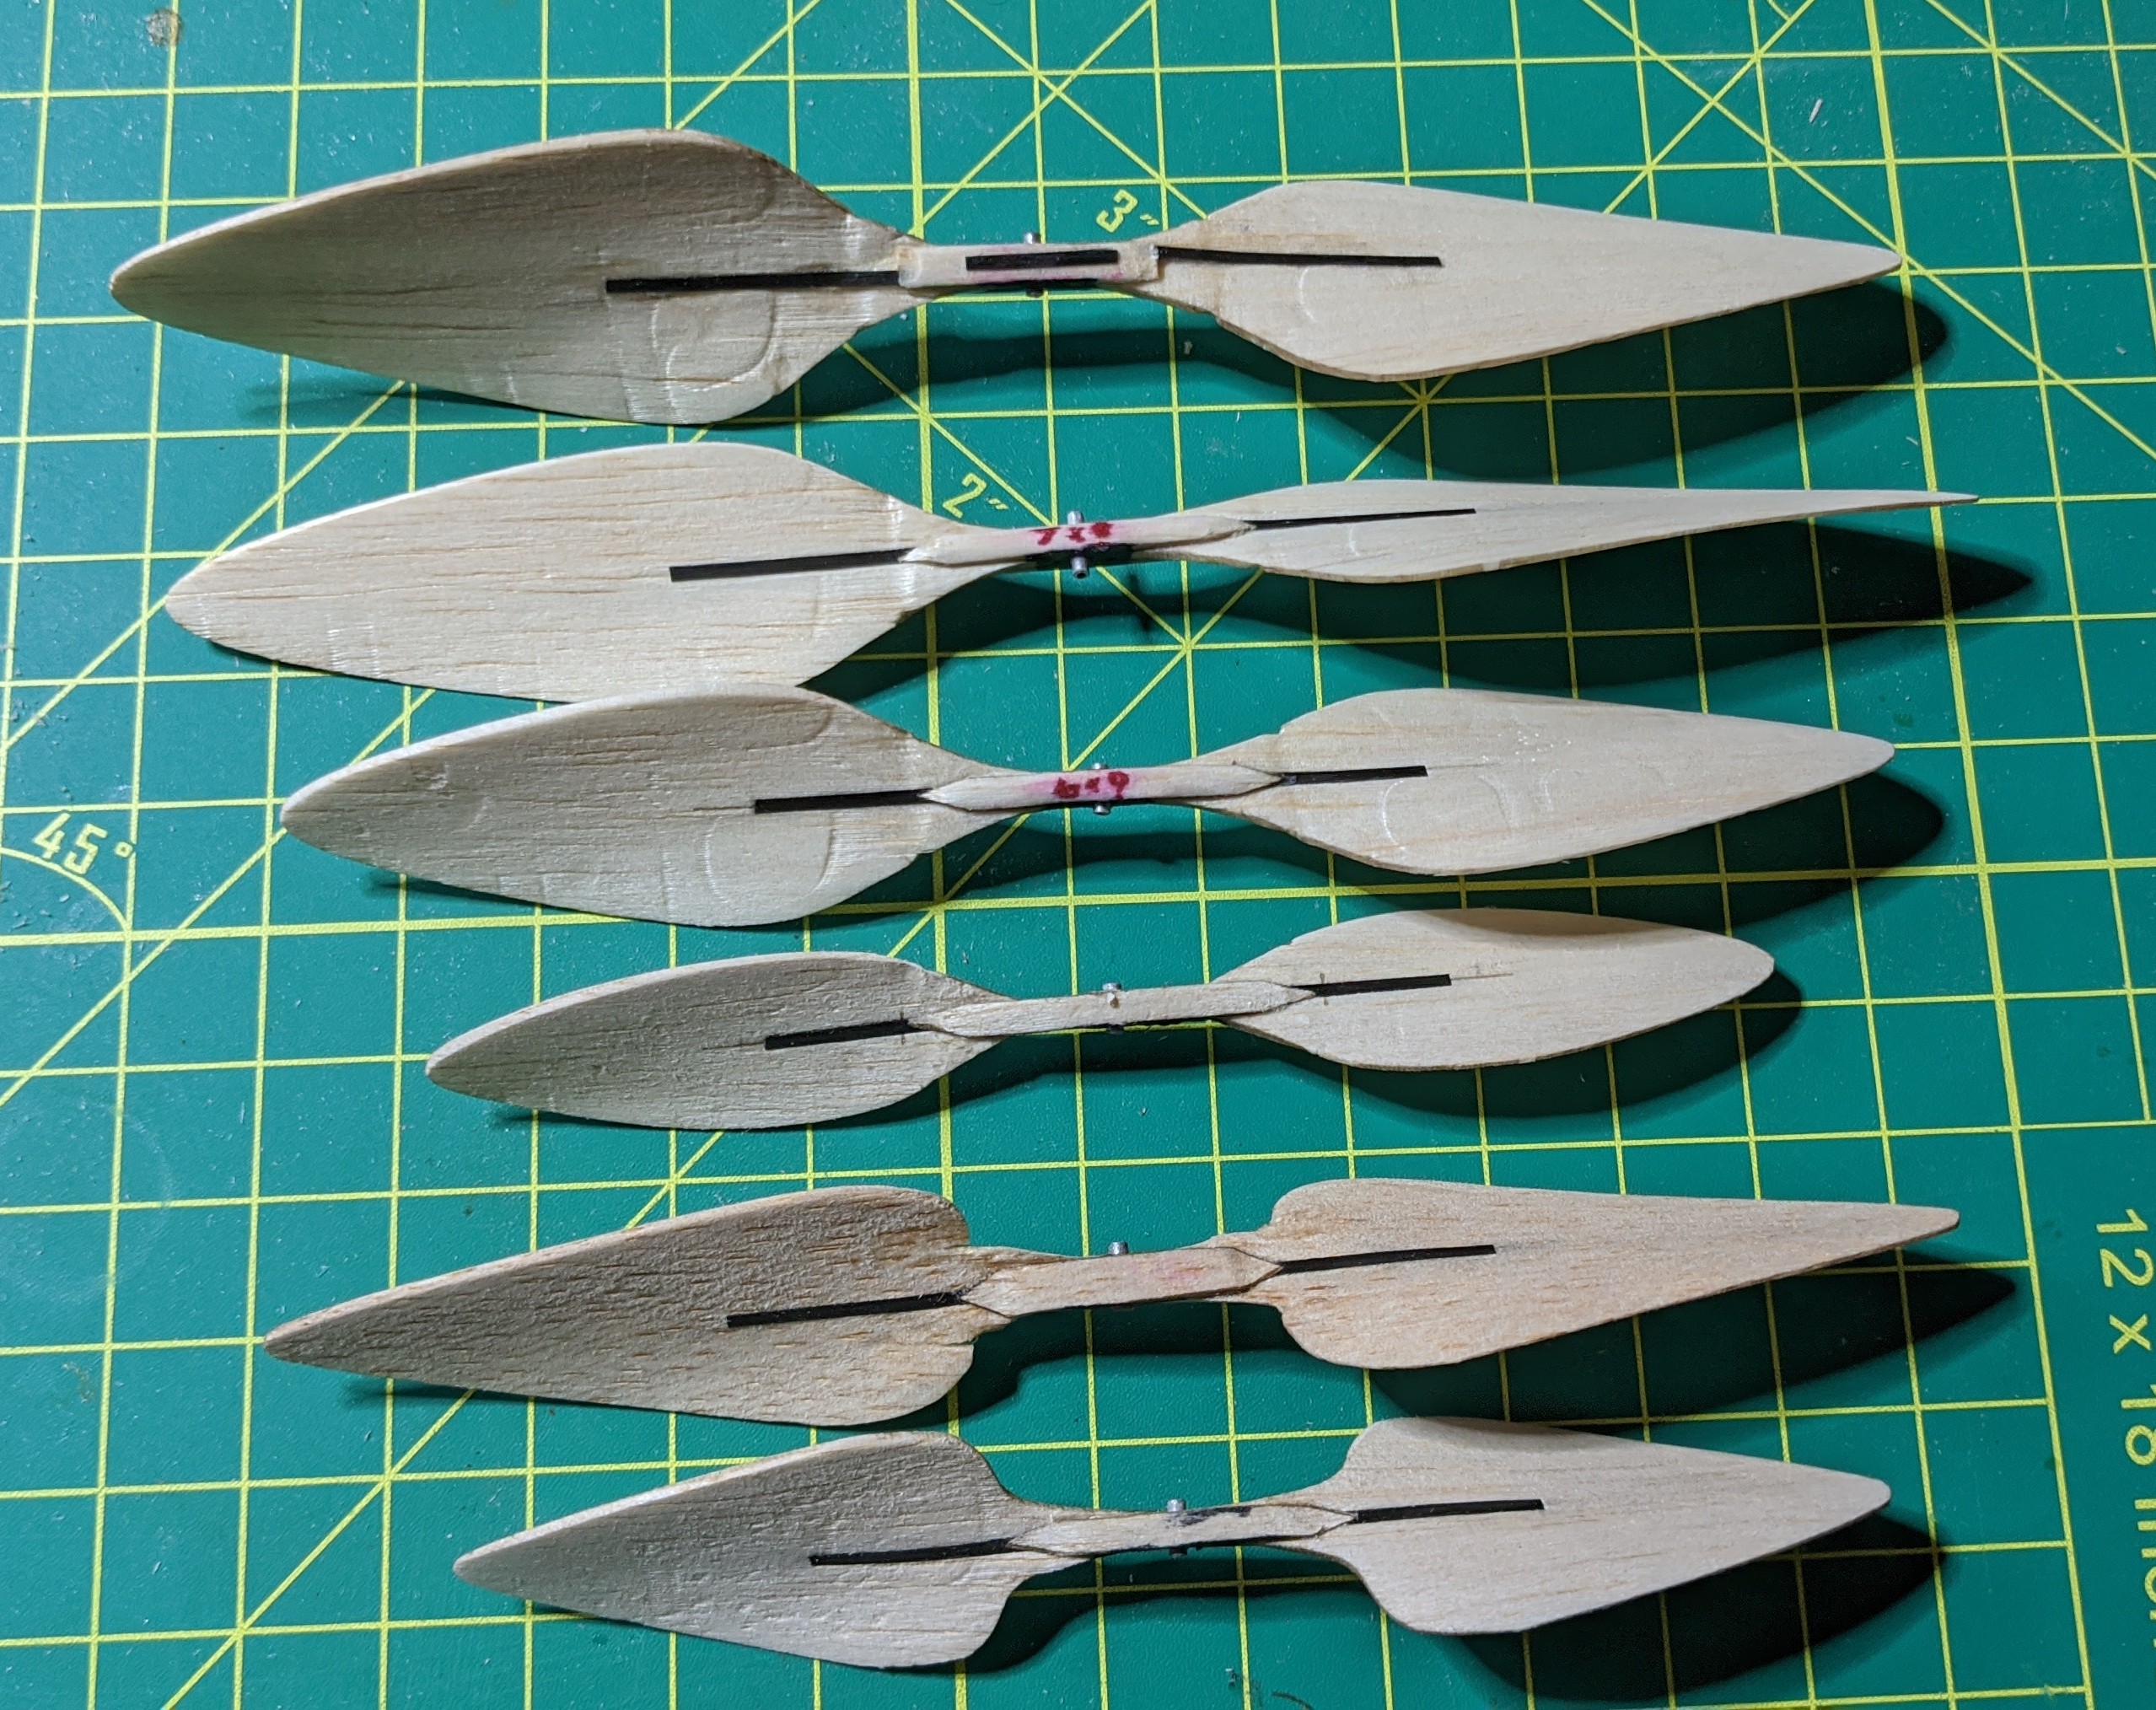
some of the formed/pressed props I made a couple years ago.
He and I have been loosely bouncing ideas off of each other in the virtual world. Mostly they are his ideas and I add some thoughts or questions here and there. We had been playing with forming balsa props over the last couple of years, forming them in a 3D printed pitch form. These work nicely, but are fragile. We have used them successfully on NoCals – in fact, his Dauntless has one on it – and I had put some on my Peanut Corsair. I was happy with the performance, but I kept breaking them. We also flew them on models as big as Embryo. His Indoor Embryo has one, but high power and outdoors was rather rough on mine.

Archie’s GeoEmbrysol with a formed prop
Well, this winter, Archie has been working on a new angle: “3D Props” – yes, that’s what he is calling them. He’s a master at layout in the 3D world and has been creating a wide variety of 3D printed props – from the very tiny (2.25″ diameter) to large – 10″ or so in diameter, including a few P-30-legal (because they are for sale) props.
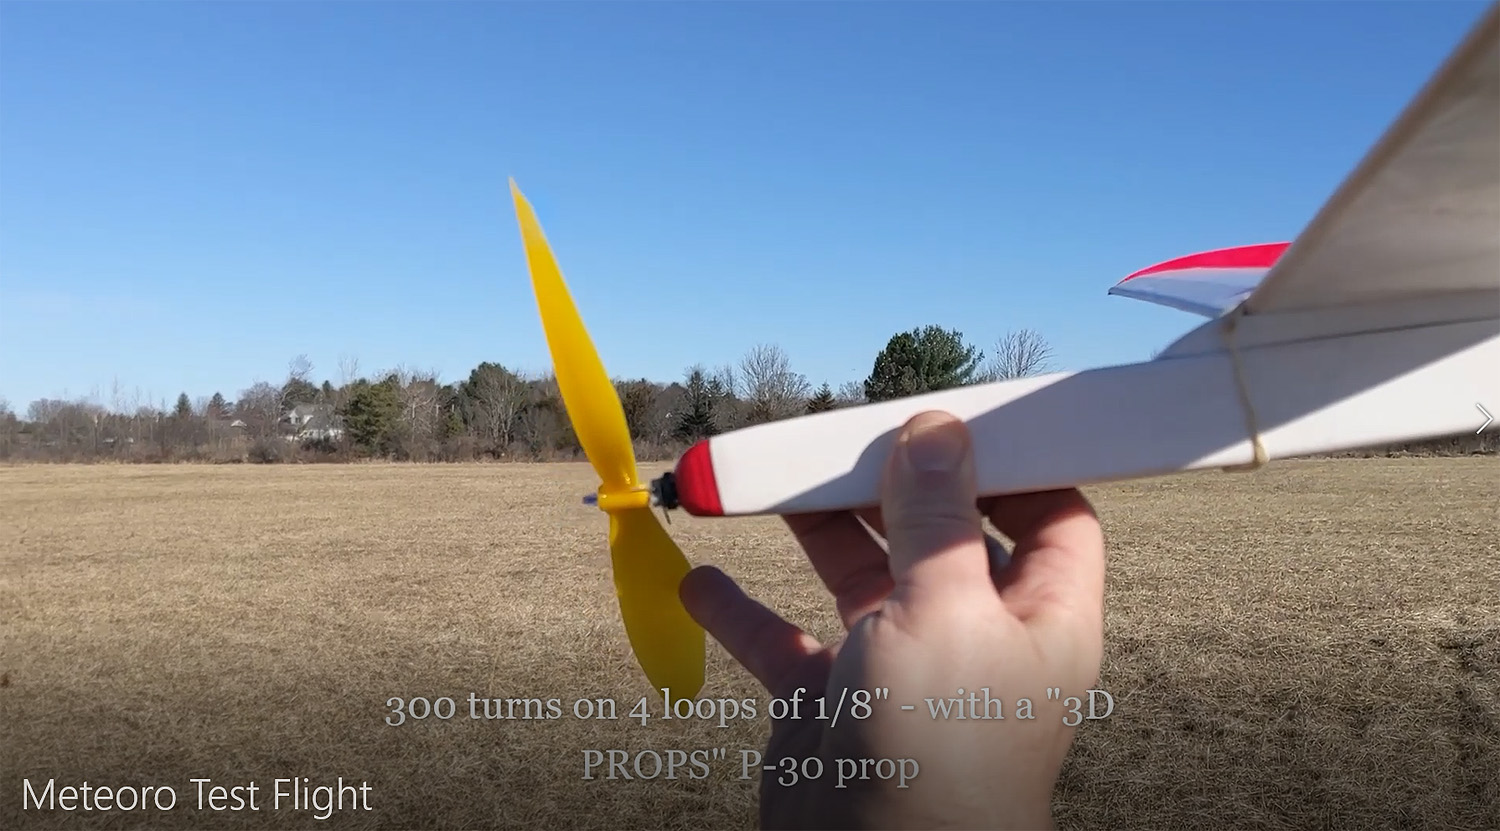
a screen grab from my Meteoro test flight video showing Archie’s P-30 prop.
Also legal are his props for Phantom Flash – he has flown his to over 3 minutes indoors. These were verified legal by FAC-GHQ. His “Nickel Scale” 3″ prop is now the standard for this class, as all successful flyers at the Indoor Fling were using his props. (You will see his Nickel prop later in this write-up.)
I have printed some of his props (as part of his “R&D team”) and I asked him for a replacement prop for my Corsair. I told him I wanted a 4-blade with a 5″ diameter, 1.3:1 P:D, and 1/2″ wide blades. You know – for that Scale Corsair look. He sent me the STL and also printed one himself. I put it on my Peanut and flew it around the arena with a happy smile on my face.
 Anyway, his “3D Props” are great, in my opinion. I know that he is selling them, but I don’t know what sizes or variations – or even the price. Contact Archie Adamisin (he’s on Facebook).
ELECTRICS
As I mentioned before, I’ve been dabbling in Free Flight Electric Scale. I put a Rookie power plant in my venerable HiMax Peanut and have had successful, if limited, flights. The limitations are on the restricted space in which I must fly. I haven’t had a chance to “wind it up” to full power and give it a toss.
But I got to talking to Archie – who also has experience in electric models: he’s dabbled in e-20 FF, but has tons of experience in electric r/c pylon racing. I had two issues with the Rookie prop: 1) it seems small and 2) it is meant for a pusher application. Now, as I say in my info pack provided with the power pack, you can reverse the prop on the shaft and rewire the motor leads on the circuit board – not at all difficult.
But why bother, if you don’t have to? And – how about a larger prop? Archie designed a printed prop at 2.25″D x 2.25″P – oh, and it is going in the “right” direction, too. I printed one and put it on the HiMax. He designed a lower pitch prop, too, but I haven’t tried it.
But I wanted to do a second iteration of Electric. I am choosing models I had retired from competition and this time I selected my Peanut Fike. This gave me two opportunities: test the new prop and test the power pack on what I have imagined is the upper limit for the little motor and capacitor – 50 square inches.
Again, I drilled out the Gizmo Geezer nose button to accept a press-fit of the 6mm motor and I added a platform in the fuselage to accept the capacitor and circuit board. I popped on the new prop and went out in the back yard. Success! It requires a bit more charge (8 seconds vs. 5 seconds) to max out my back yard, but it is a much better flyer than the HiMax. (An aside – I’ve always liked the HiMax design and I have built probably half a dozen of them in various configurations, but the all seem “draggy” and their performance has always been less than anticipated.) Of course, Fikes seem to fly in whatever configuration, but this was pleasing.
 BRAINSTORMING
So, this Indoor season, I “dominated” the Nickel season, as I was the only one that could get more than 10 or 15 seconds out of their Comet Nickel models. I was able to get 20-30 seconds – per flight – with my Miller Racer. Archie’s 3″ prop helped stabilize the model and it also allowed my to reduce power from a loop of 0.063″ to a loop of 0.045″. My loop was about 9″ long and I could get about 1200 turns in it – and that was good – until it wasn’t.
Tom Sova, an Indoor (proper) flyer from Toledo was showing up at our meets and decided to venture into Scale – and he picked the Comet Nickel Miller Racer as his firs Scale model (shocking – these are twitchy little beasts). Tom surpassed my times and then at the Indoor Fling, I took third place behind Tom (2nd) and Don Slusarczyk (1st). My “dominance” was over.
The biggest issue for me with these tiny planes is the thrust adjustment. My shims are always sloppy and temporary and just don’t work. Here’s a confession: I am addicted to the Gizmo Geezer nose button. As Eli Manning says “I put that s&!t on everything” – except tiny planes. They are just too big for tiny planes – in diameter and weight (1g).
Well, the brain was storming this week and I came up with a solution. I have developed the VPS Lightweight Adjustable Nose Button. There’s no secret in the inner workings and I fully acknowledge that I am standing on the shoulders of the giant that is Orv Olm.
Working through Thursday and Friday, the ideas just kept popping and I now have four iterations of this little gem: generic, a custom nose block for my Miller Racer, Phantom Flash, and (something I’ve been wanting for YEARS) NoCal. The generic version plugs into a 1/8″ hole (the standard I cut for my kits – based on the Peck Nose Button size) and weighs 0.34 grams – 1/3rd the weight of the Gizmo Nose button!
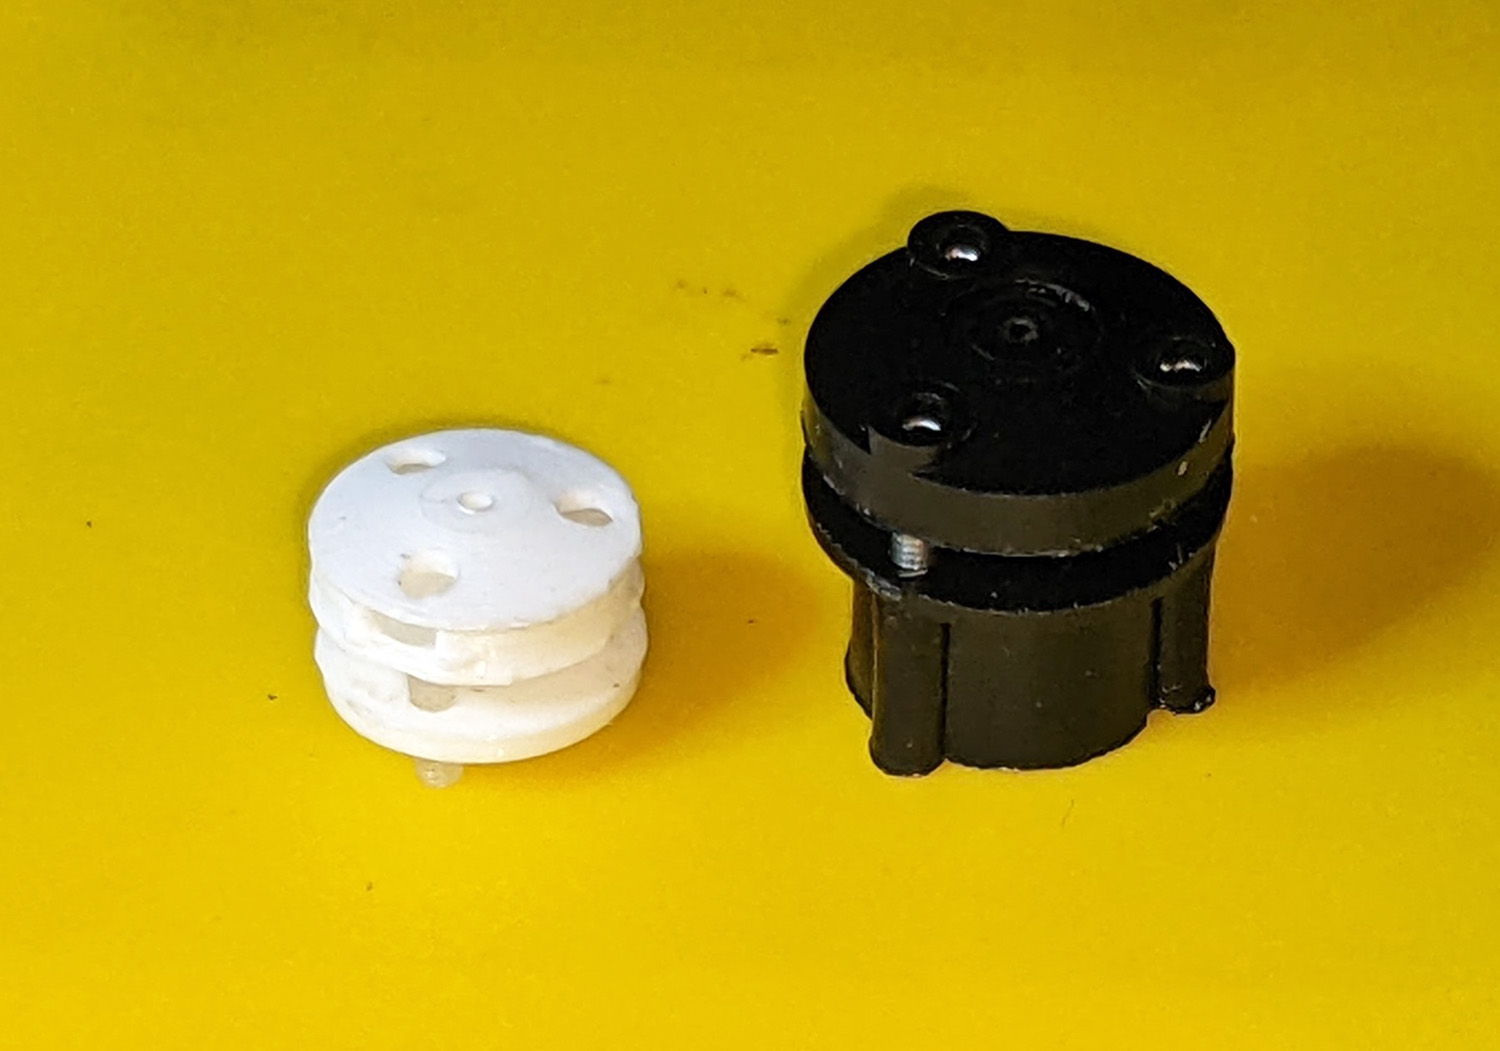
My Lightweight and the standard Gizmo
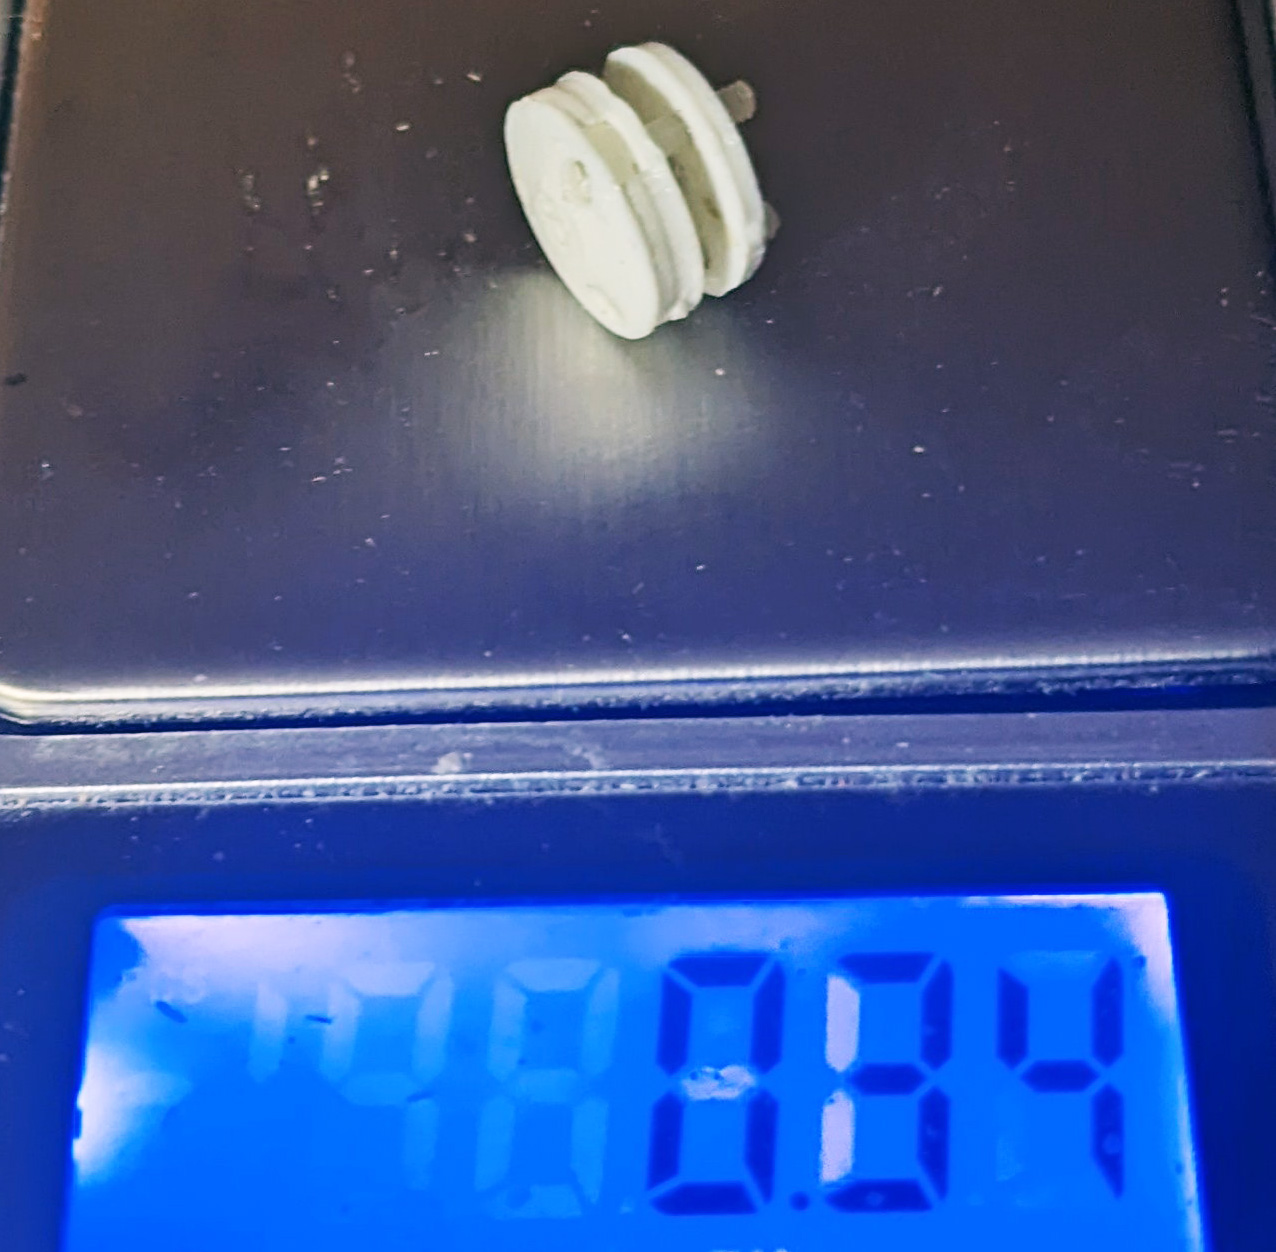
the generic weighing in at 0.34g
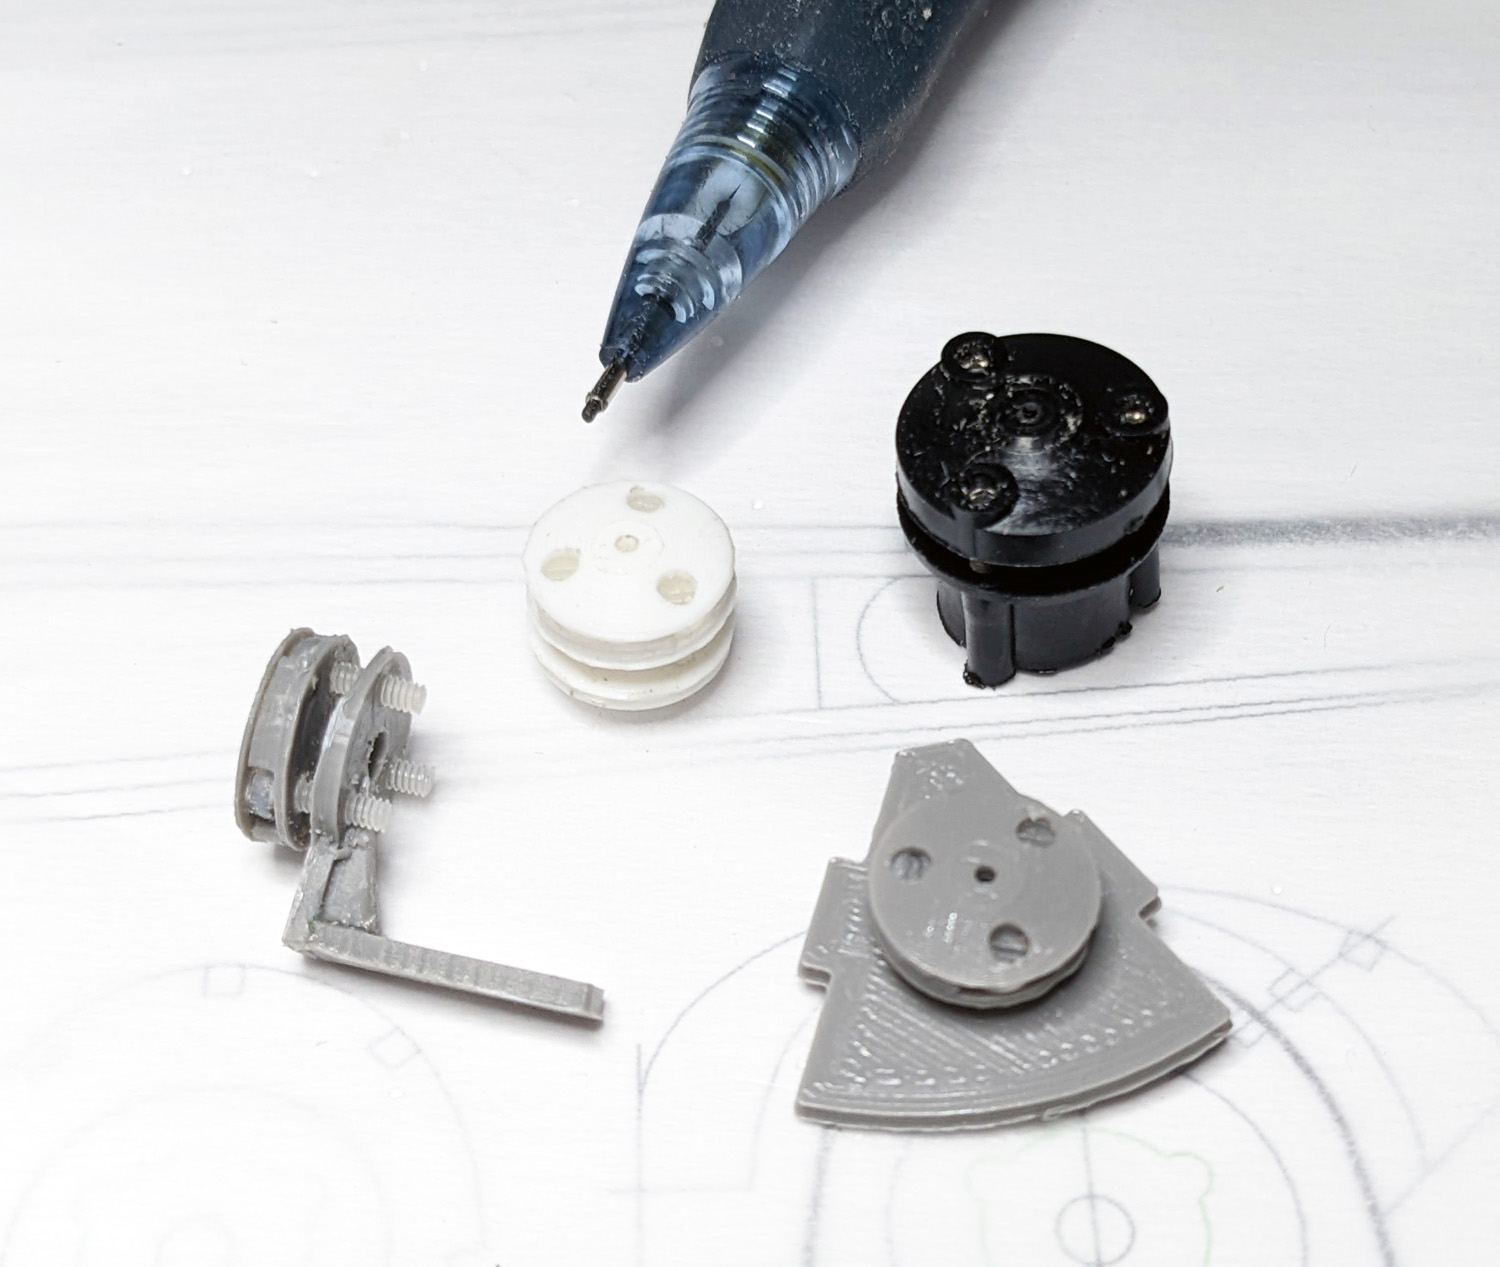
three variations plus the standard Gizmo
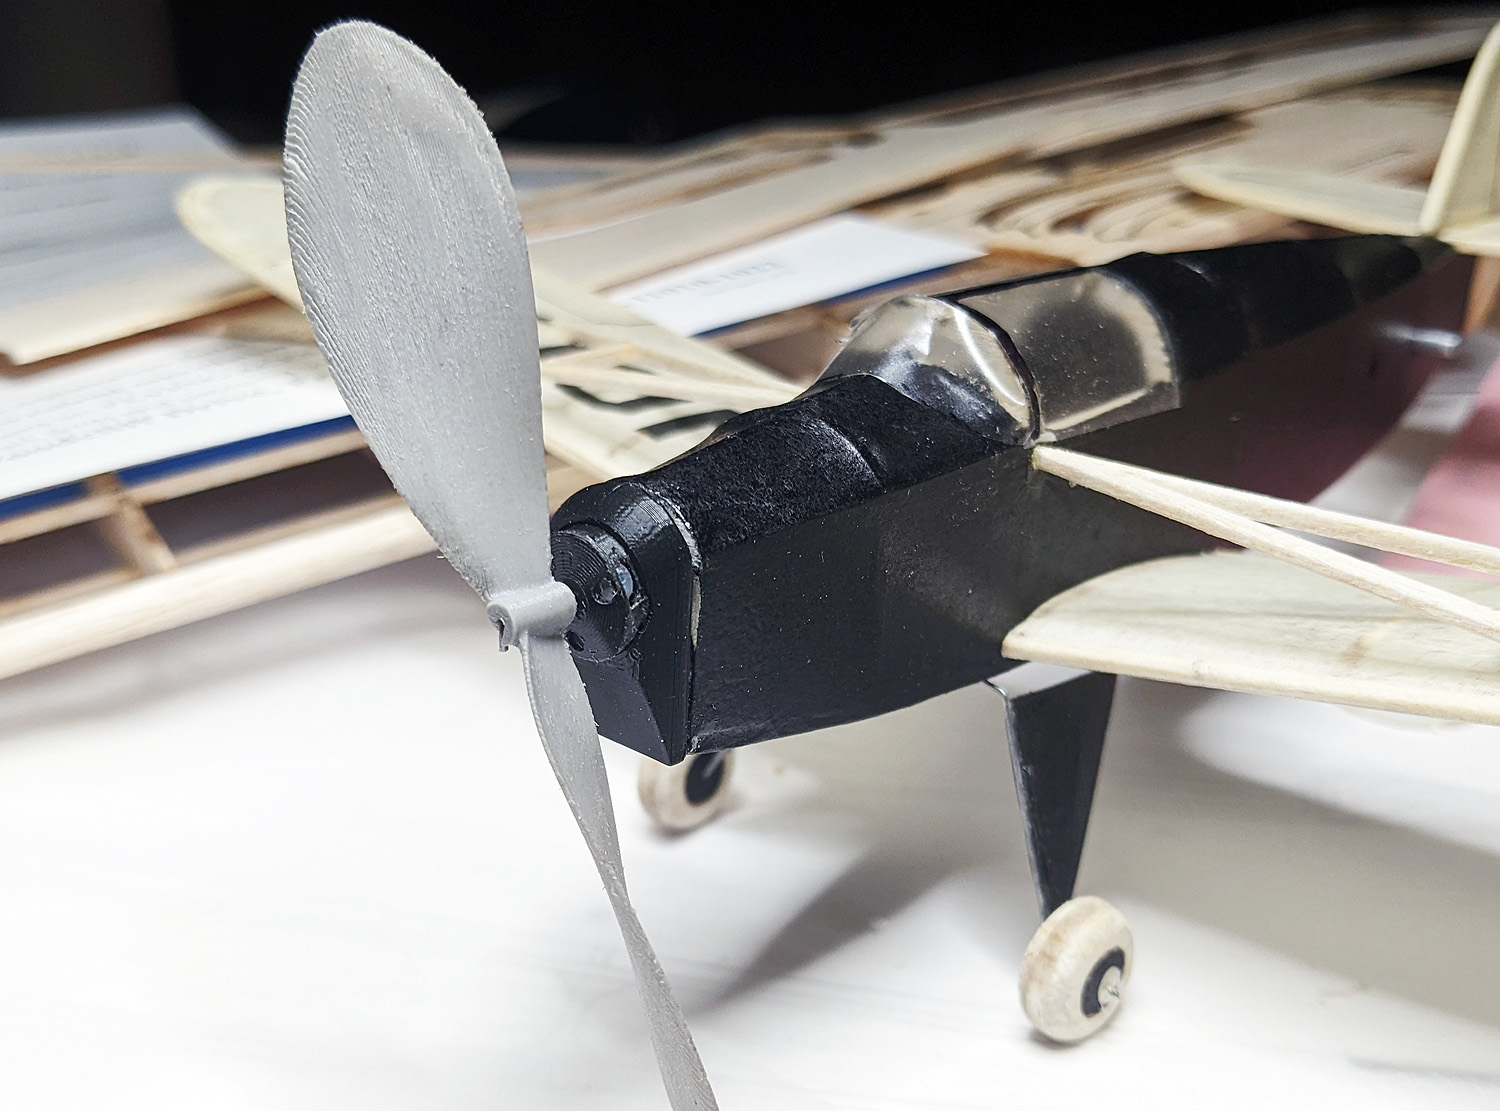
My Miller Racer with a 3D -printed Nose Block AND integrated Lightweight Adjustable Nose Button – oh, and Archie Adamisin’s 3″ Nickel prop.
The printed nose block with integrated adjustable nose button allowed me to remove all the ugly shims off the nose of my Miller Racer and produced consistent left hand climbing circles of 20+ seconds until I popped the motor.
Neither the Phantom Flash nor the NoCal have been installed yet, but I expect great things. The NoCal version is 0.4g and the PF is 0.5g.
I have really been wondering if I should even mention these, but excitement (and pride) got the better of me. I do not know if I will be selling them – “why” you ask? Well, they seem to print ok (sometimes small parts can have a rather high rejection rate), but the real reason is that they take about 10-15 minutes each to assemble. So what is the cost? Ten minutes to print, 10 minutes to assemble – that’s a lot of time – and I don’t want to saddle myself with producing 100 of these (I like “inventing” but “production” not so much). They take 12 holes drilled in four different sizes, three holes “reamed” and three holes tapped and then assembly and gluing. One thing is for sure – they won’t be any less than the Gizmo Geezer nose button.
So, it has been a busy week! Now I’ve GOT to get back on the Focke-Wulf 189. Essentially, all that is left is to cover and assemble it. I’ve got to get it done before June due to family events in the beginning of June.