I am a dedicated rubber-power guy. I don’t do gas; I’ve thought about compressed air and CO2; and electricity just seems to be too hard (assembling circuitry isn’t for me).
But a year or so ago, Vincent Merlijn, in the Netherlands, put out a foamie Free Flight kit he calls “the Rookie”. This looked simple: the motor and circuit is pre-assembled, the storage is a capacitor soldered to the circuit board, and you simply charge it with a 3- AA Battery unit. Plug the battery pack in, wait a few seconds, unplug and launch. What could be simpler?
Immediately, I thought of powering a Peanut with this unit and ordered some. When they arrived, I took a look at them and set them aside. I was still a little intimidated and unsure.
Well, yesterday, I decided to do this project and try to get an existing Peanut retrofitted with the drive train and give it a test. I chose my Peanut HiMax. The 10g model never really flew like I wanted it to – probably a result of an improperly matched prop and rubber combo. And, unless they max regularly, high-wing Peanuts are generally not competitive in FAC Peanut.
So, I took the model off the pile (of old models – yes, it is a true pile of models; one of several around the house) and started to do surgery. The first step was to mount the motor. I measured the diameter of the motor (0.237″) and selected a #1 drill (0.228″) and a new Gizmo Geezer nose button and carefully drilled out the front half of the GG button.

This allowed a press-fit of the motor into the nose button and I could swap out the existing GG nose button for the now-electric nose button on the HiMax nose block. I used the GG nose button because I love the how it makes thrust adjustment so simple. If it works for rubber power, it will work for electric power, too.
Next was mounting of the circuit board onto the model. A little bit of thought had to go into this. I wanted it as far back in the model as practical (the model was nose heavy). Also, the charge socket had to be accessible and I wanted it to be on the bottom of the model. I knew the charge system was “instant-on” – once I unplug it, the motor is going full speed and I need to launch. So I had to consider exactly how I was going to do this (hold the model with my right hand where I would to launch, plug in the charger with my left, unplug and toss).

I cut a hole in the tissue, and made a sheet base to hold the circuit board. Then I ran the motor to the nose and glued the board in place with CA. Through some trial and error, I glued the noseblock in place and just had the GG button as the removable part for assembly (temporarily removable – friction fit).
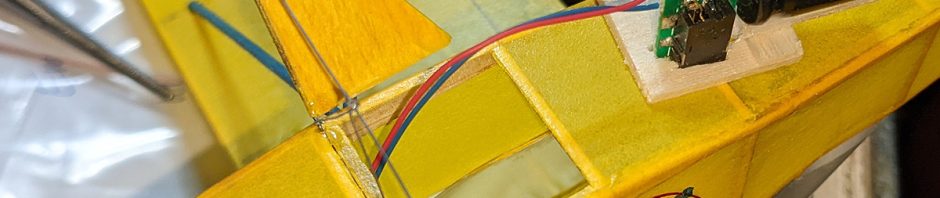
the first (unsuccessful) board installation. plugging in broke the board off the mount so a new platform was made (not shown).
My first venture to the back yard was a 50/50 success: it would take a charge and powered flight was achieved, but I did a terrible job of solidly mounting the circuit board – the insertion force of the charger broke the mount. Back inside and re-engineer the mount. It took some time, mistakes were made, but I now have a solid mount.
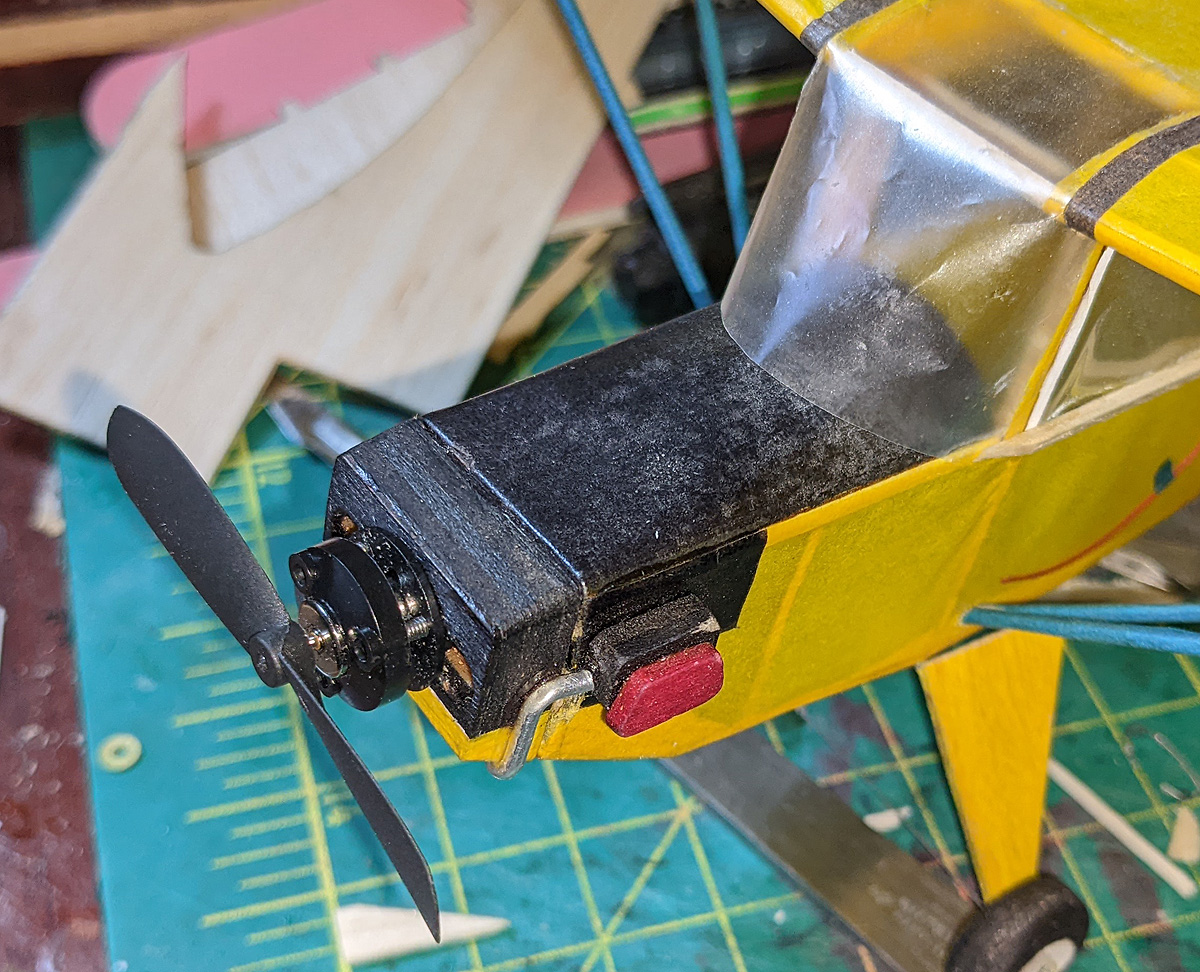
you can see the nose of the motor in the GG nose button. Also the tiny prop that pulls the plane around. This is about 1.875″ diameter (48mm?)
After a couple of partial charge flights, I was able to get a climbing turn dialed in and managed to fly off my tiny field into the surrounding pine trees about 30 feet up. After much persuading with my pole, the model came down, but suffered a good deal of strut damage.

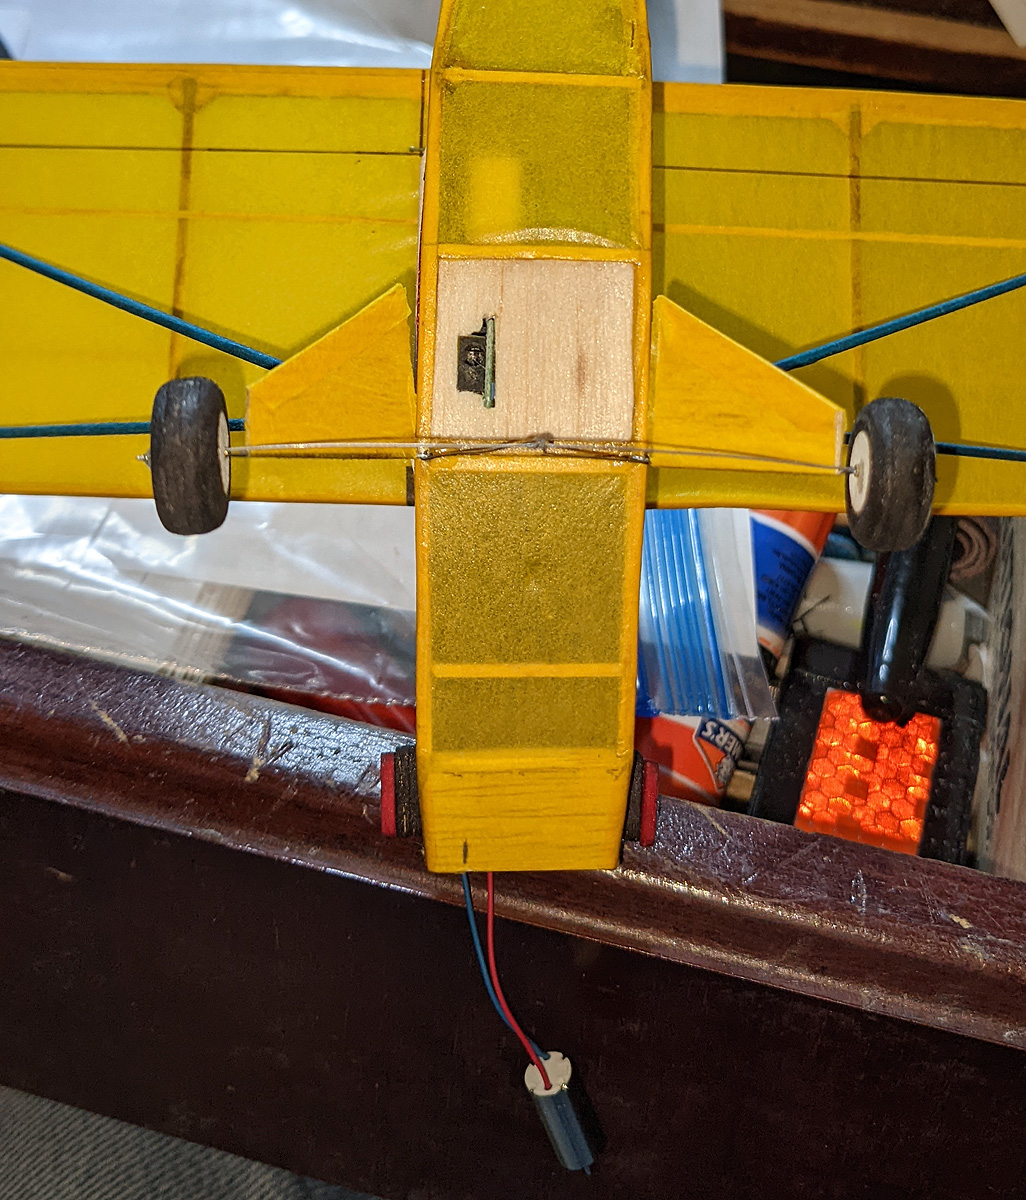
what happens when you are not careful with the Thin CA. Apparently, it wicked into the charge port and it refused to switch from “charge” to “run”. The LED shows it is charged, the charger is unplugged, but the prop is not turning!
I now have an electric-powered Scale Free Flight model! The power unit weighs in at about 4.5 grams. This was a 10 gram model so all-up weight is now 14.5 grams. With 32.5 square inches, this works out to be a 0.45g/sq.in. wing loading – not terrible.
I will say this: for all of my worries, this was an easy project. Of course, except for the new thrust settings, the model was already trimmed.