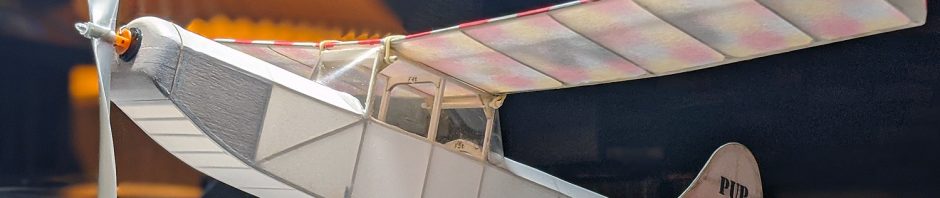
Before I took my 12-year-break, I flew with all the old-school Cloudbusters from the 80s and 90s. One of those was Don Campell and this is his 1997 design, the Tweety Pup. Ever since I drew up Don’s Tomahawk Embryo, I have wanted to do this model, too. It is a sharp-looking, stand 20 feet away, almost-semi-scale model designed as a play on the Cessna o-1 Bird Dog. The wing and vertical are very similar to the O-1, and the fuselage is similar, but lengthened significantly. And, since I just did the Bird Dog as a Dimer, it was only natural that I tackled the Tweety Pup (plus, I just lost my everyday Embryo).
For this build, I decided to go back to basics, building like a “normal” or even new modeler. No striving for lightness, building with “regular” wood, heavy plastic and wire, and a off-the-shelf plastic prop. In addition, I am testing a new tissue, a possible replacement for Esaki, that comes from Japan. This tissue has a nice feel to it, has a definite shiny side, the back side is a little rougher than Esaki (you won’t get front and back confused). It is only marginally heavier than Esaki. People are working to get this in production (if people like me give it a thumbs-up) and we’ll see in a few months if this can be done. I’ll talk about the tissue more later on.
Jump right over to the product for sale HERE.
The Build
This build was kicked in the pants when I lost my DeHavilland Discard at the Cloudbusters contest a couple weeks ago. We have one more outdoor contest this fall and I decided to have something to fly. I quickly traced Don’s plan and laid out parts so I could start building.
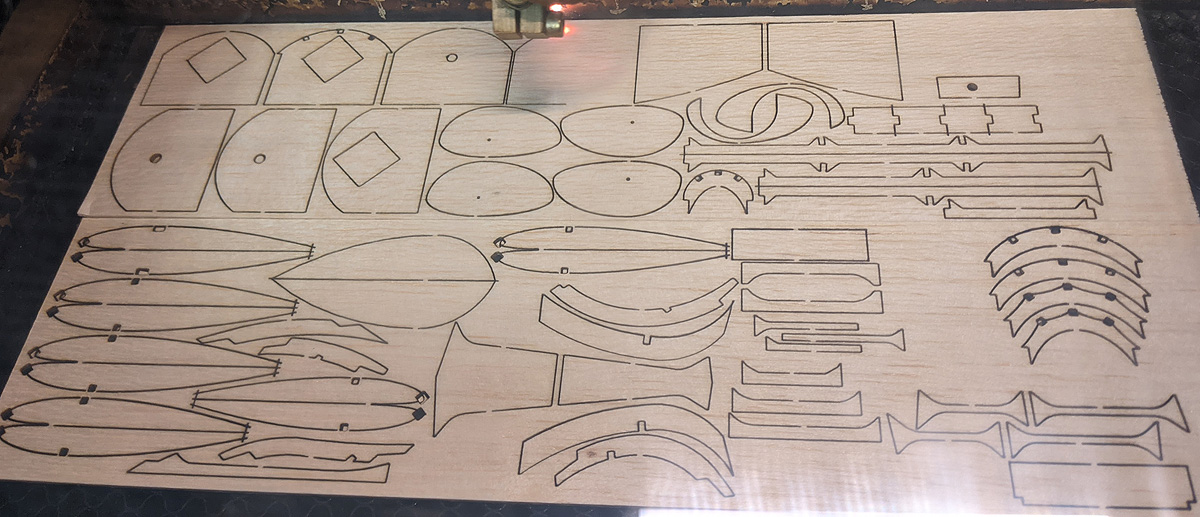 This is built entirely out of 1/16″ balsa. I designed this for quick building – almost all of the tail feathers’ parts are pre-cut, and all of the upper and lower fuselage cross pieces are pre-cut. This removes the tedium of measuring, cutting, fitting – just build the sides and pop out the crosspieces and glue them in.
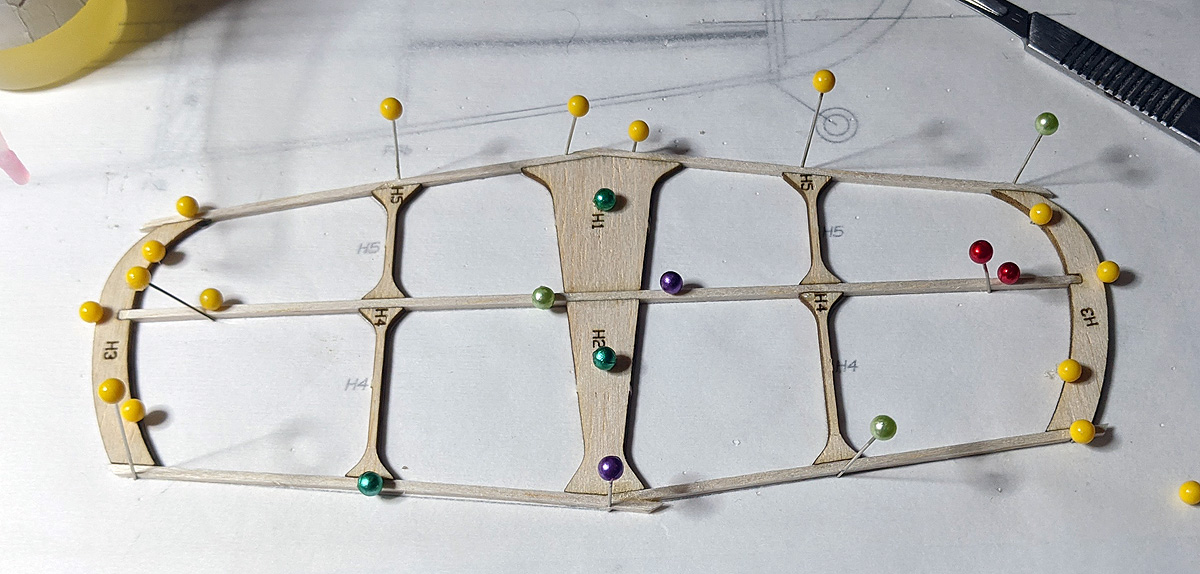


 The wing goes together in the traditional manner. I do include trailing edges with built-in gussets for the ribs.
 Back to the Tissue
Again, I am testing this tissue. So I decided to use several treatments on the tissue, in application and finish.
For the tail feathers, I used bare tissue for the fin (except a small print) and the horizontal is covered in fully printed tissue. I cover these dry and flat. when they were finished, I sprayed them with clear Krylon (or whatever the spray-can clear is that I have on hand). They are not shrunk with anything; I do this to resist warping (covering variation #1).
The wing was covered with bare tissue on the bottom and full-printed on top. Again, these were covered dry, gently tautened during the gluing process, and then sprayed with water to shrink. This tightens the tissue, but less-so than covering with damp tissue.
The fuselage was covered differently – I covered it with damp tissue. Since I didn’t know how this tissue would react, the flat sides on the fuselage allowed for a reasonable test. I was pleasantly surprised. The tissue dried nicely and pulled taut – I am very happy with the results. Even on the arched turtle decks, the results are great. Sometimes tissue pulls really tightly and causes stringer to dip under the stress. This tissue shrunk just the right amount (cue Goldilocks and Baby Bear).
 The noseblock and wheelpants were wood covered with slightly stretched tissue. I do this by putting glue stick on the solid wood and rubbing damp tissue over the curves. This worked well, as expected, although I did have one stretch separation – which is typical of this type of covering (at least for me).
 I sprayed the finished wing with clear, and the fuselage with white Design Master White. It is flat white and so I sprayed some of the gloss clear over it. While I didn’t over coat any of these with the spray, I didn’t hold back (for lightness). It all looks good and the tissue handled it all well.
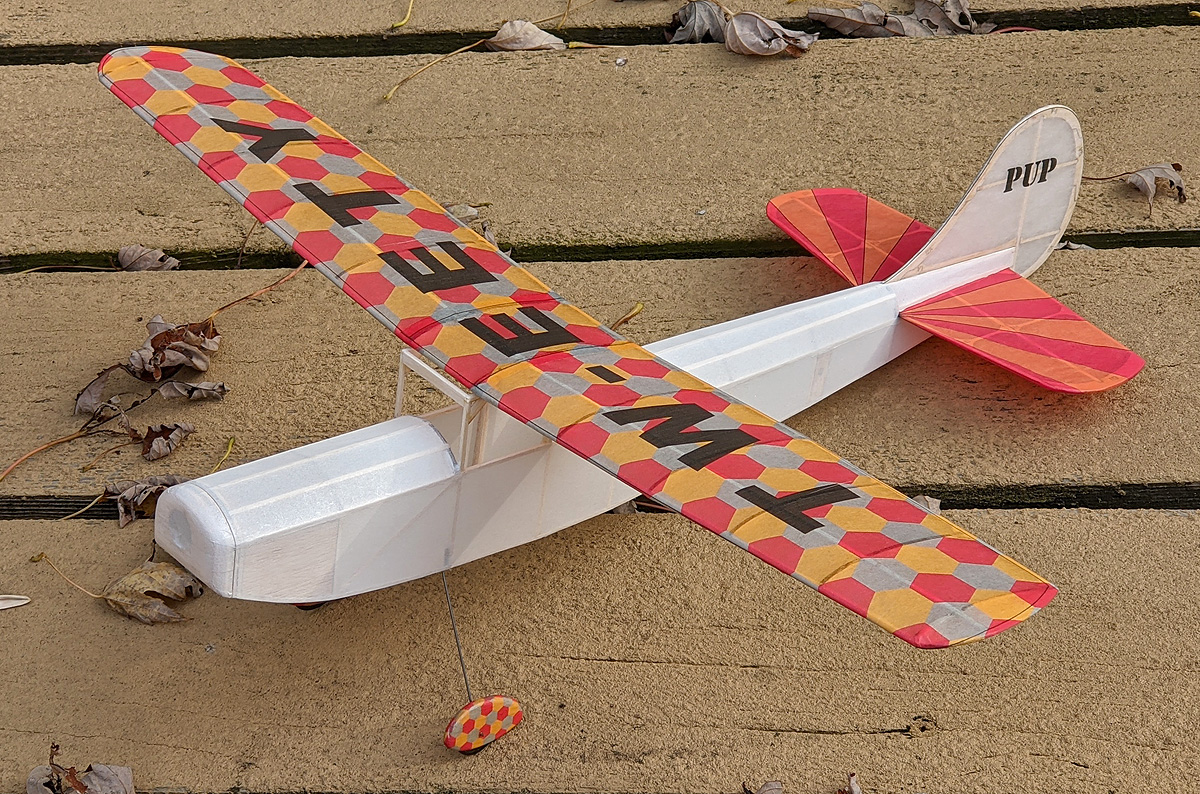

 I finished up the build with some heavier plastic than I normally use for the windscreens and side windows. Of course, along with heavier plastics, came minor frustrations of trying to glue plastic to balsa. I got through it without too much damage to my psyche. The plane was finished with full 1/32″ wire on the landing gear (usually, I use 0.025″) and a off-the-shelf plastic prop. The model came out at 22+ grams, not too heavy for an Outdoor Embryo – that’s satisfying.
 I test flew the model in my back yard yesterday, and am happy with the potential. Of course, I need a larger field (hopefully, that will come Sunday). Here’s what happens regularly in my back yard. Note: planes don’t get up there without FLYING.

UPDATE: After a few trim flights, I got the model sorted out. It climbs out well on a 7″ prop with a loop of 3/16″ and Maxed on its third official flight, winning the Embryo event!
