A friend (Jim DeTar in NY) asked about the techniques of printing on tissue and I said I’d write something up about how I do it. This write-up – Part 1 – will cover the technical aspects of the printing process. It will NOT cover the graphics and how to create graphics to print. That will be in Part 2 (if I ever do it). Part 1 only covers the mechanics of printing the image you have on hand.
- Printers and Printer Ink
- I have used a small variety of printers to print my tissue. I think some of my earliest prints were done with only black ink, back when I didn’t have a color printer. I used HP printers for years and now I use an Epson printer – and a small HP printer.
- Almost always the discussion of Printed Tissue means using Ink Jet printers, but other printers can be used successfully. Way, way, way back in the day, the legendary ALPS printer was popular – and for good reason: it could print in white and gold, and maybe silver. The Alps used a tape cartridge, similar to the old IBM Selectric typewriters. The printers still exist, but supplies are hard to find and there are no drivers for modern computers (you might have to run a Windows XP machine).
- On occasion, I use an HP Color Laser printer. I bought a cheap one (HP M252dw) after seeing some printed tissue by Jim Buxton online. The plus side to laser printing is very sharp lines, very dense and brilliant colors – it looks almost like paint. However, I think it might be heavier than ink because of the process – but I haven’t weighed it out. Note that the toner cartridges are very expensive – much moreso than inkjet cartridges. So, prepare for that, if you go color laser. I am still on the “sample” cart that came with the printer, but I only use that printer for tissue – and even then, only for final printing (preliminary layout tests are done on the ink jet).
- Mostly, I use an Epson WF-7620. This is a Wide Format (handles up to 13″x19″ paper). I use it for 85% of my plan printing. I switched from being an HP customer to an Epson customer mainly because of the ink. Epson Durabright ink is water proof – it will not run when you mist the tissue with water to shrink it. HP in WILL RUN – so you have to be super careful while covering – even while outside (don’t get your plane wet!) Because of this, I recommend Epson printers because of the water proof ink.
- Some printers have the ability for a straight paper path. This usually means there is some sort of loading door on the back of the printer. I have never used this path (because I am lazy and don’t like to spin my printer around any more than necessary), but this would be the best method of printing – if your printer has that feature – more on this below.
- Bernard Guest adds this comment: “use your rear feed slot …the page goes through an obtuse~120 deg. bend instead of having to go through a tight U turn. This reduces the amount of shear between the tissue and the carrier sheet.“
- Tissue
- Tissue quality is a concern. With ink jet printers, you are literally spraying liquid onto the tissue – what happens when you do that outside of the printer? The tissue expands and gets saggy. Well, this can (and will) happen in an ink jet printer. Fortunately, the amount of liquid is usually minimal and with Esaki or the equivalent, the sag is not too great. That is, unless you set the print quality to “high”. Anything above “standard” quality will put an excess of ink onto the tissue (this is how they get denser colors in the print).
- Bernard Guest adds this comment: “I ONLY print using “best quality” and have had no trouble at all.“
- Esaki handles standard print settings well. The lesser the quality tissue that you use, the more sag (or expansion) you will get with the tissue, and the more the ink will run into the strands. A good test is to take a felt tip ink marker, like a Sharpie, and just touch the tip to the tissue – does the ink spread like wildfire, or does it stay put in one place? Wildfire is bad – avoid printing on this tissue – because your ink jet will run just like the Sharpie.
- I have also been able to print on Gampi tissue. In fact, one tell-tale sign that you should be able to print successfully is: does the tissue have a shiny side? If so, you should be able to get good prints. (As a side note: I always print on the shiny side and cover with the shiny side out.)
- You will need to cut the tissue to size – enough to cover the graphic, but smaller than the sheet of normal paper that you are using in your printer. SEE STEP 3-C-iii BELOW. Don’t forget to consider the grain direction of how you want the tissue to run on your model (if you worry about that stuff).
- Tissue quality is a concern. With ink jet printers, you are literally spraying liquid onto the tissue – what happens when you do that outside of the printer? The tissue expands and gets saggy. Well, this can (and will) happen in an ink jet printer. Fortunately, the amount of liquid is usually minimal and with Esaki or the equivalent, the sag is not too great. That is, unless you set the print quality to “high”. Anything above “standard” quality will put an excess of ink onto the tissue (this is how they get denser colors in the print).
- Carrier Paper
- I haven’t seen a printer yet that you could simply print onto tissue without mounting the tissue on a carrier sheet first. They could exist, but I am unaware. The very nature of these printers usually means that tissue would not survive the paper path through the printer – almost all printers rely on friction and rollers to grab the paper and pull and push it through the printer. Tissue is too delicate to survive, so we must mount the tissue on regular paper – this paper is called the “carrier” since it carries the tissue through the printer. Just use a regular sheet of paper out of your printer.
- Sometimes it is not clear on which side of the paper your printer prints. This is because the paper is usually in some sort of tray. The printer grabs the top sheet (or bottom sheet) and sends that paper on some circuitous and serpentine path up through the bowels of the printer and passes it through and under the print head. Did it print on the TOP of the paper as it sits in the paper try – or on the BOTTOM? Who knows? We don’t really care – until we are manually re-loading the paper for double-side printing – OR – printing on tissue. An easy way to determine this is to do a test my making a mark on the next sheet to be printed on. I just take a pencil and mark across the face of the top sheet in the tray and do a test print (print anything – we just need to see where the ink ends up). Look at the resulting print – is the printing on the same side as the pencil mark? If so, then you know you need to load the carrier sheet with the tissue attached to the top. If the printing is on the other side, then you know you need to load the carrier sheet with the tissue face down in the tray.
- What size paper do I use? Two things come into play on this decision: 1) what size paper can my printer handle? and 2) how big is the graphic that I am printing?
- most printers are set up for Letter size printing; that is, 8.5″x11″ paper. If they can print that, they can also print Legal size: 8.5″x14″. If you have a wide format, then you can print on larger 11″x17″ or even 13″x19″. Regardless, the paper size also depends on the graphic you are printing.
- If you are making your own graphic, then make it fit your paper – don’t require 11″x17″ paper if your printer can only do Letter size. If you are downloading a tissue template from someone else, they will usually indicate what size paper is required for printing. I try to make all my tissue template fit on Letter or Legal size, because I know that most people do not have the capability to print on large sheets.
- Once you know what size paper you need, print a test print of the graphic you are printing onto the required size paper. You can print this in black and white and in draft mode – this saves ink. You are doing this so that you know where to place the tissue on the carrier sheet. In fact, you might want to do this BEFORE step 2-D above (where you cut your tissue to size).
- Adhesive and Tissue Application
You need to somehow semi-permanently attach the tissue to the carrier sheet. To do this, you will need some sort of adhesive. I will mention three methods here:- Scotch Tape – I used to use this exclusively. I would lay the tissue over the carrier sheet and then carefully stick down each corner with a small piece of tape. Be careful to avoid pulling the tissue too tight so the carrier curls up. You want everything flat, but the tissue to be taught. If you leave it too loose, you could smear the ink as the print head passes over it or you could cause a paper jam. I always cover the first edge through the printer with tape so that the tissue doesn’t snag on the internals of the printer. With some printers, it is a good idea to do this on the sides of the tissue, too – so that the print head doesn’t snag the sides, either. The risks with this method are that the tissue can billow when hit by the sprayed liquid ink (because the tissue is not held down to the carrier in the middle). I have another note about tape in step D below.
- Glue Stick – I use Scotch Repositionable Glue Stick almost exclusively when printing tissue – and I sell it so that others can use it for printing on tissue. I found that due to the printer path on my printer, I needed to keep the tissue from billowing – glue stick helps me do this. Take the tissue and flip it over to the dull side. Rub the glue stick (just a single pass) along the outer borders of the tissue. Then go across the center of the tissue, and then add more cross stripes – about 2-3 inches apart. You don’t need to cover the entire sheet of tissue. Then I flip the tissue over and align it on the carrier sheet. I gently start at the center and softly press down with all four fingers and pass center-out over the tissue. I do right then left, center to top, then flip the carrier around and do the same – swiping right then left, center to top, until I have smoothed the entire sheet. You don’t want any bulges in the tissue – the tissue and carrier should be smooth, as one. I have another note about glue stick in step D below.
- Spray Mount – I’ve never used this, but I know other have done this. Basically, you get some spray adhesive, like 3M 77, and you spray a light mist over the carrier paper. You should probably let it dry for a bit and even use soem technique to make it less sticky before you smooth the tissue over the carrier paper. After all, you DO want to remove the tissue from the paper, right? I imagine there are some light-tack sprays, but I just don’t know.
- Bernard Guest adds this comment: “change the 3M77 spray suggestions to Krylon easy tack (repositionable spray adhesive). I would never dare to use 3M77 for tissue carrier sheets because you would never get it off. Even the Krylon can be difficult if you have not removed enough tack (I spray a sheets and then past it to another sheet of paper several times to transfer the tack to the second sheet). Usually the first print is tricky to remove but it settles in after that. Also, spray is definitely superior to glue stick or tape in my experience. I spray (light fog) the Carrier sheet, detack several times and then use that same carrier sheet for many prints. this method is superior because it bonds the tissue across the entire sheet and prevents lifting etc. during the print. Of course, if you don’t detack properly then you will be making noises that would offend sensitive ears!”
- Tape Instead of Glue Stick – I use tape when I print in my laser printer and here is why. At first, I did use glue stick in the laser printer, then I realized that the tissue was really stuck to the carrier and the color was different where it was stuck. It seems that, because the laser printer uses heat fusion (just like a xerox), the heat activated the glue stick and really stuck it hard; and the combination of color toner and hot glue changed the color. So – I only use tape on the laser printer, even though I prefer glue stick.
- Printing – remember Step 3-B where we identified which side of the paper the printer printed on? Well, we need to know that now. Once you choose your paper path, or tray, you need to load the carrier/tissue into that tray or path. Make sure that you have the tissue on the printing side. In my Epson, I just put it in the print tray on top of a stack of regular paper. In my experience, printers act funny on the last two or three sheets in the tray, sometimes the pull all three, and send then through cock-eyed. This will ruin your print, so just put your carrier on a stack of regular paper. Once your tray is back in place and the printer is ready to print (or your paper is loaded whatever manner is required), go ahead and PRINT!
- Removal – once the tissue comes through the printer, it should look good. If you have smears or tears then your tissue wasn’t tight enough on the carrier and you will need to try again with a new piece of tissue. When is it satisfactory, I recommend taking it off the carrier right way, especially if you are using glue stick or spray mount. This is for two reasons:
- adhesive tends to grab more and set harder as time goes by. The longer you wait, the harder it will be to separate the tissue from the carrier sheet.
- regardless of adhesive method, you want to remove the tissue soonest to allow air to circulate and dry the ink (laser printing does not need to dry in this manner).
- In any case, be careful when removing. With tape, you can simply cut the tissue and carrier with a knife or razor. If you’re not using tape, gently peel the tissue away from the carrier – go slowly and carefully to avoid tearing the tissue!
- If your template had multiple pieces on one print, I suggest cutting them apart before you attempt to cover any part. That way, you don’t damage the the tail piece while it is attached to the wing piece.
Jim asked some additional questions about application:
- How do you apply to the airframe? – Once printed, especially with waterproof ink, I use the same techniques I always do when covering. I can damp-cover and I use glue stick. Now, I don’t know about dope and if it reacts with any printed tissue because I never have used dope.
- Can you shrink the tissue such as for for compound curves? Will this distort the printing? Yes, with the waterproof ink, you can shrink the tissue just like normal and I have never seen any distortion (unless you start pulling the tissue too hard and separate the fibers).
- What finishes can you put on the printed tissue that won’t effect the printing? Krylon? Dope? I think you can use any of these to finish the tissue – if you are spraying and use light coats. I use Future most of the time (I used to use Krylon) and have never had any issue whether spraying or brushing (again – waterproof ink). I seem to recall a Krylon problem once when I went way too heavy with the spray. Paul Bradley and Mike Kelly add these comments: Paul says “I have found dope to be a non issue when applied to either dye based ink or pigment based ink (Durabright).” Mike replies “I’ll second Paul’s comment on dope – I’ve used both AeroGloss dope and Sig Nitrate dope (thinned ~50/50 with manufacturer’s thinner) brushed on over tissue printed using Epson’s DuraBrite inks on 8 models with absolutely no bleeding, smearing or other ill effects.“
A couple other notes:
Ink jet printing on white tissue often leads to muted colors. If you want to brighten your colors (and the white), use some technique to make the tissue whiter. Such as, chalking the back side or even spraying the tissue white before printing (either side). Bernard Guest adds this comment: “You are correct about brilliance … I found spraying the tissue with design master white actually muted the red making it more of a pink color (on my Piaggio) ….. but maybe if I sprayed the tissue prior to printing …hmmmm. Chalking worked fine though and in the case of the gold letters on my Smoothie the use of a little yellow chalk made the printed letters pop and look gold.”
Of course, you can print on any color tissue that you want (or have), but you have to realize that different colors on top of colored tissue may not look right (or bright) and you will never be able to print white. White can only be done on white tissue – and that is because there is no ink going where white it. Also, you cannot print metallic colors at all – you can only approximate them. (Note: again, white and gold can be printed with the ALPS printer, but who still has one of those?)
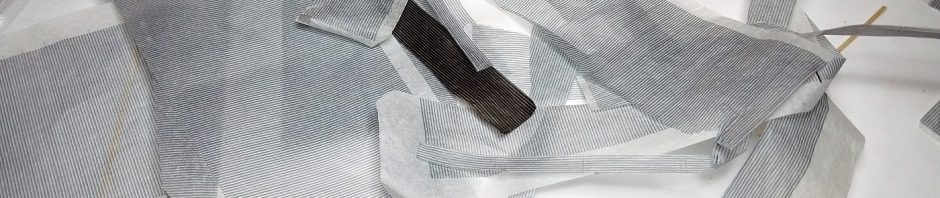
I have printed black onto silver Esaki tissue. to do this, I burnished the silver with bond paper to slightly roughen the surface. Consider this analogous to using a super fine sandpaper to break up the smoothness of the surface. It worked well, whereas not burnishing allowed the ink to be rubbed off.
Also, I have laser-printed on painted tissue. It does work, but I don’t think the toner adheres very well to the paint. It will also rub off, especially on corners and high-wear areas.
That’s about it! See you on the flying field!