Back around 1990 and 91, I built two PBY NoCals – yes, it was silly and I didn’t know any better. One was heavy, had a fully covered wing, and the other was light with a pair of tiny carved props. My records indicate that I won 3 kanones between the two in Cleveland.
Over the last year or so, I’ve considered building another, this time with laser-cut parts. So, yesterday, I went ahead and cut out the parts! Then I put them together. I finished up the model this morning and here are the results. I haven’t flown it yet, but will try to give it a go this Sunday.
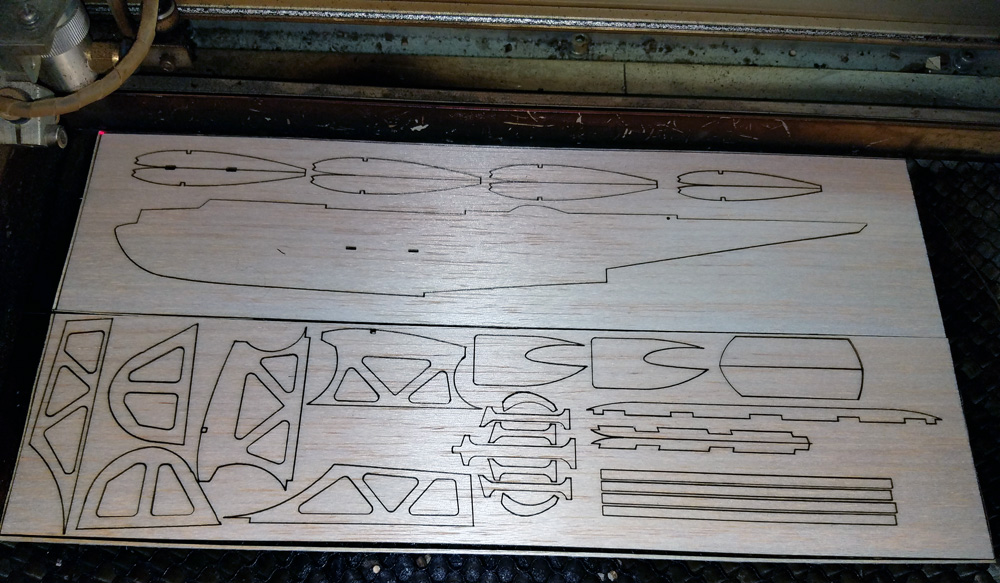 This is the laser-cut parts: two 3″x12″ sheets of 1/32″ balsa. There is a little extra wood here, but remember, I build for Outdoor.
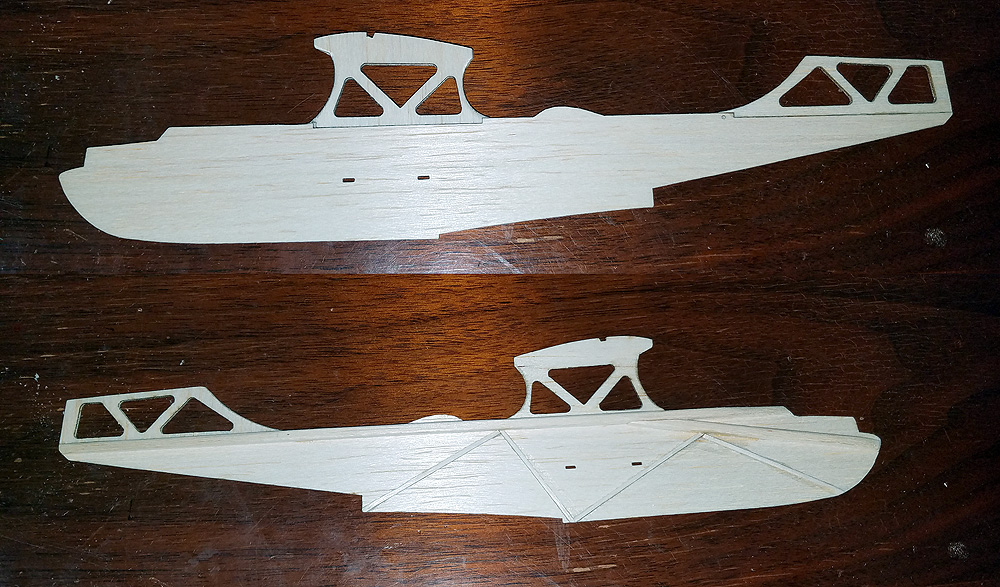
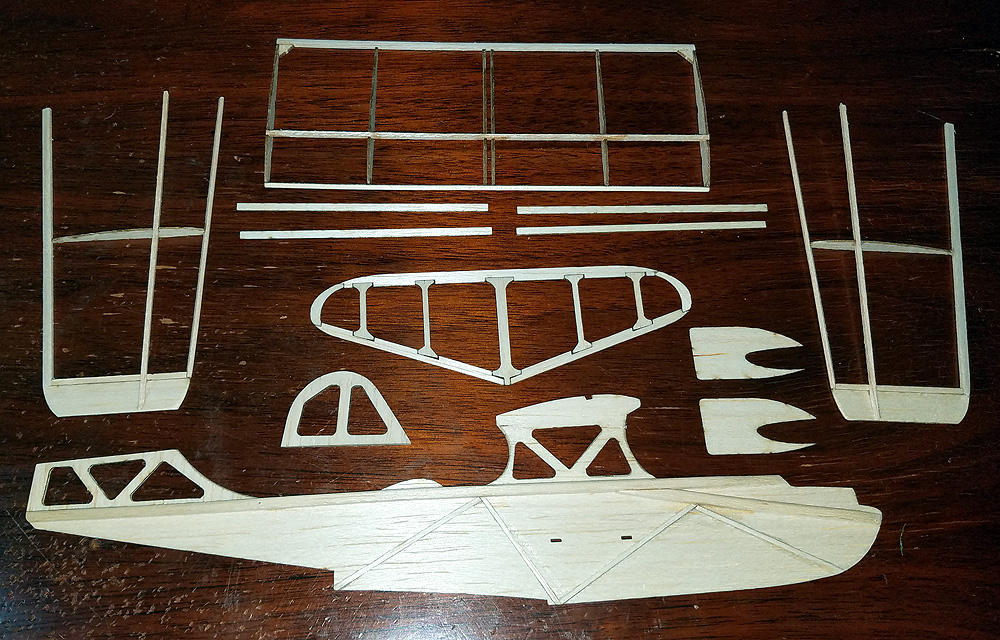
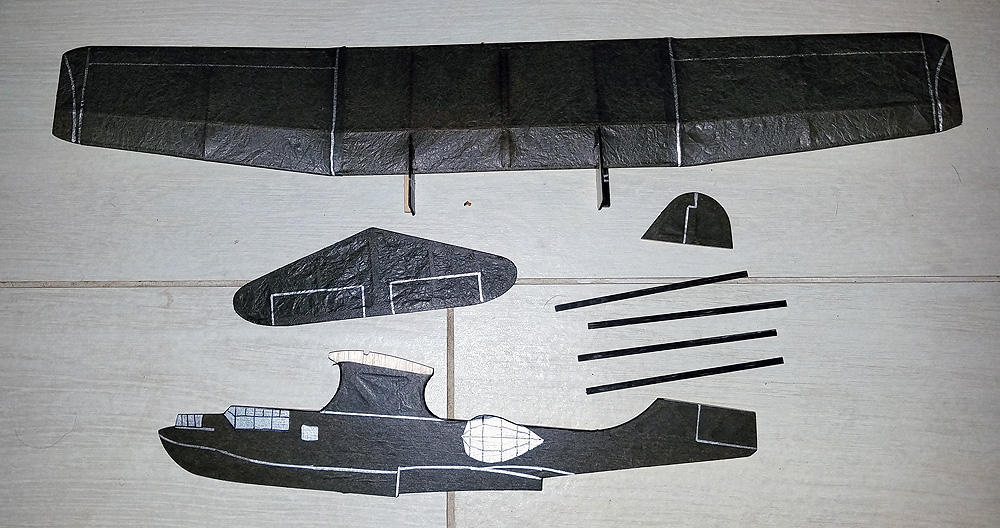
 All of the parts separated and laid out, ready to assemble. Note that the pylon and the two vertical tail pieces have double, cross-grained pieces. This was done because these areas are under some extra stress.
 Various parts assembled – the tail structures and the pylon. Note that the pylon and vertical tail interlock with the fuselage.
 A detail of the fuselage. 1/8″ square stock (light) has been added to the fuselage as a structural spine. Also, small strips of 1/32″ have been added to the back side to prevent flexing in the sheet fuselage.The two holes in the middle of the fuse will anchor the wing struts. Also note that the pylon will slip fit between two ribs and locate on the wing spar.
 All pieces assembled; now on to covering. I chose black tissue – for the Black Cats – very simple for a NoCal.
 Center Section detail: short 1/8″ square motor sticks are added to the nacelles. Also, 1/8″ square cross braces from the front of the nacelles to the rear of the pylon. This really prevents flexure of the wing. Note that the motor sticks re on the OUTSIDE of each nacelle. The nacelles have been moved out quite a bit from scale – because props have to clear the fuselage and each other. I will be using 4″ props. I use crumpled tissue on the H-stab and wing to try to combat warp-age. See that the dihedral break ribs are notched to accept the struts.
 All pieces covered, decorated, and ready for final assembly.
 Rear motor peg detail. I will be running two motors (each a loop of 1/16″, maybe less) from the prop to the rear motor hooks. this hook is just ahead of the vertical fin and embedded into the 1/8″ square fuselage spine. Taper the 1/8″ from this point rearward to save a little tail weight.
 Detail of the nose bearing and motor stick. Note that the prop shaft must be long enough to clear the wing leading edge. Care must be take when loading the motors as they run under the wings and inside of the two struts. Wind the motors from the rear.
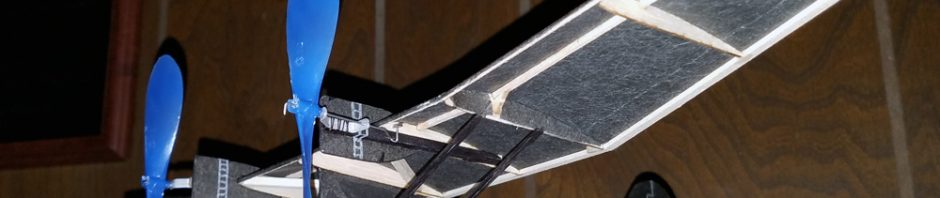
 All done, ready to fly. This weighs 8.5 grams as shown (without rubber). The props weigh 1 gram each. I might have been able to save half a gram if I had scraped the Yoshida props, but I did not. Prior to the prop installation, I had to have a glob of clay on the nose to test the glide. After the props, no clay was needed to attain the same glide. Some might be needed once the motors are in place.
I’ll see if I can get this to fly by this weekend.
I might be persuaded to offer this as a short kit, but the drawing will need quite a bit of work, as all of the special building notes will need to be added. This is a straight-forward build, but certain details must be followed.
so did you test fly this. Pretty clever model!
Yes, of course 😉 You can see a small flight report here: http://volareproducts.com/blog/?p=2426