In my spare time, I am trying to complete my 24″ Cessna C-34 and my Jumbo Aircraft Designs Stallion. Both have color schemes that do not lend themselves to colored tissue alone.
The Cessna was PPG “PeeWee Green” and I sprayed white Esaki tissue with Spring Green Design Master. I am happy with the color choice, but less than happy with the application. I painted the tissue on a board and the results look just great. However, covering with the pre-painted tissue was a challenge and my plane is full of sags and wrinkles. I should have sprayed the color after covering, but I wanted to print the numerals and stripes. That part worked fine (except for the yellow pinstripes on green tissue). This model will be a 20-footer (like I need another one of those).
The Stallion will be covered and them painted. I will have to place numerals on the side and a logo on the tail, but I think that will be ok. I did two experimental things on this plane (so far): I used a “domestic” white tissue that I found that seems to be nearly as good as Esaki and I airbrushed on some white paint – thinned acrylic titanium white artist’s paint.
The tissue seems to be very good. It has grain like Esaki and it has some wet strength. Strangely, I found I got better results covering dry and then water-shrinking. Maybe that was a factor of the season as the tissue would dry out before I could get it completely covered – maybe the humidity is too low and the water is just jumping out of the tissue.
The paint is truly an experiment. I have used Design Master White in the past, but it went on heavy. Yes, it was a Jet Cat and yes, the balsa wasn’t sealed, so that is probably why. I have also air-brushed white ink with good results, but the surface seemed to be rough. Maybe it was because I sprayed raw tissue.
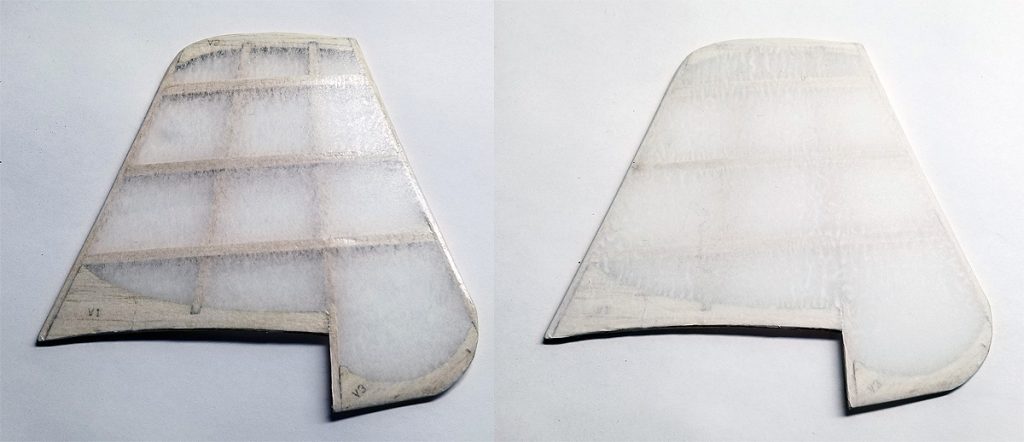
This time, I sealed the tissue with Future before painting. The image on the left above shows the fin after the Future, but before painting. The image on the right is after several coats of paint. This doesn’t look terrible, but I had some problems; problems which probably come from my very limited experience painting with an airbrush.
Firstly, my experimentation with the acrylic painter’s paint probably wasn’t the best idea. I squirted some into the jar and thinned it about 4:1, maybe more, with water. I mixed and mixed to get out the lumps. It looked thin to me. However, I had to crank up the pressure on my air brush to get it to come out. Maybe it wasn’t completely mixed and thick paint required more pressure.
Of course, I hadn’t really anticipated one factor – the water based paint loosened the water based Future and I had to let the parts dry nearly completely between applications. This took a long time. Another problem with this was that the wet and saggy tissue pooled the wet paint – you can see the results of that at the top of the fin in the photo above.
Basically, all of my processes worked, but not quite perfectly. I will go for a little more opacity on the white, I might even try a different paint, but if I try Design Master, I have to wait for warm weather. I don’t have a spray booth and I can only spray water-based indoors.
Here are some other relevant photos:
![]()


George:
Have you tried Dr. Ph Martin’s White India Ink in an airbrush? I’ve used it in my rapidograph and had good luck.
Scott
I like using white India ink shot through my airbrush. Dr.Martins brand is my go to. Personally think it’s lighter than acrylic but has good opacity.
I have used Daler-Rowney FW Artist’s Ink. I will give Dr Martin’s a try.